the Price of a Portable Veterinary Ultrasound Machine?

Ultrasound is a great imaging modality that can add value to a veterinary practice, allowing them to offer new services in-house. But for some practices, a mobile ultrasound may be the best choice. 

This includes mobile small animal practitioners, equine and large animal vets, and even some veterinary practices that may want to move their equipment between rooms or cage sides.

If you’re looking to purchase a portable veterinary ultrasound machine, here are some things to consider…

Which Components and Features Do You Need?

Before comparing the purchase price of different manufacturers and vendors, it’s important to make sure you’re comparing apples to apples.

So, make a list of the things you must have with your ultrasound machine, as well as a list of ‘nice-to-haves’. Here are some possibilities…

  • Transducers. Which type of transducer(s) are included with the machine? Ultrasound probes or transducers come in different shapes and frequencies, which are used for different purposes and different species/sizes of patients. So, it’s important to make sure you’re getting the options you need, based on your practice type, the patients you see, and the services you plan to offer.

  • Functions and features. Does the machine offer all the operating functions that you need for your studies? And what about features like color Doppler, or the ability to make measurements and annotations on the screen? Doppler technology can be indispensable for certain types of ultrasound studies. Color Doppler provides a look at blood flow, which is crucial when evaluating the heart and helpful for identifying vascular landmarks for certain abdominal structures.

  • Durability. For vets who make farm calls, it’s important to purchase a unit that can handle being out in dust, humidity, and temperature fluctuations, as well as something that travels well. 

  • Power and connectivity. Do you always have reliable power outlets available, or are there some cases when a battery-powered machine would be needed? And how will your images and videos be stored or added to your practice management software?

  • Support. Is there a technical support line available 24/7? And is the company stable—meaning, are support and replacement parts expected to be available in the next few years?

How Much Do Portable Veterinary Ultrasound Machines Cost?

Veterinary ultrasounds are highly variable in price, depending on the quality of the machine itself and what’s included. But the average price of a portable veterinary ultrasound is about $10,000 to $25,000.

Some units can cost significantly more, especially if they come with multiple probes and extended service plans, and warranties.

To the other extreme, there are some units that only cost between $1,000 to $5,000. Typically, these inexpensive units are handheld and compact, and they may be able to hook up to a smartphone. They typically don’t offer the capability of seeing everything in fine detail. But they may be a good option for vets who only plan to do things like ultrasound-guided cystocenteses or quick checks for free fluid in the chest or abdomen.

Financial Considerations

In addition to the purchase price, plan for long-term expenses. This could include routine service and maintenance costs, renewing a warranty, updating software, unexpected repairs, and anything else that could come up over time.

Also, investigate your financing options. Will you purchase the equipment outright using saved business funds? Or does it make more sense to do monthly payments via financing from the vendor or a bank?

Don’t forget to factor in tax savings, too.

Talking to a financial professional, especially one who is familiar with the veterinary industry, can help. This advisor or consultant can also help you determine how much to charge for the new ultrasound services your practice will offer.

Maximize the Return on Your Investment

Many veterinary patients can benefit from ultrasound studies. But in order to schedule a lot of studies and earn a profit with the new equipment, a vet must be able to perform an ultrasound study with confidence and in a timely manner.

Ultrasound is not covered in most veterinary schools to nearly the same extent as x-rays. And the use of the probe and interpretation of what’s on the screen are not always intuitive. Therefore, many vets require in-depth training and a lot of practice before becoming comfortable performing ultrasound studies.

For all these reasons, if a practice is investing in a new ultrasound machine, it also makes sense to invest in training. That way, the machine can be used with confidence and efficiency. 

A vet doesn’t have to have these skills mastered at the time a machine is purchased. But at least one vet at the practice should have a commitment to learning how to use the ultrasound.

The right portable ultrasound purchase will vary from practice to practice, depending on the practice type, budget, and other factors. 

But by carefully considering all these things ahead of time, it will be easier to determine which machine suits your practice’s needs and to ensure your equipment investment pays off.

Written by: Dr. Tammy Powell, DVM
What Does a Portable/Equine Veterinary X-Ray Machine Cost?

Portable x-ray equipment can be valuable to equine practitioners, mobile veterinarians, veterinary practices with limited space for equipment, or anyone else who could benefit from equipment that is compact and easy to transport.

Radiology equipment is an important investment. Here are some tips to make sure you get the best value and make a return on your portable X-ray system purchase.

How Much Do Portable Veterinary X-Ray Systems Cost?

Here, we’ll focus on digital x-ray equipment. An average price range is about $25,000-60,000. Of course, this depends on whether you are buying new or used, as well as on what’s included in the system. 

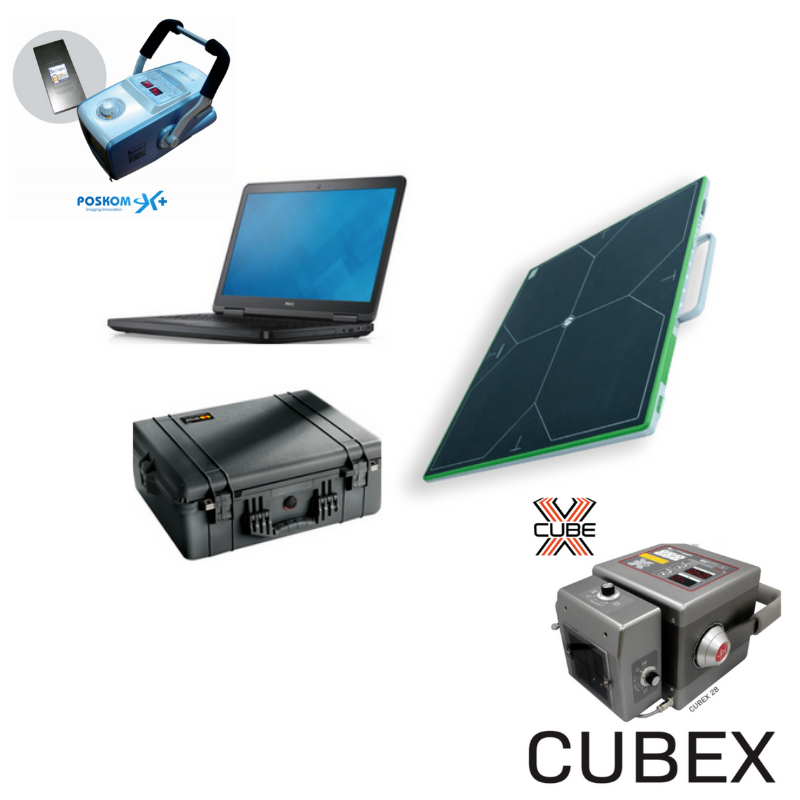
For example, you’ll need a generator and a plate or sensor. Not all systems include a generator in the price, so be sure to check exactly what’s included. And if using CR rather than DR technology, a plate reader is needed. 

Additionally, many systems include software and a laptop for capturing and storing images. Some software has extra perks that could come in handy, such as the ability to make measurements right on the images.

When deciding which x-ray equipment to purchase, consider how it will be used at your practice. 

For example, if you have a mobile small animal practice, how much room do you have for equipment storage? 

If you’re in a barn with limited electrical outlet access, would it be better to purchase a cordless unit? What about WiFi or Bluetooth access for wireless sensors or a protective cover for the equipment?

Consider getting opinions from other vets that use a portable system, to see what they recommend. 

Could These Factors Help with the Purchase Price?

Some things to consider when it comes to finding the best deal include…

  • Ask around for different quotes once you know which system you are interested in. Ask vendors for any special deals they may offer, and see if they can beat an offer you already have.

  • Consider different financing options. Does it make sense to pay upfront or to do a monthly payment plan at a reasonable interest rate? And will you finance through the equipment seller, a bank, or another option?

  • What are the tax implications (and potential savings) on your equipment purchase? In some cases, tax savings could make up for the expense of buying new equipment.

Look at Long-term Expenses in Addition to the Purchase Price

Of course, the purchase price is important. But long-term costs are also crucial to consider since expensive maintenance could end up canceling out the initial savings on a cheaper but lower-quality equipment purchase.

So, look at the warranty for starters. When does it expire? What does it cover? Can the warranty be renewed, and how much will it cost to renew? Is there an expected charge for routine maintenance? And for older technology, are replacement parts still being manufactured?

And speaking of maintenance, how durable is the equipment? This could make a huge difference, depending on when and where you plan to use the equipment. 

For example, if you do farm calls, can the generator and sensor stand up to the elements (dust, humidity, etc.)? Can it function well after being transported in the car during hot or cold weather? If equipment gets damaged easily, that could really add to long-term expenses, and that must be considered in your purchasing decision.

What about software? How often does it need to be upgraded, and are upgrades included in your costs?

Crunch the Numbers 

All of the above factors will be part of your financial considerations. Additionally, it helps to plan ahead for how much income the new equipment is expected to bring in—to ensure the purchase makes financial sense for your practice.

For example, how much would the practice charge for various types of x-ray studies? 

How many x-ray studies are expected per week or per month—and does this cover the monthly payment on the equipment while also bringing in a profit?

Before investing in new equipment for your practice, it’s helpful to consult a financial advisor or veterinary business consultant.

Make Sure Your Equipment Gets Used Safely and Efficiently

Radiation safety is always important. For mobile units, there may not be a dedicated x-ray suite available, so it’s necessary to ensure that everyone is present (the vet team operating the equipment, as well as any pet owners who are present during the visit) and follow all safety recommendations.

Additionally, training the vet team on the new equipment will ensure they can use the equipment quickly and effectively. This could potentially mean saving time and scheduling more procedures—which could help with the ROI on your equipment purchase.

The right portable veterinary x-ray system purchase will vary from practice to practice, depending on the circumstances under which the machine will be used (in a clinic or out in the field), how busy the practice is, finances, and other factors. 

But by carefully considering all these things ahead of time, it will be easier to determine which system suits your practice’s needs and to find the best possible deal to ensure your investment pays off.

Written by: Dr. Tammy Powell, DVM

Digital Radiography vs. Film X-Ray: A Veterinary Comparison

What is Veterinary Digital Radiography, and How Does It Compare to Film X-Ray Systems?

Nowadays, veterinarians have a lot of options when it comes to their x-ray system—so how does a veterinary practice choose between film and the various digital x-ray modalities that are available?

It helps to compare price, efficiency, and other factors that will affect the daily use and value of your investment. Here are some considerations…

What Is Digital Radiography Versus Film?

First, it’s helpful to define the different x-ray options that are used in veterinary medicine.

The first choice is to decide between film or digital radiography. Film is exactly what it sounds like: X-ray images are captured on physical films. To produce an image, those films are then developed using processing chemicals in a dark room.

Digital radiography, on the other hand, produces a digital image. However, there is more than one method available for obtaining this image, including CCD, CR, and DR.

CCD (charge-coupled devices) have been compared to digital cameras in the way that they work. However, they have some disadvantages, including edge distortion when collimation is wider. While this older technology is still used in some capacities, most vets would be choosing between CR or DR.

CR (computed radiography) uses phosphor plates to capture an image. That image is obtained when a plate is put through a plate reader.

DR (direct radiography) doesn’t have any type of “middleman” (film developer or plate reader). Instead, digital images are captured on a special type of x-ray sensor that directly or indirectly converts x-rays into an electrical signal. The image is produced almost instantaneously.

Costs of Digital Radiography Versus Film

As with many other technological advances, there tends to be an increase in price for newer generations of technology—at least initially, because newer technology eventually does come down in price and becomes more accessible. Compare it to smartphones and digital cameras—two type of technology that have become much more widely accessible in recent years.

X-ray technology has followed a similar pattern. Digital technology does generally cost more to purchase than a film system. And DR generally costs more than CR.

That being said, prices have come down significantly in the last decade or so, making digital technology much more affordable to many veterinary practices. 

While it’s great that newer technology is becoming more affordable, that doesn’t mean the latest tech is right for every veterinary practice. For practices with a slower pace that don’t perform a lot of x-ray studies, a film or CR system may meet their needs just fine and be a smarter investment than DR.

It’s also important to consider long-term maintenance and repair costs, in addition to the purchase price of the x-ray system. 

For example, is there a warranty, and what does it cover?

If a component of the machine or plate/sensor breaks down, are replacement parts available (that’s not always the case for older equipment)?

Also, for film, the cost of supplies (film purchase and disposal, processing chemicals, and developer maintenance) must also be factored in.

Efficiency of Digital Radiography Versus Film

There’s not doubt that, used to its maximum potential, DR technology is fast and efficient. That’s because, rather than waiting on a developer or plate reader, images are created in just a few seconds.

This efficiency can make x-ray studies go much faster, with fewer retakes. Also, for digital systems in general, it’s usually faster to set up the study, since there are automatic technique settings for different patient sizes and areas of the body being studies.

All of this means a faster, simpler workflow, less time for the patient to be on the x-ray table, and the potential to schedule more x-ray studies. Many practices have reported increasing their x-ray revenue after upgrading to DR. This can certainly increase the financial return on the equipment investment.

But there is one important consideration when it comes to efficiency. The machine is only efficient if team members feel confident using it. So, it’s ideal to invest in something that’s user friendly and that has tech support available. 

It’s smart to invest time to train everybody on the new equipment, since many employees will be used to different systems and need a little help learning all the features and functions of the new equipment.

Quality of Digital Radiography Versus Film

While many vet professionals believe digital radiography is always better quality than film, that’s not necessarily true. 

Quality depends on the system itself, as well as on the ability of team members to use the equipment proficiently to obtain high-quality, diagnostic images. Performed with skill, film studies can be perfectly diagnostic and of high quality.

That being said, digital does allow some room for error. A lot of practitioners like it for that reason. The software automates much of the image processing, and the digital image can be manually manipulated if something needs to be seen in more detail.

Which Is Best—Digital Radiography or Film?

Digital x-ray technology, particularly DR, certainly offers many advantages. And it may make sense to invest in the latest technology that a veterinary business can reasonably afford, so that replacement parts and tech support are available for as many years as possible.

However, each veterinary practice must evaluate their unique needs and see what works best for them.

Written by: Dr. Tammy Powell, DVM

How Much for a Veterinary Digital Dental X-Ray Systems Cost?

An average price range for a new digital dental radiography system would be $8,000-$15,000, depending on which components and features the system includes. 

Dental radiographs are now considered a standard part of a comprehensive dental procedure.

Good quality dental x-rays can help a vet discover and treat more pathology, thereby boosting both patient care and revenue.

Although a dental x-ray system is an important equipment investment, a veterinary practice should plan for its purchase appropriately.

This includes knowing how much to budget long-term, exploring financing options, and maximizing the ROI on the new equipment.

It’s important to see exactly what you’re getting for the purchase price. For example, is the generator handheld, or is there a stand, arm, or wall mount included?

For CR plates or digital sensors, how many are included, and in which size(s)?

Also, what type of software are you receiving?

Don’t be afraid to shop around or negotiate with sellers, to receive the best possible price.

However, also keep in mind that the cheapest price isn’t always the best. Quality is key when investing in an important piece of equipment.

Check with colleagues to see which systems they prefer, or ask the seller for references of other vets in your area who have purchased the equipment so you can get some honest feedback.

See if neighboring clinics would mind you stopping by to see the equipment in person and look at the images they’re getting.  

What Are the Maintenance Costs of Veterinary Digital Dental X-Ray Equipment?

In addition to the actual purchase price, it’s important to factor in the long-term costs of maintaining your equipment in working order. 

Ongoing costs, for both new and used equipment alike, may include…

  • Warranties. Ask when any initial warranties expire, whether they can be renewed, and how much it will cost to renew. Also, find out exactly what the warranty covers. Ask about drop damage, bite damage (since the sensor will be placed directly in a patient’s mouth!), and any other common incidents that may occur in a veterinary hospital. Not all warranties cover these things.

  • Ongoing maintenance and repairs. Ask about routine recommended maintenance, as well as costs of the most common types of repairs. If any of this isn’t fully covered by a warranty or service plan, plan ahead for these costs so they don’t catch you by surprise. Also, add these expenses into your total purchase cost. Sometimes, more expensive long-term maintenance can cancel out the cost savings of a lower initial purchase price.

  • Software upgrades. Timely upgrades are crucial to keeping your equipment working smoothly—for image processing, storage, and sharing. Also, ask about security against hacking or cyber-attacks, since radiographs are part of confidential medical records.

  • Ask about technical support, and if there is a free 24/7 support line you can call for smaller issues.

  • Ask about loaner equipment that can be used if any component of your system needs to be repaired. With this option available, you’re less likely to lose revenue if your equipment becomes damaged or needs a repair.

Look Into Equipment Financing Options

Once you’ve calculated all the costs of purchasing and maintaining your new dental x-ray system, it’s also important to consider how you will finance the purchase. This can make or break your monthly cash flow.

The first decision is whether to purchase or rent the equipment. Many vets recommend purchasing if that is an option for your practice. However, each veterinary practice must choose what works best for their finances and practice flow.

Business savings may be a good option to purchase the equipment outright. But sometimes, monthly payment plans are easier on cash flow, since revenue from using the x-ray system could be enough to cover the monthly payment and earn a profit right away.

Of course, this is assuming that the interest rate on the payment plan is reasonable.

For monthly payment plans, check with the equipment seller, or ask about a capital lease (a type of loan for equipment purchases) from banks.

Remember to factor in tax savings (Section 179 of the IRS Tax Code) and seek guidance from a financial professional.

How Can a Veterinary Practice Maximize the Return on Their Equipment Investment?

Of course, you’re probably excited to start using your new dental x-ray equipment. However, maximizing the use of your equipment starts BEFORE the purchase.

If the equipment is confusing or cumbersome to use, it will take more time per study, which means fewer dental procedures can be scheduled. Also, there will be a subconscious reluctance to schedule if the equipment is a pain to use.

So, make sure to invest in a system that is user-friendly and efficient and produces high-quality, diagnostic images. 

Also, invest in training for your team, since dental radiographs (especially those bisecting angle shots) can be confusing for anyone new to taking these x-ray studies. That also means training for vets on how to interpret dental images.

While a learning curve should always be expected, good training means less frustration and a shorter time until everyone feels comfortable getting great, diagnostic images—and for vets to feel confident diagnosing pathology on the images.

Finally, plan ahead for how much you will charge for dental x-ray studies, and how this can be worked into the total cost of a dental procedure. 

All of these efforts can maximize the ROI on your new digital dental x-ray machine, while ensuring the highest level of patient care—a plan that’s beneficial to everyone.

Written by: Dr. Tammy Powell, DVM

How Much Do Today’s Veterinary Digital X-ray Systems Cost?

What Price Range Is to be Expected?

The average price for a DR digital x-ray system in the veterinarian industry ranges from $21,000 to $35,000.

Examples:

  • DR Plate and system - $21,995

  • A complete DR system with table, generator, and DR digital x-ray is $29,995

  • A wireless system for equine or mobile vets - $28,995.

Equipment purchases are one of the most important investments a veterinary practice will make, so it’s important to ensure that the price makes sense for the business.

This doesn’t necessarily mean that the cheapest equipment is always the best deal. Instead, it’s important to consider a number of factors in terms of how you can maximize your investment and meet all the goals you had in mind for your new equipment.

The Price of Veterinary X-Ray Equipment Has Decreased Dramatically

Fortunately, this is much more affordable than machines were as recently as 10 years ago. That being said, it’s still a significant financial investment.

You may find equipment outside of this range, depending on which deals the manufacturer/seller is able to offer or which features the equipment offers. But this is a pretty common range to budget for.

Once you see the initial offer price, also be sure to ask about any deals. Don’t be afraid to shop around and tell sellers what other offers you have, in order to receive their best price. 

And if you are buying from a company from which you plan to use other services (for example, using lab work services and buying an x-ray machine from the same company), ask about discounts or bundled deals. 

What Additional Costs Can Be Expected?

In addition to the actual purchase price, it’s important to factor in the ongoing costs of maintaining your equipment in working order. 

After all, if the new digital x-ray system can’t be used, it won’t bring in any income and it would go from a smart investment to just an expense!

Some long-term or ongoing costs to consider, for both new and used equipment alike, include…

  • Warranties, including when any initial warranties will expire, whether they can be renewed, and how much it will cost to renew.

  • Ongoing maintenance and repairs. Ask about routine recommended maintenance, as well as costs of the most common types of repairs. If any of this isn’t fully covered by a warranty or service plan, set aside savings each month into a sinking fund earmarked for future repairs.

  • Software upgrades. Timely upgrades are crucial to keeping your image processing and storage in working order, efficient, and secure.

  • Ask about technical support, if there is a free 24/7 support line you can call for smaller issues.

Speaking of repairs, also check how it works if you need repairs in the future—how long your equipment would be down, and whether replacement equipment (such as another sensor or plate) is available in the meantime.

Which Financing Option Is Best for Your Practice?

Once you’ve calculated all the costs of purchasing and owning your new equipment, it’s also important to consider how you will finance the purchase. This can make or break your monthly cash flow.

If your practice is well-established and has a business savings account to fully cover the cost of the purchase, that may be a good option. But then again, a monthly payment plan may be better, since you can pay as you go (and perhaps earn a profit on your investment right away) rather than depleting the liquid funds you have on hand.

Of course, when financing on a monthly payment plan, interest rates must be factored in. Interest will increase your total cost of purchase—perhaps very significantly if it’s a high-interest rate.

But a reasonable interest rate may be worth it.

The equipment manufacturer or seller may offer monthly payment plans, so be sure to ask about this. Also, many banks offer business loans for equipment purchases, an option known as a “capital lease.”

There are even some options to rent equipment rather than purchasing if this is a good fit for your practice.

Also, remember to factor in tax savings—most commonly through Section 179 of the IRS Tax Code—which can make a huge difference on overall practice revenue.

All of this can get complicated, so it’s a good idea to seek advice from a financial professional for large purchases.

How Can a Veterinary Practice Maximize the Return on Their Equipment Investment?

Here’s the fun part—getting to use your shiny new equipment!

This is why you bought the x-ray equipment in the first place. In addition to financial gains for your practice, you wanted to provide excellent care to your patients.

Maximizing the use of your equipment starts BEFORE the purchase.

Make sure you’re investing in something that is user-friendly and efficient, as well as something that produces high-quality images on all the different sizes of patients your practice sees. 

That way, you can ensure it actually gets used (and produces diagnostic quality images) to its maximum potential rather than being cumbersome to use.

Also, plan ahead for how much you will charge for x-ray studies or other services. And talk to the team about communicating the value of these services to clients.

This improves client compliance to maximize patient care and ROI on your new x-ray machine.

With all these factors in mind, remember that a big discount on the purchase price isn’t always the best deal. Of course, you should always do your research and get the best deal you can.

But also remember the other factors that will affect the use (and profitability) of your equipment in the long term.

Written by: Dr. Tammy Powell, DVM

Taking, Measuring, & Interpreting Rads of the Equine Foot

Subtle changes within a horse’s foot can be indicative of pathology that affects the horse’s performance and quality of life, so it’s important to know how to take and interpret radiographs of the equine foot.

While extensive study and experience are needed to accurately evaluate foot radiographs, this article will cover some of the main principles behind taking and interpreting x-rays of the equine foot.

When Are Radiographs of a Horse’s Foot Indicated?

Common indications include lameness localized to the foot, suspected laminitis, navicular disease, trauma, infection, conformation or balance problems, or any other issues of the foot.

Additionally, radiographs can serve a preventive and management function, to help prevent some issues before they arise. This can be done during a pre-purchase examination, as part of a consultation with a farrier, etc.

Setting Up for and Obtaining Diagnostic Quality Radiographs

Since some of the abnormalities that indicate/lead to pathology can be subtle, it’s important to set up an x-ray study very precisely. Otherwise, interpretation can be inaccurate.

For example, a horse that is not distributing its weight equally between its right and left sides may slightly hold up one of its feet. This can result in a false diagnosis of an abnormal angle of part of the hoof when measurements are made.

Here are some tips that can help a veterinarian obtain the best possible radiographs of a horse’s feet…

  • Be very familiar with the anatomical structures, and have a good reference image for comparison.

  • Radiograph all of the feet (or at least take bilateral views), even if not all are showing symptoms of a problem. This may help uncover pathology that is radiographically evident but not yet clinically evident. At the very least, if no abnormalities are detected in the other feet, the views of the unaffected feet can serve as a great reference for comparison to normal within that individual horse. 

  • Ensure that equipment is good quality and well-maintained/undamaged.

  • Have a systematic approach each time, to ensure nothing is forgotten. Know which views need to be obtained and which technique should be used for each.

  • Do the study on level ground, so that the horse can stand in a normal position. Make sure the horse bears weight equally between the right and left foot and keeps its neck and head straight so that the foot being radiographed is at a standard, weight-bearing angle that can be effectively compared to reference images and measurements. Wooden blocks are typically used to align the beam to about the level of the bottom of the coffin bone.

Common Radiographic Views of the Equine Foot

Orthogonal lateromedial and dorsopalmar/plantar horizontal views are the most commonly obtained radiographic views of the foot, and a good starting point.

Depending on which pathology is suspected, additional views may include various oblique or angled shots. 

Tips for success include cleaning the foot to remove any foreign material that could obstruct visualization of normal anatomy or create an artifact. 

After cleaning, it is recommended to pack the sulci with a pliable material such as Play-Doh, to eliminate gas artifacts.

Many experts also recommend placing radiopaque markers (such as Barium paste) at certain positions on the hoof, to serve as a point of reference for measurements.

Describing the technique and positioning for all of these views is beyond the scope of this article, but more detailed instructions on setting up and taking views are described in reference texts.  

Measurements of Radiographs of the Equine Foot

In addition to what can be seen with the eye qualitatively, there are standard measurements of various parts of the equine foot that can greatly aid in radiographic interpretation. Some of those measurements are covered here.

For example, asymmetry or deviation of the distal interphalangeal joint space on the DP view is considered abnormal in terms of the medial-lateral balance of the foot.

Also, dorsal hoof wall thickness measurements can help identify laminitis. Rotation of the distal phalanx (P3 or coffin bone) may be noted if the lines are drawn along the hoof wall and dorsal cortex of P3 are no longer parallel to one another. 

Or, laminitis may be noted as “sinking” of P3, when the lines along the hoof wall and the dorsal cortex of P3 are still parallel to one another but are displaced lower than they should be (noted as an increased distance between the coronary band and the proximal edge of the extensor process of P3). 

These measurements can be made by hand, but some digital systems and software allow for measurements made right on the images on-screen, with automatic calculations. 

Either way, a good reference text should be used to be sure measurements are made comprehensively and accurately, and to compare the measurements to standard reference ranges. 

Having a good understanding of the anatomy of a horse’s foot, a systematic process for obtaining diagnostic quality radiographs, and practice with measurements and interpretation of the radiographs will help a vet make the most of their x-ray studies of the equine foot.

Written by: Dr. Tammy Powell, DVM
Obtaining High Quality X-Ray Images of the Equine Stifle

Radiographs of the stifle in horses are a relatively common procedure. They are used to evaluate for developmental and acquired abnormalities of various structures of the knee joint.

Here are some tips for when to obtain these radiographs, and how to obtain great shots of the equine stifle…

When Are Stifle Radiographs Indicated?

Some of the most common indications for stifle radiographs in a horse include a pre-purchase examination or investigation of any swelling of the joints, lameness localized to the stifle, difficulty bending the joint, or traumatic injuries that could affect the knee.

Some of the conditions of the stifle that radiographs may be used to evaluate include osteochondrosis, osteochondritis dissecans (OCD lesions), subchondral bone cysts, trauma, osteoarthritis, joint effusion, infection, or any other suspected abnormalities.

Ultrasound may also prove useful in evaluating the equine stifle, especially for soft tissue structures such as the joint space, meniscus, and ligaments. 

Additional diagnostics—such as joint fluid analysis, arthroscopy, or CT when available—may also provide valuable information. But radiographs are usually a good diagnostic to start with, as they are fairly routine and provide a lot of information.

Planning for Equine Stifle Radiographs

Prior to doing an x-ray study of the stifle, it’s important to thoroughly understand the anatomy of the stifle.

In addition to a working knowledge of stifle anatomy, it’s important to know how this anatomy can change over time. For example, knowing which ages the physes of the joint close can greatly aid in accurate radiographic interpretation.

A vet team should also know how to obtain standard views at appropriate angles, with correct exposure techniques for each view. Due to thick musculature, cranio-caudal views may require significantly longer exposure times than latero-medial views.

Additionally, having a differential diagnosis list will help a vet determine if any additional views are needed to see specific structures of the stifle joint in more detail.

Sedation can help to reduce motion artifact, which can produce x-ray images that are of higher diagnostic quality.

Bilateral views are recommended. This provides an easy basis for comparison in that individual horse, if lesions are unilateral. Also, some lesions (such as OCD) may be bilateral, even if the horse is only showing symptoms on one side at the moment.

Which Views of the Stifle Should be Obtained?

The most commonly obtained views of the stifle include the following…

  • Latero-medial. In this view, the x-ray generator is positioned laterally, facing the femorotibial joint, and slightly (10-20 degrees) in a caudo-cranial direction. The beam is directed horizontally, with the detector placed medially and perpendicular to the beam.

  • Caudo-cranial. For this shot, the generator is placed caudally to the joint—with the beam centered at the midline—and the detector cranially and perpendicular to the beam. The generator is raised at a 10 to 20-degree, proximo-distal angle. 

  • Caudo-lateral to Cranio-medial Oblique. For this view, also known simply as a “lateral oblique,” the beam is centered over the lateral aspect of the femorotibial joint and then angled at a 30 to 60-degree caudo-lateral to cranio-medial orientation. It is directed horizontally across the joint, or at a slight proximo-distal angle. The detector is placed on the opposing side and perpendicular to the beam. 

These three views make up the majority of routine x-ray studies of the stifle. But additional views may be included if more information is needed, such as the patellar skyline or flexed lateromedial views.

For additional information on obtaining views of the stifle in a horse—including detailed pictures of the anatomy in common x-ray views—this article is highly recommended: RadiographWilson.pdf (aaep.org)

Conclusion

As with any aspect of practicing medicine, having a good reference and proper equipment, and gaining practice/experience over time, will help a veterinarian develop confidence in taking and interpreting radiographs of the equine stifle.

Written by: Dr. Tammy Powell, DVM

Upgrade Your Surgery Room with Burton Veterinary LED Light

The Burton Veterinary LED Surgery Light is designed for surgical procedures in small and large animals. This is an ideal alternative to incandescent or halogen surgery lights and has a long life span of over 50 times the average lifespan of these lights.

What is the best use for the Burton LED surgery light?

The Burton Veterinary LED Surgery Light is ideal for veterinary specialists in small animal practices and equine veterinarians who prefer to perform surgery under local anesthesia. The Burton Veterinary LED Equine and small animal practitioners also use surgery Lights for examinations and procedures. LED surgery lights are a cost-effective alternative to conventional halogen, Xenon, or fluorescent surgical lighting systems.

Why choose Burton Veterinary

Burton Veterinary manufactures an extensive line of premium quality surgical instrumentation, flexible endoscopes, accessories, and specialty devices explicitly designed with the needs of the high-performance professional in mind. The products are developed, focusing on innovation, quality, and performance. Every product is made by hand to ensure that customers receive medical devices that are safe, effective, and durable.

The Burton light has the following features.

Safe operating temperature - The light can endure temperatures up to 70ºC (158ºF) without affecting its performance. It also has a wide range of power settings that can be adjusted according to your needs and a thermal sensor to protect it from overheating.

LED lifetime

With each light using only 1/10th the power required by other lights, the Burton LED light can last up to 50 times longer than different types of lights do. Also, due to its high CRI rating of 95, this LED provides clear, bright illumination without being too harsh on your eyes.

With the Burton Veterinary LED Surgery Light, you have the operating power you need for your next surgical procedure.

Surgically precise and brighter than ever before, it delivers 70,000 lux at 1 m and a broad 4300 K color temperature. It's easy to adjust the light output to suit your needs with a 3-step dimmer (100%, 75%, 50%).

Adjustable angling head

The flexible head allows you to adjust the direction of the light as needed so that you can work on different angles with no problems.

With a larger adjustable light pattern and limitless arm rotation, this light is ideal to provide participants in surgical procedures with a clear view of their work area.

Featuring multiple LED technology, this surgery light minimizes shadowing and provides uniform illumination. Its sleek modern design is smooth and easy to clean, plus it comes backed by a 5-year limited warranty.

The light's cutting mode has a wide beam angle that illuminates the entire operating area. The viewing mode has a narrow beam angle to focus on small areas. The light is equipped with three lenses that can be quickly interchanged. Full-spectrum light is also available if the surgeon needs to perform surgery during daylight hours.

The Burton Veterinary LED Surgery Light is the most powerful, durable, and flexible surgical light available. This premier surgical light was designed to meet the demanding needs of today's veterinary practitioners.

Written by: Rachel Best

Fluoroscopy / DR Digital X-Ray Veterinary All In One System

Fluoroscopy And DR Digital XRay, veterinary, All In One System

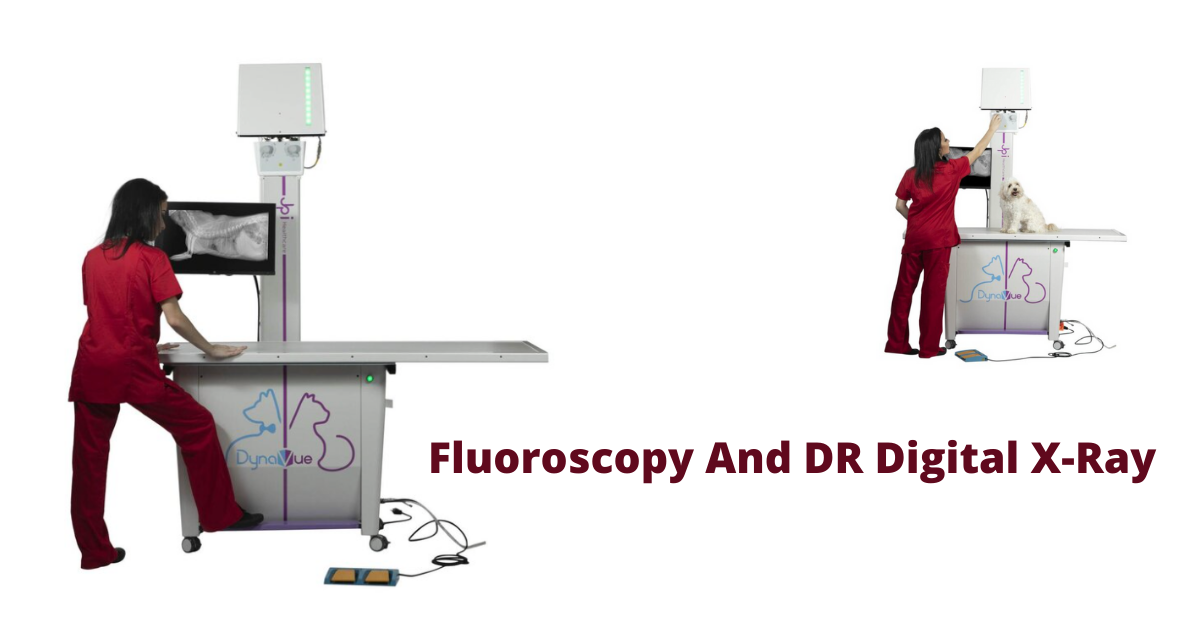
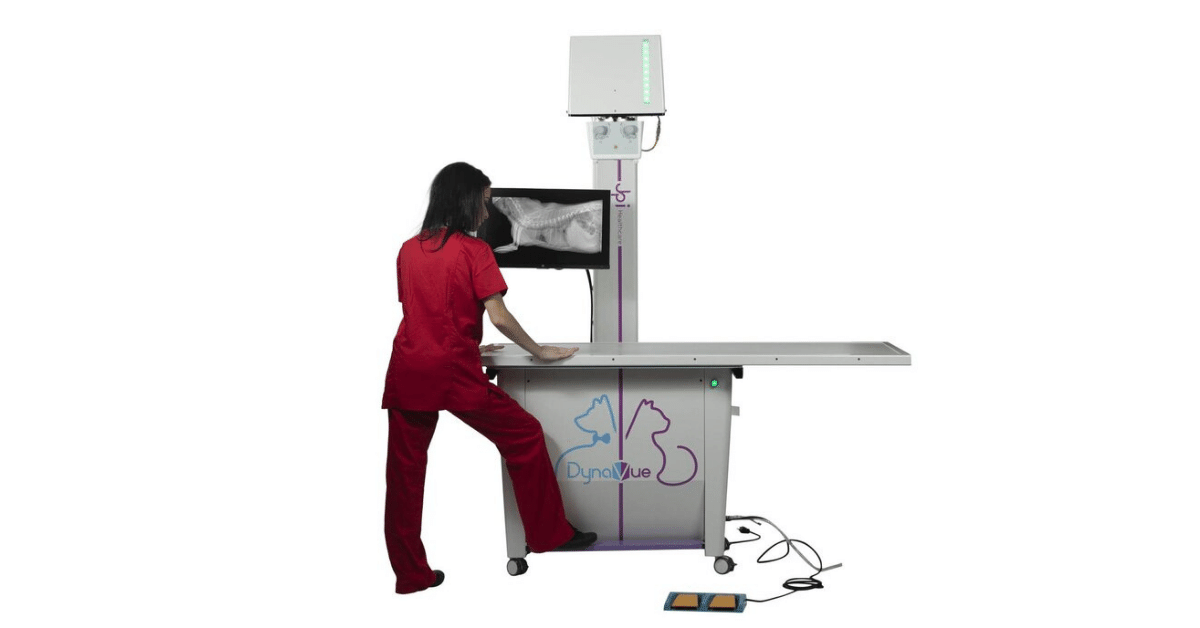
DynaVue is a very popular digital image and radiographic workflow platform used in digital radiography. It offers a complete fluoroscopy and X-Ray system, which comprises an x-ray generator, x-ray imaging table, software platform, and a large capacity Exam Pacs server for storing all the images.

DynaVue Overview

The DynaVue fluoroscopic and digital X-Ray system is based on the principles of noninvasive imaging, which utilizes ionizing radiation for medical diagnosis.

With the help of advanced processing algorithms, the system delivers high-quality images at a very low dose. The system can provide real-time cross-sectional images at a resolution of 400 microns and a speed of 30 frames per second.

The fluoroscopic imaging system is mainly used in minimally invasive surgeries and procedures such as interventional radiology, computed tomography angiography, musculoskeletal procedures, endoscopy, vascular procedures, and intraluminal stenting in veterinary medicine.

DynaVue will prove to be an advantage to veterinary practitioners as it reduces patient exposure to radiation while delivering high-quality images that can be used for various diagnostic purposes. The company offers a wide range of services for customers planning to buy DynaVue, including consultation with specialists and technical support from trained and experienced professionals.

Efficiency Requirements of a Fluoroscopy System

A sound fluoroscopy system will be able to take x-rays from multiple angles. This helps ensure doctors get the best possible images of their patients' internal problems.

The ideal system will take x-rays from three different positions: horizontal, vertical, and angled. In many cases, this is colloquially referred to as 3D imaging because of its appearance on the screen. 

A good fluoroscopy system should have several modes built-in that can be used for different types of procedures. For example, an image set that can be used for knee replacement surgery is not appropriate for heart monitoring; therefore, having several different settings is crucial. 

DynaVue is the Future Of Portable Fluoroscopy System

DynaVue all in one fluoroscopy and digital X-Ray system meets the exacting demands of modern veterinary and is built to provide precise, high-quality images that can be easily captured and shared with other clinicians.

The system is reliable enough to withstand the high levels of stress during a typical day in a busy veterinary facility. Yet, it is simple enough to be operated by anyone with minimal training.

The system has many features that will help enhance your practice's capability and save money in the long run. These include:

  • Advanced focusing - This allows for better image control.

  • Multiple radiography modes - Provides different functionality from one device.

  • Real-time image processing (8 FPS for fluoroscopy) - Supports remote monitoring.

  • Minimally invasive fluoroscopy - Helps lower radiation risks for the X-Ray test subjects.

  • DynaVue combines high-quality X-ray images with superb image quality and a wide range of therapeutic applications to perform real-time minimally invasive procedures under digital control.

It provides superior diagnostic performance to help veterinarians find early-stage diagnostics of diseases and reduce costs associated with long-term treatment.

Efficiency Requirements of a DR Digital XRay System 

There are many types of digital radiography systems, and you can find them in various places. Consider the following when choosing your digital radiography system:

Technology

X-ray systems that use computer technology are almost always going to be the most advantageous. These systems will give you the greatest flexibility, such as adjusting the screen brightness or contrast levels or freezing and zooming into your images.

Installation

Your DR digital x-ray system should be easy to install and be able to be set up by 1 or 2 people. It is best if you can connect it to your computers with an Ethernet connection, but at the very least, they should have a direct USB port connection available.

Basic

Advanced x-ray machines offer all kinds of features that can be confusing and sometimes not even used by dentists. It is best to find an x-ray system with all of the basic features such as Auto Exposure, Automatic Battery Charger, Auto Focus, Automatic Film Advance, Automatic Film 

Identification and Automatic Film Orientation.

Resolution

You want a minimum screen resolution of 1024x768 pixels to allow you to get sharp images on your screen. You will also need a good amount of contrast on your screen to view your images clearly. 

DynaVue provides superior image quality by combining two technologies: True Waveform™ and a photodiode sensor array (PSA). 

The PSA provides high-quality images with low noise levels, even at higher frame rates. The True Waveform™ feature enables superior imaging performance during cardiac gating procedures by synchronizing the image acquisition to the patient's heart rate.

For large facilities, the DynaVue system is easily scalable to meet your requirements by adding modules and accessories.

DynaVue excels in small diameter access applications because of its unique True Waveform™ technology, which provides superior imaging performance for soft tissue applications such as small blood vessels, nerve bundles, and lymph nodes.

DynaVue Features Guarantee High Efficiency

2-in-1 (DR and Fluoroscopy:

DynaVue is a 2-in-1 system that works for soft tissue and fluoro imaging. It is a state-of-the-art imaging solution that enables healthcare professionals to simultaneously see fluoro and soft tissue anatomical structures.

Flexible movement with 4-way floating table: DynaVue DR and Fluoroscopy system is one of the few systems that provides a 4-way floating table. This enables the physician greater freedom of movement, which creates a better visualization of the anatomy.

23" touchscreen display: The large display and high-quality resolution make it easy to conduct your examinations. This device ensures high-quality imaging and an intuitive user experience.

10 kW monoblock type; 15 kW inverter-based system: DynaVue DR and Fluoroscopy systems are developed for advanced diagnostic applications. Up the image quality, up the efficiency, and up the flexibility. Up the power with the Fluoroscopy system and enjoy a full range of possibilities with a single system.

Pulsed fluoroscopy offers reduced dose: The DynaVue DR system uses a backscatter method that reduces patient radiation exposure by up to 50 percent. This system also offers greater visibility throughout the exam. What's most important is that the system can still produce excellent diagnostic images comparable to existing diagnostic imaging procedures.

DynaVue uses ExamVue, a straightforward, easy-to-use, and highly customizable digital radiography software.

ExamVue is the most advanced DICOM 3.0 compliant software for X-ray imaging and reporting. More than 1,000 hospitals worldwide trust it for their daily clinical activities. 

The intuitive interface offers seamless frame rate control, imaging and annotation, post imaging processing, and connection to DICOM 3 to allow your team to focus on their work instead of dealing with technology.


Takeaway: The brand new DynaVue is the perfect solution for busy animal hospitals looking to optimize their diagnostic capital while minimizing radiation exposure with a minimal investment in terms of space and equipment.

Written by: Rachel Best

Sources

https://www.ncbi.nlm.nih.gov/pmc/articles/PMC7653184/

https://www.researchgate.net/topic/Minimally-Invasive-Surgery~Diagnostic-Imaging/publications

https://www.dicomstandard.org/

https://www.jpihealthcare.com/examvue-pacs/

https://www.medicalexpo.com/prod/jpi-healthcare-solutions/product-100612-915091.html 


Enhance Veterinary Care with Cutting-Edge Dental Equipment

Cutting-Edge Dental X-Ray Equipment for Animal Clinics

Just like human beings, animals are susceptible to various physical ailments and maladies. Practitioners of veterinary medicine are trained to handle all these situations, with animal dentistry being one of these fields of practice. Dental health plays a vital role in the general wellbeing of pets and animals, and veterinarians need various tools and instruments to carry out their role effectively.

One of the essential pieces of equipment is veterinary dental x-ray equipment. This allows the vet to look at the problem areas and make the appropriate diagnoses that will enable them to carry out the corrective procedures required. In this piece, we'll be taking a look at the dental x-ray package provided by New Vet Equipment.

We'll be exploring the qualities of each piece of equipment in the setup, highlighting how they might positively impact the overall performance of a veterinary practice.

Let's dive right in.

Digital Intraoral Sensors

A digital intraoral sensor is a piece of x-ray imaging equipment that makes it possible to get high-resolution images of the inside of a patient's mouth without the need for the bulky, frightening, radiation-leaking x-ray machines of old.

Some people wonder whether these new devices are as effective as the traditional x-ray machines, and the answer is yes, they are.

They not only offer higher-resolution results, but they do it much faster than conventional machines. This means that veterinarians will be able to make their diagnoses much quicker and with more accuracy, leading to better patient outcomes without the need for multiple visits to the vet. This saves the client time and money.

These sensors come with smooth edges, rounded corners and are available in two sizes, making them very comfortable for the patient. For extra comfort, they have a removable outer covering of soft silicon.

These are the specifications on the latest digital intraoral sensors:

  • Less than a quarter of an inch in thickness

  • Highly durable polyamide housing

  • CSI Scintillator

  • CMOS Image Sensor Chip

  • Shielding Foils

  • Shock Absorbers

  • Polyurethane USB Cable

E-Z Dent Software and Laptop

This software is designed to make your veterinary dental operations as efficient and straightforward as possible, making the entire process easier for the vet, the patient, and the client.

It is a user-friendly platform that aims to eliminate redundancies, streamline your file keeping, and provide marketing tools and management reports that will combine to optimize the efficiency and effectiveness of your practice.

A typical practice may experience a reduction of up to 75 % in the time it takes for image posting and a 90 % reduction in the time taken for other radiography functions. E-Z Dent was explicitly designed for dental operations and has been rigorously tested and optimized to make it an excellent fit for any practice it may be employed in across the United States.

The Principal Functions of E-Z Dent Software:

  • Electronic dental record-keeping

  • Referrals tracking

  • Electronic dental records

  • Patient scheduling

  • Word processing

  • Treatment planning as well as follow-ups

  • Practice management reports

  • Recalls

  • Electronic and paper billing

Benefits of Using E-Z Dent Software

This software can tangibly improve revenue collections, patient tracking, and information gathering for your practice by:

  • Assigning finance charges

  • Tracking late payments owed by insurance companies and patients

  • Printing out of financial statements and reports

  • Providing informative and timely reports

  • Highlighting new patient percentages

  • Providing collections data

  • Referral tracking as well as follow-ups

  • Giving flexible reports determined by your chosen criteria on selected patients

  • Showing patients who have not shown up for recalls

  • Printing of timely, accurate electronic claims and insurance forms

  • Estimating the amount insurance should pay and what should be collected from the client at the time of their visit

NOTE: This software will come with a laptop chosen for its ability to handle the memory and processor requirements of the equipment. This will typically be running on a Windows platform (Usually Windows 10) and can be linked to other workstations on the office network.

Portable Dental Generator

Clients will have a choice of generators. These are all effective, reliable generators selling at the flat rate of $6000, but depending on their preferences, they may choose from among the following:

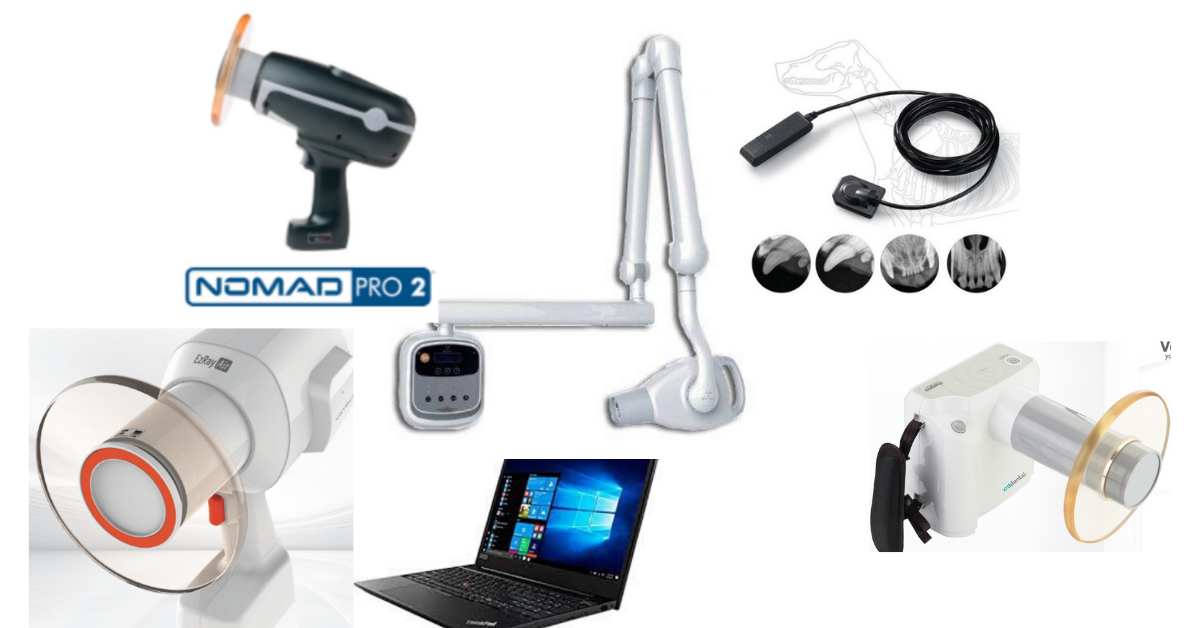
1. Wall/Cart Mounted E-Z Ray Dental Generator

This comes with a detachable control panel, easily moved anti-drift arms and a lightweight tube head. It also features an easily gripped ergonomic handle. You may opt for the wall or cart attachment at no extra cost.

2. Hand-Held Nomad Pro-2 Generator

This comes with a backscatter shield that works with its fully-encapsulated x-ray source to minimize the exposure operators and pets endure. It works well with digital sensors, film, and phosphor plates. It is highly portable and lightweight, weighing only 5.5 lbs.

3. XRD Dental Portable X-Ray

This comes with a small 0.4mm focal spot that provides higher definition and superior imaging while minimizing radiation exposure to the operator and pet. It is compact, lightweight, and features long-lasting battery technology that makes hundreds of exposures possible on a single charge. It is compatible with PSP plate systems, film, and dental sensors.

4. EZ Ray Air Portable Generator

A lightweight, portable device optimized for stable positioning and easy handling. It comes with Internal shielding and external backscatter shielding to ensure operators are not exposed to radiation leakage and backscatter. It utilizes carbon nano-technology to reduce cooling times between shots and thus optimize workflow rates.

5. COCOON Hand-Held Generator

This light-weight, gun-type, portable generator is optimized for battery life and stunning, high-resolution imagery. For added safety, it features a locking trigger and lock mode. It is oil-cooled and has a 0.4 mm focal point size. Its target angle is 12.5 degrees and has a pre-recorded voice guide to assist operators unfamiliar with it.

2-Year Hardware and Software Warranty

Clients who purchase this digital x-ray package will enjoy two-year warranty coverage and support, ensuring that they don't have to worry about any mechanical or software trouble.

Final Thoughts

Regardless of how skilled, experienced, or well-trained a veterinarian might be, they will all acknowledge that poor equipment leads to poor results.

For the optimal welfare of their patients, vets strive to get the best, most accurate, and most reliable instruments to help them play their trade.

The setup we've just reviewed seems to fulfill these requirements.

To acquire it for your practice, visit New Vet Equipment and place your order today. They are always willing to address any questions or concerns you might have, so don't hesitate to make the call.

Written by: Rachel Best

Sources

https://www.vatech.com/software_2d/419

https://newvetequipment.com/dental-xray-equipment

https://ezdent.com/technote/EasyDentManual.pdf

https://videodental.com/digital-intraoral-sensors/

https://imageworkscorporation.com/the-seven-most-common-questions-when-implementing-a-new-dental-intraoral-sensor-system/

https://www.vatechamerica.com/products/ezray-air

https://newvetequipment.com/wall-or-cart-mounted-generator

https://newvetequipment.com/xrd-dental-portable-xray-ray98p-vet

https://newvetequipment.com/nomad-hand-held-generator

https://newvetequipment.com/cocoon


When and How to Perform Equine Neck X-Rays

Radiographs of the cervical spine in horses can be challenging, but developing a system and becoming familiar with interpretation of these views can be very useful.

Here are some common guidelines to follow for cervical x-ray studies in horses…

When Are X-Rays of the Neck Indicated in Horses?

X-ray studies of the cervical spine are used to evaluate for a number of different conditions, such as cervical vertebral malformations, congenital malformations, trauma such as fractures, subluxations, osteoarthritis, or neoplasia.

Some of the symptoms that might lead a veterinarian to suspect an issue with a horse’s cervical spine include pain on palpation, stiffness or a reduced range of motion in the neck, neurological signs (ataxia, proprioceptive deficits), swellings or asymmetry of the neck, or even lameness or decreased competitive performance.

Advanced imaging, such as CT and nuclear scintigraphy, is becoming more common. A myelogram is sometimes indicated as well, for more information.

However, plain radiographs are usually the first line for diagnostic imaging. Plain radiographs can provide a lot of information, can be used to guide the next step of treatment or diagnostics, and may be performed with sedation, whereas other imaging modalities require general anesthesia.

An ultrasound study may also accompany neck radiographs, especially for evaluating the joints and soft tissues such as ligaments.

Performing Radiographs of the Cervical Spine in a Horse

Here are a few things that will help with smooth and efficient x-ray studies of the neck…

  • Make sure the generator is powerful enough for cervical radiographs, especially for the caudal cervical spine, which is a very thick region to shoot through due to surrounding musculature.

  • Know which views are needed (more on this below).

  • Carry all appropriate PPE, including cassette holders, lead aprons, gloves, etc.

  • Use appropriate technique for this region. This is typically a kVp of 70-90, while mAs can vary greatly between the cranial to caudal portions of the neck due to thickness.

  • The horse is typically sedated unless contraindicated and standing for the x-rays.

  • Markers should be used to clearly differentiate the different regions of the neck, so a vet knows which vertebrae they are looking at. Some vets find it’s easier to use tape on the cassette to mark the views.

Which Radiographic Views of the Equine Neck Should be Taken?

Lateral views are typically the first ones taken. The standard lateral-to-lateral view (which can be taken from either the right or the left side) can provide a good screening of the entire area. 

The region is usually broken down into three overlapping shots: cranial, middle, and caudal. One disadvantage of a lateral-to-lateral view is that bilateral structures are superimposed.

Oblique views can help with the problem of superimposition and allow the vet to take a closer look at the side where a lesion is located. To provide a basis for comparison, both a right and a left oblique are taken for each region of the cervical spine (cranial, middle, and caudal). 

Obliques are usually performed at an angle of 45-50 degrees from lateral—for example, dorsal-right-lateral to ventral-left-lateral oblique. A ventral to dorsal oblique technique has also been described. Either way, the direction of the shot should be clearly noted and compared to a reference of the same direction and angle, for accurate interpretation.

Additional views may be obtained if needed, especially if more focal shots are indicated to isolate an area in question. 

VD views are typically not performed due to impracticality, because of the thickness of a horse’s neck, although it may be possible in smaller breeds or foals.

Interpreting Radiographs of the Equine Neck 

Practice, good reference images for comparison, and familiarity with the anatomy of the region can all help with the interpretation of x-ray images.

A consultation with a radiologist can also be helpful.

Evaluate each radiograph in its entirety. Asymmetry, variations of normal anatomy, changes associated with degenerative joint disease, lytic lesions, stair-stepping between vertebrae, compression of the vertebral canal, or any other abnormalities should be noted.

Measurements of the vertebral canal can also be made and compared with standards, which can help with diagnosing more subtle compressive lesions.

By having a system for neck radiographs, knowing which views to take, and becoming familiar with the interpretation of these x-ray studies, a vet can determine the next step for a horse showing symptoms of a problem localized to the cervical spine. 

Written by: Dr. Tammy Powell, DVM
Upgrade to Digital X-Ray with Your Existing Table/Generator

 Saying Goodbye to Chemicals and Dark Rooms: The Digital X-Ray Advantage

Advantages of upgrading to digital X-ray:

  • Faster viewing of X-rays compared to film x-ray.

  • Elimination of the need for a dark room, saving 20-30 minutes of processing time.

  • Improved environmental conditions and staff health:

    • No more purchasing and handling of chemicals.

    • Elimination of film, storage, toxic chemical fumes, and odors.

  • Convenient sharing of X-rays:

    • Sending x-rays to a radiologist via email or PACS.

    • Easy sharing of X-rays with customers through email.

  • Enhanced customer service and interaction:

    • Digital technology allows for easier and more efficient viewing of each X-ray.

    • More time can be spent with customers, providing better service.


We had one location that had a table/generator which was over 15 years old, and we were able to upgrade to digital, still using his old table and generator.  

Money saved!

The Doctor upgraded to a DR system, and we saved him money by using his old table and generator.

We can do the same for you and it doesn't matter if you want a CR or DR digital x-ray system.

TESTIMONY

Here is what the Doctor had to say in an unsolicited email a few days after the installation...
 

“Image quality is superb! Far better than Sound x-ray we use to have at Bakersfield hospital. We took abdominal X-rays on a 70-pound dog and the x-rays came out great. Thank you! Let me know if anybody wants to visit and see the images...I will be more than happy to show them the images” — Dr. Singh - Family Pet Hospital - Vacaville, CA

Use your current table and generator and go digital - for a CR or a DR system.

Upgrade to Digital X-Ray & Keep Current Table & Generator

DR Digital X-Ray - Easy to Upgrade - Use Your Current Table and Generator

Each veterinary practice relies on various tools and equipment to carry out its services. One of the most important pieces of equipment in treating animals is an X-ray machine.

These machines make it possible to examine the internal structures of an animal to make diagnoses as to the ailments the animals are suffering from.

Broken bones, impacted gastrointestinal tracts, inflammation, and myriad other conditions will all be exposed without the need for invasive surgery with the aid of good x-ray equipment.

In this piece, we'll be taking a look at one of the best x-ray setups designed for use in veterinary practices. This is the DR Digital X-Ray assembly with Plates, Software/Computer, and ExamVue PACS (Server Based) offered by New Vet Equipment.

We'll be taking a step-by-step look at the various components in this assembly, highlighting their positive attributes and how they can positively impact your professional operations. Let's get right into it.

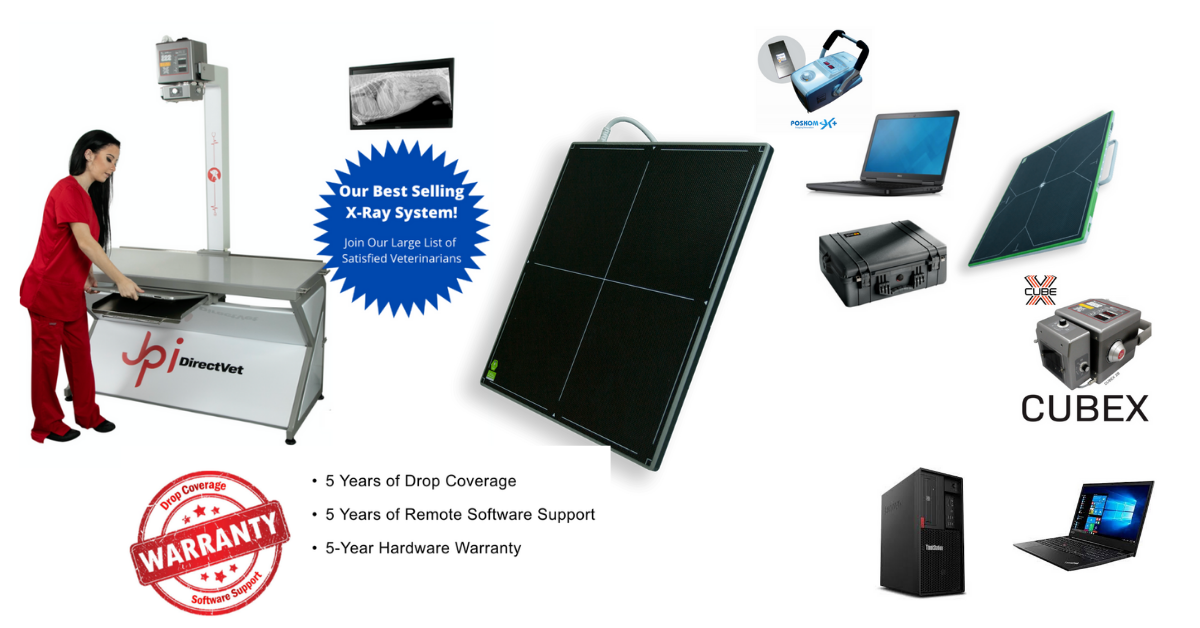
Flat Panel Detector (CareRay Cesium Plate)

Digital Radiography (DR) utilizes x-ray sensitive plates to capture data while the patient examination is going on directly. This data is immediately transferred to a computerized system without needing an intermediate cassette, as happens during Computer Radiography (CR) procedures.

For this reason, DR systems are considered a great choice for those hoping to upgrade from film x-ray techniques. 

Flat Panel Detectors (FPDs) are the essential components of these systems and typically use combinations of amorphous silicon detectors fitted with gadolinium or cesium scintillators.

These are responsible for converting x-rays hitting them into light, which is subsequently translated into digital data by thin-film transistors. This data is represented on the acquisition screen for viewing by the vet.

Various advantages come with using Digital Radiography instead of other methods, including:

  • Superior images that exhibit higher resolutions and overall quality, making diagnoses easier and more accurate for veterinary medicine practitioners.

  • The ability to enhance images through software tools and algorithms. This capability is not possible when using film x-rays.

  • Radiation dosages are significantly reduced because the amount of radiation produced by the x-ray generator does not need to be as high as it is when using other radiography methods.

  • Processing chemicals and film will be a thing of the past, making the entire radiography procedure much simpler.

  • It's possible to retrofit your equipment to accommodate Digital Radiography equipment without the need to overhaul your entire x-ray setup.

  • Processing times will be significantly reduced (by up to 5% in some instances).

  • Thanks to increased efficiency and a more streamlined workflow, higher patient throughput can be achieved.

  • Digital Radiography systems can be utilized across multiple modalities and systems.

Host Workstation (Desktop/Laptop)

Clients are given the option of choosing between a laptop-based or desktop acquisition computer. These are both sufficiently powerful computers for the tasks they will be called upon to handle, so the choice will largely depend on your particular preferences or space considerations.

The desktop version utilizes an Intel Core i5-6500 with 16GB Ram, 1600Mhz processing speed, and two 1TB hard drives. On the other hand, the laptop version is a ThinkPad E580 running on an Intel Core i7, with 8GB RAM and 500GB hard disk space. It features a 15.6" display. Both these options run on the Windows 10 operating system and come with a 3-year manufacturer's warranty. 

Compatible with Portable X-Ray Generator

Portable medical x-ray units are not much different from fixed digital x-ray units in their method of operation except for their size. Even so, they also have certain unique benefits for practitioners of veterinary medicine, including:

  • Portability: Some veterinary practices can be very busy at times, and a portable x-ray unit makes it possible to conduct an x-ray. This convenience causes less stress to the ailing animal and makes things easier for the x-ray technician as well.

  • Safer Operation: The use of traditional medical imaging equipment was a source of concern for those exposed to potentially harmful radiation. Portable units come with protective shields mounted on the front of the devices to help prevent patients and operators from exposure to scattered radiation. 

  • Increased Speeds: These units eliminate long waits and processing times, leading to quicker diagnosis, treatment, and also recoveries.

ExamVue PAC Software

The ExamVue PAC software is an imaging management solution that will work seamlessly with your hardware while integrating easily with your office workflow. It is designed to facilitate the viewing, storage, sharing, and management of DR images. It offers a variety of benefits and features, including:

  • Advanced specialty tools, including Vertebral Heart Score (VHS) and Norberg Angle that make it possible to make quick diagnoses on your x-ray images

  • Interactive sharing features that allow for the sharing of diagnostic images with clients and colleagues through their Windows tablets or work desks

  • Integration capacity for up to ten Windows stations within a single office setup

  • A large variety of annotation tools make it a useful tool for those wishing to share and collaborate with others in the course of their work.

5-Year Warranty

This DR Digital x-ray setup comes with a 5-year warranty to see owners enjoy their use without the worry of system or mechanical failure. These warranties include 5-year drop coverage, five years of remote software support, and five years of hardware support as well.

Shipping and Installation

Depending on your location, you might be eligible for free shipping and installation services. With a quick call or email, you can find out whether or not you qualify for this service.

Final Thoughts

All veterinary professionals know that the success of their efforts relies not only on their personal skill, experience, and training but on the equipment they use. Even the best practitioner of veterinary medicine will perform at less than their best if they are using substandard, inaccurate equipment. To acquire the best digital x-ray assembly for your veterinary practice, visit New Vet Equipment today and place your own order.

Written by: Rachel Best

When and How to Perform Equine Skull X-Ray

Radiographs of the head are useful when evaluating for injuries or disease processes of the skull, jaws, teeth, nasal cavity, and paranasal sinuses in horses.

Examples include, but are not limited to, dental or periodontal disease of the cheek teeth, head trauma, sinusitis, and neoplasia.

Common clinical signs for which skull radiographs may be indicated include nasal discharge or epistaxis (especially unilateral), swellings of the face, odor or draining tracts, bony changes, or difficulty eating.

When skull radiographs are indicated, here are some common guidelines to follow for procedures, views, and interpretation.

Performing Radiographs of the Head in a Horse

A systemic approach to an x-ray study can help improve efficiency and ensure nothing is missed. This should include…

  • All necessary equipment, including a generator with enough power for skull radiographs, a large sensor (while intraoral plates are available for dental evaluation, here we’ll discuss extraoral views), and any props that may be needed to aid with views or positioning.

  • Knowing which views are needed (more on this below).

  • Having a technique chart or reference for settings. While the numbers can vary depending on the machine/equipment, commonly kVp is set between 70-100 and mA between 3-20.

  • Sedation is generally recommended unless there is a medical contraindication.

  • If possible, remove the horse’s halter or anything else on the head that could create an artifact or cover-up details in the x-ray image.

In some cases, it may be worthwhile for radiographs to be accompanied by (or followed up with) additional diagnostic tests, such as ultrasound or endoscopy.

Which Radiographic Views of the Equine Skull Should be Taken?

These are the most common views that are typically used for an equine skull study…

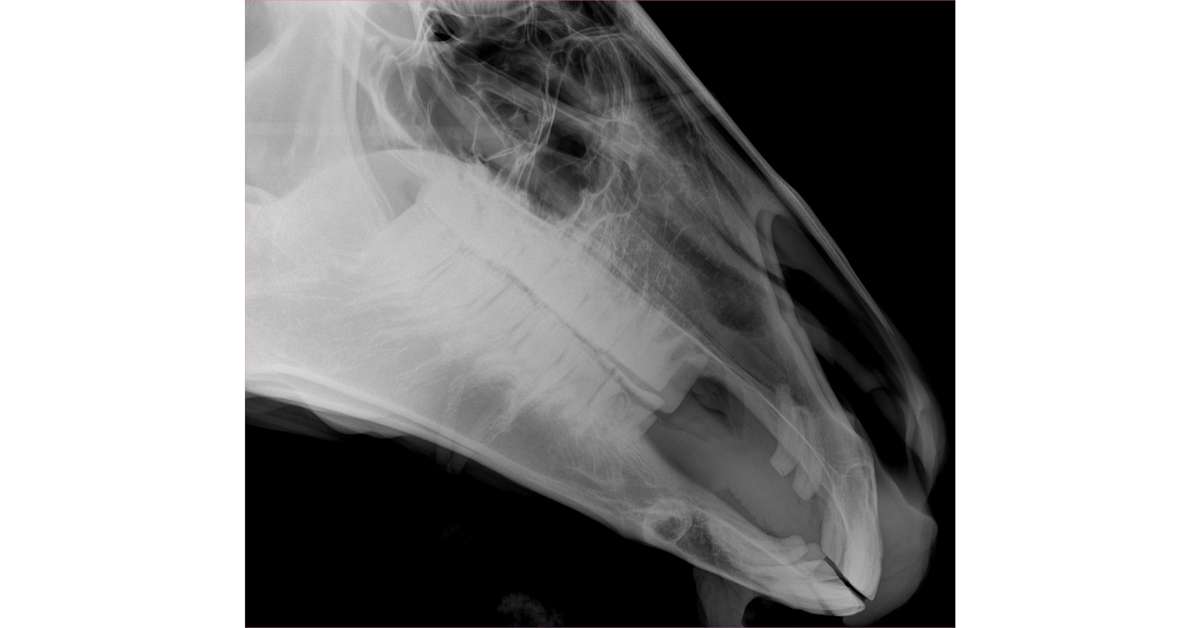
  • Lateral: This is a good screening shot to look for abnormalities (such as fluid or opacity) in the nasal cavity and paranasal sinuses. Bony and dental structures will be superimposed, but obvious abnormalities (such as tooth root abnormalities) might also be noted here. The cassette is centered over the 4th upper cheek tooth or rostral aspect of the facial crest, and a horizontal beam is used. 

  • Ventrodorsal (or Dorsoventral) Oblique: Oblique views are valuable for reducing superimposition. A VD or DV technique can be used. 

    • A VD oblique aids in evaluating mandibular structures, as well as in viewing the maxillary sinuses with less superimposition. The cassette is centered at about the same location as the lateral shot, but more dorsally to create obliquity. The x-ray tube is placed ventrolateral to the mandible so that the beam is at approximately a 45-degree angle on the opposite side of the face.

    • A DV oblique is helpful for evaluating sinus structures and maxillary cheek teeth. This view is basically the reverse of the VD, with the cassette positioned below the jaw and the x-ray beam pointing down at approximately a 45-to-60-degree angle on the opposite side of the face.

  • Dorsoventral: This view provides a lot of information about the sinuses, nasal passages, and nasal septum, especially for comparing right to left. Teeth and bony structures may also be evaluated, although overlap of these structures is to be expected. For this shot, position the cassette ventral to the head, centered under the mandibles. Then position the beam perpendicular to the cassette.

Additional views may be obtained as needed, especially more focal shots and additional angles to isolate an area in question. 

For more detailed guidance on views for evaluating specific areas of the skull, this article is highly recommended: 101-eve-v25-i12-fm-toc.indd (aaep.org) 

Interpreting Radiographs of the Equine Skull 

Fortunately, the contrast between air (the nasal passages and paranasal sinuses) and bone creates good radiographic contrast. On the other hand, the complex structures of the skull, combined with superimposition of those structures, can make radiographic interpretation challenging.

For the best results, always use markers to identify which side of the head is being evaluated in the shot and differentiate between right and left, especially in oblique views (for example, RDLV—right dorsal to left ventral oblique).

Also, obtaining bilateral views is helpful for lateral and oblique shots, since it allows for comparison between sides. 

Always evaluate the entire radiograph, and be on the lookout for asymmetry.

As with any x-ray study, clinical experience and good radiography reference images can help a vet identify what is normal versus abnormal.

Consultation with a radiologist can be helpful as well.

By having a system for skull radiographs, knowing which views to take, and becoming familiar with the interpretation of these x-ray studies, a vet can determine the next step for a horse showing symptoms of a problem with the head or teeth. 

Written by: Dr. Tammy Powell, DVM

Reliable Suburban Surgical Operating Table

Suburban Surgical 58 inch V-Style Operating Table With Heated Top and Hydraulic Base


For precise animal positioning, the Suburban Surgical V-style operating table does the job excellently.

With a heated top and hydraulic base, there is a wide range of positions that this operating table can do. A high-quality stainless steel top offers durability and reliability even for several years of use.

The elite hydraulic hand operating table allows you to perform even the most complicated procedures comfortably. Combined with a stainless steel enhanced tilt mechanism, perform your procedures at your desired positions.

The Suburban V-style operating table gives you effective and efficient control of the patient. Achieve the perfect angle while operating on your patients.

Your patient requirements and surgery style are unique and special to your veterinary practice. A good operating table must have excellent features in order to meet the needs of your practice.

The Suburban Surgical 58 inch V-Style Operating Table With Heated Top and Hydraulic Base is specially made for practitioners to meet the demands and requirements they need for their practice.


58 inch V-style stainless steel operating tabletop


The Suburban V-style operating table has one of the strongest operating tables top in the market. If you're looking for a reliable, secure, and durable operating table for your veterinary clinic, this is the best choice.

Stainless steel construction provides strength and convenience as it repels most foreign substances and body fluids. It permits easy cleaning and prevents cross-contamination. For you and your patient's safety, welded smooth radius bends for the corners are designed to avoid accidental injury. 


The table is made with a one-piece die-formed 18-gauge that is designed to last. The top is made with an elegant satin finish.

A large 58-inch top ensures the patient is comfortable no matter how large the patient is. It has a top panel adjusting knob that you can turn counterclockwise to loosen and raise it to a 90-degree angle.


Therm-o-Matic II Heat Control provides Heated and Unheated modes


The Suburban V-style operating table allows you to operate on animals that require certain temperatures while being operated. The heating feature maintains the body temperature of the patient even during long hours of use. The heating mode is conveniently placed on the side of the table, giving you easy access when desired. Control the temperature via an easy-to-use mounted side panel. 


The Therm-o-Matic II Heat Control shows the temperature using an LCD panel on the side of the table. Once the desired temperature is reached, an indicator light turns on.

The heat control requires 120V AC power. Just select the temperature you want the tabletop to reach, and sensors will automatically regulate the desired temperature. The heating mode can also be turned off when a patient does not require certain temperatures to be operated.


Top-quality stainless steel construction

The Suburban V-style operating table is manufactured and engineered to last. The operating table is made with the latest laser manufacturing and computer numerical control process. Every piece of the table is made with precision and accuracy.

Only high-quality parts are used in the table to give reliability even in the toughest procedures. Engineered and built to last, you can depend on the Suburban V-style operating table for a long time.


Solid stainless steel base with enhanced tilt mechanism and hydraulic hand operation


The stainless steel base is made with high-quality steel that guarantees steady and stable performance even in the toughest procedures. Perform your operations at your desired position with the enhanced tilt mechanism. You can adjust the table to your desired height with the help of the hydraulic mechanism feature.

A pump-action foot pedal is conveniently placed at the side of the base for you to smoothly raise or lower the operating table. The operating table can rise from 35.750" H to 47.500" H. The tilt mechanism is also made with strong stainless steel for enhanced durability and strength.


An adjustable floor leveler feature is also available in this excellent operating table. The floor levelers are located on all four corners to ensure stability during intensive operations.

A positive locking handle is also included so that the top is steady when the desired angle is made. The flat stainless steel base can also b used as a footrest for enhanced comfort, especially in long procedures.

The elite base allows the table to be rotated in full 360 degrees. The mounting brackets are made with high-quality steel for long-lasting strength and durability. The tabletop can be locked in any position from horizontal to near vertical.

Sanitary features

The rigid stainless steel top has a unique raised center to direct and channel fluid to the collection holes at one end. This feature allows a sterile environment for your patient. Avoid having messy procedures with the Suburban V-style operating table.

Access-A-Rail operating table system

The innovative Access-A-Rail feature on this table provides precise positioning for demanding procedures. This feature allows excellent positioning flexibility that is not seen in other operating tables. It has an adjustable height stainless steel with cleats to attach the Access-A-Rail and two Cam Cleat Tie-down for accurate positioning of patients. Keep animals safely positioned and secured during your surgical procedures.

Restraint capability


There are times when patients need greater than necessary control and handling. The Suburban V-style operating table provides a convenient over-the-table restrainer assembly.

The stainless steel supports can attach to the Access-A-Rails and hold a steel rail that spans the width of the operating table. It gives you a reliable upper restraint capability when needed.

This operating table is designed to give you comfort and ease of use even in unique patient situations. The table can have upper rail adjustments to provide excellent flexibility.

Stainless steel rail extensions

Stainless steel extensions allow you to add tie-downs and other accessories for convenience. Your materials and equipment can be placed slightly away from the surgical area for better visibility and ease of access. Make your surgical procedure efficient and fast with this excellent feature.

Warranty

A 3-year warranty on parts is included for the Suburban V-style operating table. Labor is not included in the warranty.

Written by: Leo Heno

Pre-Purchase Examinations and X-Rays in Horses

Since purchasing a horse can be a large financial investment—both the purchase price itself, as well as any medical bills that arise later due to health or lameness issues—it makes sense for horse owners to do their research prior to buying a new horse.

As such, a pre-purchase examination with a veterinarian is typically performed prior to the sale going through, which includes a physical evaluation and possibly radiographs. 

What Is Included In a Pre-Purchase Examination of a Horse?

At the very least, a pre-purchase check includes the horse’s history (ownership, work, and medical history) and a full physical evaluation.

A horse’s identification should be verified. A vet may also make notes about the horse’s temperament or other non-medical factors.

The horse’s history is important when considering expectations of future performance. 

For example, what is the horse being purchased for, i.e., what will their job be? And how does this level of activity compare to their current level of activity?

Then there’s a standard full physical examination, which looks for abnormalities of the skin, eyes, mouth, cardiovascular, gut, and other body systems. 

This includes evaluating the horse before and after physical exertion and seeing how long it takes them to recover.

The musculoskeletal part of the exam may include more detail while evaluating for lameness. Examples of this part of the exam include (but are not limited to)...

  • Observing the horse’s gait at walk, trot, canter, or other tasks, both saddled and unsaddled.

  • Palpation of the limbs, neck, and back.

  • Hoof evaluation and hoof testers.

  • Flexion testing.

  • Range of motion.

In addition to the physical examination and lameness evaluation, diagnostic testing may be performed. This might include…

  • Bloodwork or labs for general health.

  • Drug testing.

  • Diagnostic imaging, including radiographs of the joints or ultrasound of tendons.

  • Any additional tests (breeding soundness, tests required for interstate travel, endoscopy for respiratory issues, etc.) as needed.

Which Radiographic Views Should Be Included In a Horse Pre-Purchase Exam?

That being said, there is some debate over which/how many views should be included. 

When in doubt, it’s probably best to err on the side of caution and obtain more views rather than less, since these views may potentially be used in litigation if the buyer ends up encountering a problem with the horse.

For this reason, the images also need to be of excellent quality, and it is recommended to use standard views/angles.

Radiographs of the limbs may include views of joints and bones that are more likely to encounter issues, especially the… 

  • Stifles (craniocaudal, lateral, +/- obliques).

  • Hocks (DP, lateral, +/- obliques). 

  • Fetlocks (DP, lateral, +/- obliques)

  • Foot/navicular series. 

  • Additional views could be added depending on the needs of the situation. This may include additional joints, additional angles or flexed/stressed shots, or even vertebral studies of the neck and back.

A veterinarian would be looking for any abnormalities, such as previous or current injuries, arthritis, or OCD lesions. Of course, all of these findings should be correlated with the horse’s history and clinical evaluation.

Getting a radiologist consultation on pre-purchase radiographs is never a bad idea either.

Conclusions from a Pre-Purchase Examination

The purpose of a pre-purpose examination, including the radiographs, is to uncover any abnormalities which may potentially lead to a problem later, so a buyer has more information about what to expect from that particular horse.

However, it’s important to remember that there aren’t a lot of “perfect” horses out there. Most horses will have some type of lesion or abnormality uncovered. 

While some abnormalities may predict a severe issue and lead to cancellation of the sale, other potential issues are not so clearcut. A pre-purchase examination isn’t a guarantee that a horse will never have a problem. And a mild abnormality may be perfectly acceptable to the buyer for the purpose for which they are purchasing the horse.

The goal is to provide information, and to convey that information to the buyer so they can make an informed decision and get the horse that’s right for them.

Written by: Dr. Tammy Powell, DVM

The Case for Veterinary Nurse Practitioners

We covered what a veterinary nurse practitioner’s role may include, as well as some of the most commonly heard pros and cons of adding this new role to the profession.

This week, we’re covering some additional pros and cons for discussion, as well as practical considerations for when and how this change may occur in vet med.

Read on to learn more…

Veterinary Technician Utilization and Career Growth 

It’s no secret that veterinary technicians are often underutilized and that their pay is often not up to the standards of their professional education and the crucial role that they play at a veterinary practice.

Many technicians note there is a “ceiling” for them in clinical practice—in terms of reaching new levels of professional satisfaction and an income that truly reflects their knowledge and hard work. 

As such, many vet techs leave the clinical side of the work they love in order to pursue management, teaching, or even an entirely new start in human medicine or another field. 

Many argue that a veterinary nurse practitioner option would help more techs stay in the field and be appropriately compensated while continuing to grow professionally.

On the other hand, many have pointed out that it may make more sense to fully utilize vet techs (and pay them a higher compensation) prior to creating a new role. 

In other words, if we don’t fix the current problems vet techs are facing, would those issues just be perpetuated in a new role?

Less of a Role for Veterinary Technicians

Those who don’t support the veterinary nurse practitioner movement point out that once this new role is created, there may be less of a need for traditional vet techs. 

These wonderful staff members may begin to feel underutilized, underappreciated, and underpaid next to their new nurse practitioner coworkers—since nurse practitioners would still be able to perform all the tasks a vet tech could.

Veterinarians Fully Utilizing Their Education versus Daily Routine Appointments

While a nurse practitioner role may help vet techs see their full professional potential, some argue it will carry the same benefit for veterinarians. 

If a vet’s time is freed up from repetitive daily wellness and minor issues appointments, they may be freer to pursue their own professional interests, such as dentistry, surgery, acupuncture, complicated internal medicine cases, or anything else they enjoy. 

Of course, many vets do enjoy daily interactions with clients for more routine appointments, so this may depend on personal preference.

And some worry that the loss of those daily, routine interactions could hurt their relationships with clients in the long-term—that they would only see clients when their pet is seriously ill, without a prior relationship.

Preventing Burnout Within the Profession

Many veterinarians and veterinary professionals have suffered from burnout and mental health concerns related to their careers. 

Some state that a veterinary nurse practitioner role can help the profession as a whole in this regard—by taking some of the extraordinary workloads off of veterinarians and delivering better workflow to the whole practice.

Also, allowing skilled veterinary professionals to receive fair compensation and derive more professional satisfaction could help with job satisfaction for the whole team, not just vets.

Consumer Expectations and Preferences

It’s been pointed out that veterinary medicine, in general, is slow to update to new technology and consumer preferences.

Some argue that veterinary nurse practitioners may be expected by pet owners in the near future, since that’s what people are used to for their own health care.

While many veterinarians and practice owners expect clients to stick to the practice’s way of doing things, history in many other industries has shown us that customers eventually do turn elsewhere when businesses fail to adapt to the times.

Distribution of Veterinary Services

Whether there is a national surplus or shortage of veterinarians, some parts of the country have faced a vet shortage in either climate—especially rural areas.

For this reason, some rural practitioners have voiced their support of the veterinary nurse practitioner, as it may be a way to distribute some of their caseloads even when they can’t find a DVM to hire.

Others argue that while nurse practitioners would be more affordable than a DVM, they would still be too expensive for some rural practices—and that these practices would be hurt in the long run because there would be fewer traditional vet techs overall for them to hire.

Liability

One serious concern to answer is who is legally responsible if a medical error occurs while a patient is under the care of a veterinary nurse practitioner?

If the veterinarian is liable, as is the case when an error occurs by a vet tech, this may make veterinarians reluctant to delegate.

When and How Could the Role of Veterinary Nurse Practitioner Be Created?

While there is much discussion about this topic right now, it could take quite a while for any serious changes to be made toward the creation of this new role.

Some of the roadblocks include the need for major changes to education and credentialing. 

Currently, many vet techs have an associate degree—which is much shorter than the length of time required to become a veterinarian. Supporters of the nurse practitioner role envision the degree being the equivalent of a master’s degree, so the education would be much more extensive.

Additional considerations include accreditation of any educational programs, as well as standardization for credentialing, continuing education, etc.

Also, there’s the matter of what the state laws allow vet techs to do at a veterinary practice. These laws would have to be changed, and that could take years and be very expensive.

What’s Next?

It’s been suggested that more data is needed to know if the nurse practitioner is really sustainable for the long-term (and not just a short-term need during the pandemic), and that it may take many years for this new role to be created.

On the other hand, at least one university is in the process of creating a master’s degree targeted to veterinary technicians.

There is certainly some appeal to the collaborative environment envisioned by supporters, with a healthier workload distribution to all employees while allowing the practice to provide high-quality care to more pets and bring in more revenue.

But while there may be benefits, it’s certainly necessary to continue discussing any potential downsides so that there is a realistic idea of how this new potential role could affect the profession as a whole.

Additional great sources of information include a recent podcast from Dr. Andy Roark

(https://drandyroark.com/vet-nurse-practitioners/ ),

and an article from VIN News Service (https://news.vin.com/default.aspx?pid=210&Id=10484775 ).

Written by: Dr. Tammy Powell, DVM

Does the Profession Need a Veterinary Nurse Practitioner?

A hotly debated topic in veterinary medicine right now is whether there is a need for a midlevel practitioner—a position comparable to a nurse practitioner or physician’s assistant on the human side of medicine. 

So, what are the arguments for and against this potential new veterinary career track? And what would be required for the role of veterinary nurse practitioner to be created?

This is what will discuss today, in the first part of a two-part series on midlevel practitioners in veterinary medicine…

What Is a Veterinary Nurse Practitioner?

A midlevel practitioner is someone whose scope of practice would be beyond that of a veterinary technician or nurse, but less than that of a veterinarian.

This idea has been floating around for at least a decade, if not longer. But the recent veterinarian and vet staff shortage during the pandemic may have spurred to the forefront of many vet professionals’ minds.

Right now, veterinary technicians are able to perform many of the tasks necessary for patient care. The exception is any part of the scope of practice that is limited to vets—diagnosing, prognosing, prescribing, and performing surgeries.

Creating a veterinary nurse practitioner would mean allowing these vet professionals to take on some of these roles that are currently restricted to veterinarians. 

Examples may include taking on wellness visits, diagnosing and prescribing treatment for minor ailments (ear infections, etc.), refilling chronic medications after checking bloodwork or performing minor surgeries such as uncomplicated dental extractions.

Of course, many tasks—including most surgeries and management of more in-depth medical cases—would continue to be reserved for licensed DVMs… 

The goal of this new role would be to take some of the routine daily tasks off the veterinarian’s hands, to free up the veterinarian and allow the practice to provide care to more patients.

What Are the Arguments For and Against Creating Veterinary Nurse Practitioners?

There are strong cases being made both for and against this new position within veterinary medicine. Here are some of the key points of the debate…

Access to Care 

Right now—as demand for veterinary care increased during the pandemic, while a shortage in vets and vet team members has left many practices struggling to keep up with that demand—many pet owners report challenges in receiving care for their pets. 

Clients are having difficulty scheduling appointments, often having to wait weeks to months for a wellness visit. And some practices have limited how many new clients they can see. 

Proponents of the veterinary nurse practitioner envision the role freeing up time for the vet, so that the practice can see more patients and clients. 

On the other hand, some state that a decision that could permanently affect the future of the profession shouldn’t be made because of circumstances that could be short-term.

In other words, is the increased demand for pet care during the pandemic going to stick around? Is it enough to fuel and support the new role of the veterinary nurse practitioners in the long term?

Availability of Jobs for Veterinarians

Right now, there is a veterinarian shortage. But not so many years ago, many complained of a surplus, which made veterinarians’ jobs harder to find with less competitive salaries.

Detractors of the veterinary nurse practitioner movement worry that in another few years, we could again be facing a surplus of vets. After all, ups and downs are natural in any industry.

Should that occur at any point in the future, there is a serious concern that veterinarians could be out of work because practices (especially corporate practices) may prefer to hire lower-salary nurse practitioners rather than DVMs.

Since nurse practitioners in human medicine have the right to open their own practice, there is also a potential concern of competition for veterinarians who are practice owners.

Cost of Care 

Even before staffing shortages occurred, the cost of care has been another hotly debated topic in veterinary medicine for many years. This is another important facet of access to care since many pet owners are unable to afford quality veterinary care. 

Some state that by providing a midlevel practitioner, a veterinary practice can expand its reach to more clients by offering affordable services (since a veterinary nurse practitioner would be paid less than a veterinarian), especially for wellness and minor ailments.

Supporters argue it would be the best of both worlds. In addition to the ability to offer affordable services, the new system would also increase the practice’s bottom line and provide fair compensation to all employees (since having a nurse practitioner would allow a practice to see a lot more patients per day and thus bring in more revenue). 

Also, the availability of nurse practitioners may decrease the need to hire relief vets for too many shifts, decreasing the practice’s overall operating costs. Of course, for relief vets, this would be a disadvantage.

Stay Tuned for More…

To cover this topic more in-depth, we’ll address more pros, cons, and considerations in next week’s article. 

In the meantime, hopefully, this has provided some food for thought. 

Whether the profession moves forward with creating a nurse practitioner role or not, the issue has opened discussions on many important topics currently facing the field of veterinary medicine. And those discussions are important to always improve, adapt, and to find solutions to keep the profession healthy and sustainable.

Written by: Dr. Tammy Powell, DVM

Veterinary Digital DR X-Ray JPI Directvet System

Veterinary Digital DR X-Ray System Package Deal

Regardless of healthcare professionals' skills and experience, the quality of medical care patients receive will only be as good as the equipment used. This applies not only to human beings and their doctors but to animals and veterinary healthcare practitioners. NewVetEquipment is the proud supplier of high-quality veterinary equipment and is pleased to offer the DirectVet Plus full Veterinary Digital X-Ray System.

Here's a closer look at what this system has to offer

DirectVet Plus X-Ray Table

Veterinarians have to handle pets and animals of all sizes, which means that the x-ray table they use needs to withstand the weight of larger animals. This 32x54-inch system can support more than 300 pounds of weight at a time, and the generator arm is designed to move back and forth over the subject. This makes the system capable of handling the x-ray needs of animals as large as ponies with relative ease.

CubeX 28 X-Ray Generator

CubeX is well-known and respected for its high-frequency, portable generators for veterinary and medical use. These x-ray generators are lightweight and compact. Veterinarians will be pleased with the CubeX 28 due to its user-friendly digital displays, simple design, and soft-touch controls. It comes with two-stage, dynamic auto-line compensation, dual integrated laser pointer, and an easy-to-use inverted control panel that makes it compatible for use with a table. 

CareRay Cesium Flat Panel Detector

CareRay Digital Medical Systems is an industry leader in developing, researching, and manufacturing x-ray flat-panel detectors. This system comes with the 17x17-inch cesium flat panel detector that is packed with exceptional performance features, including:


  • High-definition filming: The high levels of detail these panels can produce make it possible for veterinarians and radiologists to diagnose tuberculosis, inflammation, tumors, and more. Experts will observe and make judgments regarding the biliary tract, abdomen, and urinary tract. These panels also facilitate skeletal viewing, muscular system observations, foreign body identification, and trauma diagnoses. 

  • Image and Video Playback functionality: It comes with a playback function that allows you to save and review videos that highlight the motility and morphology of the organs in the gastrointestinal tract.

  • Visual contrast functionality: Barium-based imaging is often necessary for the x-raying and observation of the esophagus, angiographies, enemas, sinus fistulas, and other circumstances where observations need to be made compared to surrounding tissues.

  • Large-format perspective functionality: Veterinarians will be able to get a clear view of the pulsation of the heart and respiratory movement of the subject's lungs. This is made possible by the wide format of the flat panel's 17x17-inch layout. These clear and comprehensive radiographic images make the need for multiple imaging and repositioning unnecessary.  

  • Easy integration: These flat panel x-ray detectors are easy to configure and integrate with whatever system you're using. This broad system compatibility will make the operator's or technician's life much easier. 

All CareRay Digital flat panels are fully FDA, CFDA, CE, and ISO13485 certified and are widely used in the veterinary, medical, security, and industrial fields in various capacities. They are highly durable pieces of equipment made out of aluminum alloy and carbon fiber housing.

ExamVue PAC Software 

The proper software has to be put in place to support the function of this system in an office setting. ExamVue has developed its simple, fast, and user-friendly software, with a very convenient diagnostic function. ExamVue PAC is server-based, and it comes with a series of advanced specialty tools, including line profiles, freehand, rectangle, polygon, and histogram. Image annotation is also made possible via user text, length, cobb angle, angle, and R/L mark.

Smaller practices and more extensive operations are accommodated by the system, with the capability of supporting up to 10 separate viewers. It has unique features and capabilities, including image stitching, importation, comparisons, processing, storage, and communication. It will work well with any DICOM DIR or Q/R compatible devices.

Host Computer Workstation

Buyers have the option of choosing a laptop or desktop computer as the host workstation. Whichever the case, this piece of equipment will have the computing power and processing muscle to handle high volume and high-complexity operations. The desktop host is an i5-6500 processor with 16 GB RAM and 2 Terabytes of storage with a 3-year warranty. The acquisition laptop option is a ThinkPad E580 running on an Intel Core i7 processor with 8GB RAM and 500GB of storage. These specifications, however, might be subject to change. 

5-Year Warranty and Easy Payment Plans

Acquiring the equipment to run a veterinary and radiology service properly is a significant investment. It can be a hurdle for many trying to establish new offices or expand their current operations. To help clients acquire the equipment they need, they may choose between one-time payments or make reasonable monthly payments. 

All the equipment that comes with this system is covered under a 5-year warranty, with 5-year drop coverage and software support included. The DirectVet Plus System offers peace of mind to all who choose to make it a part of their operation.

Take note that you may qualify for a deduction on capital equipment purchases under section 179 of the current Internal Revenue Service (IRS) tax codes. Your potential deduction might allow you to treat the full cost of new equipment and software as a deductible expense whether you purchase cash, capital lease, loan, or an Equipment Finance Agreement (EFA). Further information may be found on the IRS section 179 portal

Final Thoughts

The DirectVet Plus Digital X-Ray System is an effective solution for veterinarians looking for a convenient, powerful, and user-friendly way to handle their x-ray needs. It is a system that doesn't need any additional power supplies, construction, or preparations. It is a self-contained veterinary digital x-ray equipment system that will be ready for use as soon as it's delivered, making it an excellent choice for veterinarians in the process of establishing their practice. Visit NewVetEquipment.com to place your order or have any questions or concerns you might have addressed.

Written by: Rachel Best

Treatment for Blocked Cats: The Power of Fluoroscopy

Urinary obstructions in cats are a life-threatening issue that vets see and treat commonly. 

And while most vets have a system for caring for these unfortunate felines, it is exciting to learn about new technology that may provide value during the treatment of these critical patients.

One such development is fluoroscopy technology, which is now more accessible than ever to general practitioners. Here are three ways fluoroscopy may help while unblocking a cat… 

Confirming Placement of the Urinary Catheter

Depending on the type of indwelling catheter used, it may be of value to check the placement of the catheter on radiographs. 

This is especially true for red rubber catheters—which can double back on themselves or even tie into a knot if too much of the catheter is placed into the urinary bladder—or for any catheter long enough to cause additional trauma if passed so far that the tip contacts and irritates the bladder wall.

While traditional x-rays may be used for this purpose, fluoroscopy offers the advantage of being able to adjust the catheter placement in real time. That way, the catheter can be quickly adjusted prior to placing sutures.

Real-Time Contrast Studies of the Bladder and Urethra

Blocked cats with severely distended urinary bladders are at risk for bladder rupture—whether from the condition itself or from manipulation (pressure or cystocentesis) while the bladder is excessively full.

A large bladder rupture is often obvious since a full bladder will suddenly become difficult or impossible to palpate. However, a small tear or leak may be more difficult to detect.

A positive contrast cystourethrogram can help to identify small ruptures, by looking for contrast outside the borders of the urinary bladder on radiographs. 

While traditional radiographs can certainly be used for this purpose, fluoroscopy may prove useful because of the ability to see things moving in real time, and the ability to move the patient and quickly see the abdomen at multiple angles without taking a lot of x-ray shots. 

In addition to the bladder, this can be very useful for tracking the movement of contrast through the urethra (to identify obstructing materials, strictures, etc.), versus only seeing a couple of snapshots in time on traditional x-rays.

Since contrast media can be irritating to tissue that is already compromised, a vet must weigh the pros and cons of doing a contrast study right after unblocking a cat. But this procedure could also be useful after the cat has had time to heal, to ensure the bladder is intact before the urinary catheter is removed and the patient is sent home.

Evaluating for Uroliths and “Sludge” 

In cats, sludge, sand, or gritty material—which may be a combination of crystals, blood clots, mucus, etc.—can accumulate in the urinary bladder. And while less common than in dogs, uroliths are sometimes diagnosed in cats.

On radiographs, sludge may be confused with a bladder mass or even sometimes with uroliths. Fluoroscopy can help with characterizing this material inside the urinary bladder (and distinguishing it from a bladder mass) by seeing how it moves in real time, as the patient is moved. 

Additionally, a vet could use fluoroscopy to track the progress of flushing this material out of the bladder (or urethra) after relieving a blockage. 

Conclusion

For many years, traditional radiographs have been included as part of the workup for blocked cats, and a vet can provide excellent care to feline patients with current protocols.

However, as fluoroscopy technology continues to evolve and become more accessible to general practitioners, it’s exciting to see the ways in which this modality can make a vet’s job easier and provide more information for patient care.

Written by: Dr. Tammy Powell, DVM