


How to Find Vacant Veterinary Hospitals Before Everyone Else

A practical guide to finding vacant and off-market veterinary properties before they reach the broader market.
If you're hoping to open your own veterinary practice, buying an existing hospital isn't the only path to consider.
Across the country, former veterinary practices sit vacant after owner retirements, corporate consolidations, relocations, or business closures. Many are already equipped with important necessities, potentially saving hundreds of thousands of dollars compared to building from scratch.
A Former Veterinary Hospital May Already Include:
```- Exam rooms and treatment areas
- Kennels
- Plumbing
- Medical-grade electrical infrastructure
The challenge isn't finding these properties once they're publicly listed. The challenge is finding them before everyone else does.
The good news? With a little detective work, strong networking, and the smart use of AI tools, you can find opportunities that many buyers never see.
Start With Google Maps and Street View
One of the simplest ways to locate former veterinary hospitals is by virtually exploring the communities where you'd like to practice.
Using Google Maps, search for terms such as:
- Veterinary hospital
- Animal hospital
- Veterinary clinic
- Emergency veterinarian
As you browse Google Maps, pay attention to clinics marked as “Permanently Closed.” While not every listing is accurate, it creates an excellent starting point.
Next, switch to Street View and look for clues such as:
- Empty parking lots
- Removed or faded signage
- Vacant-looking buildings
- “For Lease” or “Available” signs
- Buildings that still feature veterinary architecture, such as outdoor runs or multiple exam-room entrances
Even if a building has already changed ownership, it may still be available for lease or redevelopment.
Search Commercial Real Estate Websites
Many former veterinary hospitals eventually appear on commercial real estate marketplaces, although they aren't always advertised as veterinary facilities.
Instead of searching only for “veterinary clinic,” try keywords such as:
- Medical office
- Healthcare building
- Former medical office
- Commercial office
- Freestanding medical building
- Specialty healthcare property
Some listings intentionally avoid mentioning the property's previous veterinary use. This is where some of that detective work comes in.
Floor-plan photos may reveal treatment areas, kennels, surgical suites, or specialized plumbing.
Build Relationships With Commercial Real Estate Brokers
Commercial brokers often hear about available properties before they're officially listed. Introduce yourself to brokers who specialize in:
- Medical offices
- Healthcare properties
- Commercial redevelopment
Let them know you're specifically looking for former veterinary hospitals.
Many brokers will happily add you to their contact list and notify you when a property matching your criteria becomes available.
The more specific you are about your preferred city, square footage, budget, and timeline, the easier it becomes for brokers to think of you when opportunities arise.
Join Veterinary Facebook Communities
Veterinary professionals often hear about closures long before the public does.
Facebook groups can be valuable sources of local information, including:
- Practice owners nearing retirement
- Clinics preparing to relocate
- Hospitals reducing locations
- Corporate closures
- Equipment liquidation announcements
Rather than immediately asking, “Does anyone know of a clinic for sale?” become an active participant in these communities. Over time, conversations naturally reveal opportunities.
Stay Connected With Veterinary Practice Brokers
Although practice brokers are known for selling operating hospitals, they frequently know about clinics that never officially reach the market.
Some owners simply want to retire. Others close after being unable to recruit veterinarians.
Maintaining relationships with veterinary-specific brokers increases the likelihood of hearing about these opportunities early. Practice brokers often maintain extensive buyer networks and may become aware of off-market opportunities before public listings appear.
Talk With Veterinary Equipment Dealers
Equipment representatives visit practices every day. They often know when practices are:
- Closing or downsizing
- Relocating
- Renovating
- Preparing for ownership transitions
While they can't always disclose confidential information, developing relationships can position you to hear about opportunities as they become public.
Let AI Do the Research
Artificial intelligence isn't replacing your search; it's helping you search smarter.
Tools such as ChatGPT, Perplexity, and Claude can dramatically reduce the amount of manual research required to identify potential acquisition targets.
For example, you can ask AI to:
- Find recently closed veterinary clinics in a specific city or state
- Search local news for hospital closures
- Summarize corporate announcements involving practice consolidations
- Monitor news related to veterinary real estate
- Organize findings into spreadsheets
- Build prospect lists for outreach
- Draft personalized introduction emails to property owners or brokers
Example AI Research Prompt
```“Research veterinary clinics, animal hospitals, and veterinary practices that permanently closed, relocated, merged, or became vacant within a 50-mile radius of Columbus, Ohio, between [START DATE] and [END DATE].
For each location, provide:
- Business name
- Full street address
- Type of veterinary facility
- Closure, relocation, or vacancy date
- Current property status, if known
- Building size and acreage, if available
- Asking price or lease rate, if listed
- Property owner, listing broker, and contact information
- Source links
- A brief explanation of the evidence confirming the location is closed or vacant
Search commercial real estate listings, veterinary industry publications, local news, business closure announcements, social media pages, Google Business profiles, county property records, broker websites, auction notices, and archived web pages.
Separate the results into:
- Confirmed permanently closed or vacant veterinary properties
- Clinics that relocated, merged, or were acquired
- Possible closures that require further verification
Do not include clinics that are temporarily closed, operating under a new name at the same location, or lacking credible evidence of closure.
Prioritize properties that still appear suitable for use as a veterinary hospital. Present the findings in a table and clearly label any missing or uncertain information.”
```AI won't uncover confidential deals, but it can help connect publicly available information far faster than manually searching dozens of websites.
Like any research tool, however, AI-generated results should always be verified against original sources before making business decisions.
Remember: The Best Opportunities Rarely Advertise Themselves
The most desirable former veterinary hospitals often fail to appear on major listing websites. Instead, they're discovered through relationships, conversations, and consistent outreach.
The buyers who find the best deals aren't necessarily searching harder; they're searching in more places.
Through traditional networking and modern research tools such as AI, you can dramatically expand the number of opportunities you uncover while staying ahead of competing buyers.
Sometimes the next great veterinary hospital isn't hidden at all; it simply hasn't been discovered yet.


The Hidden Opportunity: Turning a Closed Veterinary Hospital Into Your Dream Practice

Before You Build: Consider Buying or Leasing a Closed Veterinary Clinic
For many veterinarians, owning a practice feels like the ultimate career goal. But then reality sets in.
Commercial construction costs continue to climb. Build-outs can take months. Equipment purchases add up quickly. Before long, the dream of opening your own hospital can start to feel financially out of reach.
But what if the perfect practice is already sitting there, waiting for someone to unlock its potential?
Across the country, veterinary hospitals occasionally close for reasons such as:
- Corporate restructuring
- Lease changes
- Owner retirement
- Relocation
- Shifts in local demand
While seeing a neighborhood clinic close its doors can be disappointing for pet owners, it can also create a valuable opportunity for independent veterinarians who are ready to build something of their own.
Instead of starting with four empty walls, you may be able to breathe new life into a space that was already designed to care for animals.
Why a Former Veterinary Hospital Can Be a Gold Mine
Building a veterinary hospital from scratch is expensive—not just because of the equipment, but because of everything hidden behind the walls.
Think about what may already exist in a former veterinary clinic:
- Exam rooms
- Treatment areas and surgical suites
- Kennel runs
- Pharmacy shelving
- Specialized plumbing
- Medical-grade electrical systems
- Reception and waiting areas
These are not just conveniences. They represent significant investments that have already been made.
Repurposing an existing veterinary facility can dramatically reduce renovation time and construction costs. This may allow you to focus more of your budget where it matters most: your patients, your team, and the technology that will help your practice grow.
Not Everything Needs to Be Brand New
One of the biggest misconceptions about opening a veterinary practice is that everything has to be purchased new.
The reality?
Many existing fixtures inside a former veterinary hospital may still have years of useful life remaining.
Depending on your lease agreement or purchase terms, you might inherit items such as:
- Kennels
- Cabinetry
- Exam room counters
- Surgical tables
- Reception desks
- Storage shelving
- Built-in workstations
- Isolation rooms
Every piece you can safely reuse is money that can be invested elsewhere. That does not necessarily mean you should keep everything, though.
Know Where to Invest
While cabinets and kennels can often serve a new practice well, diagnostic technology is an entirely different story.
Older imaging equipment may no longer provide the speed, image quality, or reliability that today’s veterinary teams expect. Outdated systems can also become more expensive to maintain over time.
When opening a practice, it may be wise to upgrade key technologies such as:
- Digital radiography
- Dental imaging systems
- Ultrasound
- Anesthesia equipment
- Patient monitoring equipment
- Infusion pumps
These investments can improve efficiency, enhance patient care, and help create a modern client experience from day one.
Think of it this way: Keep what still works well, and upgrade the tools that directly affect diagnostics, workflow, reliability, and patient outcomes.
A Faster Path to Opening Your Doors
Starting with an existing veterinary hospital can also save something every entrepreneur values: time.
Instead of waiting months for construction permits, plumbing, electrical work, and room layouts, much of the infrastructure may already be in place.
That means you can spend more time preparing your team, building client relationships, and planning your grand opening—and less time staring at construction schedules.
For veterinarians transitioning from relief work, associate positions, or a mobile practice, this approach can significantly shorten the path from an idea to opening day.
Every Closed Clinic Represents a New Beginning
A building that once cared for pets does not have to become another empty storefront. With the right vision, it can become a thriving independent veterinary hospital again.
Families often appreciate seeing a familiar veterinary location come back to life. Former clients may be excited to have veterinary care available in their neighborhood again. Your team also gets the opportunity to build something meaningful without having to start completely from scratch.
Sometimes the best opportunity is not finding an empty building. It is finding one that already knows how to be a veterinary hospital.

How Veterinary Dentistry Improves Staff Engagement and Productivity
Veterinary Dental Care Supports Team Growth and Retention
Ask most veterinary professionals why dentistry matters, and you'll hear plenty about periodontal disease, oral pain, and improved patient health. What you may hear less often is this:
A strong dental program can also strengthen the veterinary team.
I know how that sounds, but stick with me.
In a profession where burnout, staffing shortages, and compassion fatigue continue to challenge practices of every size, dentistry offers something many teams are searching for:
- Meaningful work
- Skill development
- Collaboration
While dentistry certainly benefits patients and clients, it can also become one of the most rewarding areas of practice for veterinarians, technicians, and support staff alike.
Giving Technicians the Opportunity to Practice at a Higher Level
Veterinary technicians are highly skilled professionals, yet many teams struggle with fully utilizing those skills. Dentistry offers technicians opportunities to become deeply involved in patient care before, during, and after procedures.
Depending on state regulations and practice protocols, technicians often play critical roles in:
- Patient preparation and anesthesia monitoring
- Dental charting and radiography
- Scaling and polishing
- Recovery monitoring
- Client education
Rather than performing the same routine tasks throughout the day, dental technicians can engage in more advanced, hands-on work.
For many team members, that increased responsibility brings greater job satisfaction.
When people are trusted to use their skills, they become more invested in both their work and their patients.
The Moment Things Change: Seeing What’s Hidden
One of the most rewarding moments during a dental procedure often happens when the first radiographs appear on the screen.
A tooth that looked relatively normal externally may reveal severe bone loss. A fractured tooth may show a damaged root. A cat with mild tartar may have advanced resorptive lesions.
These discoveries create valuable learning opportunities for the entire team.
Dental radiography turns procedures into diagnostic investigations rather than routine cleanings. Team members begin asking questions:
- What are we seeing?
- Why is this happening?
- What treatment options are available?
- How can we improve this patient's comfort?
Those moments build clinical confidence and encourage continued learning.
Over time, your team becomes better at recognizing pathology, discussing findings, and contributing to patient care decisions.
Immediate Results Create Meaningful Work
Veterinary medicine can sometimes feel emotionally challenging because progress isn't always obvious.
Chronic disease management takes time. Behavioral improvements may take months. Long-term treatment plans often unfold gradually.
Dentistry is different.
A patient may arrive with severe tartar, inflammation, infection, or oral pain and leave significantly more comfortable the very same day.
The team can see the difference. Clients often notice the difference quickly. And perhaps most importantly, staff members know they helped relieve pain that may have gone unnoticed for months or years.
Those experiences matter.
They remind your team why they entered the field in the first place.
Creating More Predictable Days
Anyone who has worked in veterinary medicine knows that unpredictability is part of the job.
Emergencies happen. Schedules change. Appointments run long.
While no service completely eliminates those challenges, well-organized dental programs can add welcome structure to the workday. Dedicated dental appointments often create:
- Predictable procedure blocks
- Clear team assignments
- Consistent equipment setups
- Efficient patient flow
Your team knows their role. Supplies are prepared. Expectations are clear.
Instead of constantly reacting, your team spends more time working together with purpose.
Investing in Growth Keeps Teams Engaged
Few things improve retention as much as professional growth. Dental programs often encourage continuing education opportunities, such as:
- Dental radiography training
- Anesthesia education
- Dentistry certifications
- Wet labs and hands-on courses
When you invest in these areas, employees often feel valued and supported.
A technician who develops expertise in dentistry may become a mentor, trainer, or internal resource for the rest of the team. That sense of ownership can significantly improve engagement and long-term retention.
In an industry facing staffing challenges, opportunities for growth matter.
Building a Culture Around Better Care
The most successful dental programs become more than a service line. They become part of the practice culture.
Technicians become advocates for dental education. Doctors collaborate on treatment planning. Clients receive more consistent recommendations.
That sense of purpose can strengthen teamwork and create a culture centered around delivering better care.
Dentistry Is About More Than Procedures
It's easy to measure dentistry by production numbers, procedure counts, or equipment investments. But those metrics only tell part of the story. Every dental procedure is also an opportunity:
- To help a pet live more comfortably.
- To strengthen a technician's skills.
- To build confidence within the team.
- To create meaningful work.
- To support professional growth.
Dentistry isn't simply a revenue center. It's a service that allows your team to practice at a higher level while making a real difference in their patients' lives.
And when your team feels challenged, supported, and connected to their work, everyone benefits—including the pets they care for every day.

Building a Sustainable Veterinary Dental Program: The Benefits to Pets, Clients, and Practice Growth
Build a Stronger Veterinary Dental Program
How Better Dental Care Benefits Pets, Clients, Veterinary Teams, and Practice Growth
When veterinarians talk about dentistry, the conversation usually centers on patient health—and for good reason.
Dental disease can cause chronic pain, infection, tooth loss, and a significant decline in a pet’s comfort and quality of life. Helping pets live healthier, more comfortable lives is the primary reason veterinary dentistry matters.
But there is another side of the story that also deserves attention.
A well-developed dental program can strengthen client relationships, help more pet owners follow through with recommended care, create opportunities for team development, and provide a predictable source of revenue that supports the long-term health of the practice.
Veterinary dentistry is one of the rare areas where everyone can benefit: pets, clients, veterinary teams, and the clinic.
Dental Disease Is Often Underdiagnosed
One of the biggest challenges in veterinary dentistry is that many pets do not show obvious signs of discomfort.
Unlike people, dogs and cats often continue eating and following their normal routines even when they are experiencing significant dental pain. They quietly adapt, which can make oral disease difficult for pet owners to recognize.
As a result, serious dental conditions may go unnoticed until they become advanced. Veterinarians commonly discover:
- Advanced periodontal disease
- Tooth-root infections
- Fractured teeth
- Tooth resorption
- Significant bone loss
Many of these conditions can only be fully identified through a comprehensive oral examination and dental imaging.
Because pets are so skilled at hiding oral pain, proactive dental care is especially important.
A strong dental program helps practices identify disease earlier and intervene sooner, before smaller problems become more painful, complicated, and expensive to treat.
Dentistry Creates Opportunities to Improve Patient Health
Unlike procedures that happen only once during a pet’s lifetime, dental care often becomes part of an ongoing healthcare plan.
Oral health requires regular monitoring, preventive care, and treatment throughout a patient’s life. This creates opportunities for:
- Annual dental evaluations
- Professional cleanings
- Dental imaging
- Follow-up procedures
- Preventive care recommendations
- Ongoing client education
Every dental conversation is another opportunity to improve a pet’s quality of life while strengthening the relationship between the veterinary team and the client.
The goal is not simply to perform more procedures. It is to create a proactive approach to oral health that supports patients throughout their lives.
Existing Clients Are Often the Best Opportunity for Growth
Many veterinary practices spend significant time and money attracting new clients.
While new client acquisition is important, existing clients often represent one of the greatest opportunities for sustainable practice growth.
Why?
Because trust has already been established.
When a veterinarian recommends dental care based on examination findings, clients are often more receptive than they would be to an unfamiliar service they have never discussed before.
Dental recommendations are a natural extension of preventive healthcare. The practice is not trying to sell an unnecessary service. It is helping the client understand and address a health problem that already exists.
“Here is what we are seeing.”
“Here is why it matters.”
“Here is how we can help.”
Clear communication helps clients understand the value of treatment and make more confident decisions about their pet’s care.
Dentistry Can Create Predictable, Recurring Revenue
Every veterinary practice needs revenue to operate, invest, and continue providing high-quality care.
One advantage of dentistry is that it can become a relatively predictable service line.
Because dental disease is common and often ongoing, practices can build consistent revenue through:
- Annual dental procedures
- Dental imaging
- Follow-up treatment
- Extractions when medically necessary
- Preventive dental programs
Unlike services that may fluctuate significantly from month to month, dentistry can become a dependable part of practice operations.
That stability can help a practice plan for staffing, equipment, training, and future growth with greater confidence.
Profitable Dentistry Supports Better Veterinary Medicine
Profitability should never take priority over patient care.
However, it gives veterinary practices the resources they need to continue providing excellent medicine.
A profitable dental program can help fund:
- Staff training and continuing education
- New diagnostic equipment
- Facility improvements
- Additional support staff
- Expanded treatment capabilities
- Improved patient-care technology
In many cases, the investments made possible through dental revenue benefit the entire practice, not just the dental department.
The result is a stronger clinic that is better equipped to serve patients, support its team, and help clients make informed healthcare decisions.
Building a Dental Program That Lasts
The most successful dental programs are not built around production goals. They are built around patient care.
Practices that focus on education, early detection, quality diagnostics, and comprehensive treatment recommendations often find that growth follows naturally.
When pets receive better care, clients understand the value of treatment.
When clients understand the value, they are more likely to follow through with recommended care.
That, in turn, gives the practice the resources it needs to invest in its team, equipment, and services.
It becomes a healthy cycle that benefits everyone.
The Real Value of Veterinary Dentistry
At its core, veterinary dentistry is about identifying hidden disease, relieving pain, and improving quality of life.
The business benefits are real, but they are a result of providing valuable care—not the primary objective.
A healthy dental program is not about maximizing revenue. It is about building a sustainable practice that can continue serving pets, supporting veterinary teams, and helping clients make confident decisions about their animals’ healthcare.
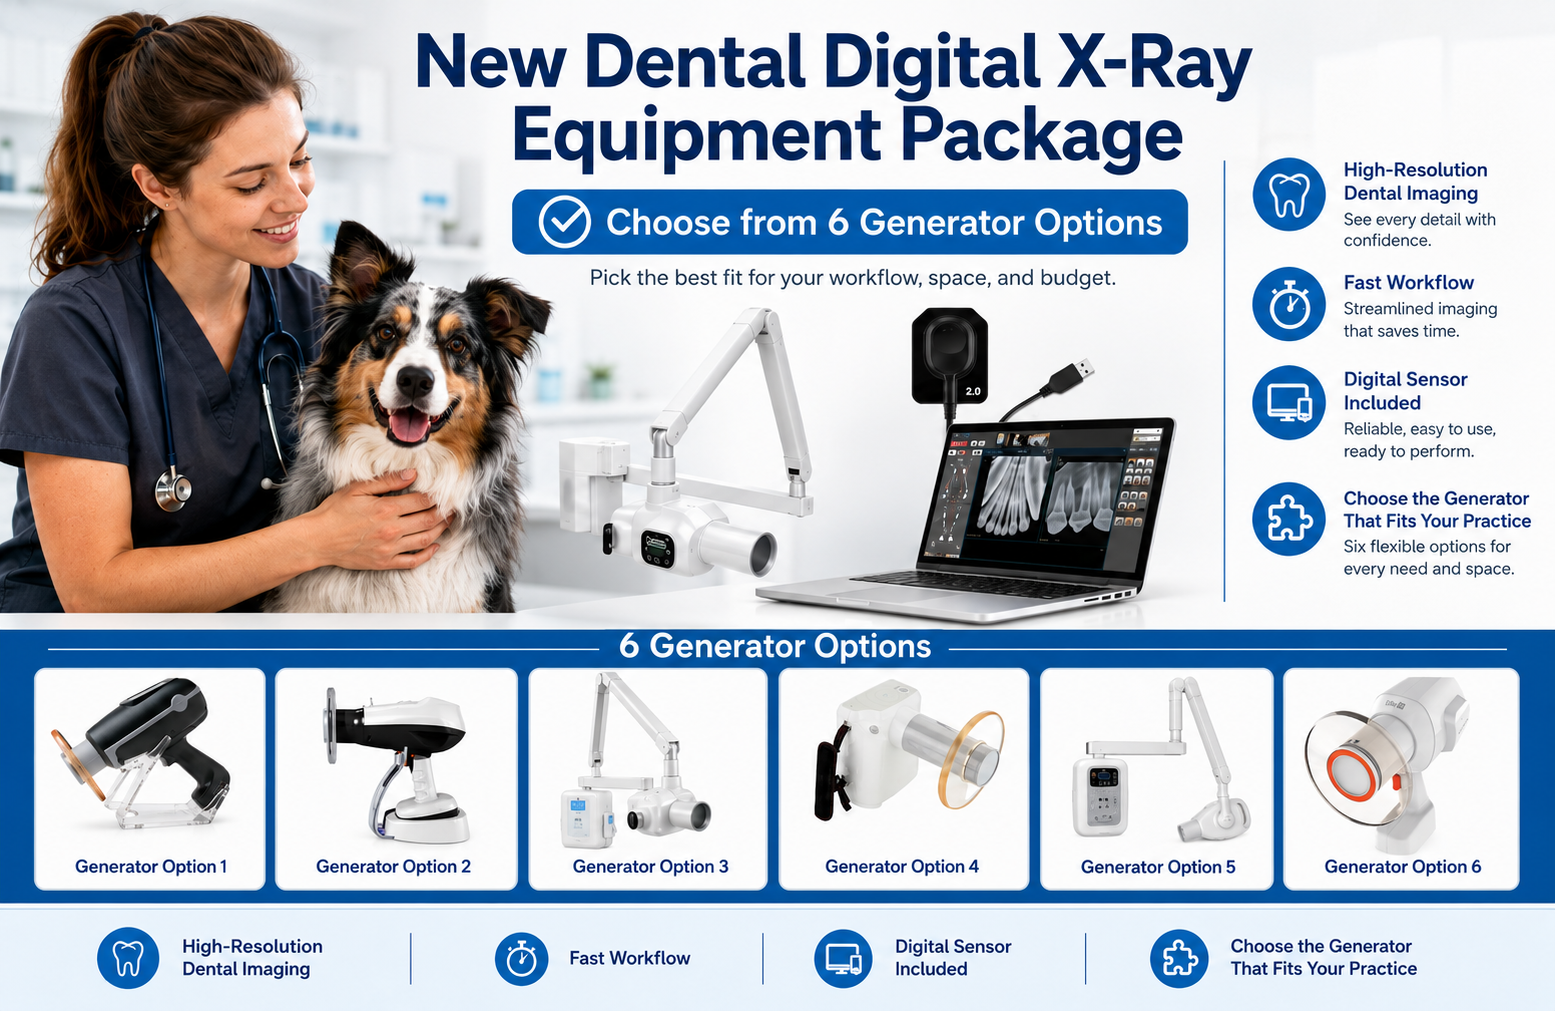
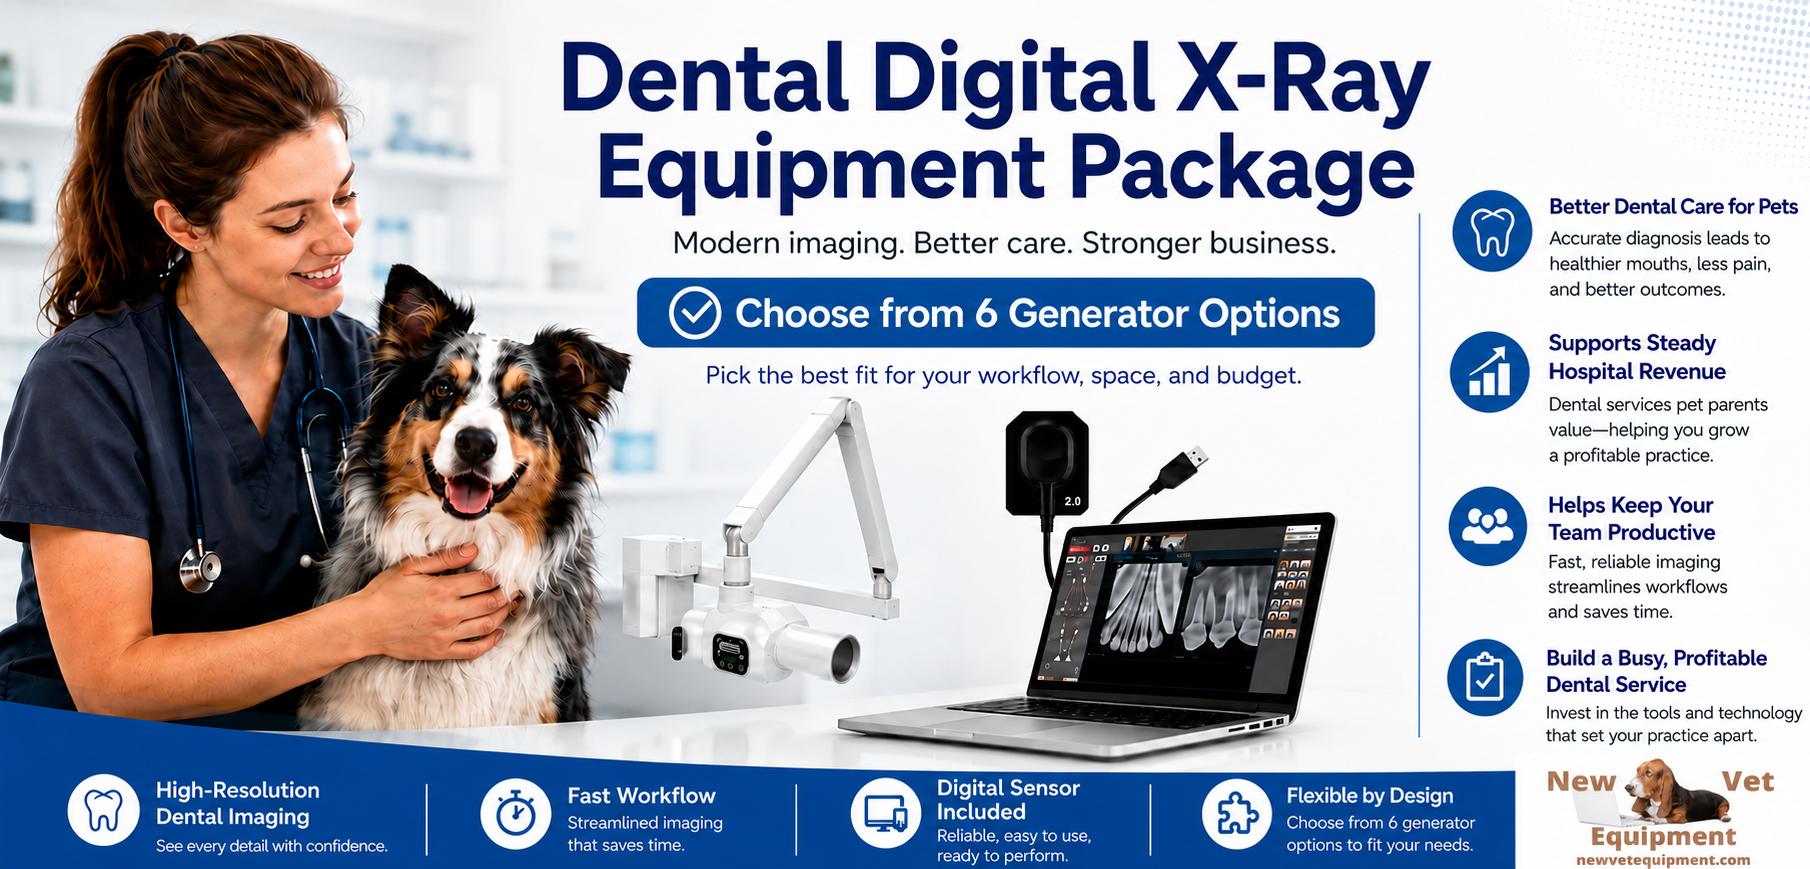
Better Dentistry, Better Business: The Value of Digital Dental X-Rays

The Hidden ROI of Veterinary Dentistry: How Digital Dental X-Rays Pay for Themselves
When veterinary practices consider investing in dental equipment, the conversation often starts with patient care…and rightfully so.
Dental disease is one of the most common health issues affecting companion animals, and dental radiographs have become an essential part of providing high-quality care.
But there is another side of the conversation that is equally important: the business case for veterinary dentistry.
Running a successful practice requires more than compassion and clinical expertise. You need to generate enough revenue to pay your team, invest in technology, maintain facilities, and continue delivering exceptional care.
Fortunately, veterinary dentistry is one of the few service areas where improved patient outcomes and financial sustainability often go hand in hand.
The key is making smart equipment investments that support both goals.
Why Dental Radiographs Are the Standard of Care
Many pet owners are surprised to learn that much of a tooth lies below the gumline. In fact, studies have shown that a significant percentage of dental pathology cannot be identified through a visual examination alone.
Without dental radiographs, veterinarians may miss:
- Tooth root abscesses
- Resorptive lesions
- Periodontal bone loss
- Retained roots
- Fractured teeth
- Endodontic disease
Digital dental X-rays allow you to identify problems that would otherwise remain hidden, helping you provide more accurate diagnoses and treatment recommendations.
Today, many veterinarians consider dental radiography a fundamental component of a complete dental procedure rather than an optional add-on.
Looking Beyond the Price Tag
One of the biggest misconceptions about dental equipment is that practices need to spend top dollar to build a successful dental program.
Some premium dental imaging setups can cost $35,000 or more once sensors, generators, software, and accessories are included.
While those systems may offer additional features, you can achieve excellent clinical results with quality digital dental radiography systems in the $12,000-$15,000 range.
The difference matters.
A lower initial investment can significantly shorten the time required to achieve a positive return while still providing the diagnostic capabilities veterinarians need to deliver quality care.
A Simple ROI Example
Let’s look at a realistic scenario:
Assume a practice purchases a digital dental radiography system for $15,000. Now consider a conservative estimate:
Average dental procedure revenue: $600
Dental procedures performed per month: 10
Monthly dental revenue: $6,000
Of course, equipment cost is only one piece of the equation. There are labor, anesthesia, supplies, and overhead expenses to consider. However, even when accounting for those costs, dental procedures often represent a valuable service line for many practices.
If the practice attributes only a portion of that revenue toward recovering the equipment investment, the payback period can still be surprisingly short.
For example:
Equipment investment: $15,000
Contribution toward equipment recovery per procedure: $150
Procedures needed to recover investment: 100
At just 10 dental procedures per month, the equipment could effectively pay for itself in less than a year.
Now compare that to a $35,000 investment.
Using the same assumptions, the practice would need approximately 233 procedures to recoup the equipment cost, significantly extending the payback timeline.
The takeaway is not that higher-priced systems are inherently bad investments. The purchase price directly affects how quickly a clinic can realize a return.
Improving Workflow Efficiency
The ROI of digital dental radiography is not limited to revenue generation. Digital systems can also improve workflow efficiency throughout the practice.
Digital dental X-rays eliminate many time-consuming steps and can help reduce the need for unnecessary retakes.
Benefits often include:
- Immediate image review
- Improved image storage and retrieval
- Easier integration with practice management software
When procedures move more efficiently, you can often complete appointments more predictably and utilize staff time more effectively.
Helping Clients Say “Yes” to Treatment
Client education is one of the most overlooked benefits of digital imaging. When pet owners can actually see pathology on a screen, treatment recommendations become much easier to understand.
A fractured tooth root, severe bone loss, or a resorptive lesion is often far more compelling when accompanied by an image rather than a verbal explanation alone.
The result is better patient care and greater confidence in the veterinary team’s recommendations.
What to Look for When Purchasing Dental Equipment
Not all dental radiography systems are created equal, but the most expensive option is not always the best choice. When evaluating equipment, consider:
- Image Quality: The system should consistently provide diagnostic-quality images with excellent detail.
- Ease of Use: A user-friendly interface can reduce training time and improve adoption among team members.
- Sensor Durability: Dental sensors represent a significant investment. Durability and warranty coverage matter.
- Software Integration: Look for systems that work seamlessly with your existing workflow and practice management software.
- Service and Support: Reliable technical support can make a major difference when issues arise.
- Total Cost of Ownership: Consider not only the purchase price but also future maintenance, replacement costs, and warranty protection.
Better Dentistry, Better Business
Veterinary dentistry should never be viewed solely as a revenue generator. At its core, dental care is about identifying pain, treating disease, and improving quality of life for pets.
But it is also fair, and necessary, to acknowledge the business benefits.
Profitable service lines help you retain talented staff, invest in better technology, expand patient care capabilities, and continue serving your community for years to come.
Inside the Mind of a Veterinary Neurologist: What MRI Actually Reveals
When a patient presents with seizures, neck pain, weakness, ataxia, or paralysis, the neurological exam provides important clues, but it rarely tells the entire story.
It’s possible for a neurologist to localize a lesion to a specific region of the brain or spinal cord based on clinical signs alone. However, localization is only the first step. The real question remains: What is actually causing the problem?
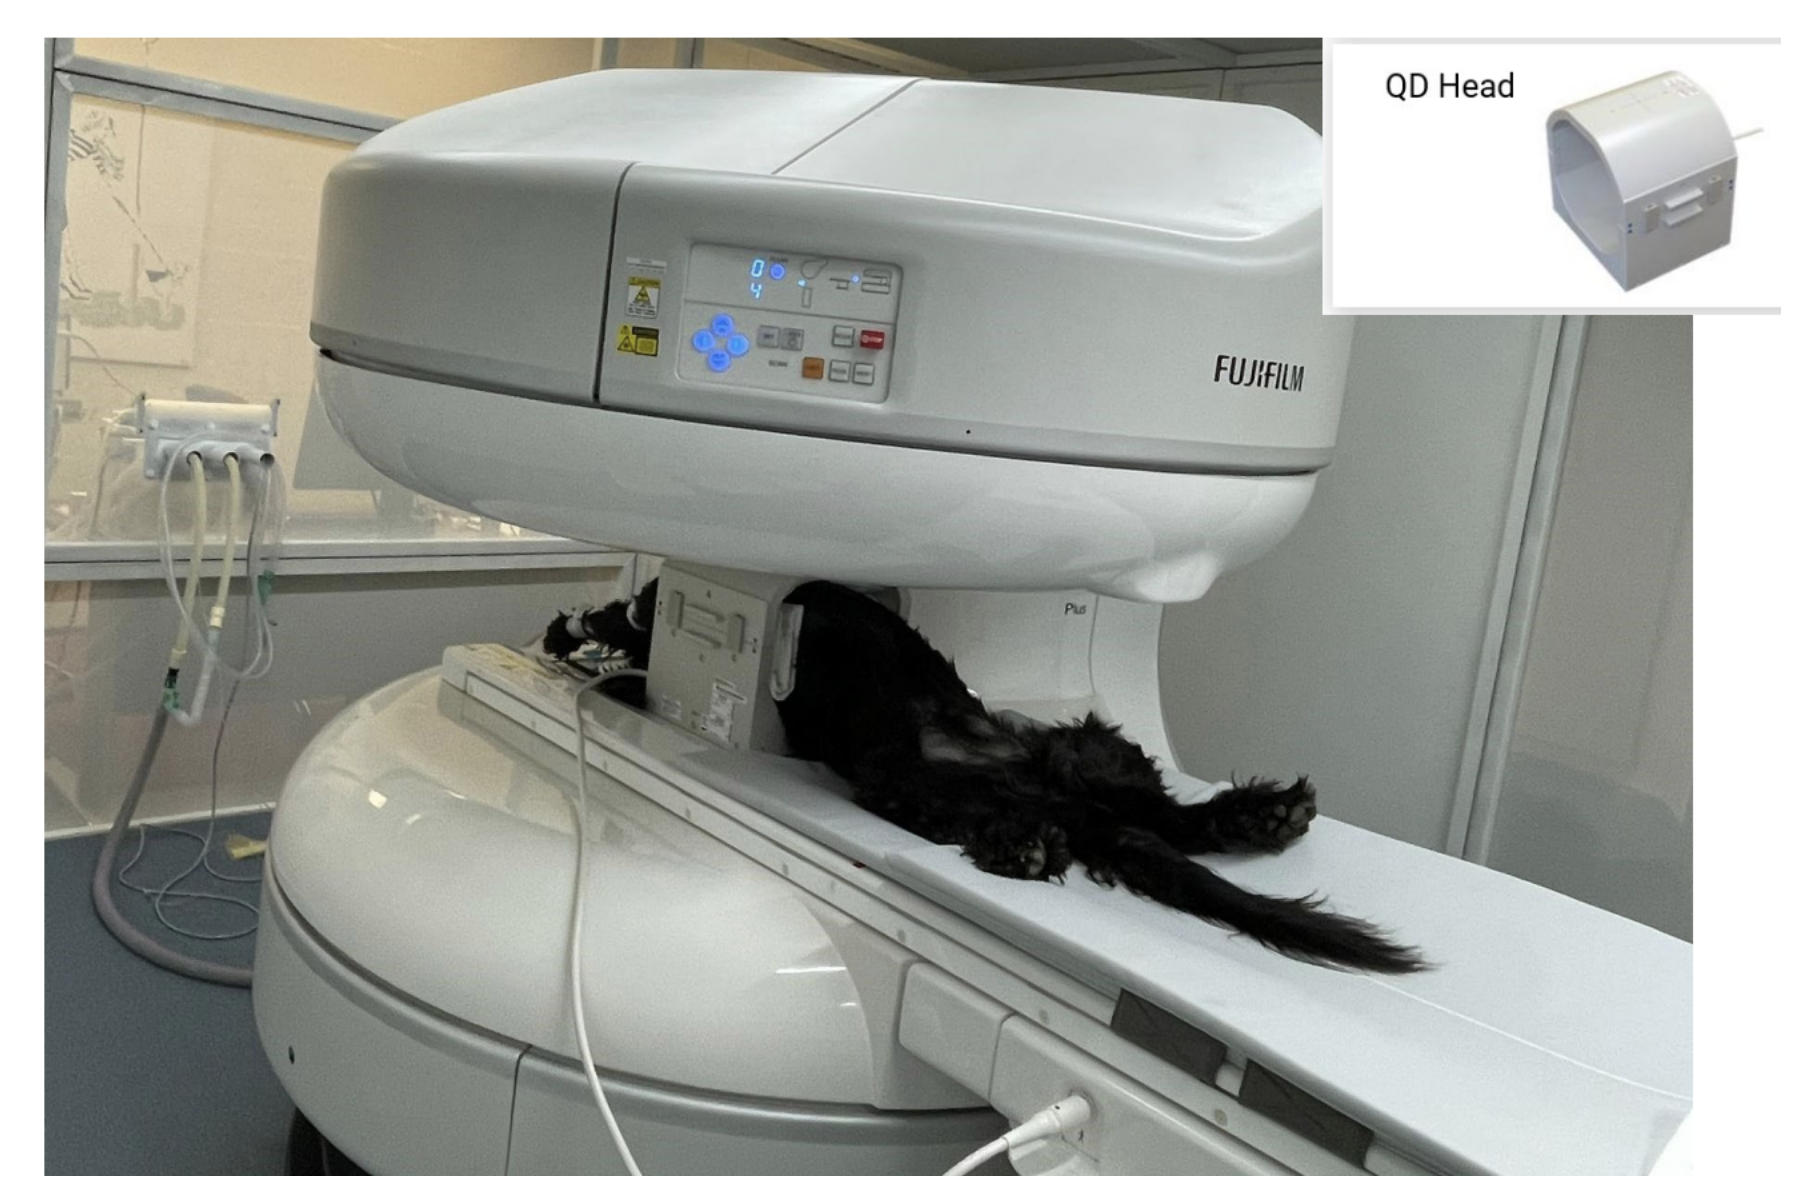
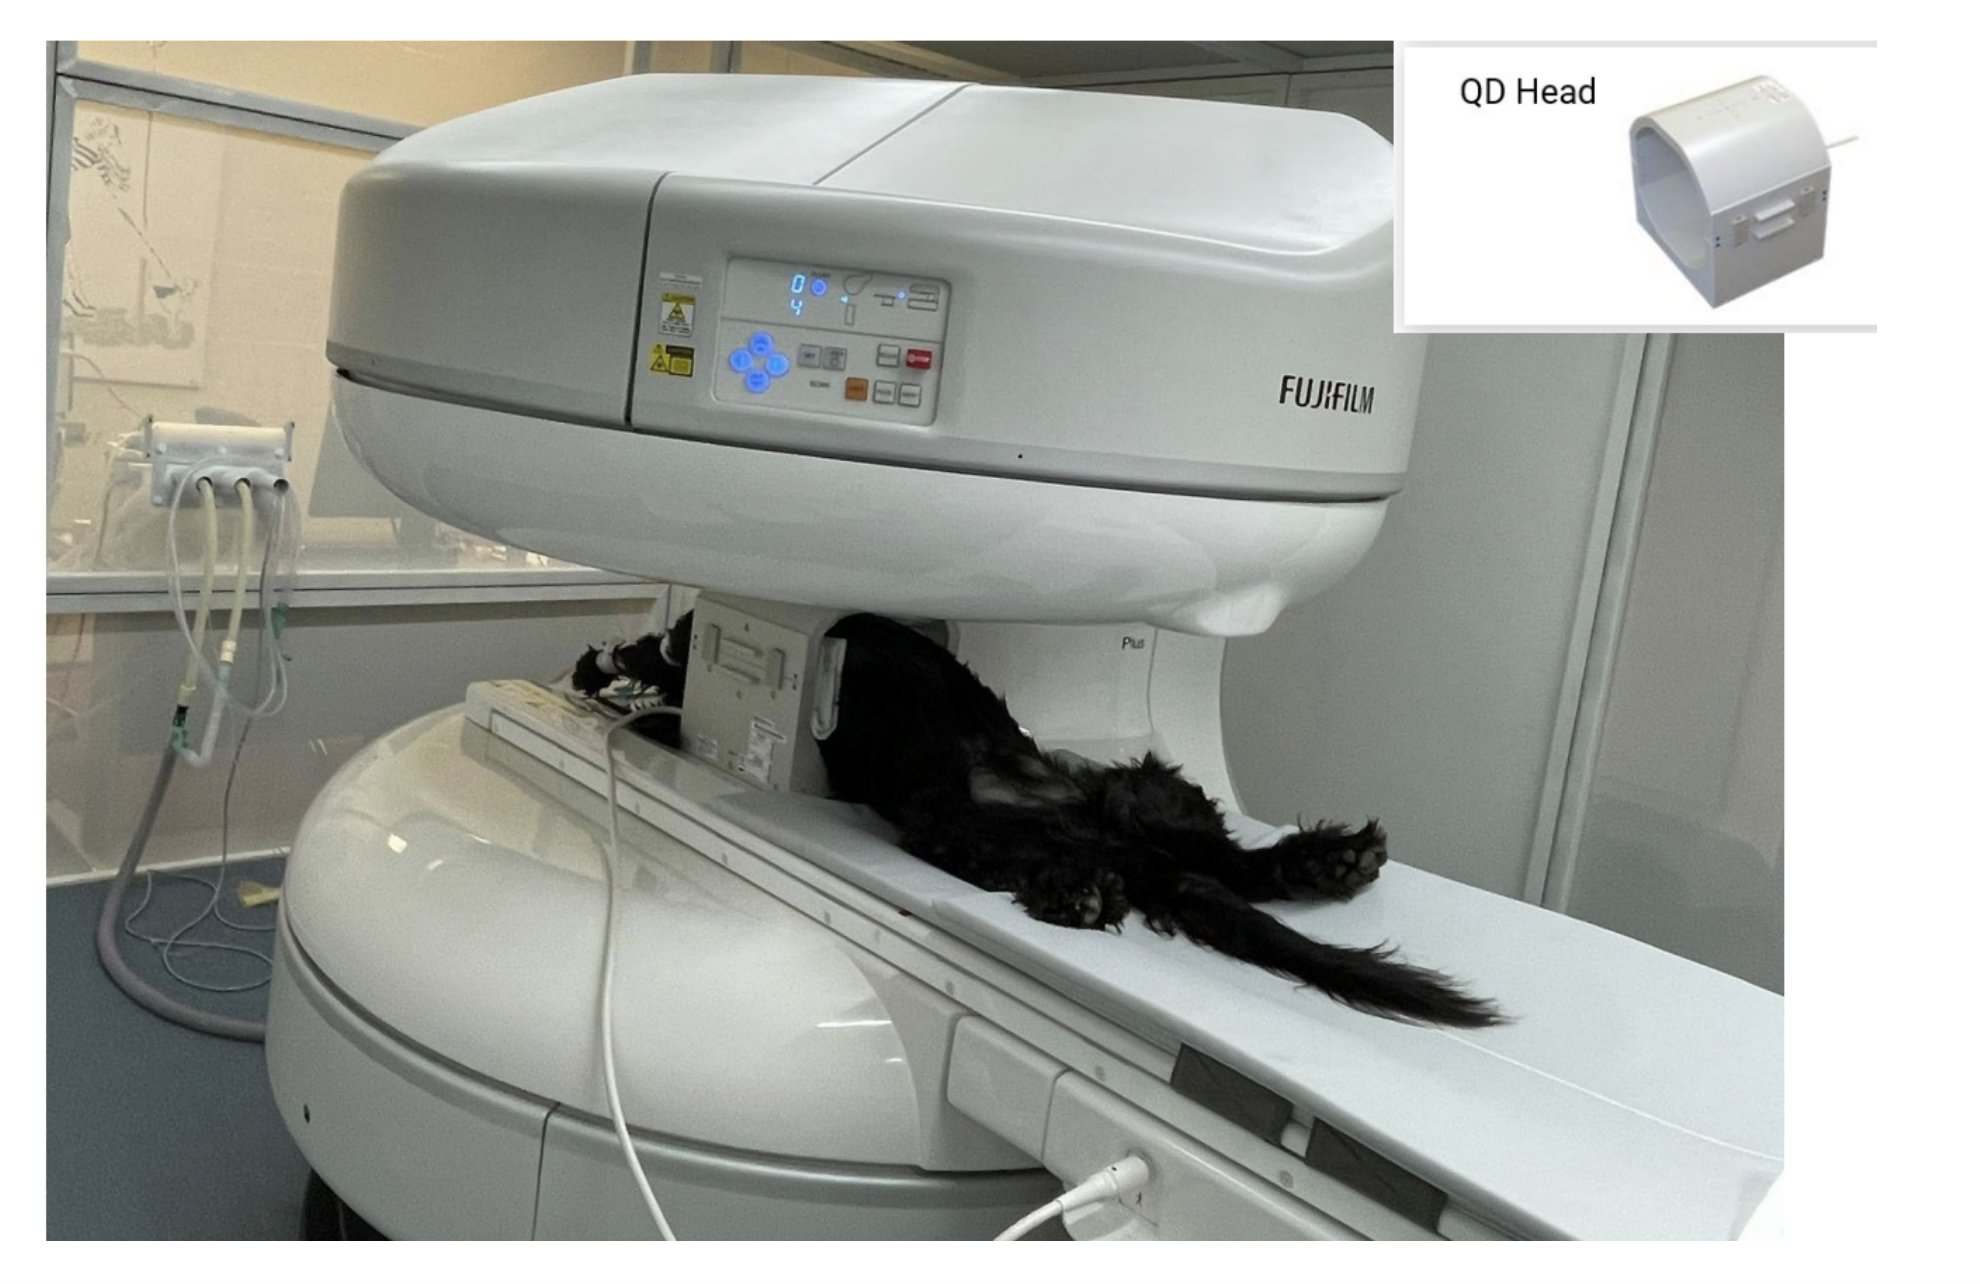
That’s where magnetic resonance imaging (MRI) becomes one of the most powerful diagnostic tools in veterinary medicine. Modern systems, such as the Fujifilm Aperto MRI System, allow clinicians to move beyond educated suspicions and visualize disease processes with remarkable detail. For veterinary neurologists, MRI is not simply about obtaining images; it is about uncovering information that directly influences diagnosis, treatment decisions, prognosis, and ultimately patient outcomes.
From Localization to Confirmation
One of the most important distinctions in neurology is between a suspected and a confirmed diagnosis.
Consider a dog presenting with acute hindlimb paralysis.
Based on history, neurological exam findings, and signalment, a neurologist may strongly suspect an intervertebral disc extrusion. However, several other conditions can produce nearly identical clinical signs, including:
Spinal neoplasia
Inflammatory disease
Hemorrhage
Vertebral abnormalities
Infectious conditions affecting the spinal cord
Without advanced imaging, treatment decisions are often based on probabilities. MRI changes that equation.
Instead of asking, “What is most likely happening?” Neurologists can ask, “What is actually happening?”
That distinction can dramatically alter a patient's treatment plan.
What Neurologists Are Actually Looking For
Many people assume neurologists simply look for obvious abnormalities on MRI images. In reality, image interpretation is far more nuanced. A veterinary neurologist evaluates dozens of variables simultaneously, including:
Tissue Characteristics
Different diseases affect tissue differently. MRI sequences help distinguish:
Normal tissue from abnormal tissue
Inflammation from neoplasia
Acute injury from chronic disease
Edema from hemorrhage
Active disease from residual structural change
These distinctions often determine whether a patient requires surgery, medication, monitoring, or referral.
Lesion Location
In neurology, location matters almost as much as the disease itself. A lesion affecting one area of the spinal cord may carry a very different prognosis than an identical lesion located elsewhere.
MRI allows neurologists to assess:
Precise anatomical location
Degree of compression
Involvement of surrounding structures
Extent of tissue damage
Even subtle differences can influence recommendations regarding surgery, rehabilitation, and long-term management.
Disease Extent
Clinical signs may underestimate, or occasionally overestimate, the true severity of the disease.
MRI frequently reveals:
Multiple lesions rather than a single lesion
More extensive inflammation than anticipated
Additional areas of compression
Previously undetected abnormalities
Understanding the full extent of disease helps clinicians build more accurate treatment plans and set realistic expectations for owners.
The Power of Subtle Findings
Some of the most valuable MRI discoveries are not dramatic. In fact, small findings often provide the information that changes everything.
Case Example: Cervical Disc Disease
A dog presents with neck pain and intermittent forelimb lameness. Radiographs may show degenerative changes, but they cannot determine whether the spinal cord is affected.
MRI may reveal:
Mild disc protrusion
Early spinal cord compression
Subtle spinal cord signal changes
These findings can help determine whether conservative management is appropriate or whether surgical intervention should be considered before neurological deficits progress.
Case Example: Seizure Patients
A young dog with seizures may have a normal neurological examination between episodes.
MRI may identify:
Congenital abnormalities
Inflammatory brain disease
Structural lesions
Previously undetected masses
Each finding points clinicians toward a completely different diagnostic and therapeutic pathway. Without imaging, those distinctions may remain hidden.
Why Image Quality Matters
Advanced MRI systems have transformed veterinary neurology by providing higher-quality images, faster acquisition times, and improved diagnostic capabilities.
TheFujifilm Aperto MRI System is designed to support the detailed visualization that neurologists rely on every day. High-resolution imaging helps clinicians identify subtle lesions that might otherwise be missed and evaluate complex neurological cases with greater confidence.
This becomes particularly important when assessing:
Early inflammatory disease
Small intracranial lesions
Mild spinal cord abnormalities
Post-surgical evaluations
Progressive neurological conditions
When image quality improves, diagnostic confidence often improves as well.
The Impact on Patient Outcomes
Ultimately, MRI is not about technology. It is about reducing uncertainty.
Every veterinary team has experienced cases where clinical signs suggest one diagnosis, only for advanced imaging to reveal something entirely different. For neurologists, MRI provides answers that physical examination alone cannot.
It confirms suspicions. It challenges assumptions. It guides treatment decisions. And most importantly, it helps clinicians deliver the best possible care for their patients.
Bringing It All Together
MRI Systems provide the detailed imaging needed to uncover subtle abnormalities, refine diagnoses, and support confident clinical decision-making. The result is more than a clearer image; it is a clearer path forward.
Because in neurology, the difference between uncertainty and certainty can mean the difference between monitoring and intervention, between symptom management and targeted treatment, and ultimately between guessing what is wrong and knowing what is truly affecting the patient.

Anesthesia & MRI: Minimizing Risk While Maximizing Image Quality
MRI is an imaging procedure, but a successful scan depends on much more than the machine.
Behind every good MRI study is a team carefully managing four important things:
Patient safety
Stable anesthesia
Efficient workflow
Clear, diagnostic images
For many veterinary teams, the anesthesia side of MRI can feel intimidating at first.
Not because it is impossible.
But because MRI is different.
The room is different.
The equipment is different.
The team setup is different.
And communication can feel different because the patient is not managed the same way as in a typical surgery room.
That is why preparation matters so much. When the team understands the MRI environment and has a clear plan before the scan begins, the entire process becomes safer, smoother, and more efficient.
Good MRI Images Start Before the Patient Enters the Scan Room
One of the easiest mistakes teams make early on is focusing only on the scan itself, but image quality starts long before imaging begins.
Things like:
Proper catheter placement
Organized line management
Patient padding
Stable anesthetic depth
Thoughtful positioning
…all directly impact the quality and efficiency of the study. A patient who’s uncomfortable, unstable, or poorly positioned often leads to:
Motion artifact
Repeat sequences
Longer anesthesia times
Increased stress for the entire team
Preparation matters more than people realize. And smooth MRI days usually come down to one thing: fewer preventable adjustments once the scan has started.
Positioning: Small Details Make a Huge Difference
Positioning is one of those things that can either save your team time or quietly steal a lot of it. Repeatable positioning helps create:
More consistent images
Faster sequence setup
Better study interpretation
Less need for rescans
Even small changes can matter, like:
Keeping the spine straight and supported
Avoiding rotation
Using consistent landmarks
Securing patients well enough to prevent subtle movement
The goal is stability without creating unnecessary pressure points or compromising ventilation. And from a workflow standpoint, consistency is everything.
When every technician positions slightly differently, studies become harder to reproduce and troubleshooting becomes more frustrating. That’s why many successful MRI teams eventually develop very standardized positioning protocols:
Same supports
Same setup sequence
Same communication process
It reduces guesswork for everyone involved.
Monitoring in MRI Environments Requires a Different Mindset
MRI anesthesia monitoring can feel uncomfortable at first because the setup naturally creates more distance between the patient and the anesthesia team.
You can’t always stand directly beside the patient the way you might during surgery. That’s why preparation and vigilance become even more important.
Some practical habits that help:
Confirm all monitoring equipment is MRI-compatible before the patient enters the room
Organize lines and cables carefully to prevent tangling or interference
Double-check connections before sequences begin
Establish clear communication between the imaging and anesthesia teams
And perhaps most importantly:
Anticipate problems early instead of reacting late
Because once imaging is underway, interruptions cost time, not just operationally, but anesthetically too.
Efficiency Between Sequences Matters More Than You Think
This is an area that often improves dramatically with experience. In the beginning, sequence transitions can feel slow:
Repositioning takes longer
Communication gets clunky
Adjustments happen reactively instead of proactively
But over time, efficient teams learn how to minimize downtime between sequences. That might look like:
Planning the study flow ahead of time
Anticipating coil changes early
Having positioning aids ready before they’re needed
Assigning clear responsibilities to each team member
The smoother those transitions become, the less time patients spend under anesthesia overall. And that benefits everyone:
Efficiency isn’t about rushing; it’s about reducing unnecessary delays.
Reducing Time Under Anesthesia Starts With Preparation
One of the best ways to shorten anesthesia time is surprisingly simple: be organized before induction ever happens. That includes:
Confirming imaging protocols ahead of time
Reviewing patient history thoroughly
Preparing supplies in advance
Ensuring the room is ready before bringing the patient in
Because once anesthesia begins, time matters. Even a few preventable delays can slowly compound:
Missing supplies
Positioning uncertainty
Communication breakdowns
Repeated setup adjustments
And those little inefficiencies add up quickly over the course of a full MRI day.
MRI Success Is Deeply Team-Dependent
One thing worth appreciating about MRI workflows is how clearly they highlight the importance of every role in the hospital. Successful MRI cases aren’t driven by one person. They rely on:
Veterinarians making thoughtful case selections
Technicians managing anesthesia and positioning
Assistants help maintain efficiency and patient safety
Imaging teams coordinating workflow and communication
When everyone understands the process, the entire experience becomes calmer and more controlled.
The Goal Isn’t Just Faster Scans
This is important. Efficiency matters, but not at the expense of patient care. The goal is not: “How fast can we get this done?”
The goal is: “How can we create consistent, high-quality studies while keeping patients as safe and stable as possible?”
When teams focus on preparation, communication, and repeatable workflow habits, both things tend to improve naturally:
Better image quality
Better anesthesia experiences
And over time, MRI shifts from feeling intimidating to feeling like just another well-coordinated part of patient care.
Common MRI Cases in General Practice (Not Just Specialty Hospitals)

When many people think about MRI in veterinary medicine, they picture massive specialty centers handling only the most advanced neurological cases.
But the reality is… a lot of the patients who benefit from MRI are already walking through the doors of general practices every single day. They’re the cases that leave you thinking:
“Something still isn’t adding up.”
“I feel like we’re missing a piece of the puzzle.”
“We’ve tried conservative management, but we still don’t have answers.”
And honestly, that’s where MRI becomes so valuable.
Not because every patient needs advanced imaging, but because some cases simply can’t be fully understood without it.
The interesting part? These aren’t always rare or highly specialized cases. Many of the patients you’re already seeing regularly, you just don’t always have the diagnostic clarity to confidently move forward.
The Suspected IVDD Case
This is probably one of the most recognizable MRI cases in veterinary medicine.
The painful dachshund.
The suddenly non-ambulatory Frenchie.
The patient went from “a little stiff” to neurologic symptoms seemingly overnight.
In many cases, you can strongly suspect IVDD based on exam findings and history alone. But MRI helps answer the deeper questions:
Which disc is affected?
How severe is the compression?
Is surgery indicated?
Are there multiple sites involved?
That level of detail matters—not only for surgical planning, but for setting realistic expectations with clients.
And sometimes, MRI reveals something entirely different than what was initially suspected.
That’s the part that turns educated guesses into confident treatment plans.
The Seizure Workup That Needs More Than Monitoring
Seizure cases can be incredibly frustrating for both veterinarians and pet owners.
Sometimes, everything points toward idiopathic epilepsy. Other times… something feels off.
Maybe:
The patient is older at onset
Neurologic deficits are present between episodes
Medications aren’t helping the way you expected
Episodes are becoming more frequent or severe
MRI becomes especially valuable in these situations because it helps determine whether there’s an underlying structural cause:
Brain tumors
Inflammatory disease
Congenital abnormalities
Previous trauma or infarcts
And for clients, having clearer answers often improves their ability to commit emotionally and financially to treatment plans. Even when findings are difficult, clarity helps families make more informed decisions moving forward.
Chronic Lameness Cases That Keep Circling Back
Every practice has them…the patient that’s had:
Multiple radiographs
Rest periods
Medication trials
Rehab recommendations
…but still isn’t improving the way everyone hoped.
Sometimes the issue isn’t orthopedic at all. MRI can uncover:
Soft tissue injuries
Neurologic involvement
Subtle joint abnormalities
Muscle or tendon pathology that radiographs simply can’t show well
And these are often among the most diagnostically rewarding cases because the answer has been hiding in plain sight all along.
It’s not that the case was being managed incorrectly—it’s that the full picture wasn’t visible yet.
The “Painful but Normal Diagnostics” Patient
These cases can be some of the most mentally exhausting.
The patient is clearly uncomfortable. The owner knows something is wrong. Your team knows something is wrong, but bloodwork looks normal, radiographs are inconclusive, and conservative management only partially helps.
These are the moments where MRI can completely shift the direction of a case. Whether it’s:
Spinal cord compression
Nerve root involvement
Inflammatory disease
Hidden soft tissue pathology
…advanced imaging often provides the missing explanation everyone has been searching for. And perhaps just as importantly, it gives clients reassurance that their concerns were valid all along.
MRI Isn’t About Replacing Clinical Skills
This is important: MRI doesn’t replace a strong physical exam, thoughtful diagnostics, or clinical intuition.
If anything, it enhances them.
Because most MRI cases don’t begin with imaging. They begin with experienced veterinary teams recognizing:
“This patient needs more answers than we can get from our current diagnostics.”
That’s good medicine, not overcomplication.
General Practice Is Already Seeing MRI Cases
This is where the conversation around MRI has really started to shift in recent years. Advanced imaging is no longer reserved exclusively for referral hospitals handling ultra-rare cases.
General practices are already seeing:
Neurologic patients
Chronic pain cases
Complicated lameness workups
Patients that plateau despite treatment
The difference is that now, more practices are exploring ways to keep those diagnostic journeys closer to home. And for many hospitals, that changes:
Continuity of care
Client trust
Diagnostic confidence
Long-term case management
Sometimes the Biggest Value Is Simply Having Answers
At the end of the day, MRI isn’t just about finding dramatic diagnoses.
Sometimes, its greatest value is ruling things out or confirming a suspicion.
Sometimes it’s helping a client finally understand why their pet hasn’t improved.
And sometimes, it simply allows everyone, the veterinarian, the team, and the owner, to stop operating in uncertainty.
Because you’re already seeing these cases. You just don’t always have all the answers yet.

From Referral to Diagnosis: The MRI Patient Journey in a Busy Practice

When practices first start considering MRI, it’s easy to focus on the machine itself.
The specs. The installation. The financial investment.
But eventually another question surfaces: “What would this actually look like in our hospital day-to-day?”
And honestly, it’s such a good question to ask.
Because successful MRI integration isn’t just about having advanced imaging, it’s about creating a workflow that feels manageable, efficient, and sustainable for your team.
The good news is that most practices don’t build perfect MRI workflows overnight. They build them one protocol, one patient, and one team adjustment at a time.
Let’s walk through what the MRI patient journey can realistically look like inside a busy veterinary practice.
It Starts Before the Appointment Is Even Scheduled
One of the biggest shifts in practice experience after adding MRI is becoming more intentional about case selection. Not every patient needs advanced imaging. But the right cases become much clearer over time.
Common MRI candidates often include:
Suspected IVDD cases
Seizure patients
Chronic neurologic symptoms
Unexplained pain or lameness
Patients are not responding to treatment as expected
As your team gains confidence, scheduling becomes more streamlined because everyone begins to recognize which cases are most likely to benefit from MRI. That’s where strong communication between doctors, technicians, and client care teams becomes incredibly important.
When everyone understands which patients are appropriate candidates, which diagnostics should be performed beforehand, and how to prepare clients for the process, the entire workflow runs more smoothly before the patient even walks through the door.
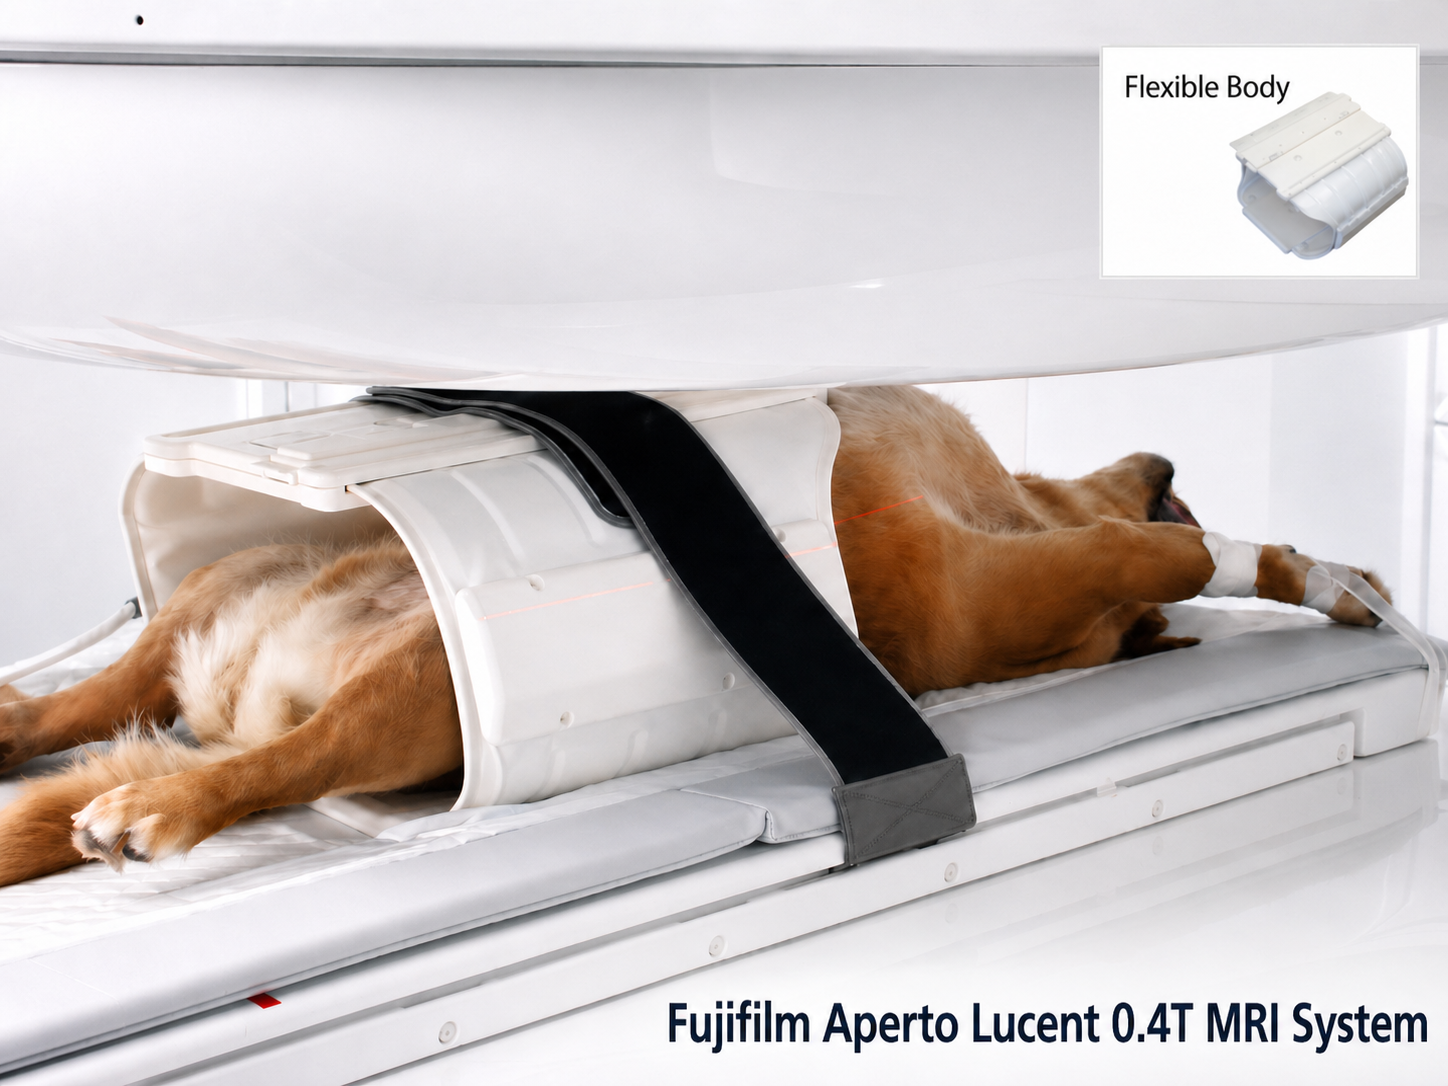
The Day-of Workflow: Organized, Not Chaotic
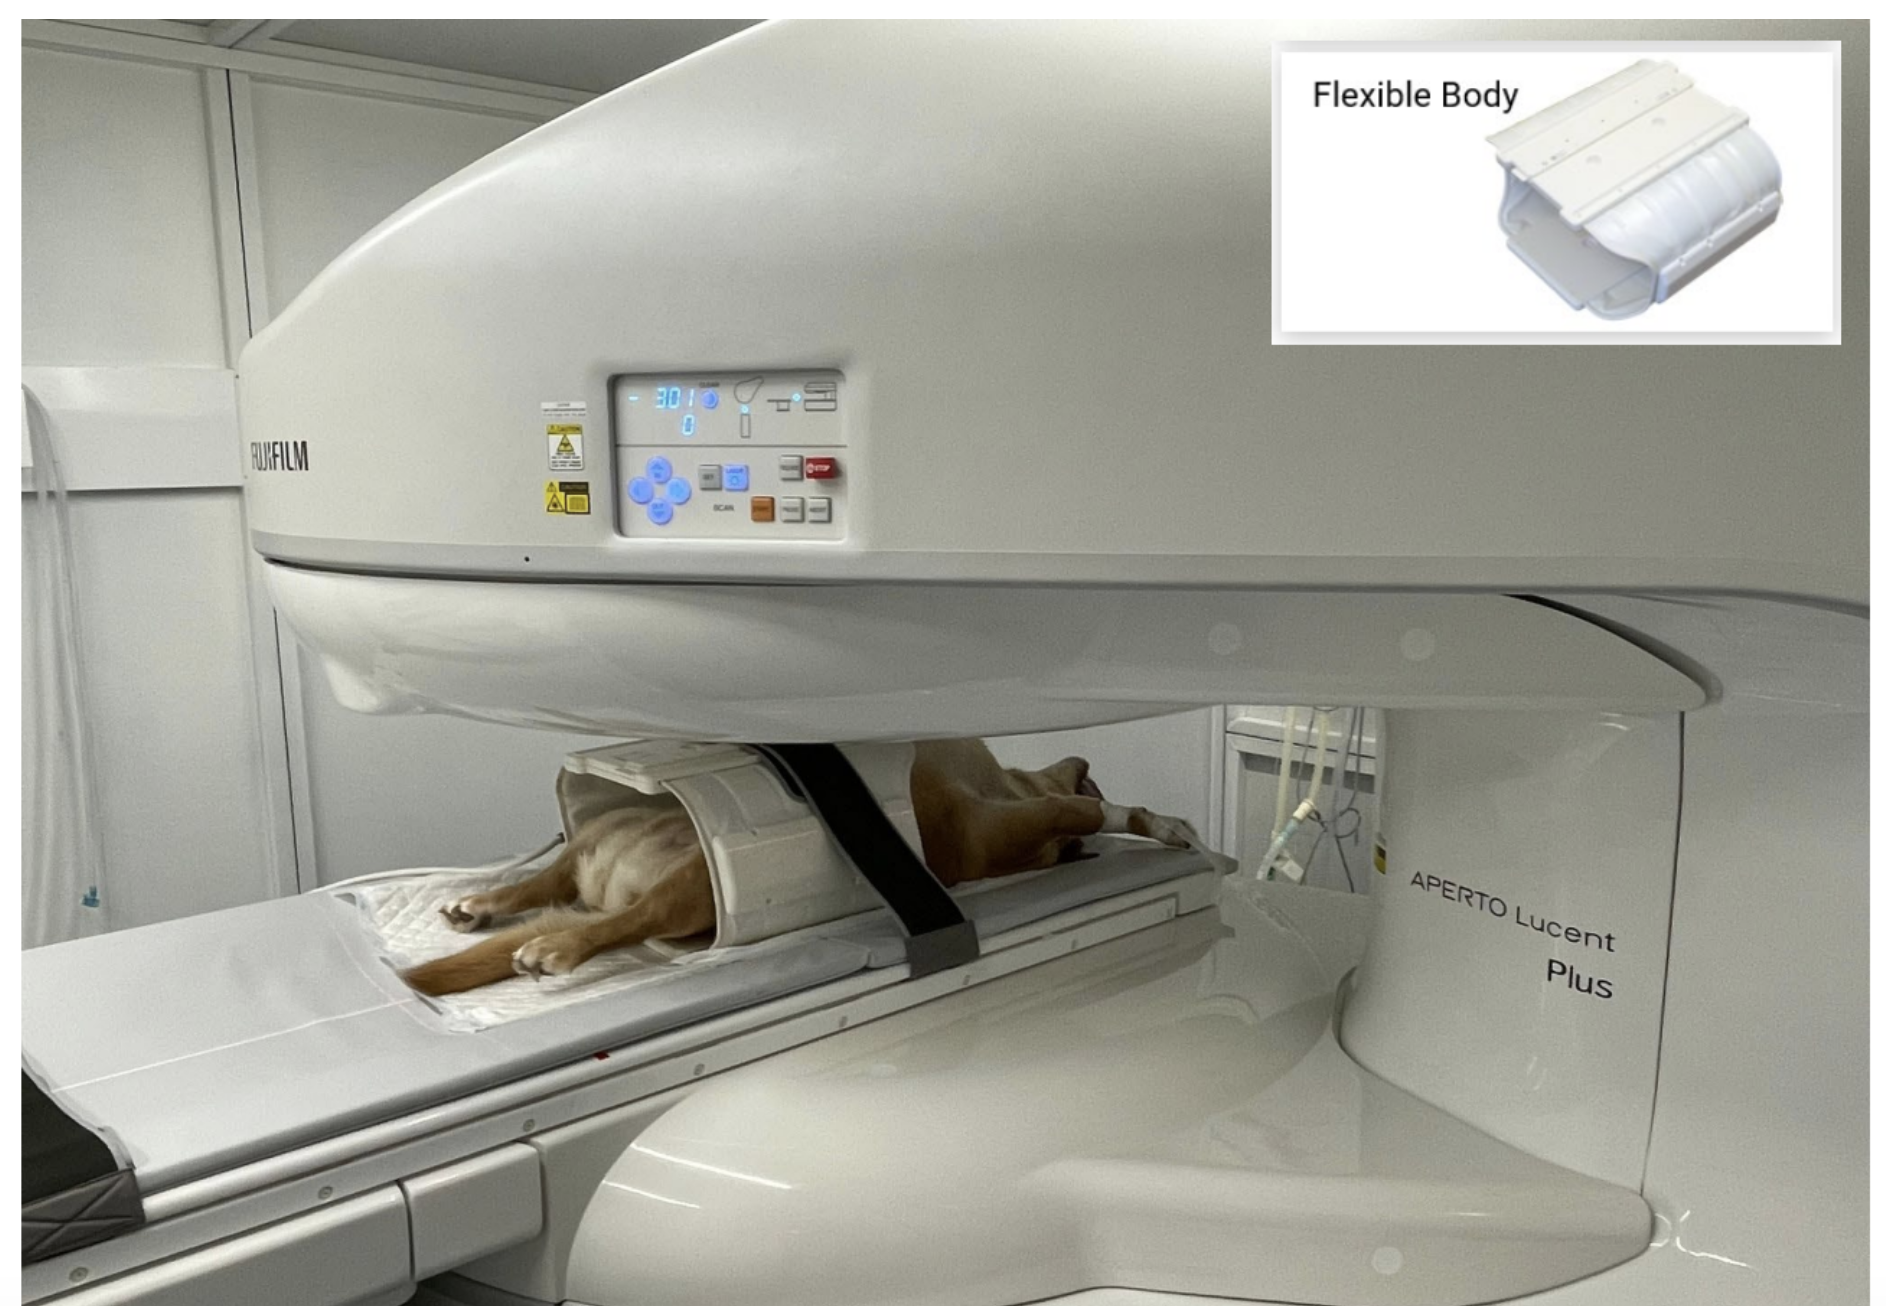
From the outside, an MRI can seem an intimidating operation. In reality, many practices discover that once protocols are established, MRI days become surprisingly structured. Especially using an MRI like theFujifilm Aperto Lucent 0.4T MRI system.
Typically, the workflow looks something like this:
Morning admission and patient assessment
Sedation or anesthesia preparation
MRI safety checks
Positioning and imaging
Recovery and monitoring
Image review and reporting
The key is consistency. The more repeatable your protocols become, the less stressful the process feels for everyone involved. And unlike many areas of veterinary medicine, which can feel unpredictable by nature, MRI often rewards preparation and routine.
Team Roles Matter
MRI is one of the clearest examples of how veterinary medicine truly functions as a team effort. A smooth imaging day depends on multiple moving pieces working together:
Veterinarians selecting appropriate cases
Technicians managing anesthesia and positioning
Assistants supporting patient handling and workflow
Client care teams coordinating communication and scheduling
Every role impacts efficiency. And interestingly, many hospitals find MRI creates opportunities for team growth:
Technicians developing advanced anesthesia skills
Staff are becoming more confident with neurology cases
Improved collaboration between departments
For some teams, adding MRI becomes more than a service expansion—it becomes a professional development opportunity across the hospital.
Positioning and Preparation Can Make or Break the Scan
One thing that practitioners learn quickly is that MRI quality doesn’t depend solely on the machine itself. Patient preparation matters. Good positioning:
Improves image consistency
Reduces repeat sequences
Shortens anesthesia time
Helps radiologists interpret studies more accurately
And in busy hospitals, efficiency matters. Even small improvements in preparation and workflow can significantly reduce recovery times, improve scheduling, and lower stress levels.
That’s why many successful MRI programs focus heavily on protocol refinement early on.
Report Turnaround: Where Answers Start Taking Shape
For both clients and clinicians, the moment that matters most… when the scan is complete. Now everyone wants answers. Depending on the hospital setup, MRI studies may be:
Reviewed internally by specialists
Sent to teleradiology services
Interpreted collaboratively between teams
Fast, clear reporting can dramatically improve workflow momentum:
Treatment plans move forward faster
Surgical decisions happen sooner
Client communication becomes more confident and direct
And perhaps most importantly, patients spend less time in diagnostic limbo. That’s something both veterinary teams and pet owners deeply appreciate.
The Reality: Workflow Evolves Over Time
No MRI workflow is perfect from day one. There will be adjustments:
Scheduling tweaks
Protocol refinements
Team training moments
Efficiency improvements
That’s normal. The practices that succeed with MRI aren’t necessarily the ones that start with flawless systems; they’re the ones willing to continuously refine the process as their confidence grows.
And over time, what once felt like a major operational leap simply becomes another integrated part of how the hospital delivers care.
MRI ROI Calculator
Total Cases to Pay Off: 0
Weekly Revenue: $0
Monthly Revenue: $0
Yearly Revenue: $0
Time to Pay Off Machine:
0 Years
How MRI Improves Client Trust and Case Acceptance

One of the hardest parts of veterinary medicine isn’t always making the diagnosis.
Sometimes, it’s helping clients feel confident enough to move forward with the next step.
You can have the right instincts, the right experience, the right treatment plan, but when a client is scared, overwhelmed, or struggling to fully understand what’s happening with their pet, hesitation naturally follows.
That’s where MRI can change the conversation in a powerful way.
Not because it’s flashy technology or advanced imaging…
But because it brings something clients desperately want during stressful moments: Clarity.
When “We Think” Becomes “We Know”
There’s a big emotional difference between: “We suspect there may be a spinal issue…”
and “Here’s exactly what we’re seeing.”
MRI gives clients something tangible. Instead of trying to visualize a problem through explanations alone, they can often see that something is wrong.
That clarity changes the tone of the conversation almost immediately. Suddenly:
Recommendations feel more concrete
Treatment plans feel more justified
Decisions feel less uncertain
And for many clients, that makes moving forward feel far less intimidating.
Confidence Builds Trust
Clients don’t expect veterinarians to have all the answers instantly. What they’re looking for is confidence that their pet is being guided thoughtfully and thoroughly.
Advanced imaging reinforces that trust.
When you’re able to pursue deeper diagnostics in-house, clients often perceive:
A higher level of medical capability
Greater continuity of care
A more proactive approach to their pet’s health
That doesn’t mean every case needs an MRI - far from it. But when MRI is recommended, it says, “We’re committed to finding answers, not just managing uncertainty.”
MRI Helps Clients Understand the “Why”
One of the biggest barriers to case acceptance isn’t always cost; often, it’s confusion. If clients don’t fully understand why additional diagnostics are needed, what information MRI provides, or how results impact treatment decisions, it becomes much harder for them to say yes.
MRI creates opportunities for clearer education:
Showing a compressed spinal cord
Identifying a brain lesion
Explaining why surgery is, or isn’t, the best option
Those visual conversations are often far more impactful than words alone.
For many clients, seeing the problem helps them emotionally process the seriousness of the situation in a way that verbal explanations sometimes can’t.
Keeping Care Within One Trusted Team
There’s another layer to client trust that often gets overlooked: continuity.
When patients are referred elsewhere for imaging, clients suddenly find themselves:
Retelling their story
Meeting a new medical team
Navigating an unfamiliar hospital
Waiting for communication between providers
Even when referral relationships are excellent, the experience can still feel fragmented from the client’s perspective. Offering MRI within your own hospital can create a much more connected experience:
Familiar faces
Consistent communication
One team guiding the case from start to finish
That continuity builds reassurance during what’s often a stressful and emotional time.
Better Understanding Often Leads to Better Compliance
When clients clearly understand a diagnosis, they’re more likely to follow through with treatment recommendations. That can mean:
Moving forward with surgery sooner
Committing to rehabilitation plans
Understanding realistic prognoses
Staying engaged in long-term management
MRI doesn’t just influence the initial decision; it can improve compliance throughout the entire treatment journey. And ultimately, better compliance often leads to better patient outcomes.
The Emotional Value of Answers
Anyone who’s worked in veterinary medicine long enough has seen it:
Sometimes the hardest part for clients is not knowing.
The uncertainty. The waiting. The fear of making the wrong choice.
MRI can’t fix every diagnosis. It can’t guarantee every outcome, but it can provide direction.
And even when the news isn’t ideal, many clients feel relief simply having clearer answers and a defined plan moving forward.
That emotional value is easy to underestimate, but incredibly important.
Technology Matters. Communication Matters More.
At the end of the day, MRI itself doesn’t create trust; people do.
The technology supports stronger conversations:
More confident recommendations
Better client education
Clearer expectations
More informed decision-making
When used thoughtfully, MRI becomes more than an imaging tool. It becomes a bridge between medical knowledge and client understanding.
And in a profession built on relationships, that connection matters just as much as the images themselves.

Choosing the Right Veterinary MRI: A Practical Guide for Real-World Decision Making

If you read thelast article and found yourself thinking, “Okay… MRI might actually make sense for us,” the next question is usually where things get a little murky:
“Which system do we even choose?”
This is where many practices get stuck: there’s so much information, and not all of it feels relevant to your day-to-day.
So instead of diving into spec sheets and technical jargon, let’s simplify this.
There are three key players you’ll see again and again in the veterinary MRI space:Fujifilm, Esaote, and Hallmarq Veterinary Imaging.
Each brings something different to the table, and the “right” choice has a lot less to do with which system is best and a lot more to do with which system fits your practice.
Let’s walk through the differences in a way that actually helps you decide.
1. Workflow: How Will This Fit Into Your Day?
This is one of the most overlooked (and most important) factors.
Some MRI systems are built for high-volume, fast-paced environments where efficiency is everything. Others are designed with simplicity and accessibility in mind.
Systems from Hallmarq Veterinary Imaging are often praised for their workflow-friendly design. They’re designed specifically for veterinary use, which shows up in intuitive interfaces and streamlined protocols.
Esaote systems also lean into ease of use, especially with low-field MRI. Many practices appreciate the shorter learning curve and smoother integration into general practice workflows.
Fujifilm tends to bring a more advanced imaging environment, often with greater customization and capability.
2. Footprint & Installation: What Does This Actually Look Like in Your Hospital?
MRI isn’t just a piece of equipment; it’s an infrastructure decision.
This is where real-world constraints come into play:
Available square footage
Structural considerations
Power requirements
Shielding and site prep
Esaote is known for its compact systems, which are a good fit for general practices or smaller specialty hospitals.
Hallmarq Veterinary Imaging also offers purpose-built veterinary systems, often designed to fit into existing clinical spaces compared to traditional human MRI units.
Fujifilm Healthcare systems are known for their robust infrastructure and high performance.
Before you fall in love with any system, make sure it realistically fits your space, your buildout timeline, and your tolerance for construction.
3. Image Quality vs. Throughput: What Do You Actually Need?
This is where conversations can get… a little heated. High-field vs. low-field. Resolution vs. speed. Detail vs. practicality. Here’s the grounded version:
Fujifilm Healthcare systems are often associated with higher field strengths and advanced imaging capabilities, which can deliver exceptional detail—especially valuable for complex neurological cases.
Esaote focuses heavily on low-field MRI, which is more than capable for many common veterinary applications.
Hallmarq Veterinary Imaging offers systems designed to balance usefulness with practical workflow, particularly in veterinary-specific applications.
But here’s the key question to ask:
Are you optimizing for the most advanced image possible, or the most usable system for your caseload?
Because those aren’t always the same thing.
4. Service & Support: What Happens After Installation?
This is the part no one gets excited about, until something goes wrong.
MRI uptime matters. Delays cost money, disrupt schedules, and create stress for your team.
Hallmarq Veterinary Imaging has a sound reputation for its support and repair services.
Esaote provides accessible support and training, particularly helpful for practices newer to MRI.
Fujifilm Healthcare benefits from the backing of a large, global imaging company, which can translate into robust service networks and advanced technical resources.
The takeaway: Don’t just ask if service is available, ask:
How fast is the response time?
What does training look like?
Who do we call when something feels “off”?
So… How Do You Choose?
At the end of the day, this isn’t about picking the “best” MRI system.
It’s about choosing the one that aligns with:
Your caseload
Your team’s experience
Your physical space
Your growth goals
A system that looks incredible on paper but slows down your workflow or overwhelms your team isn’t a win. On the flip side, a system that fits seamlessly into your day, even if it’s not the most “advanced” option available, can completely transform how you practice.

Is MRI Worth It for Your Practice? A Real-World Discussion
If you’ve ever found yourself sending a case out for advanced imaging and thinking,
“I wish we could keep this in-house.”
You’re not alone.
For many veterinary practices, MRI sits in that category of “maybe someday.” It feels like a big leap, financially, operationally, and even mentally. But the conversation around MRI has shifted more recently. It’s no longer just for large specialty centers. More general and hybrid practices are starting to ask a very practical question:
Does this actually make sense for my hospital?
Let’s break that down in a way that feels real.
It’s Not Just the Cost, It’s the Cases You’re Losing
When most practices evaluate MRI, the first number they look at is the price tag. That’s fair. But focusing only on upfront cost can miss the bigger picture.
Think about the cases you’re already seeing:
The down dog with suspected IVDD
The seizure workup that needs answers
The chronic lameness case that just isn’t adding up
Right now, what happens to those patients?
They get referred out.
And when they leave, a few things often go with them:
Diagnostic revenue
Treatment plans
Follow-up care
Long-term client loyalty
Not every referral is lost forever, but many don’t come back in the same way. MRI changes that dynamic. It allows you to keep the case, guide the course of care, and remain at the center of the patient’s care.
Revenue Per Scan Adds Up Faster Than You Think
Let’s keep this easy.
MRI isn’t about running dozens of scans a day. In fact, many successful veterinary practices start with just a handful of cases per week. Even at a conservative pace:
A few scans per week
Consistent demand from neurology and complex cases
Gradual growth as your team gains confidence
That can translate into meaningful, steady revenue, not just from the scan itself, but from everything that follows:
Surgical procedures
Ongoing treatment plans
Rechecks and monitoring
MRI often feeds into the rest of your services.
Referral Retention vs. Referral Dependence
There’s nothing wrong with referring. In many cases, it’s absolutely the right call.
But there’s a difference between strategic referral and default referral.
When MRI isn’t available in-house, even cases you could manage often get sent elsewhere simply because you don’t have the diagnostic clarity to move forward confidently.
Bringing MRI into your practice shifts that balance and you refer when it truly benefits the patient, not just when you’re missing a diagnostic piece
That distinction matters for both patient care and business sustainability.
The Confidence Factor (For You and Your Clients)
There’s also a less tangible, but incredibly important, ROI: confidence.
When you can move from “this is what we think is going on…” to “this is what we’re seeing and here’s the plan…”
…it changes everything.
Clients feel it, and decision-making becomes clearer and faster.
That level of clarity often leads to:
Higher case acceptance
Stronger trust
Better compliance with treatment plans
MRI provides answers, and we all know how powerful clear answers can be.
Growth Doesn’t Have to Mean Overwhelm
One of the biggest hesitations around MRI is the fear of disruption:
Will this slow us down?
Can our team handle it?
Is this going to complicate our workflow?
Those are certainly valid concerns, but they’re also manageable. Many practices gradually integrate MRI, starting with select case types, building protocols over time, and training the team in phases.
It doesn’t have to be an overnight transformation. In fact, the most successful implementations rarely are.
So… Is It Worth It?
The honest answer is: it depends on your goals. But if your practice is:
Seeing a steady stream of complex cases
Looking to retain more advanced diagnostics
Wanting greater control over patient outcomes
Focused on long-term growth rather than short-term volume
…then MRI becomes less of a “nice to have” and more of a strategic next step.
MRI ROI Calculator
Total Cases to Pay Off: 0
Weekly Revenue: $0
Monthly Revenue: $0
Yearly Revenue: $0
Time to Pay Off Machine:
0 Years

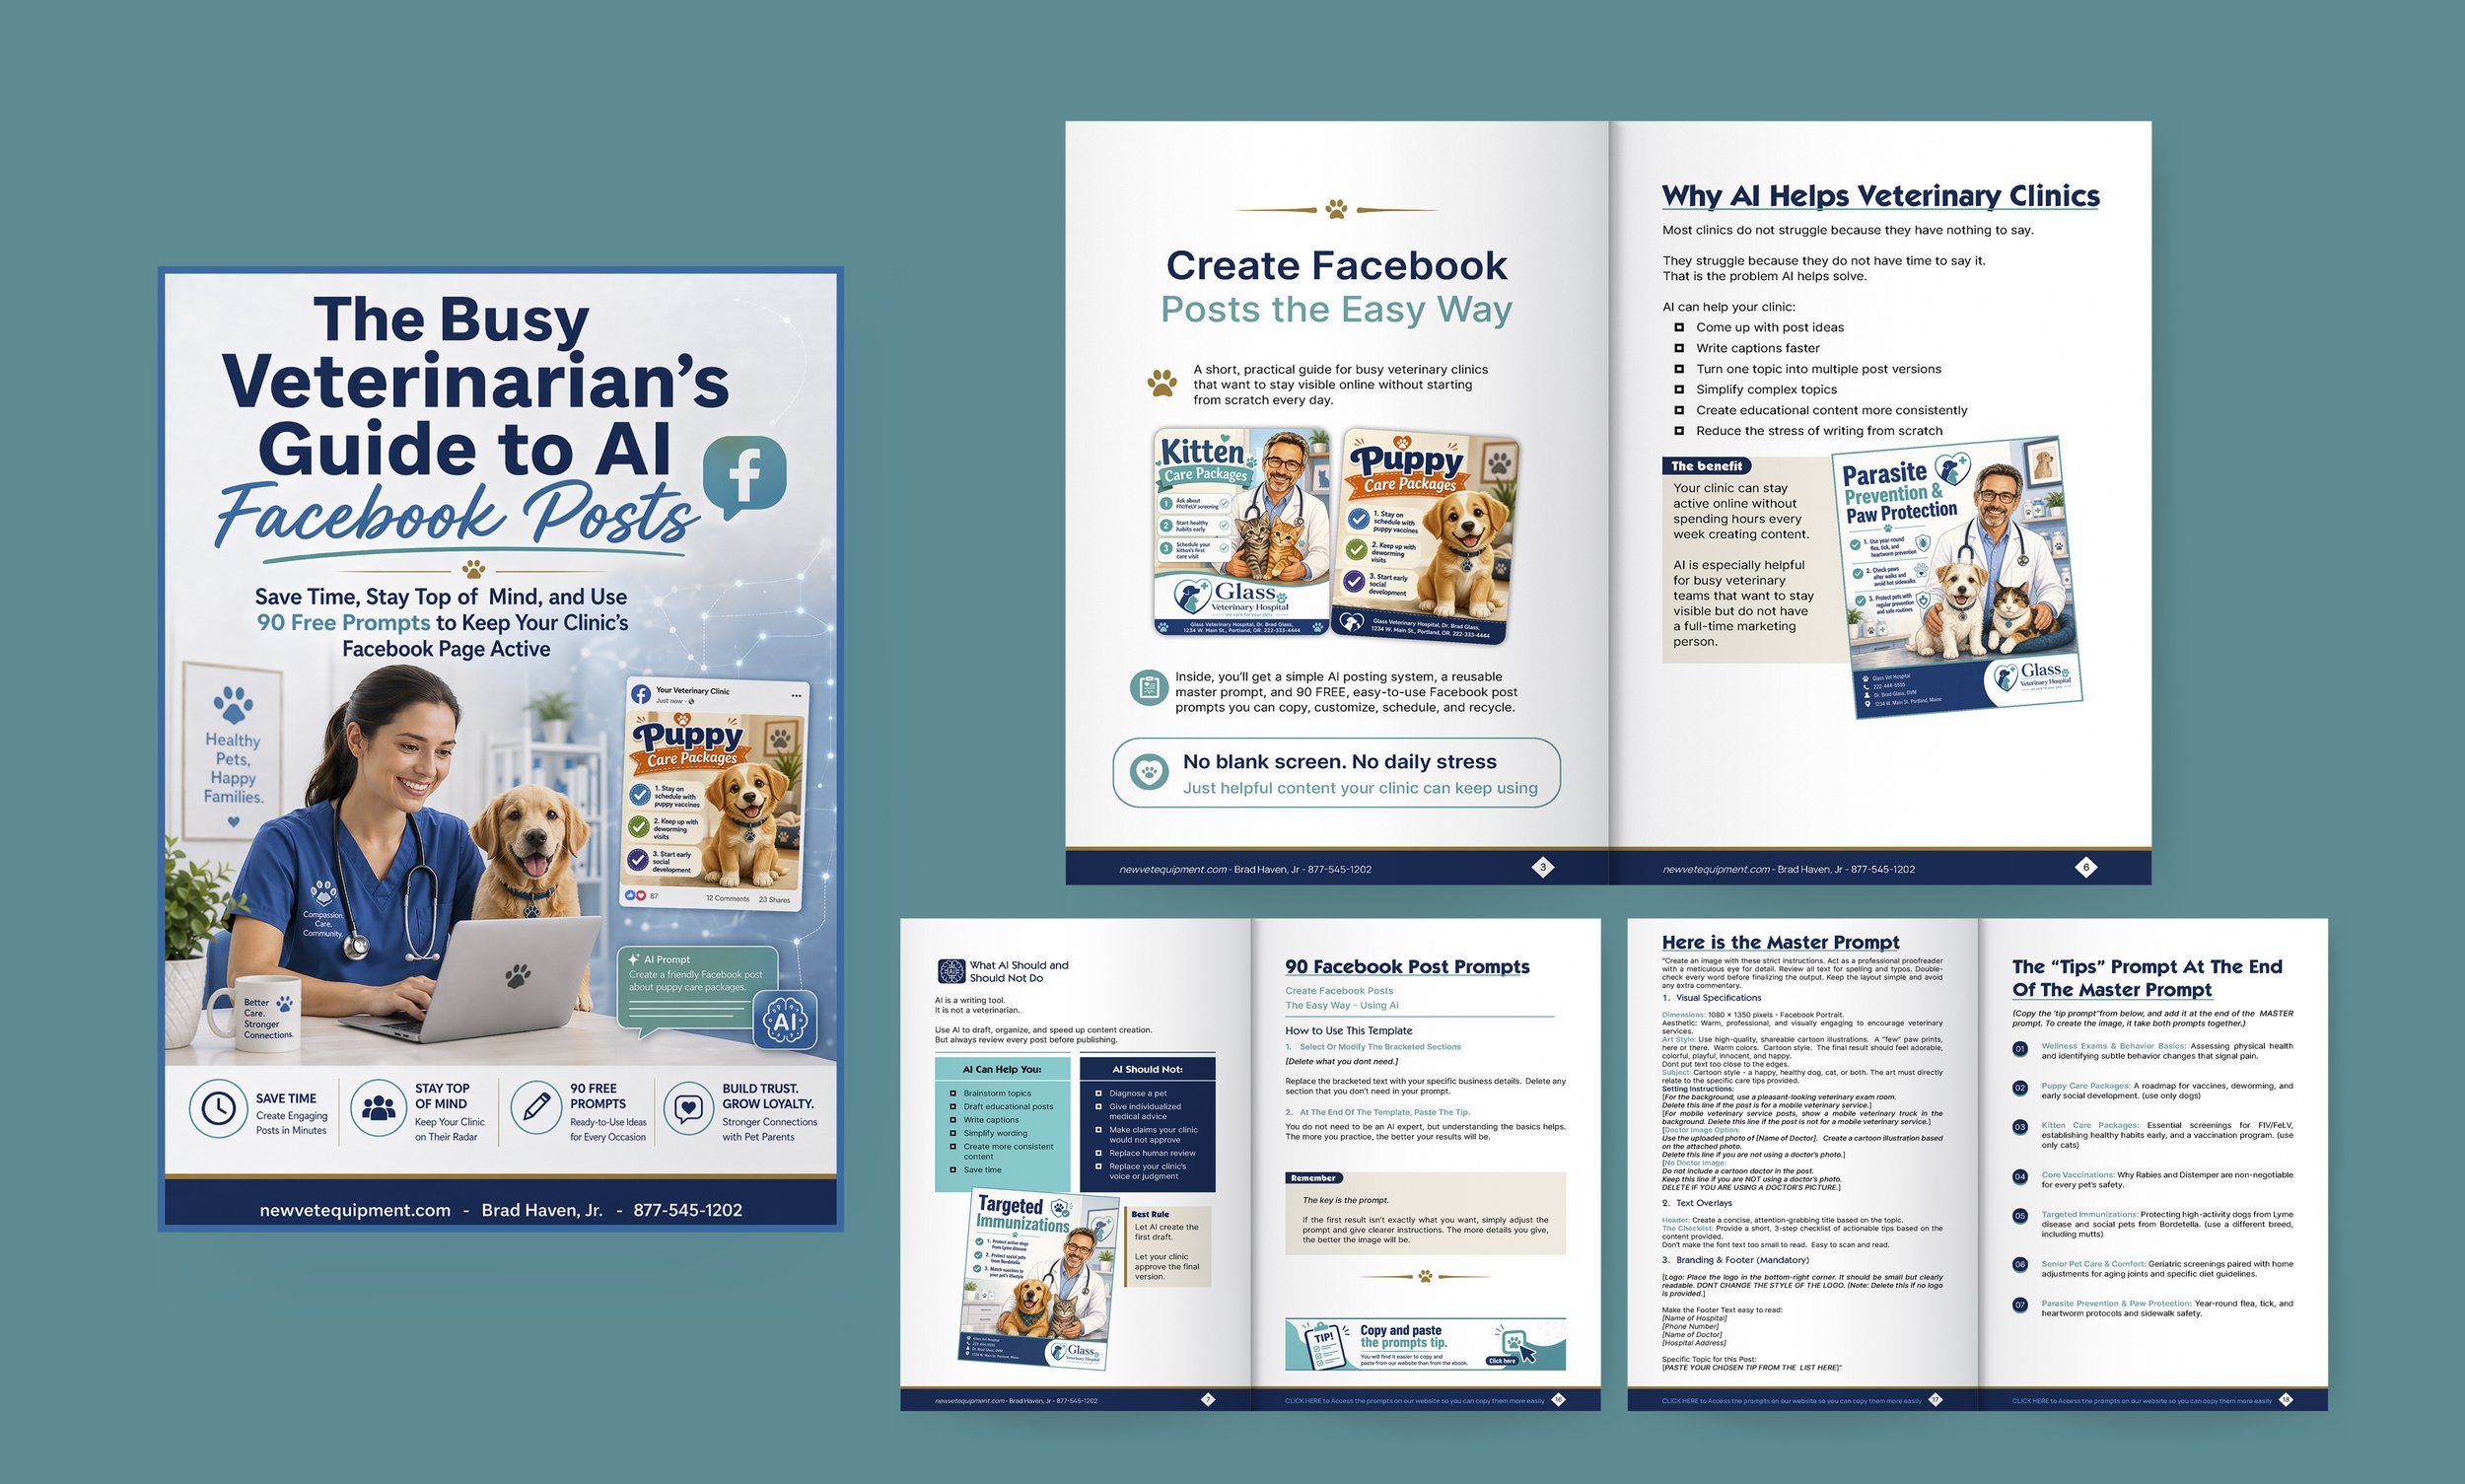
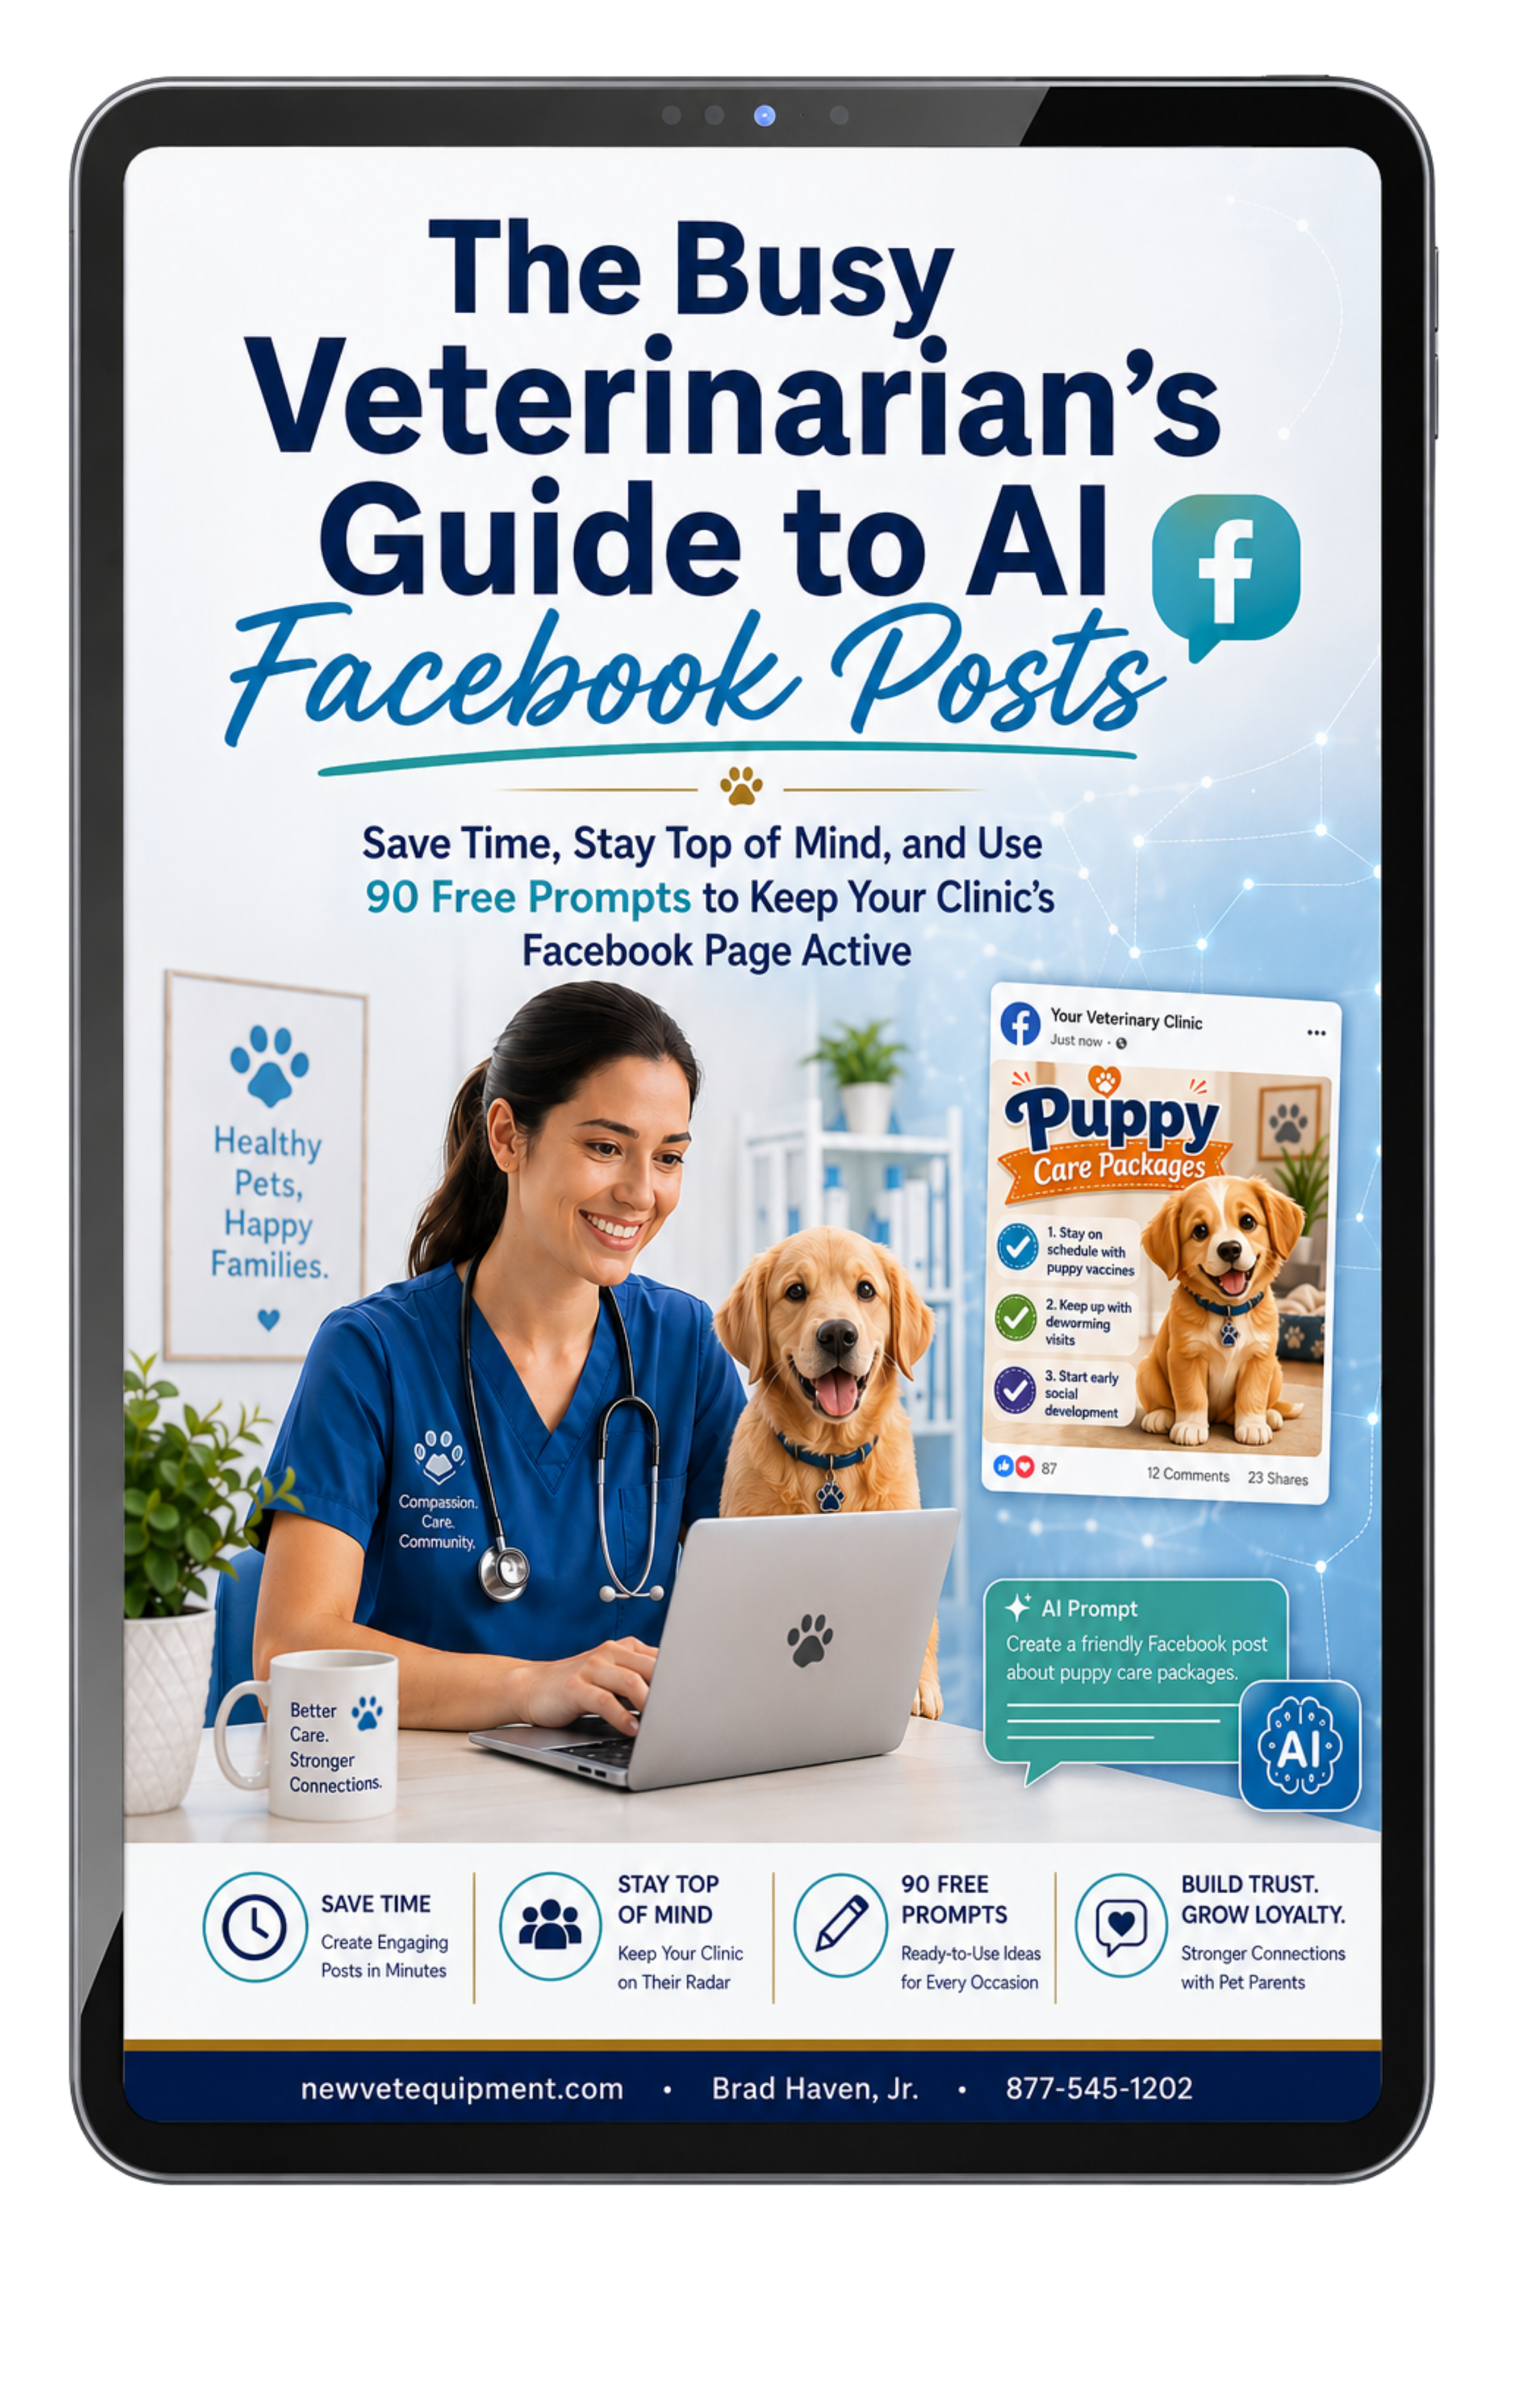
90 Free Facebook Post Prompts
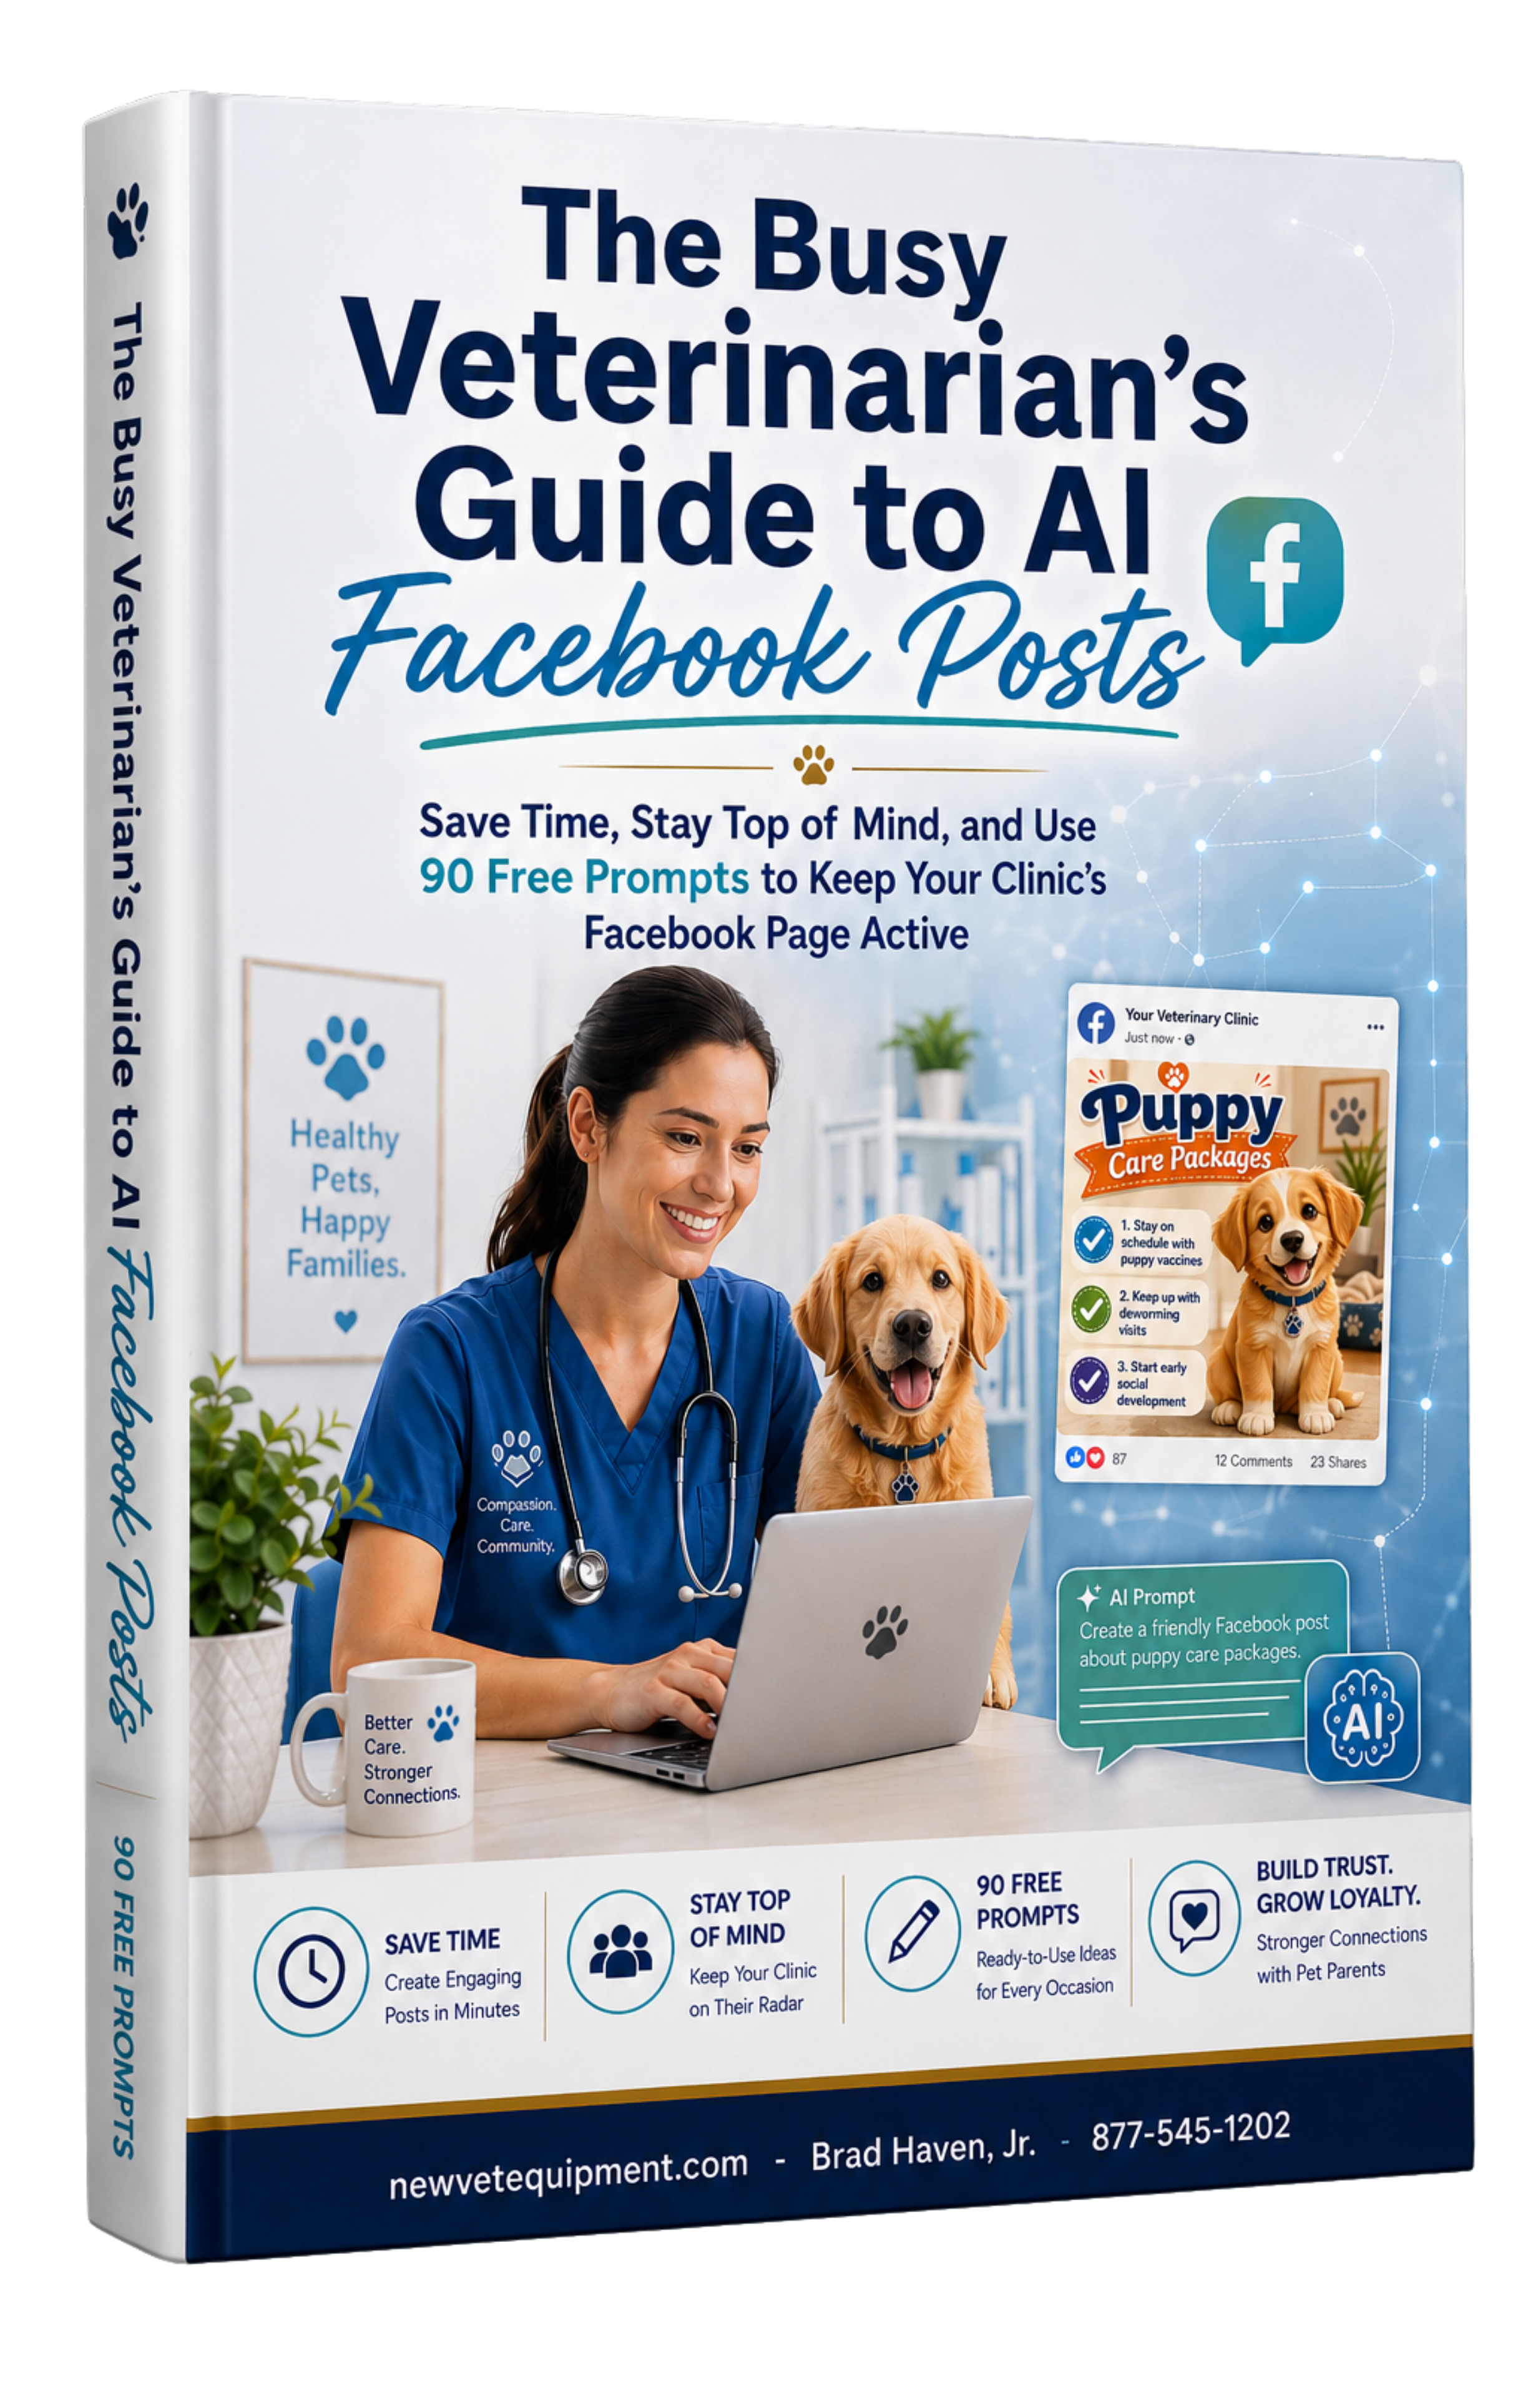
Free ebook
90 Free Facebook Post Prompts for Veterinary Clinics
Many veterinary clinics want to post more often on Facebook.
But the hard part is knowing what to say.
That blank screen can slow everything down.
This free ebook solves that problem.
It gives veterinary clinics 90 ready-to-use Facebook post prompts that can be copied, customized, scheduled, and reused.
What is inside the ebook?
The ebook includes a simple system for creating Facebook posts with AI.
Inside, you get:
A reusable master prompt
90 veterinary Facebook post ideas
A simple posting system
Tips for scheduling and recycling content
Practical reminders about reviewing AI posts before publishing
The goal is simple: help your clinic stay visible without making social media feel like a daily chore.
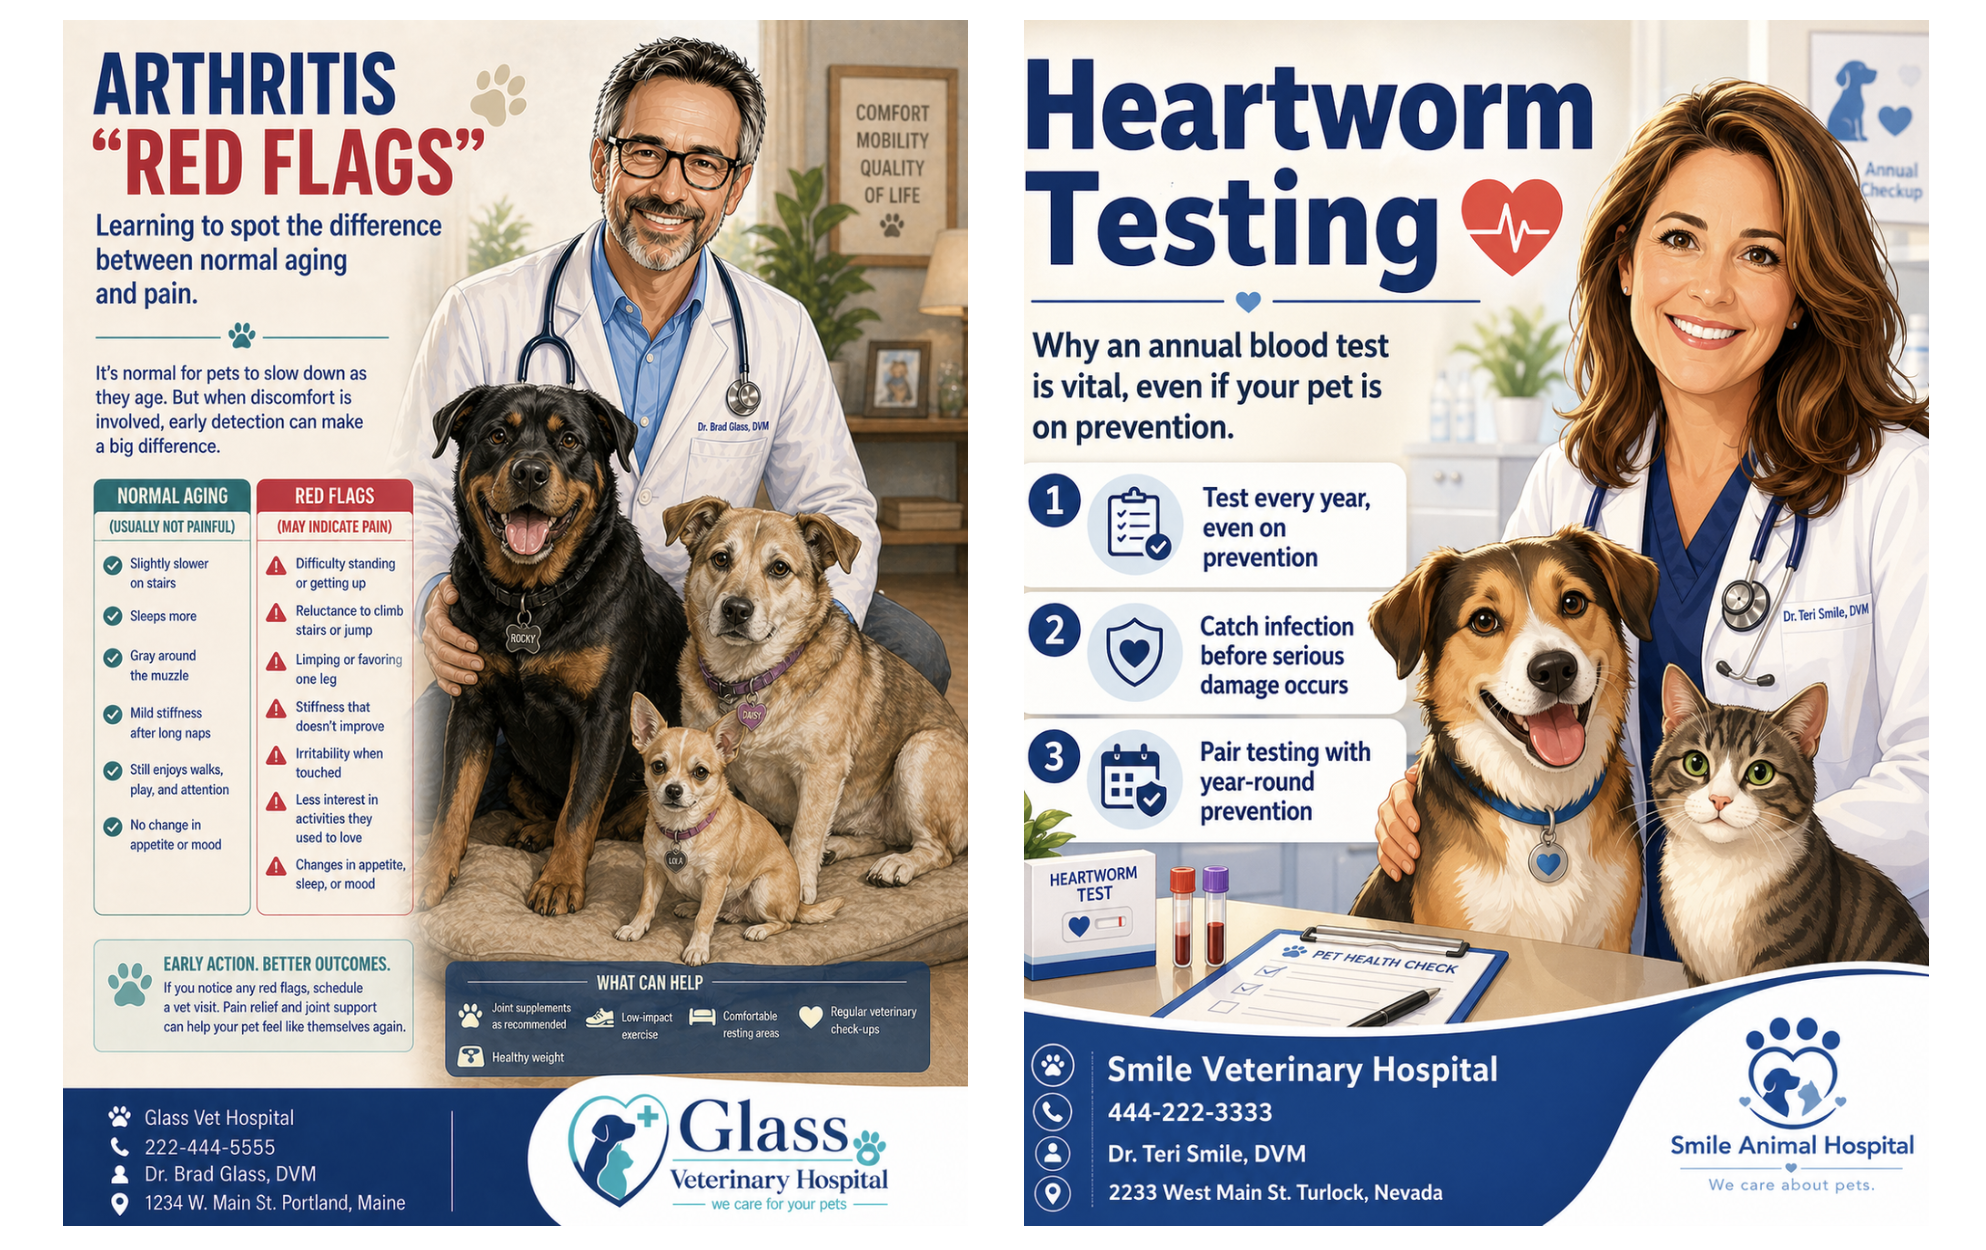
What kind of posts can you create?
The prompts cover real veterinary topics that pet owners care about.
Topics include:
Puppy care
Kitten care
Wellness exams
Vaccines
Dental care
Parasite prevention
Senior pet care
Surgery prep
Heatstroke prevention
Toxic foods
Urgent care reminders
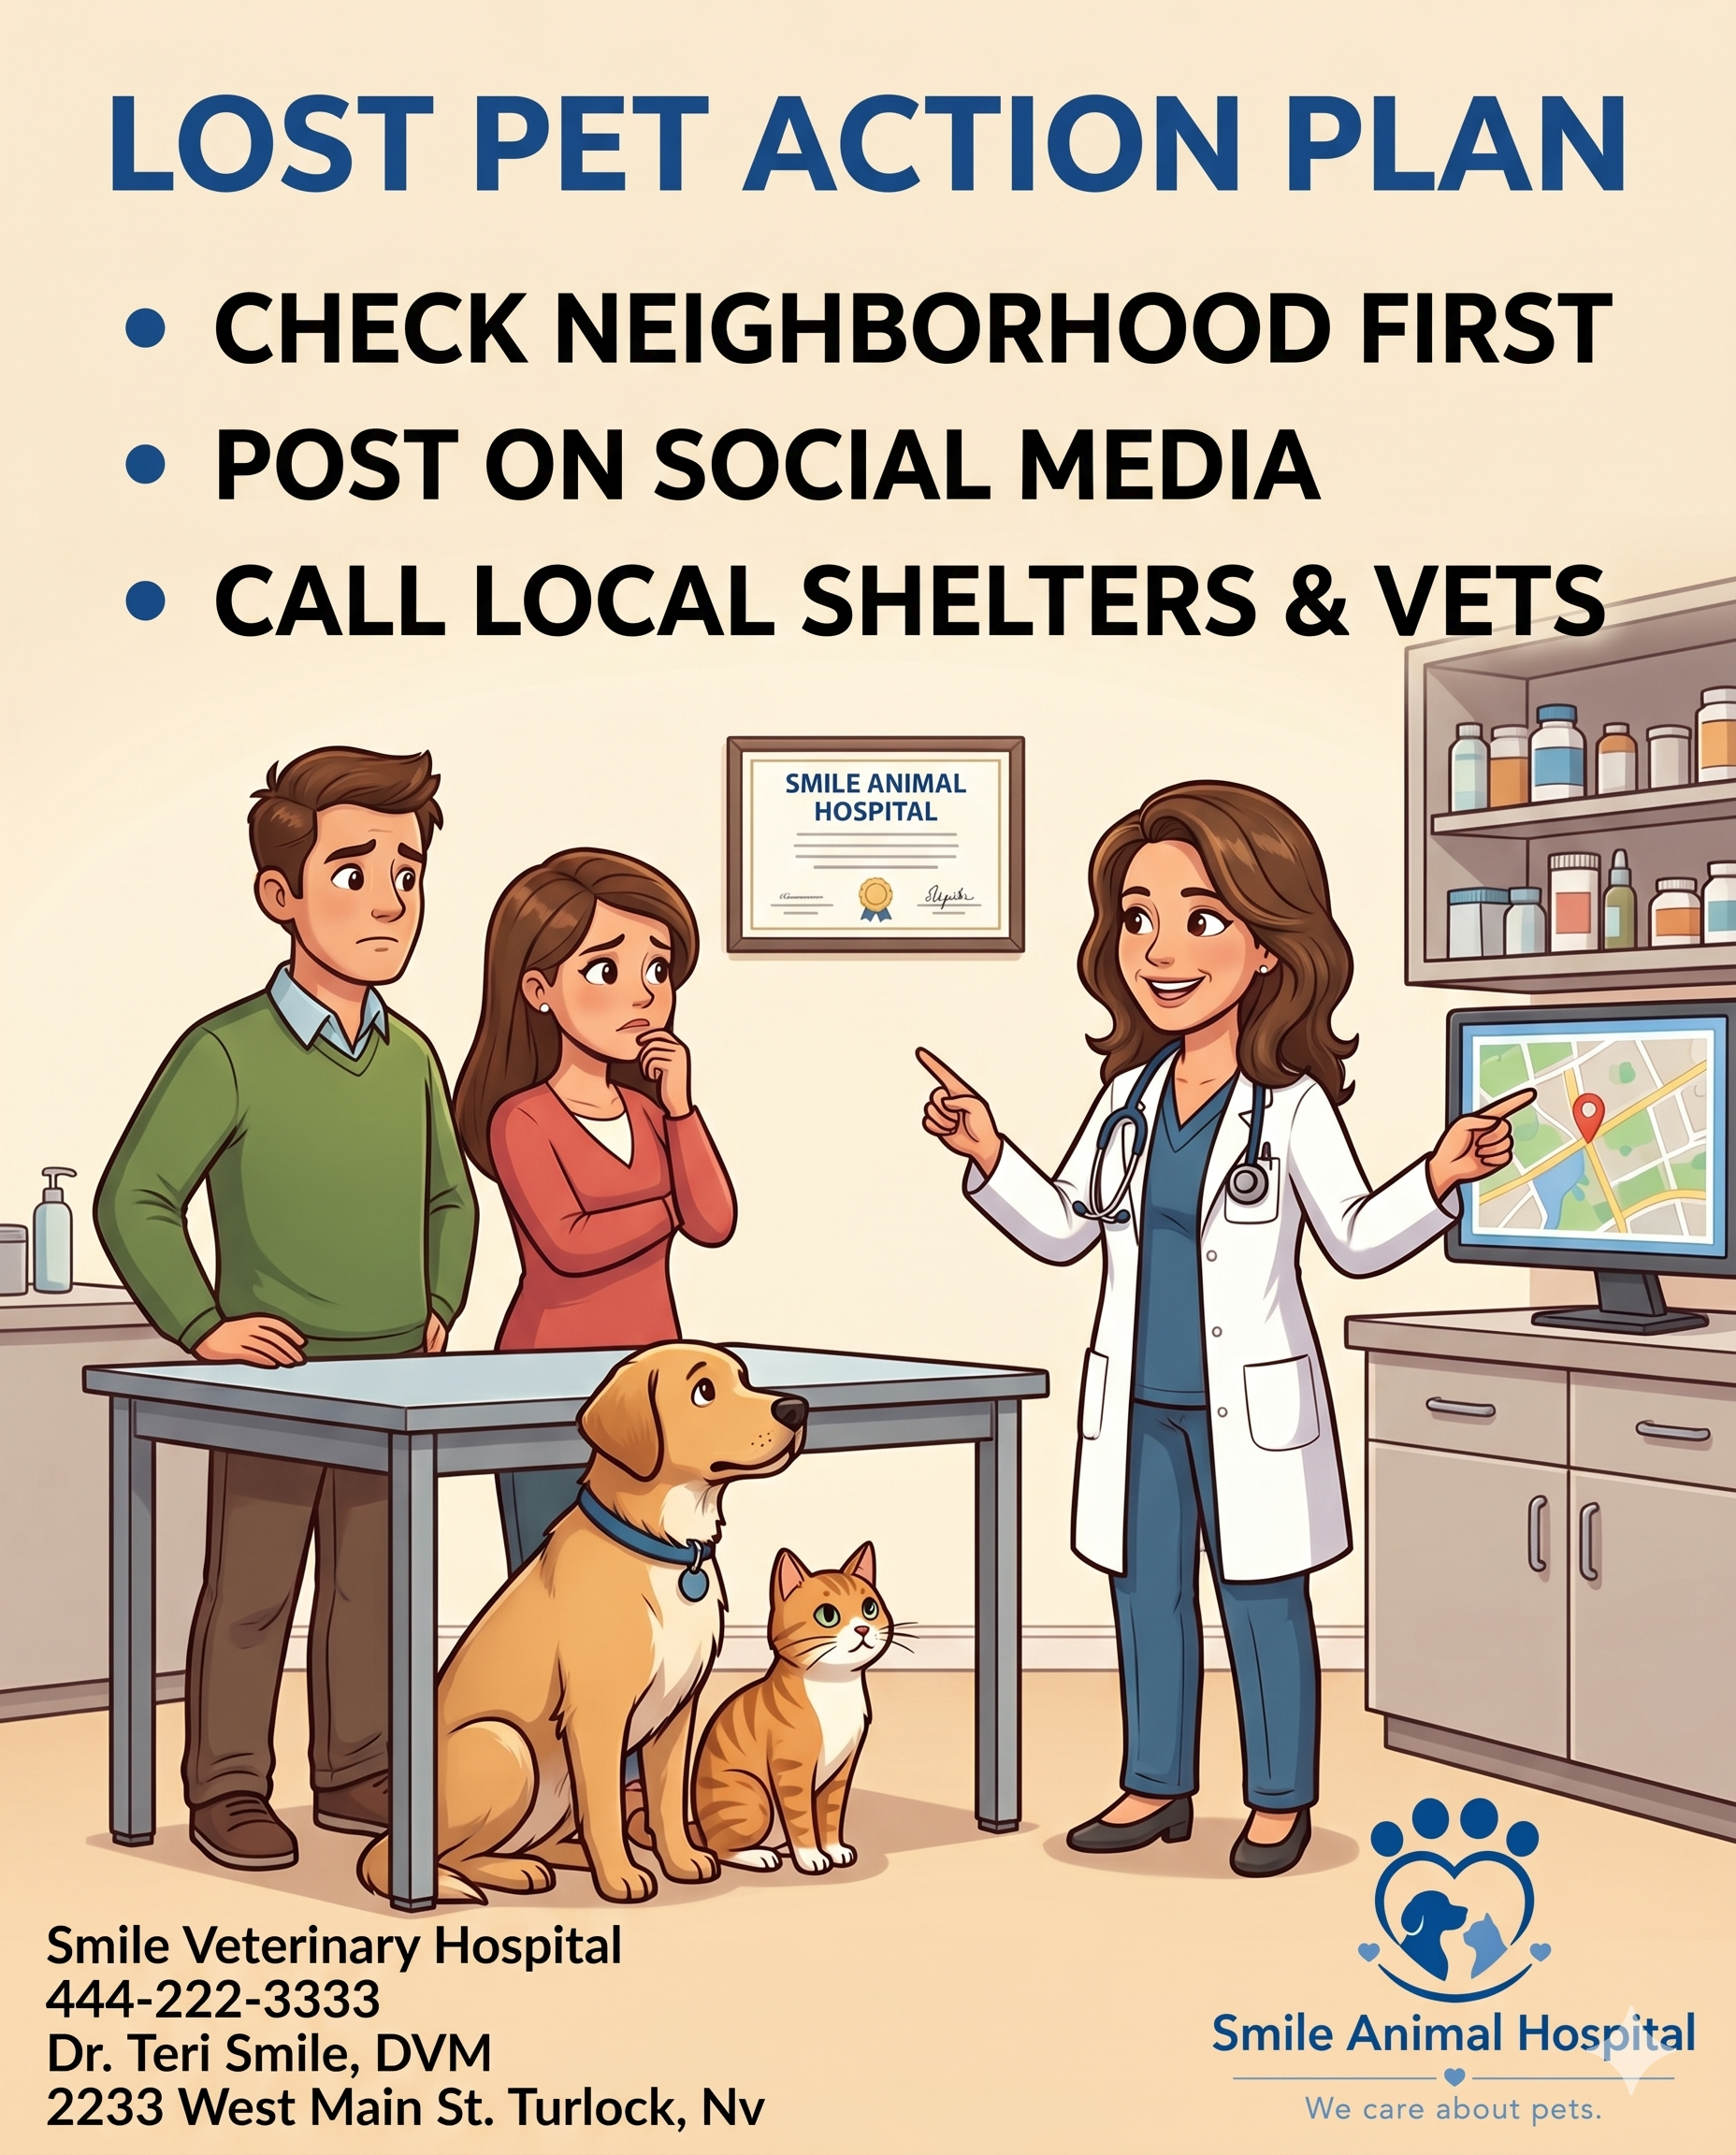
Lost pet safety
Team appreciation
These are helpful, practical topics that keep your clinic visible and useful in a pet owner’s Facebook feed.
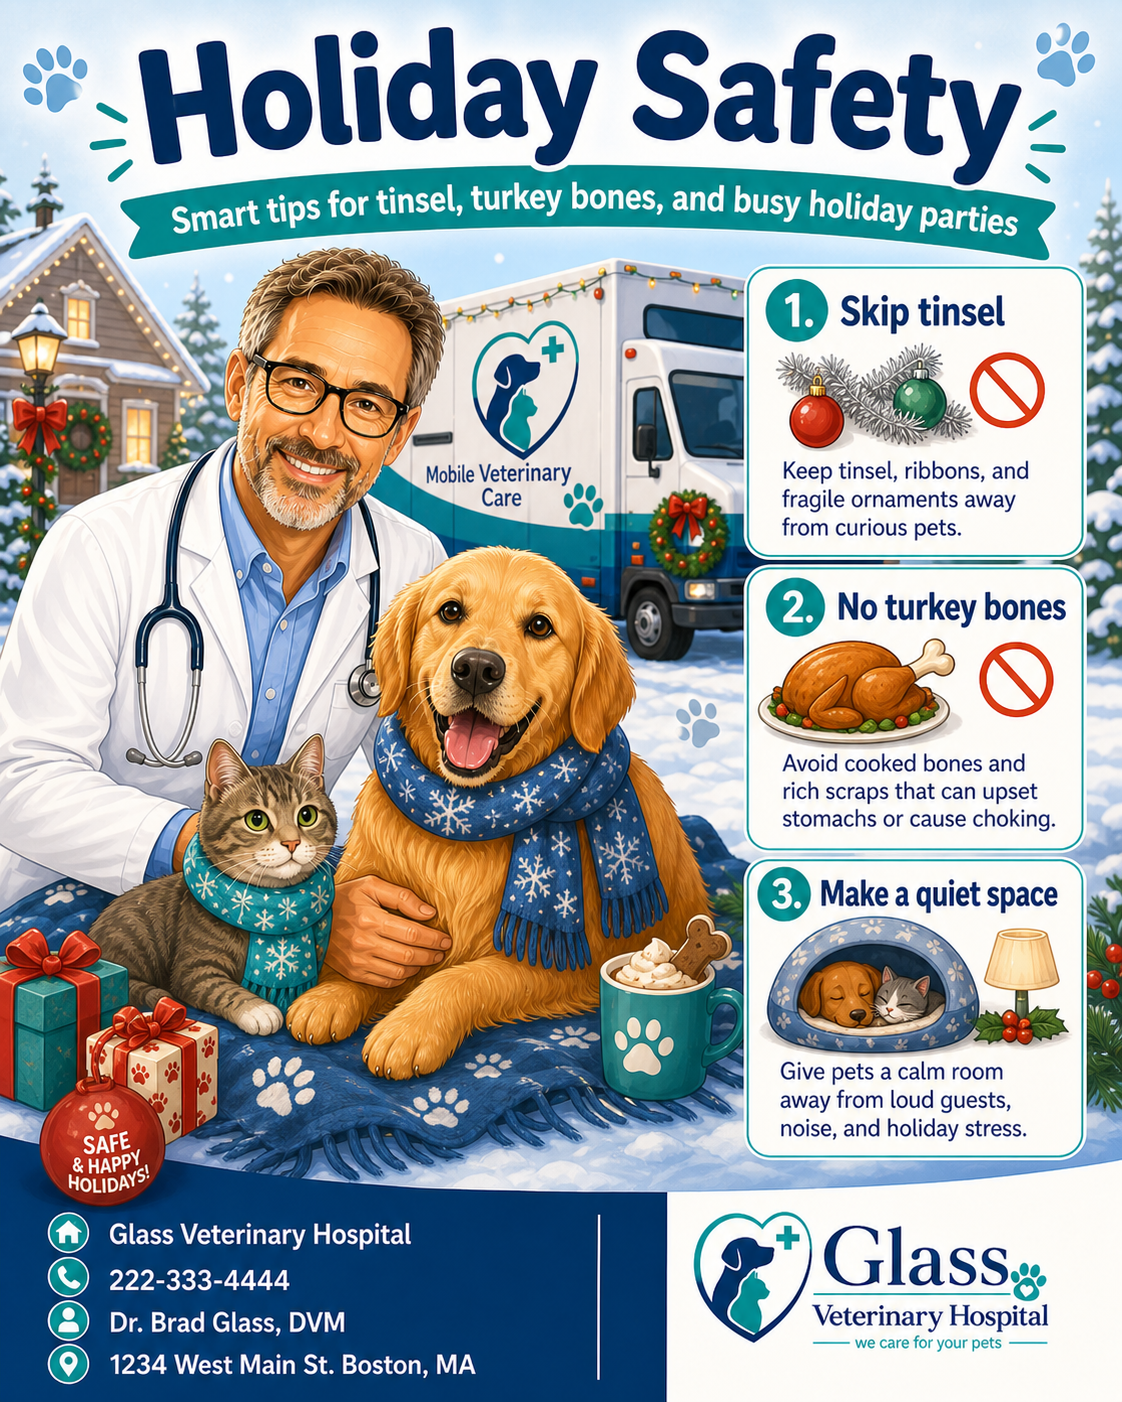
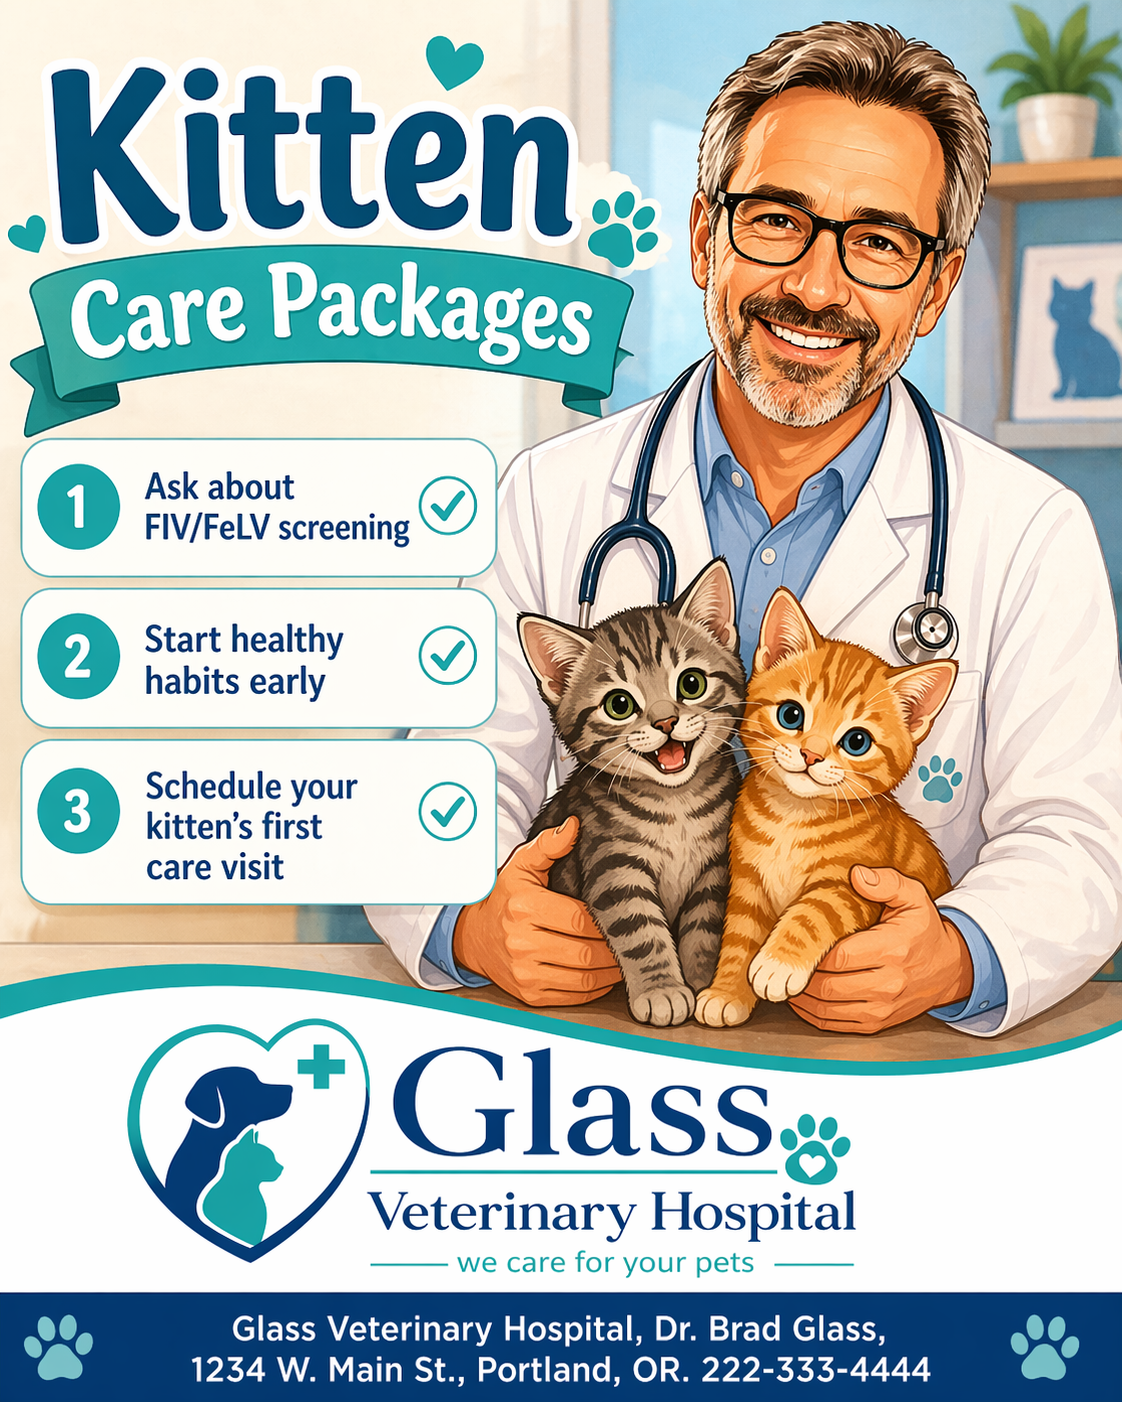
Why image posts work well
Facebook posts do not need to be complicated.
A strong image post can quickly convey a single helpful idea.
The best posts are often:
Short
Friendly
Easy to scan
Visually clear
Focused on one topic
Helpful to pet owners
A simple checklist can work very well.
For example:
Watch for warning signs
Call your vet when needed
Keep preventive care current
That kind of content is easy for pet owners to understand and remember.
AI can help you move faster, and your clinic should always review the final post.
Before publishing, check:
Medical accuracy
Clinic voice
Spelling
Logo placement
Phone number
Address
Any wording that could sound like individual medical advice
Let AI help with speed. Let your clinic protect quality.
Your clinic does not need to reinvent Facebook every week.
Start with good prompts.
Create useful posts.
Schedule them.
Recycle the best ones.
Keep showing up.
That is how your clinic can stay visible without adding more stress to an already busy week.
Click here to download the free ebook and get 90 free Facebook post prompts your veterinary clinic can start using today.

The 90-Post Facebook System
How to Build a Simple 90-Post Facebook System for Your Veterinary Clinic
Posting on Facebook does not have to feel random.
It does not have to be rushed.
It does not have to depend on someone “remembering” to post.
With the right system, your clinic can stay visible without having to start from scratch every day.
The simple math
Here is an easy system:
3 posts per day
5 days per week
15 posts per week
6 weeks = 90 posts
That gives your clinic a full library of useful Facebook content.
That is not random posting.
That is a real content system.
Why this works
Most veterinary topics are evergreen.
That means they stay useful over time.
Examples include:
Wellness exams
Vaccines
Parasite prevention
Dental disease
Heat safety
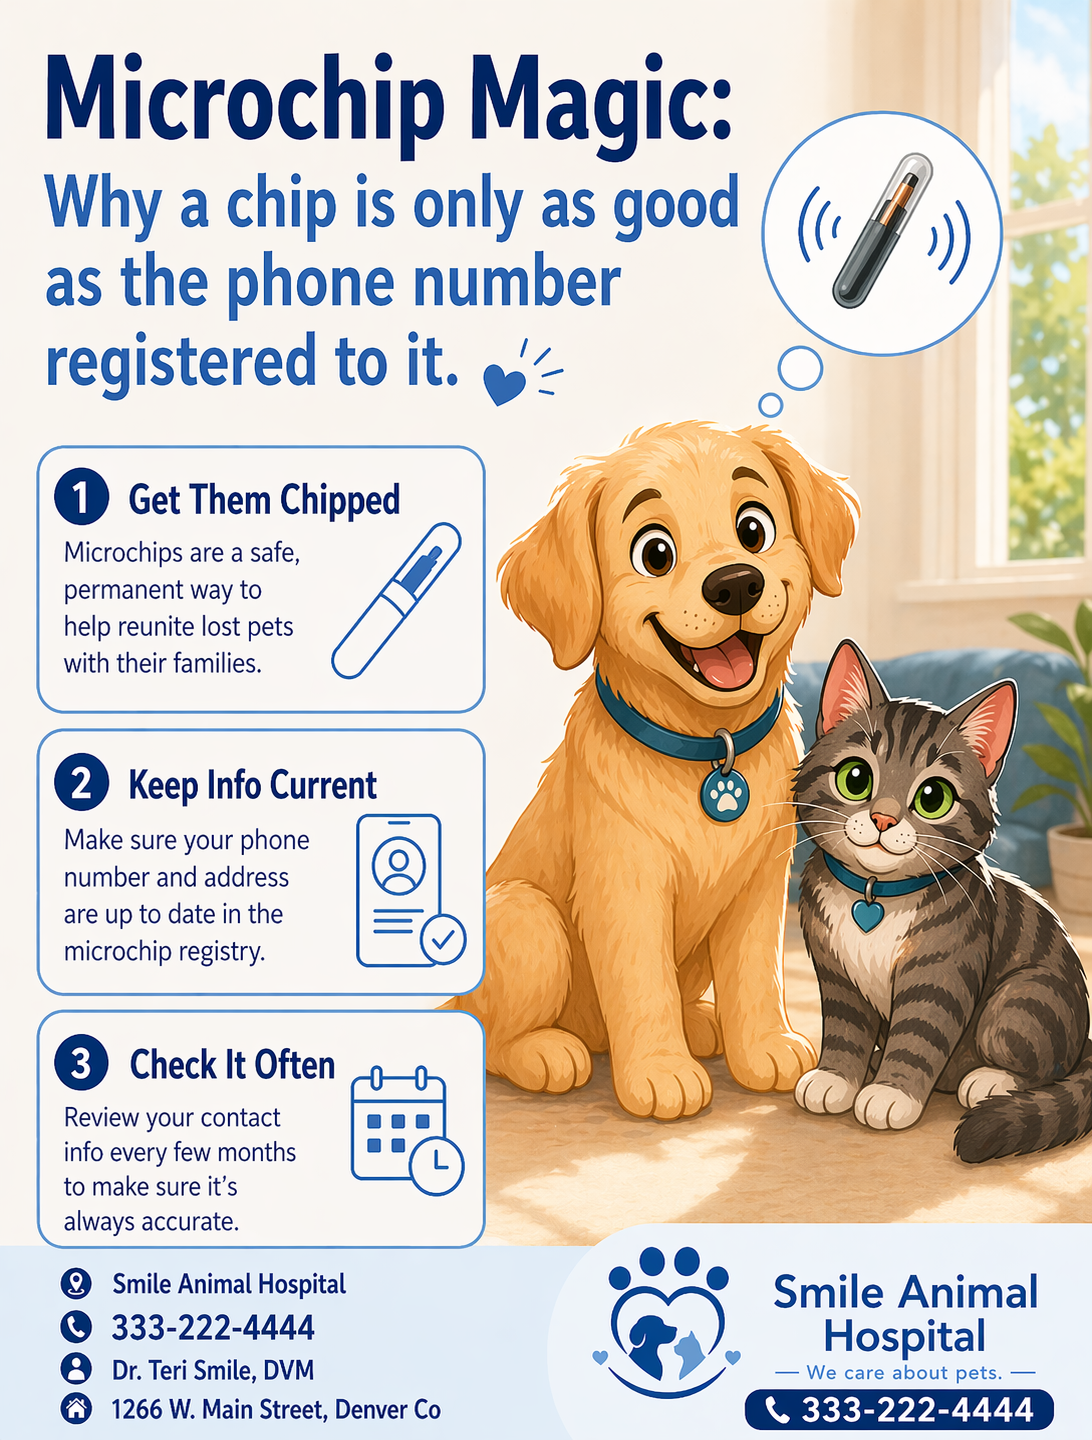
Microchips
Toxic foods
Senior pet care
Surgery prep
Lost pet reminders
These topics do not expire after one post.
You can reuse them later with a new image, headline, caption, or seasonal angle.
That is not lazy. That is smart.
The content loop
Once you create your 90 posts, number them.
Post #1.
Post #2.
Post #3.
And so on.
Then schedule them in Facebook’s scheduler.
When you reach post #90, start again with post #1.
You can update, refresh, or improve posts as needed.
What AI does
AI helps create the content.
It can help you:
Create the first draft
Turn one topic into several versions
Keep the wording simple
Create short checklists
Make posts more scan-friendly
Save time
What your clinic does
Your clinic still approves the final post.
Before publishing, ask:
Is this accurate?
Is it easy to understand?
Is it friendly and helpful?
Does it sound like our clinic?
Did we avoid individual medical advice?
Is the spelling correct?
Is the phone number correct?
Is the logo correct?
AI helps create. Your clinic protects trust.
The bottom line is consistency works.
When pet owners see helpful posts from your clinic again and again, your clinic stays top of mind.
You do not need a complicated marketing plan.
You need a simple content library, a schedule, and a repeatable process.
Want the full system? Click here to download the free ebook with 90 ready-to-use Facebook post prompts for veterinary clinics.

AI Helps Veterinary Clinics Stay Visible
How AI Helps Veterinary Clinics Stay Visible on Facebook
Most veterinary clinics know they should post on Facebook more often.
But in the real world, social media often gets pushed aside.
Appointments come first.
Surgeries come first.
Phone calls come first.
Emergencies come first.
The problem is not that your clinic has nothing to say.
The problem is finding the time to say it.
That is where AI can help.
The big idea
AI can help your clinic create Facebook posts faster, easier, and more consistently.
It can help you:
Brainstorm post ideas
Write captions
Turn one topic into several posts
Simplify pet care topics
Avoid starting from a blank screen
Stay active without spending hours every week
The goal is not to replace your team.
The goal is to give your team a faster starting point.
Why Facebook still matters
Many pet owners may not visit your website every week.
But they do scroll Facebook.
That gives your clinic a simple way to stay visible between appointments.
Helpful Facebook posts can remind pet owners about:
Wellness exams
Vaccines
Parasite prevention
Dental care
Senior pet needs
Seasonal safety
When to call the vet
Visibility builds familiarity.
Familiarity builds trust.
Trust helps pet owners think of your clinic first.
Keep it simple
A good Facebook post does not need to be long.
It needs to be:
Clear
Friendly
Useful
Easy to read
Accurate
Consistent with your clinic’s voice
Pet owners are busy. They do not need a lecture.
They need quick, helpful reminders that make pet care easier.
AI is a tool, not a veterinarian
AI should help with writing, organizing, and creating first drafts.
It should not diagnose a pet.
It should not give individual medical advice.
It should not replace your clinic’s judgment.
Best rule: Let AI create the first draft. Let your clinic approve the final version.
Before anything goes live, review it carefully.
Check the facts.
Check the tone.
Check the spelling.
Check the clinic name, phone number, address, and logo.
Small mistakes matter online.
The bottom line
Your clinic does not need to become a media company.
You just need a simple way to stay visible, helpful, and consistent.
AI can make Facebook posting easier.
A good prompt can make it faster.
A repeatable system can make it something your clinic actually maintains.
Want the easy way to start? Click here to download the free ebook with 90 ready-to-use Facebook post prompts for veterinary clinics.
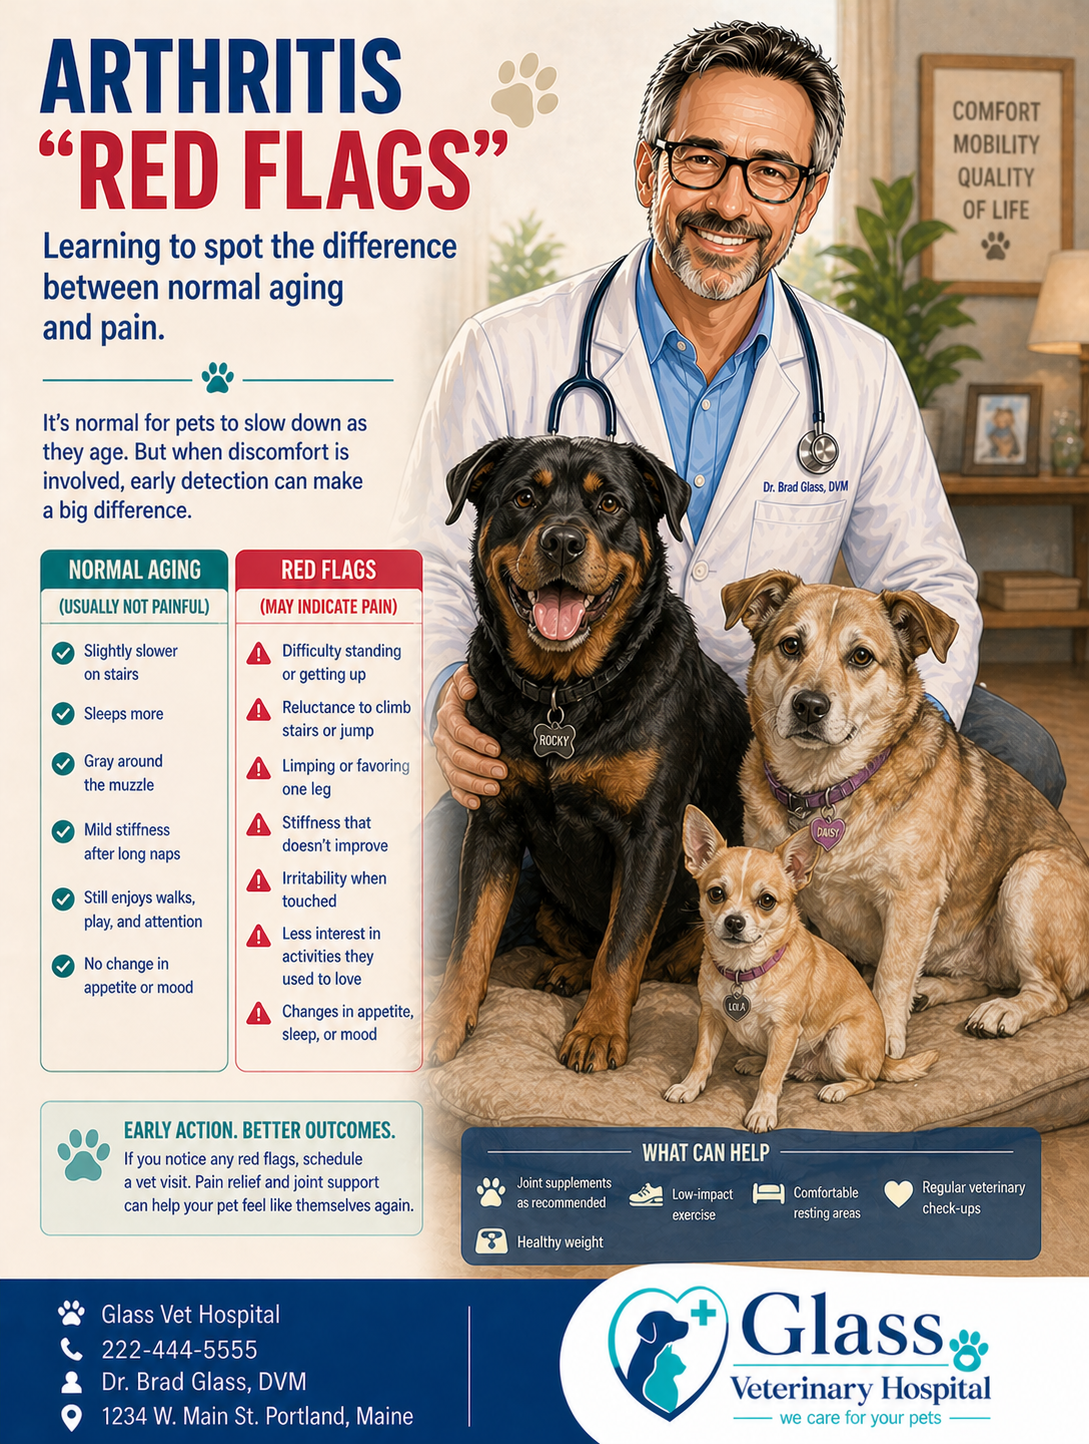
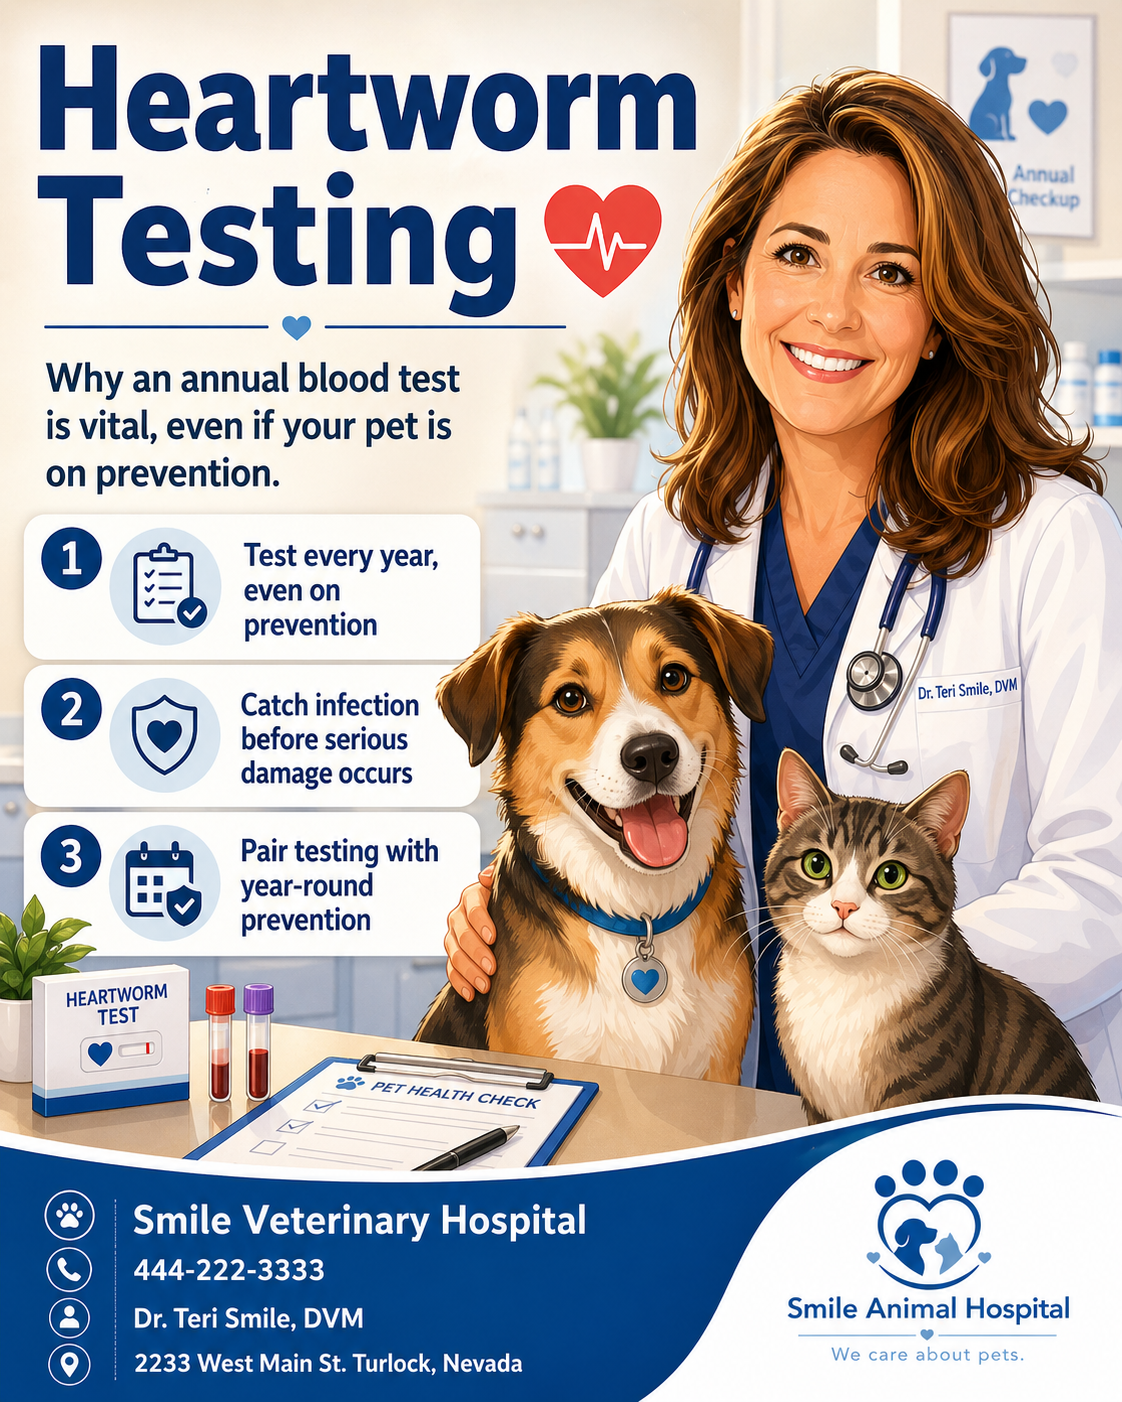
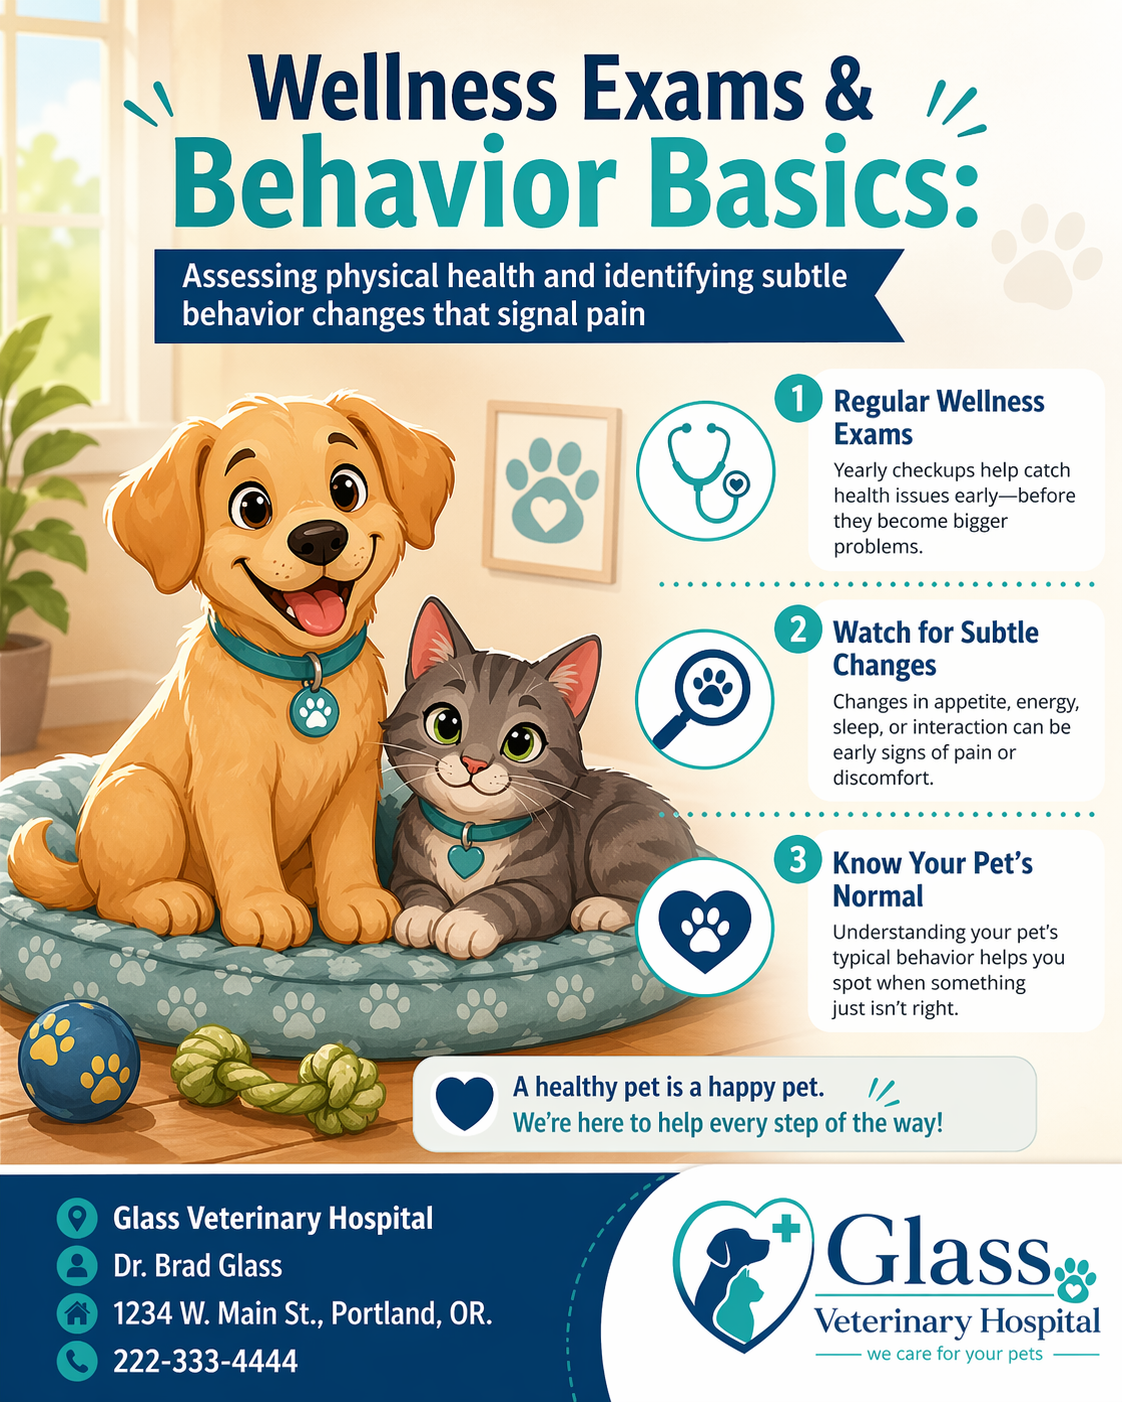
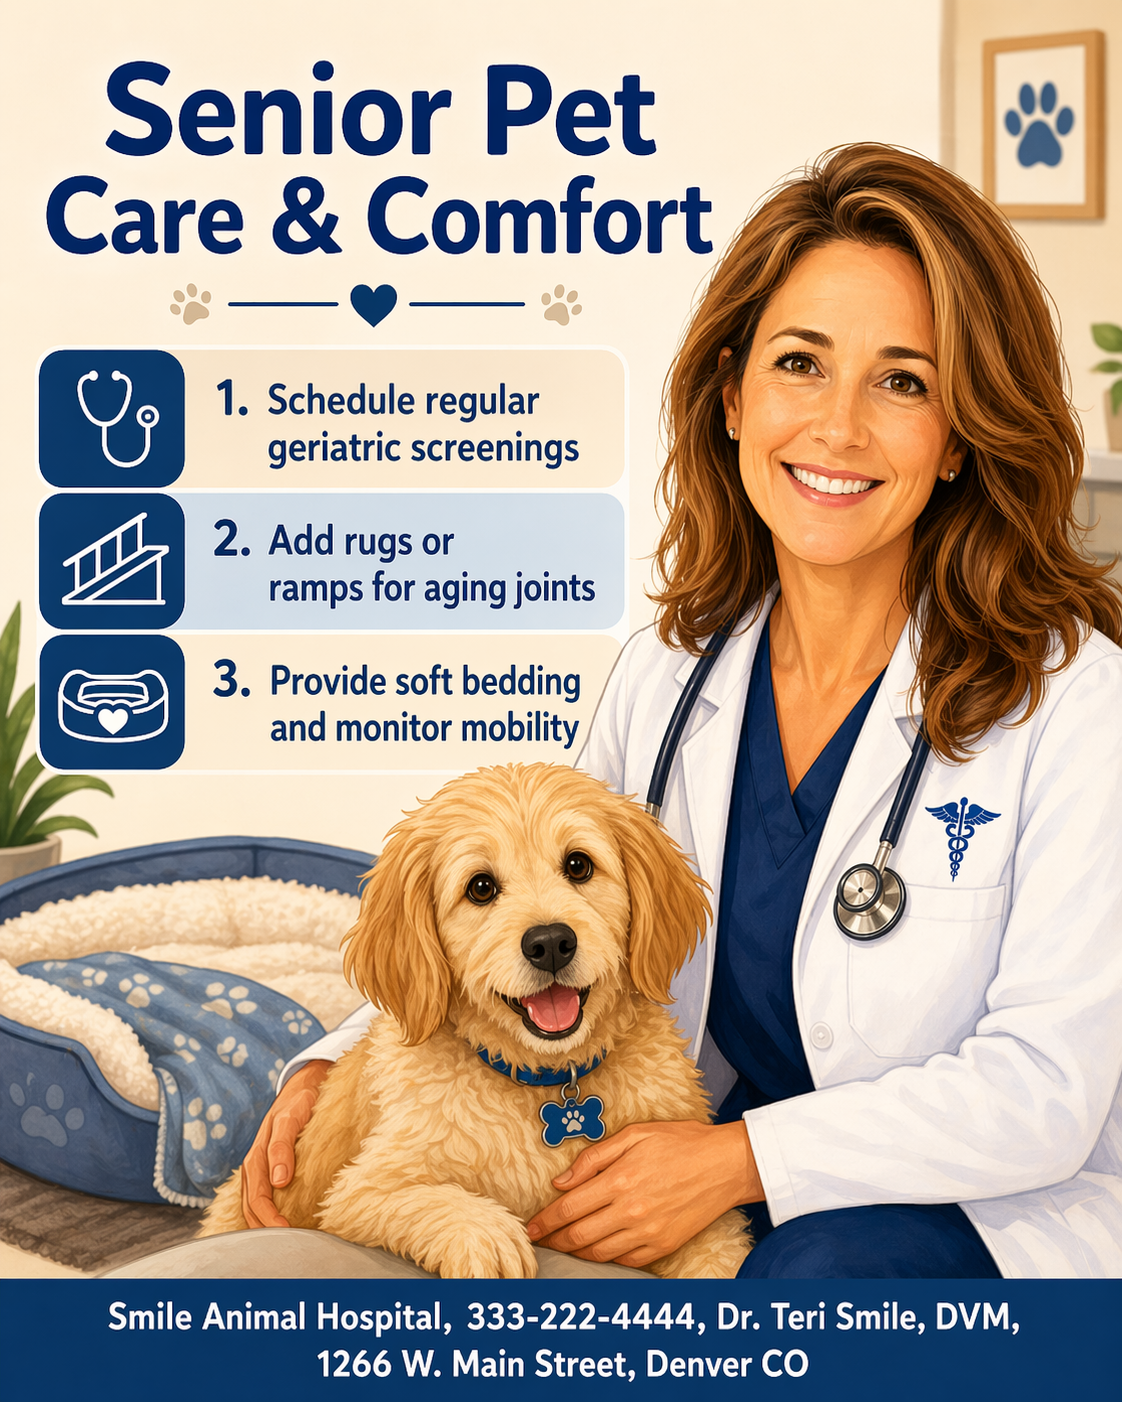
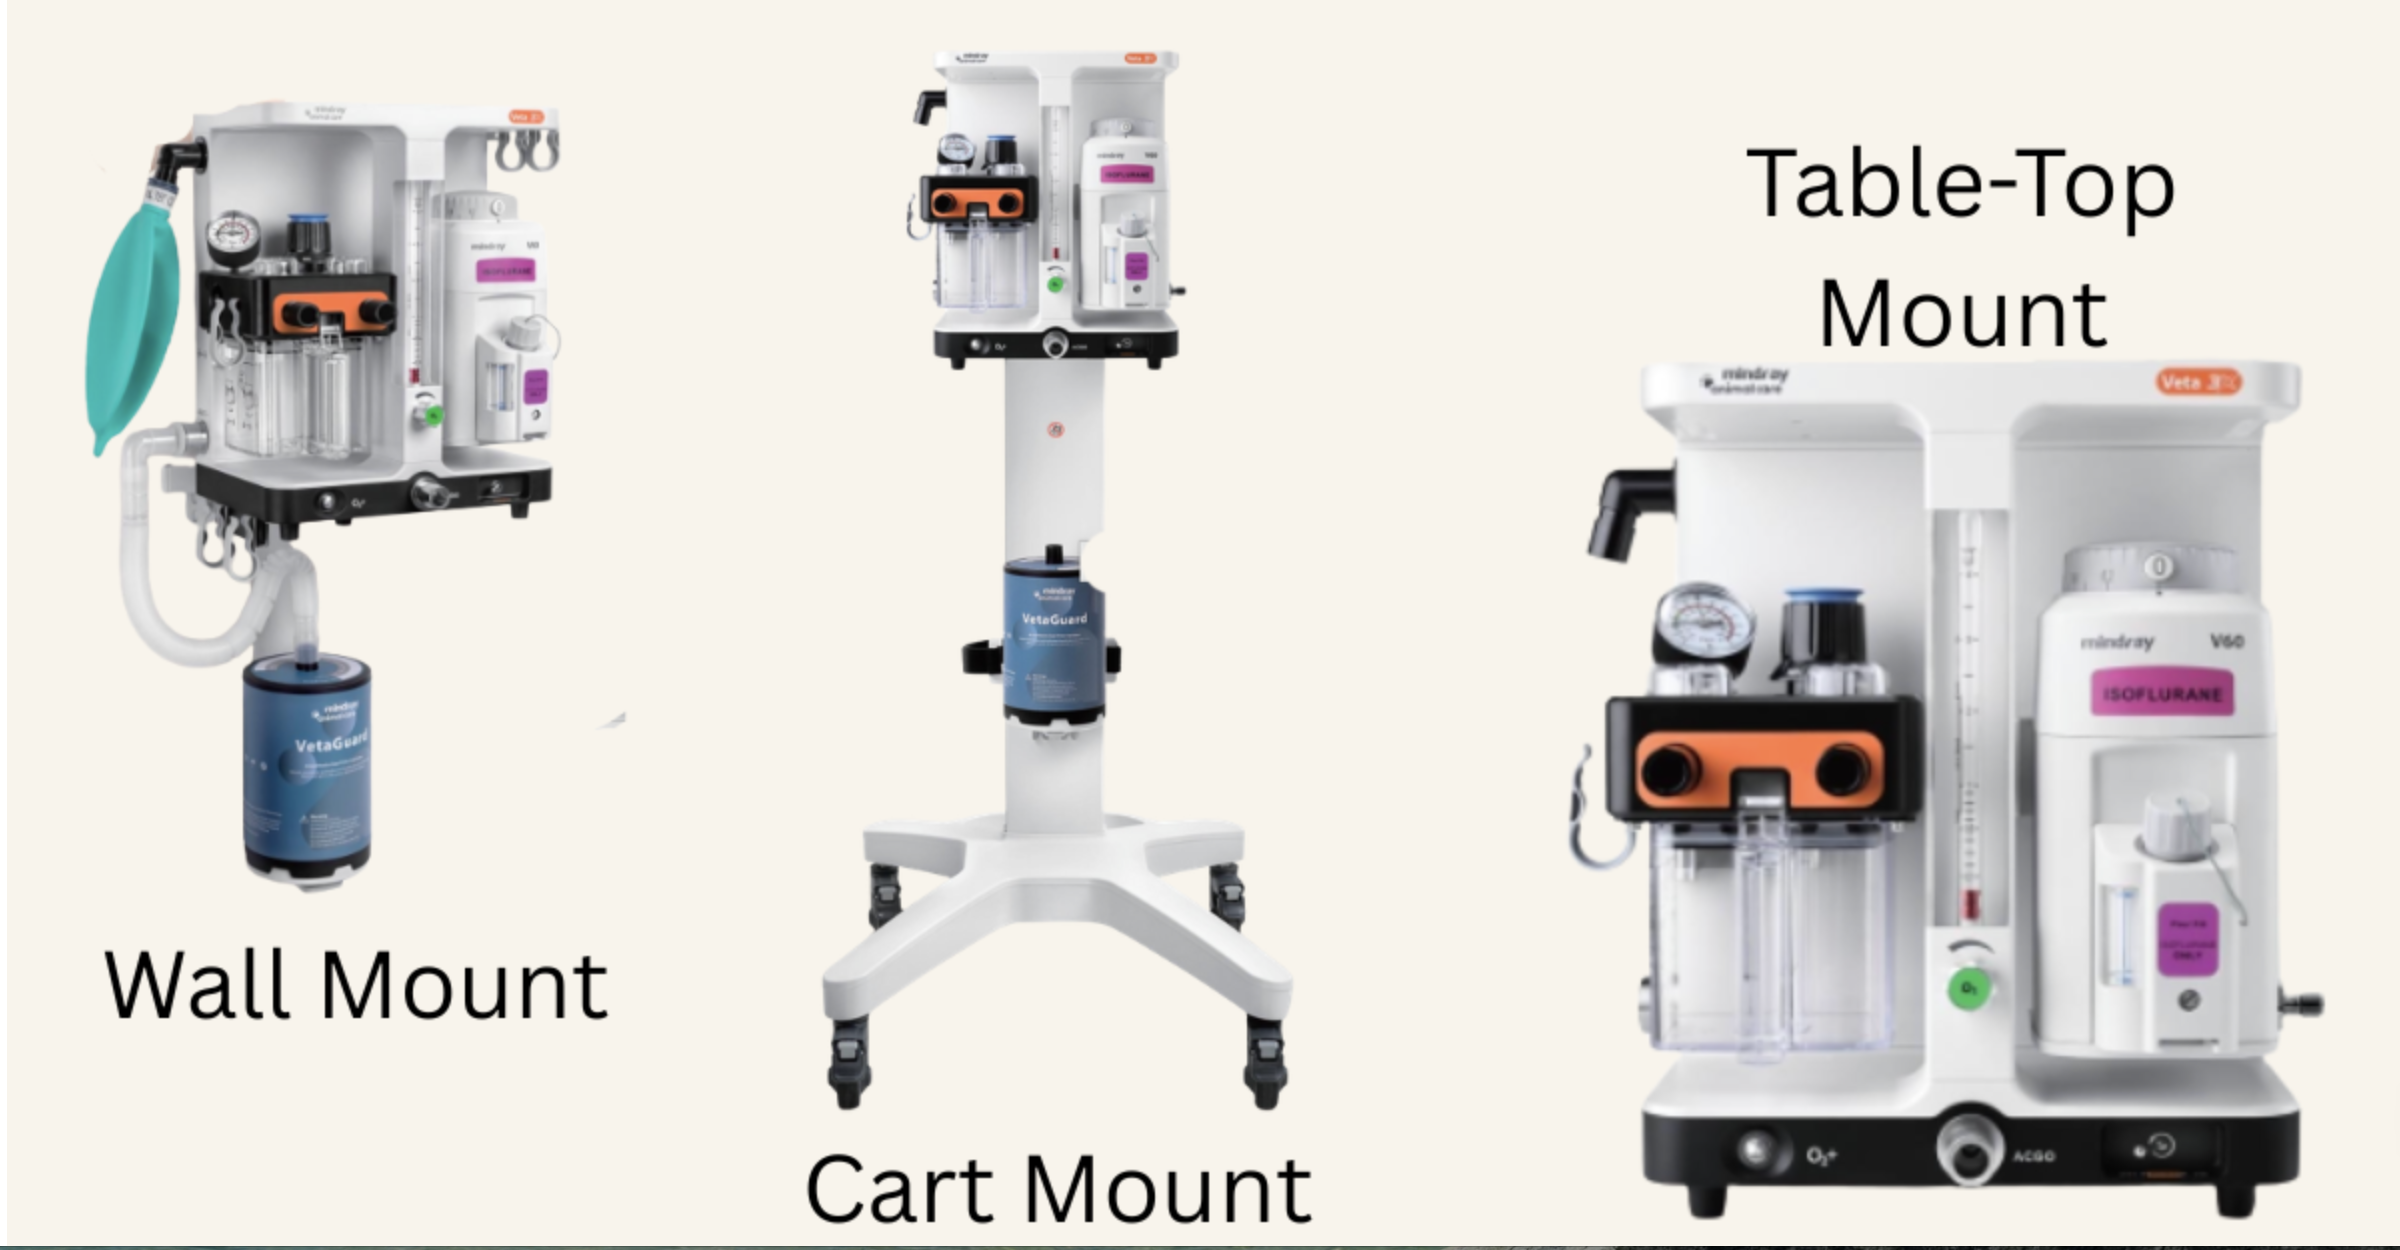
Built for Busy Surgery Days: Making the Most of the Veta 3X in High-Volume Veterinary Practices
In a practice where surgery days stack up quickly, and anesthesia is part of the daily rhythm, your equipment has to do more than just function. It needs to keep up with the pace.
When you’re moving from one procedure to the next, efficiency, consistency, and ease of use start to matter just as much as performance.
That’s where a system like the VETA 3X really supports a high-volume environment, especially when it’s set up and used intentionally.
Keeping Turnover Smooth Between Cases
In busy hospitals, the time between procedures can add up fast. Small inefficiencies like switching circuits, adjusting setups, or troubleshooting equipment can slow your entire day.
The VETA 3X has both rebreathing and non-rebreathing options readily available (including the Bain system setup), allowing for quicker transitions between patients of different sizes. Instead of reworking your setup each time, your team can move efficiently from one case to the next.
Tip: Keep commonly used circuits (like your Bain and standard rebreathing system) prepped and easily accessible. Even shaving a few minutes off each case can significantly improve overall flow.
Supporting Consistency Across Multiple Team Members
In high-volume settings, anesthesia isn’t managed by a single person; it’s often shared among technicians and doctors throughout the day. That makes equipment consistency especially important.
The VETA 3X layout and accessible controls help create a more consistent experience for everyone who uses it. When each team member knows exactly where to look and what to expect, it reduces variability in setup and monitoring.
Consideration: Standardize your anesthesia protocols alongside your equipment. When your machine and your processes align, it creates a smoother, safer experience across the board.
Reducing Setup Fatigue
On long surgery days, even experienced teams can feel the effects of repetition. Equipment that’s overly complex or difficult to handle increases the risk of small errors, especially later in the day.
A streamlined system with clearly organized components helps reduce that mental load. Features like the fixed-mount pour-fill vaporizer and simple hose connections mean fewer steps and less second-guessing during setup.
Tip: Build a quick pre-anesthesia checklist specific to your machine. This helps catch small issues early and keeps your team consistent, even during busy or fatiguing days.
Managing Smaller Patients Efficiently
High-volume practices often see a mix of routine procedures: spays, neuters, dentals, many involving smaller patients. Having a reliable non-rebreathing option readily available is essential.
The included Bain system kit and disposable Bain circuit make it easier to quickly set up for these cases without needing additional equipment or adjustments.
Consideration: Keep a dedicated small-patient anesthesia station or a similar setup if your caseload leans heavily in that direction. It minimizes switching and keeps your workflow tighter.
Planning for Maintenance Without Disruption
In a busy practice like yours, downtime isn’t just inconvenient; it can throw off your entire schedule. Reliable equipment helps, but proactive maintenance matters just as much.
The VETA 3X's simple design and accessible components make routine checks and maintenance more manageable, which is key when you’re relying on it daily.
Tip: Schedule brief, regular equipment checks (daily quick checks, weekly deeper reviews) rather than waiting for issues to arise. It’s far easier to prevent disruptions than to work around them mid-day. (see tips below)
The Bigger Picture
Your day already demands a lot: balancing a packed surgical schedule, managing your team, handling administrative responsibilities, and navigating the emotional weight of patient care.
The last thing you need is equipment that adds friction or uncertainty.
Your anesthesia machine should be one of the most dependable parts of your workflow, something your team can trust without hesitation. When that piece is solid, it’s one less thing pulling your attention, and one more way to support a smoother, more manageable day.
Daily Quick Checks (The "Pre-Flight" Routine)
Perform these every morning before the first patient is prepped.
Perform a High-Pressure Leak Test: Close the pop-off valve, occlude the Y-piece (with your thumb or a stopper), and use the $O_2$ flush to pressurize the system to 30 cmH2O. Ensure the pressure holds for at least 10–15 seconds.
Check Vaporizer Levels: Ensure the vaporizer is filled to the appropriate line. Verify the fill cap is tightened securely to prevent anesthetic gas leaks.
Inspect CO2 Absorbent: Check the color of the soda lime or Baralyme. If 1/3 to 1/2 of the canister has changed color (usually to purple), replace it immediately. Remember: color can "revert" overnight, so trust your usage logs if the granules look white but are exhausted.
Oxygen Supply Verification: Check your tank pressure or central line. Ensure you have more than enough volume to get through the day's scheduled procedures.
Verify Scavenging Connection: Ensure the scavenging interface (active or passive) is properly connected, and the charcoal canister (if used) is not expired by weight.
The "Open Pop-Off" Rule: Immediately after your leak test, re-open the pop-off valve. A closed pop-off valve is a leading cause of barotrauma.
Weekly Deeper Reviews
Schedule these for a specific day (e.g., Friday afternoon) to prep for the coming week.
1. Seal and O-Ring Inspection
Check the O-rings on the vaporizer mounting and the CO2 canister. Dry or cracked O-rings are the primary source of "phantom leaks" that are hard to find during daily checks.
Apply a tiny amount of medical-grade lubricant if seals appear dry.
2. Breathing Circuit & Bag Integrity
Fully extend your breathing hoses and check for small cracks or "milky" discoloration in the plastic.
Inflate your reservoir bags and check for brittleness or tiny pinholes, especially around the neck where they connect to the machine.
3. One-Way Valve (Flutter Valve) Inspection
Unscrew the clear domes over the inspiratory and expiratory valves.
Ensure the thin discs are clean, dry, and not "sticking" due to moisture or residue. A sticking valve can cause a patient to re-breathe $CO_2$.
4. Flowmeter Function
Turn the oxygen flowmeter up and down slowly. Ensure the bobbin or ball moves smoothly without sticking or "jumping," which can indicate debris in the flow tube.
5. Bain System / Non-Rebreathing Kit
Since the Veta 3X is often used for smaller patients, inspect the inner tube of the Bain circuit. Ensure it is not disconnected or kinked, as this can lead to a failure in delivering fresh gas to the patient.
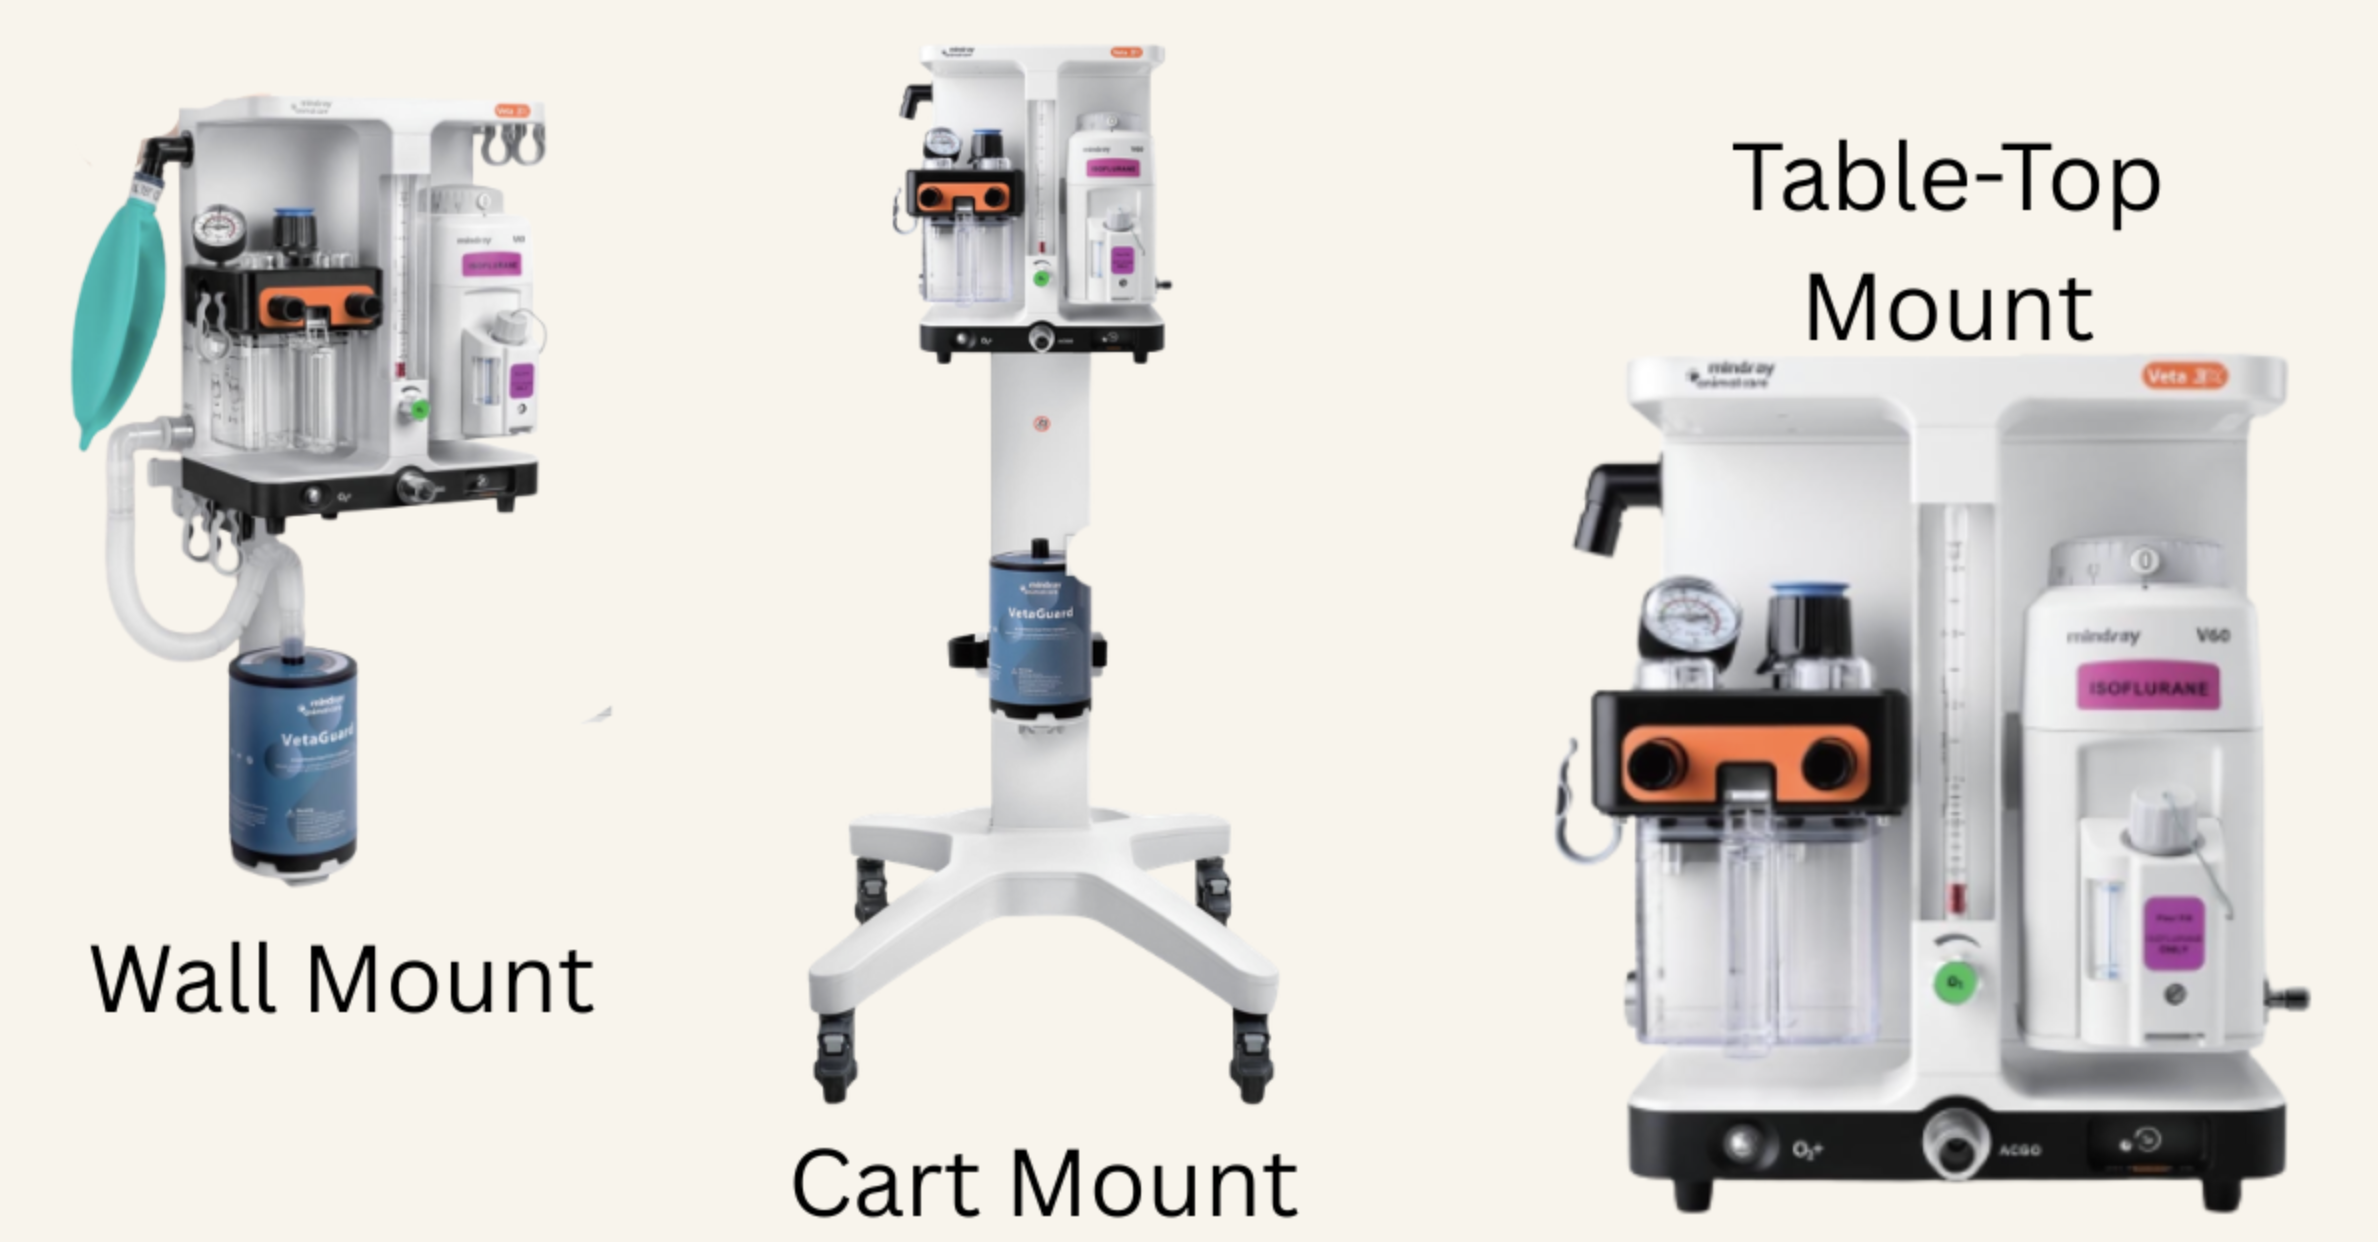
5 Factors That Make or Break Your Next Veterinary Anesthesia Machine Purchase

Veta 3X
Investing in a new anesthesia machine is one of those decisions that quietly shapes your entire surgical workflow. It’s so important to choose equipment your team can rely on every single day, across every patient, in every procedure.
If you’re in the process of evaluating options, here are five key factors worth paying close attention to.
Let’s dive in…
1. Reliability of Anesthetic Delivery
At the core of any anesthesia machine is its ability to deliver consistent, controlled anesthesia. Variability can directly impact patient stability, so, as you know, it’s not something to be taken lightly.
Look for systems with dependable vaporizers and pressure management features that help maintain steady anesthetic depth throughout a procedure.
A fixed-mount isoflurane vaporizer with a pour-fill system, like the one included with the Veta 3X, supports consistent output while minimizing handling complexity.
This is one area where simplicity and precision go a long way.
2. Compatibility with Your Patient Base
Not every practice has the same caseload, and your anesthesia machine should reflect that.
If you’re seeing a wide range of patients, from small cats and exotics to larger dogs, you’ll want flexibility in your breathing systems.
Machines that support both rebreathing and non-rebreathing setups allow you to adapt quickly without needing separate equipment. The inclusion of a Bain system kit and disposable Bain circuit makes it easier to safely anesthetize smaller patients without overcomplicating your setup.
Versatility here directly translates to smoother case flow.
3. Ease of Use for Your Team
Anesthesia is managed by a team, often in fast-paced environments. Intuitive, easy-to-use equipment reduces training time and helps minimize errors.
Features to look for:
Clearly labeled and accessible controls
Logical component layout
Straightforward switching between systems
When components like the APL valve, CO₂ absorber, and breathing circuits are easy to access and manage, your team can stay focused where it matters most…on the patient.
It’s also worth considering how well a new anesthesia machine will integrate into your existing workflow without slowing your team down.
The goal is to create a smoother, more predictable surgical environment. Equipment that’s quick to set up, easy to maintain, and intuitive to use can reduce delays between cases and help your team stay efficient throughout the day.
4. Included Components and Setup Readiness
One of the most overlooked factors when purchasing a new anesthesia machine is what actually comes with it. A more complete system, like one that includes:
Fixed mount Iso vaporizer (pour fill)
O₂ hose
US gas hoses (DISS/DISS)
Bain system kit
Disposable Bain circuit
…allows your team to get up and running quickly without sourcing additional parts or troubleshooting compatibility issues.
It’s a small detail that makes a big difference during setup.
5. Cost, Warranty, and Long-Term Value
Price always matters, but it should be evaluated alongside what you’re actually getting.
A system priced at $4,000 (including shipping) with a 3-year parts-only warranty offers a clear, predictable investment. Beyond the upfront cost, consider:
Expected lifespan of the equipment
Ease of maintenance
Availability of replacement parts
A well-balanced machine provides not just affordability, but dependable performance over time, without constant repairs or workarounds.
Reliability Where It Counts
Choosing the right anesthesia machine goes beyond specs on a page. It’s about finding a system that fits your patients, supports your team, and performs consistently under real clinical conditions.
When you evaluate options through that lens, reliability, flexibility, usability, completeness, and long-term value, you’re far more likely to land on a machine that truly supports your practice day in and day out.
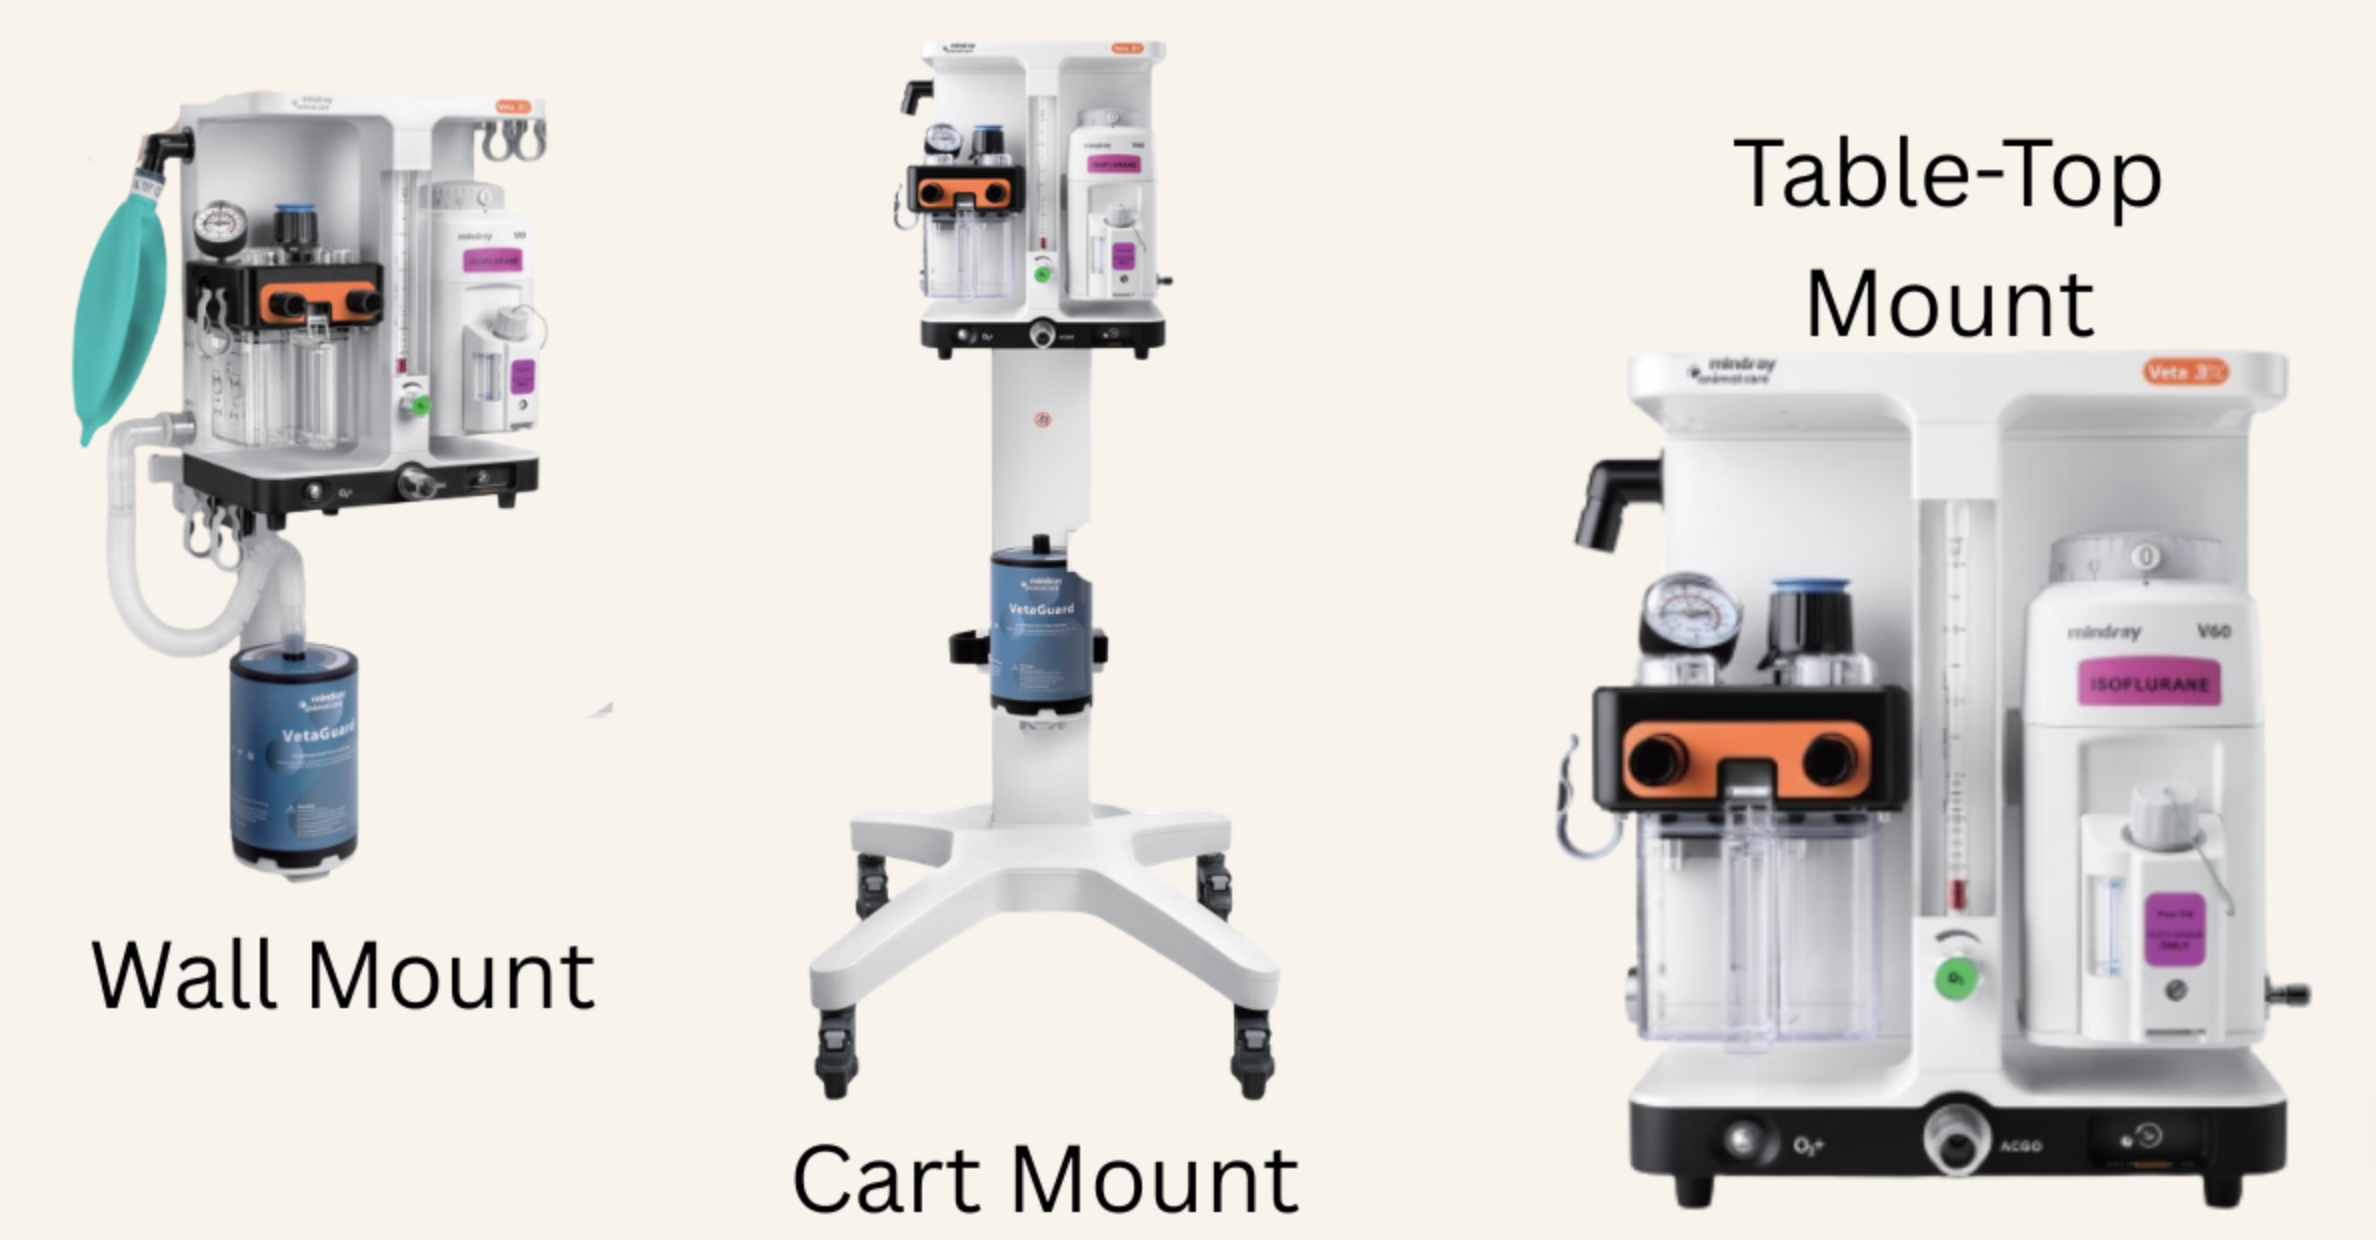
The Mindray Veta 3X: Reliable Anesthesia for Modern Veterinary Practices

As an experienced pro in veterinary surgery, you know that your anesthesia machine is a critical component of maintaining safe, controlled procedures.
When equipment is reliable, intuitive, and easy to integrate into the workflow, it supports patient safety and team efficiency.
That’s where the Mindray Veta 3X Anesthesia Machine fits in.
Before we dive into the details, let’s revisit the importance of choosing the right anesthesia machine for your practice.
Why Choosing the Right Anesthetic Machine Matters in Veterinary Practice
Anesthesia is not a one-size-fits-all process. Differences in patient size, species, and procedure type require equipment that can deliver precise, consistent control while adapting to a variety of clinical scenarios.
A well-matched machine supports accurate anesthetic delivery, effective ventilation, and safe pressure management, all while integrating smoothly into your team’s workflow.
For practice owners, it also plays a role in things like:
· Long-term reliability
· Maintenance costs
· Overall standard of care
Making it a foundational investment, not just another piece of equipment.
The Risks of Using Outdated Anesthetic Equipment in Veterinary Procedures
Using outdated anesthetic machines can introduce avoidable risks that impact both patient safety and clinical efficiency. Older equipment may lack modern safety features like:
Precise vaporizer calibration
Reliable pressure regulation
Effective leak detection
Increasing the likelihood of inconsistent anesthetic delivery.
Wear and degradation over time can also lead to equipment malfunction, gas leaks, or inaccurate monitoring, which could go unnoticed until they affect a procedure.
As standards of care continue to evolve, relying on aging equipment can make it more challenging to maintain predictable, controlled anesthesia across a wide range of patients and procedures.
A Practical, Streamlined Approach to Anesthesia
The Veta 3X is designed particularly for those working with limited space or lean teams. Its compact footprint allows it to integrate easily into existing treatment and surgical areas without extensive reconfiguration.
The system is intentionally straightforward, focusing on essential functionality like:
Consistent anesthetic delivery
Simple transitions between breathing systems
Clearly organized and accessible components
This design supports easy and efficient operation during procedures, especially in time-sensitive situations.
Built for Safety and Consistency
At the core of the Veta 3X is a fixed-mount isoflurane vaporizer with a pour-fill system, designed to deliver reliable anesthetic output. Key features that support patient safety include:
Adjustable APL valve for controlled pressure management
Visible and accessible breathing system components for monitoring
Integrated CO₂ absorber canister for effective gas management
These elements work together to promote consistent anesthetic depth and controlled delivery throughout procedures.
Designed for Everyday Veterinary Workflow
The Veta 3X incorporates design features that support daily use:
Organized hose and cable management to reduce clutter
Durable construction suited for high-use environments
Compatibility with both rebreathing and non-rebreathing systems
The included Bain system further supports flexibility, particularly for smaller patients requiring non-rebreathing anesthesia.
What’s Included
This configuration provides a complete anesthesia setup:
Fixed mount Iso vaporizer (pour fill)
O₂ hose
US gas hoses (DISS/DISS)
Bain system kit for Veta 3X
Disposable Bain circuit (1.2M)
These all work together, reducing the need for additional sourcing or compatibility concerns.
Cost and Warranty
The Veta 3X is available for $4,000, including shipping, and includes a 3-year parts-onlywarranty. This positions it as a practical option for:
New or expanding veterinary practices
Additional surgical suites
Facilities replacing older anesthesia equipment
The Mindray Veta 3X Anesthesia Machine offers a straightforward, reliable solution for veterinary anesthesia. Its design emphasizes essential functionality, ease of use, and compatibility with common clinical workflows, supporting consistent performance in a variety of practice settings.
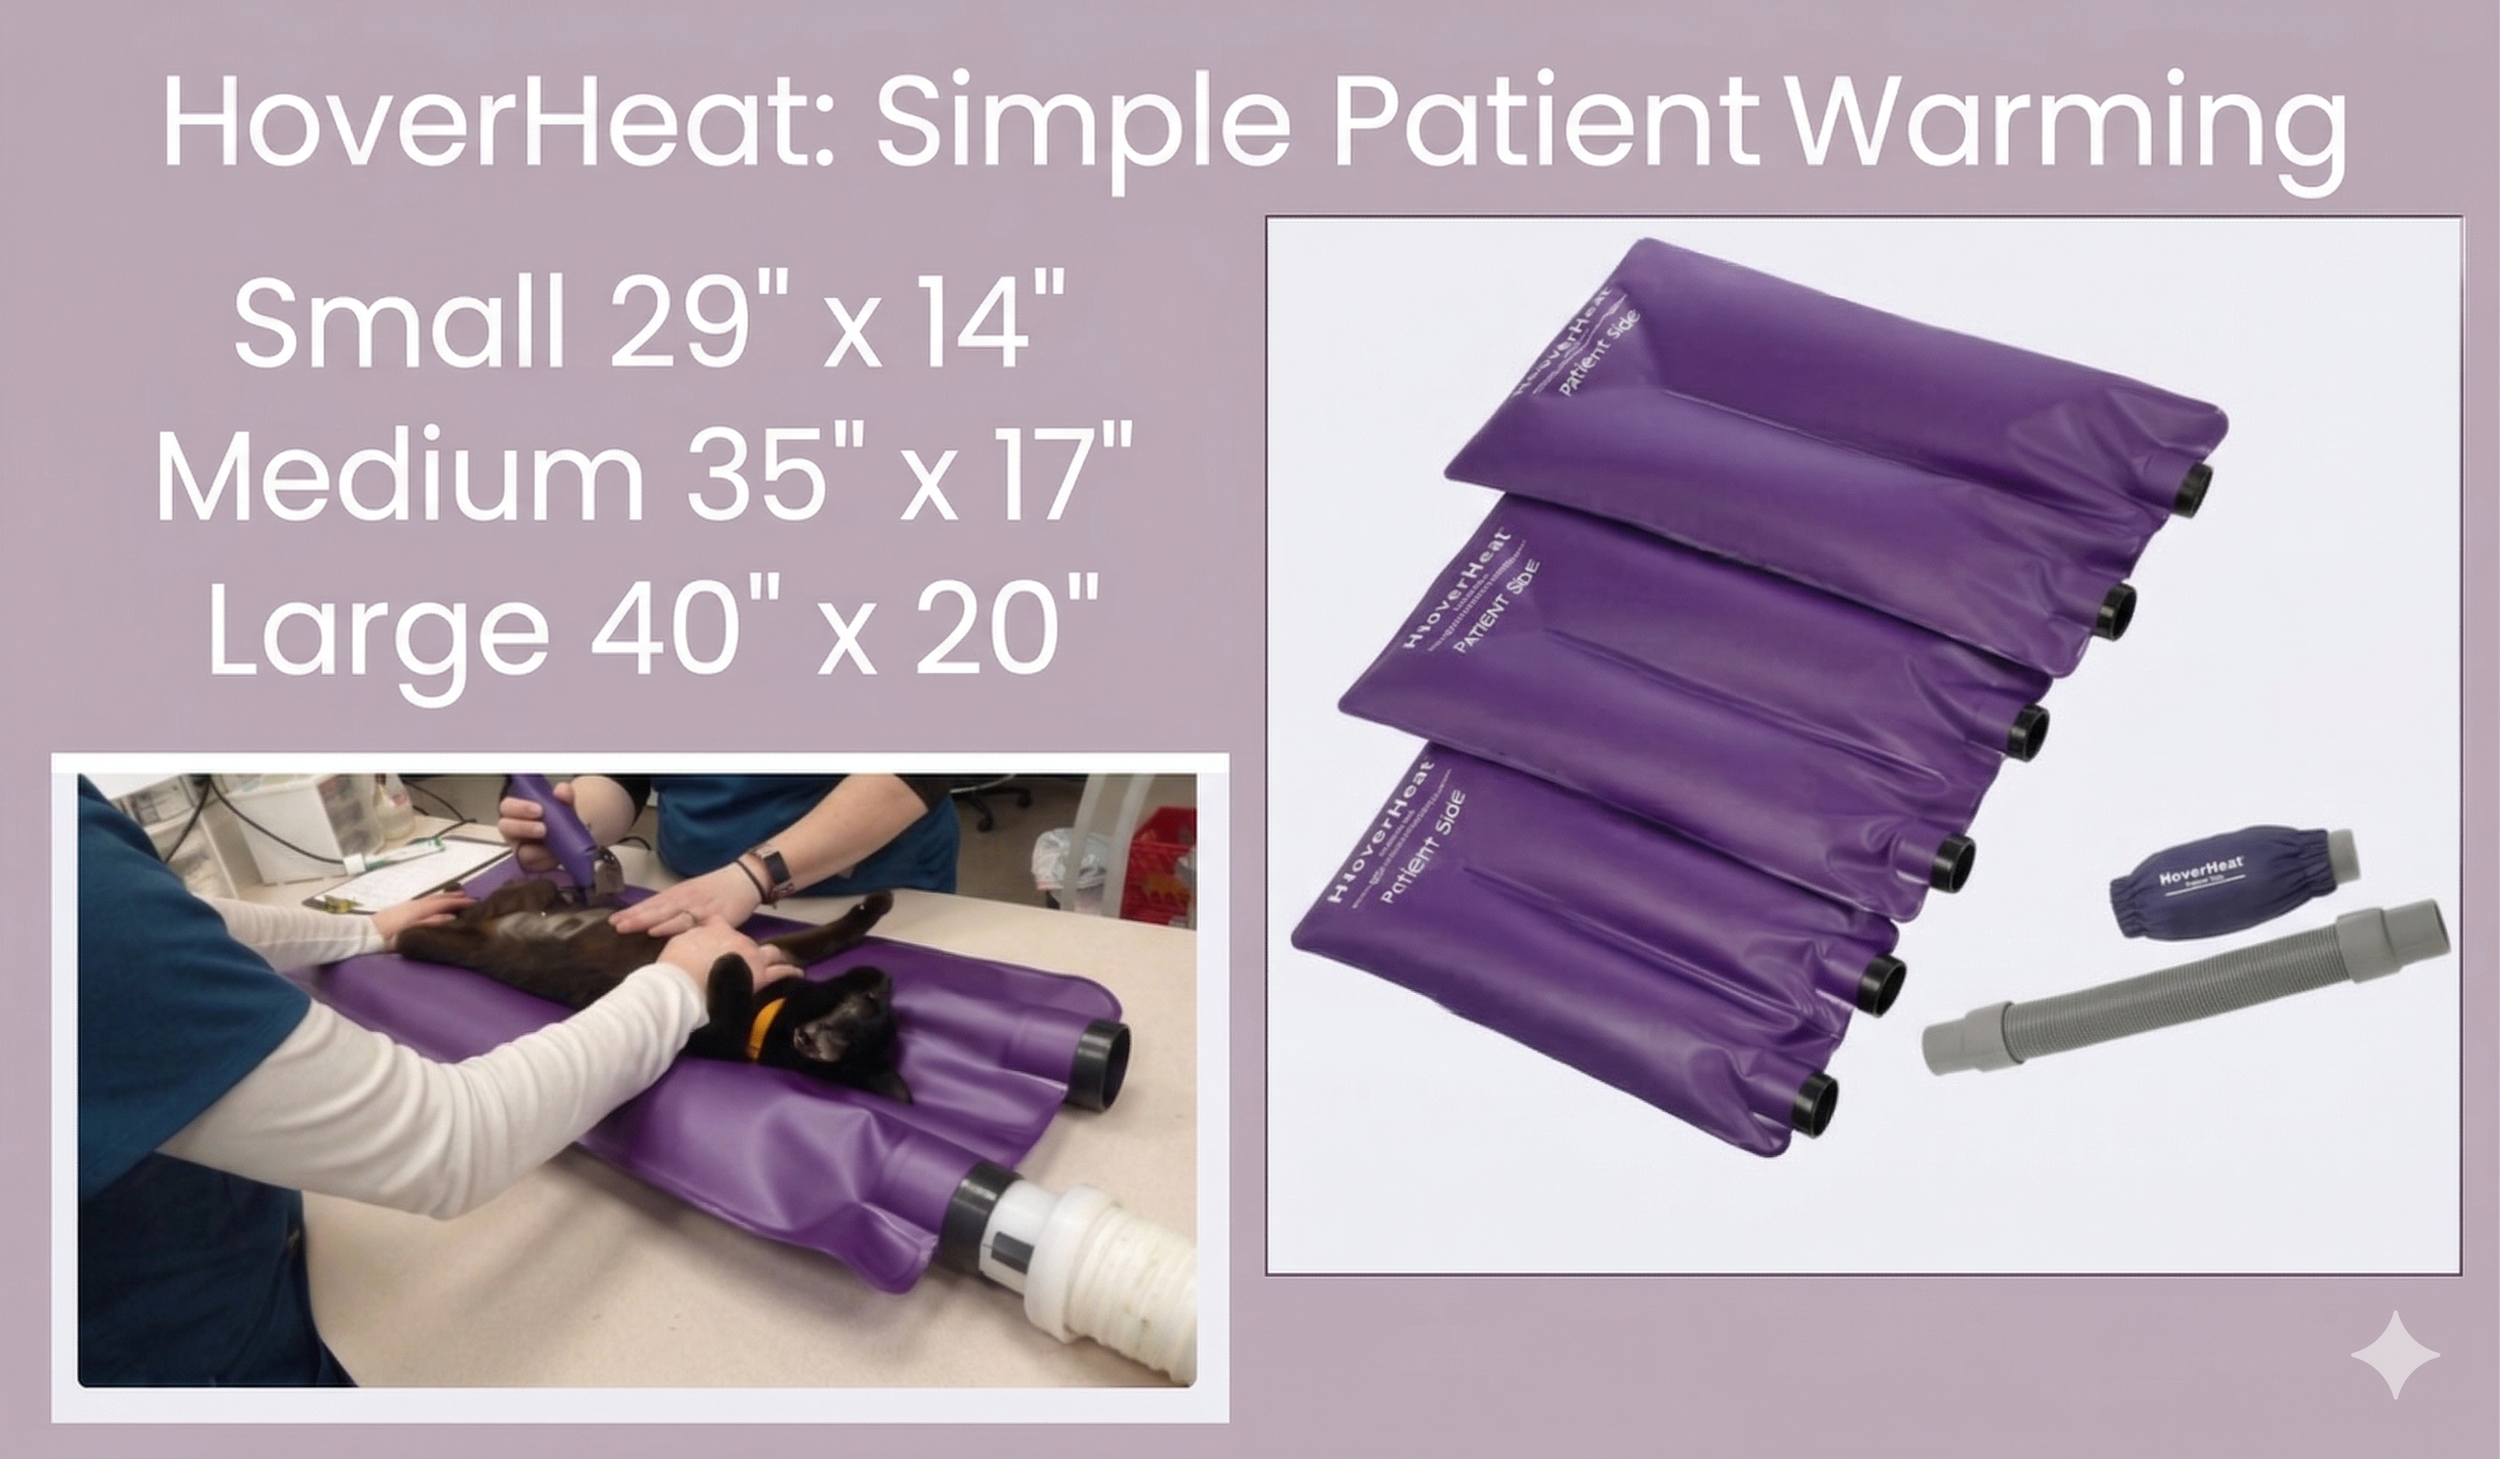
The Warming Gap No One Talks About in Veterinary Surgery
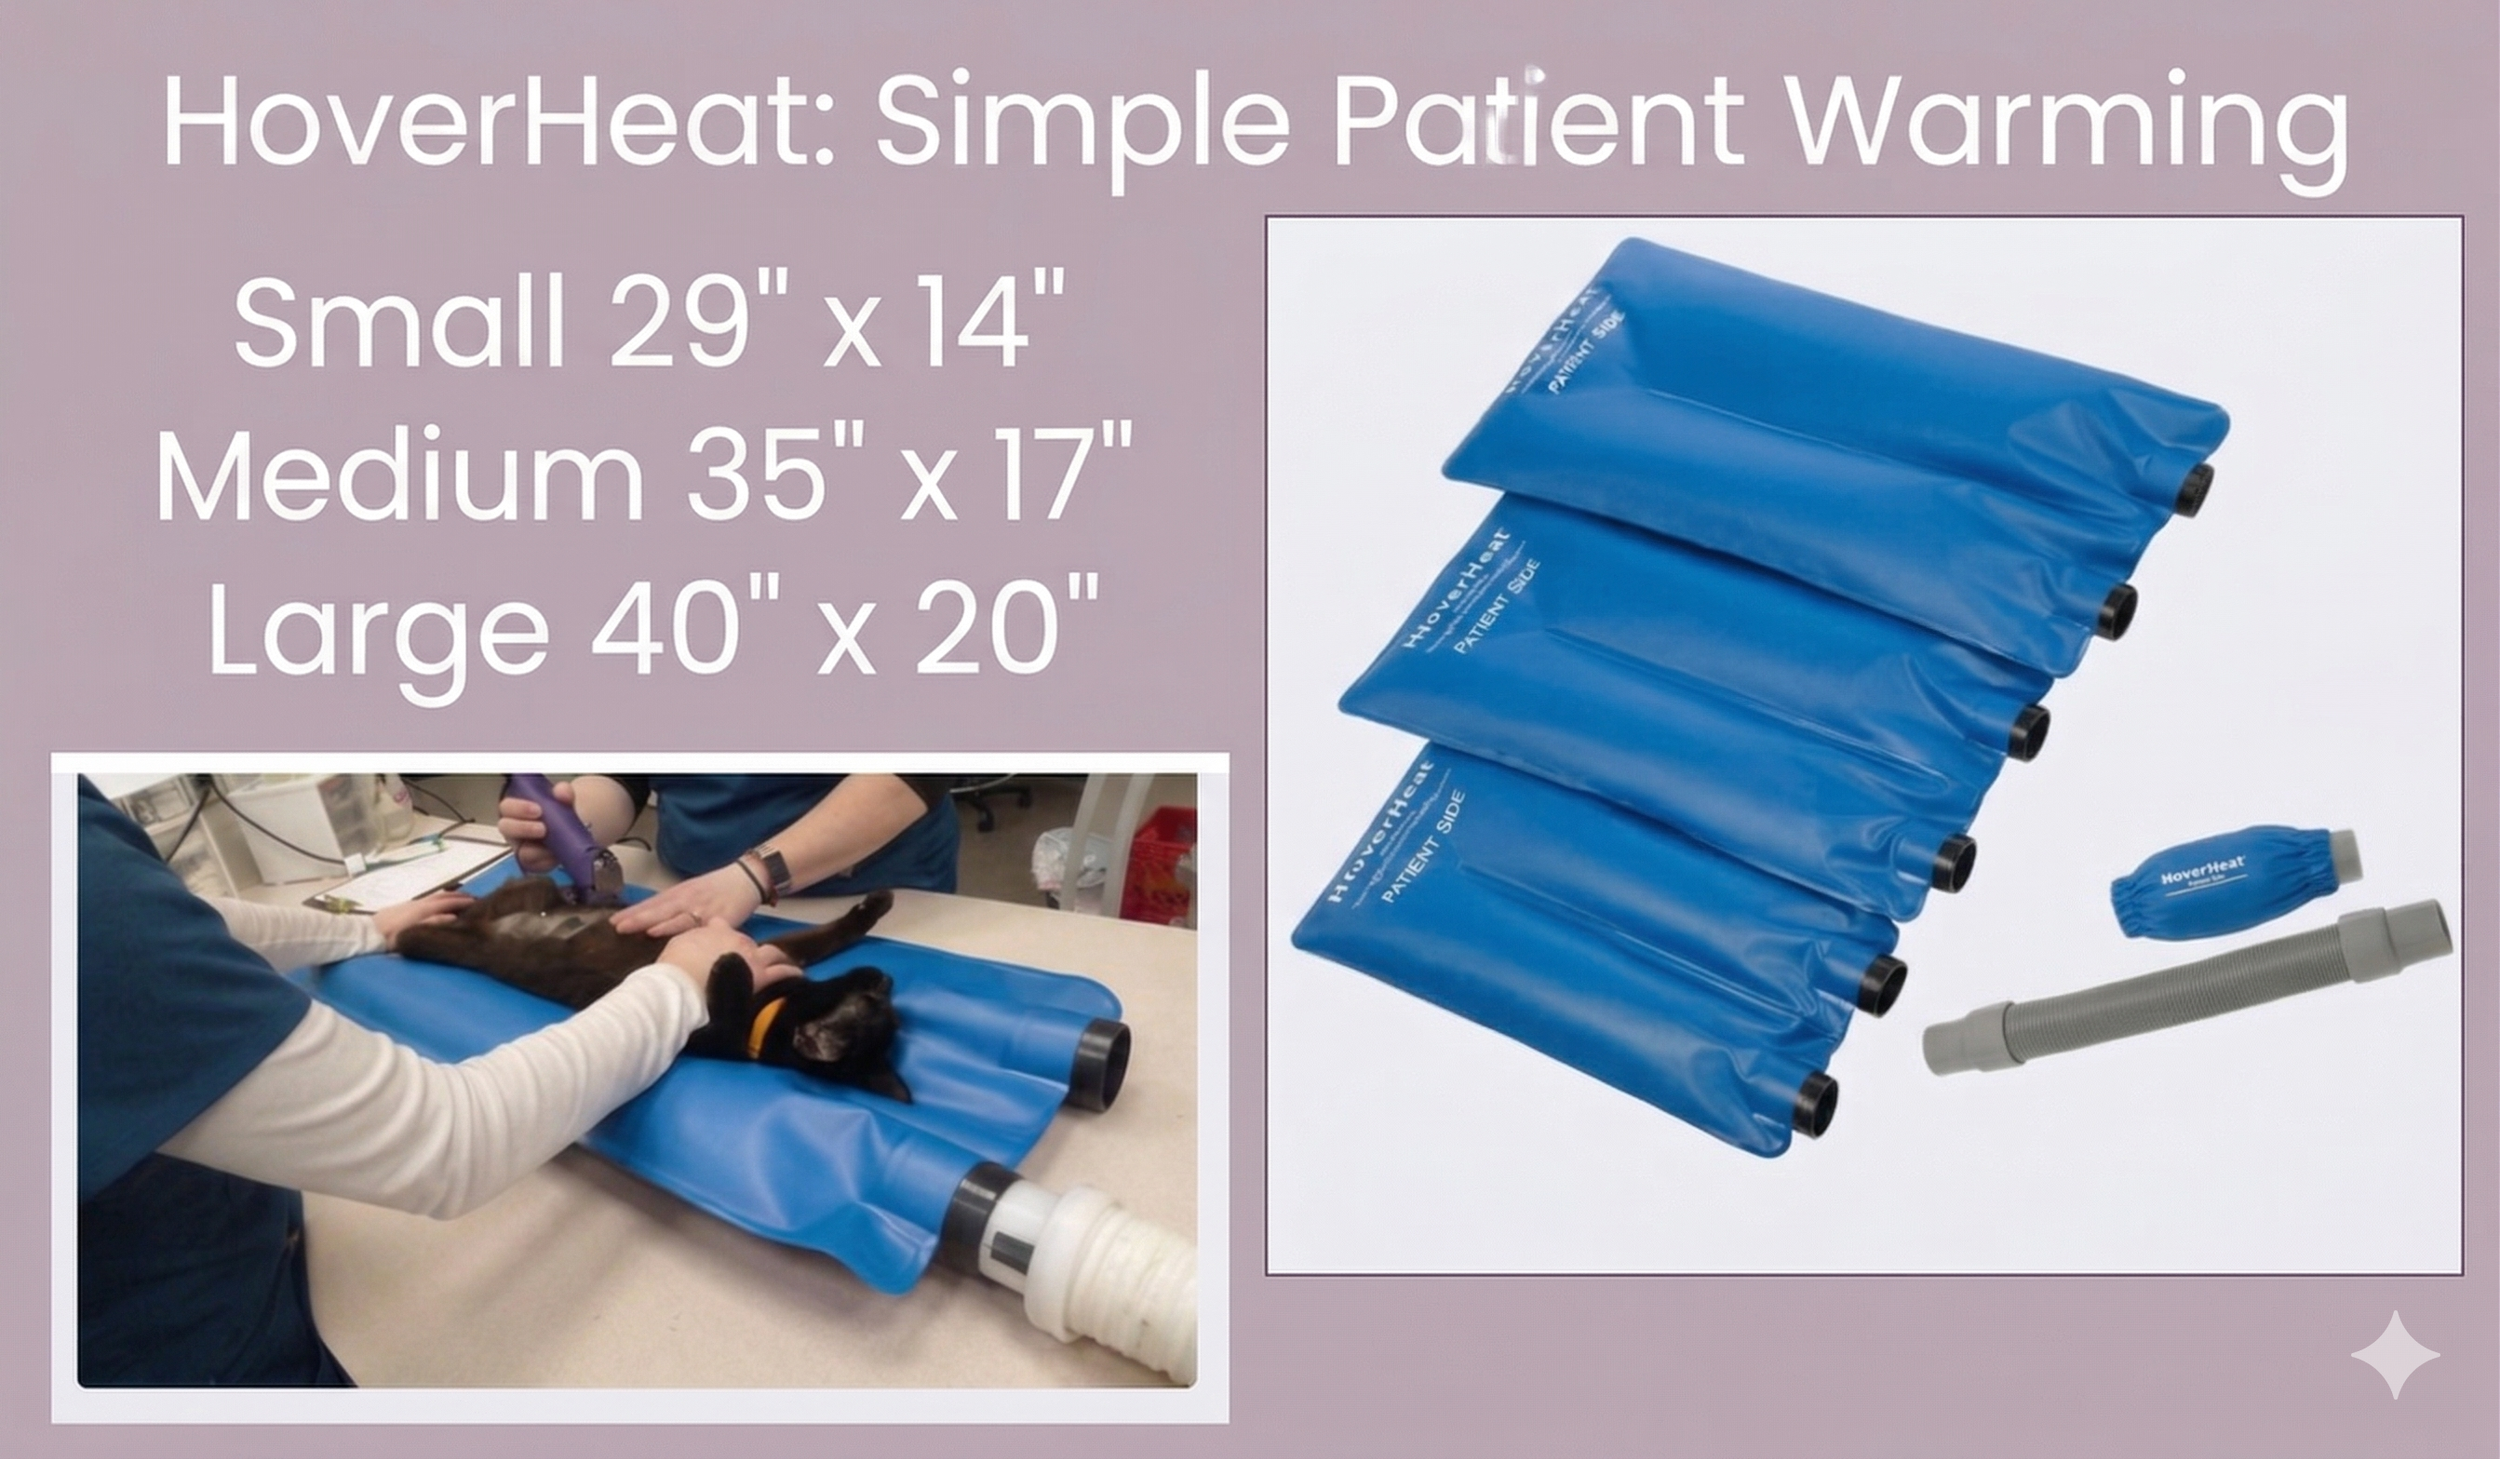
Most veterinary teams don’t struggle with whether to keep patients warm—we all know it matters. The real challenge is consistency.
You can have all the right intentions, trained staff, and monitoring in place… and still end up with a patient whose temperature dips halfway through a procedure. Not because your team isn’t doing a good job, but because your warming setup isn’t working with you.
That’s the gap many veterinary hospitals are starting to notice, and it’s where theHoverHeatwarming blanket fits in.
The Reality of a Busy Surgery Day
Let’s zoom out for a second and look at a typical day in practice.
Back-to-back dentals. A couple of surgeries are running longer than expected. Different team members are rotating through anesthesia monitoring. Patients of all sizes, from a 5 lb cat to an 80 lb dog
In that environment, warming methods need to be simple, reliable, and low-maintenance.
Because if a system is cumbersome or inconsistent, it doesn’t reach its full potential. That’s where many traditional warming methods fall short. They often require constant adjusting, layering, or troubleshooting to stay effective.
Why Some Warming Setups Fall Apart Mid-Procedure
Even with multiple warming tools in place, temperature drops still happen. A few common reasons:
Heat isn’t reaching the areas that need it most
Warming is uneven or inconsistent
Setups shift during patient repositioning
Staff are too busy to continuously adjust equipment
In other words, it’s not just about having warmth; it’s about having dependable warmth that holds up throughout the entire case.
A More Practical Approach with HoverHeat
The HoverHeatwarming blanket was designed with real veterinary workflow in mind.
Instead of requiring constant attention, it provides a steady, even source of warmth that supports the patient without needing frequent adjustments.
Its underbody warming design helps address one of the most common breakdown points in temperature management—losing heat through prolonged contact with the surgical table.
For teams, that translates to:
Less time troubleshooting warming setups
Fewer last-minute “we need another blanket” moments
More consistent temperature trends on the monitor
And those small wins add up over the course of a full surgery day.
Especially Useful for Dental Days
If you’ve ever had a full dental schedule, you know how tricky temperature management can be. Dentals tend to involve:
Longer anesthetic periods than expected
Water exposure that contributes to heat loss
Frequent repositioning
Smaller patients who cool quickly
It’s the kind of setting where warming can easily become reactive instead of proactive.
Using a system like HoverHeat allows teams to build warming into the setup from the start, rather than chasing temperature drops later in the procedure.
Supporting Your Team (Not Just the Patient)
One overlooked benefit of a reliable veterinary patient warming system is how much it helps the team. When warming is predictable:
Anesthesia monitoring feels more controlled
Technicians can focus on trends instead of constant adjustments
There’s less mental load during already busy procedures
For former veterinary technicians, especially, this is a big deal. You know how many moving parts there are in anesthesia, and any tool that reduces friction is worth paying attention to.
Small Changes, Noticeable Differences
What makes the HoverHeatComplete Set appealing for many veterinary practices isn’t that it completely overhauls your workflow; it’s that it fits into it.
You’re not reinventing your surgery setup. You’re simply improving one piece of it in a way that’s:
Easy to implement
Simple to maintain
Consistent across different types of procedures
And over time, those small improvements show up in ways that matter, like with smoother recoveries, more stable anesthetic events, and less scrambling mid-procedure.
Where It Fits Into Your Current Setup
HoverHeatis designed to strengthen your approach to patient warming. It works alongside your existing protocols and equipment, helping create a more complete warming strategy for:
Surgery
Dentals
Recovery
Even longer or more complex cases
In real-world veterinary medicine, the goal isn’t perfection; it’s reliability.
You already understand the importance of keeping patients warm. But understanding it and achieving it consistently are two different things.
The HoverHeatwarming blanket helps close that gap by offering a practical, dependable solution that works with your team.
And when your warming system becomes one less thing to worry about, your entire surgical workflow benefits.


Preventing Hypothermia in Veterinary Patients: A Smarter Approach to Surgical Warming
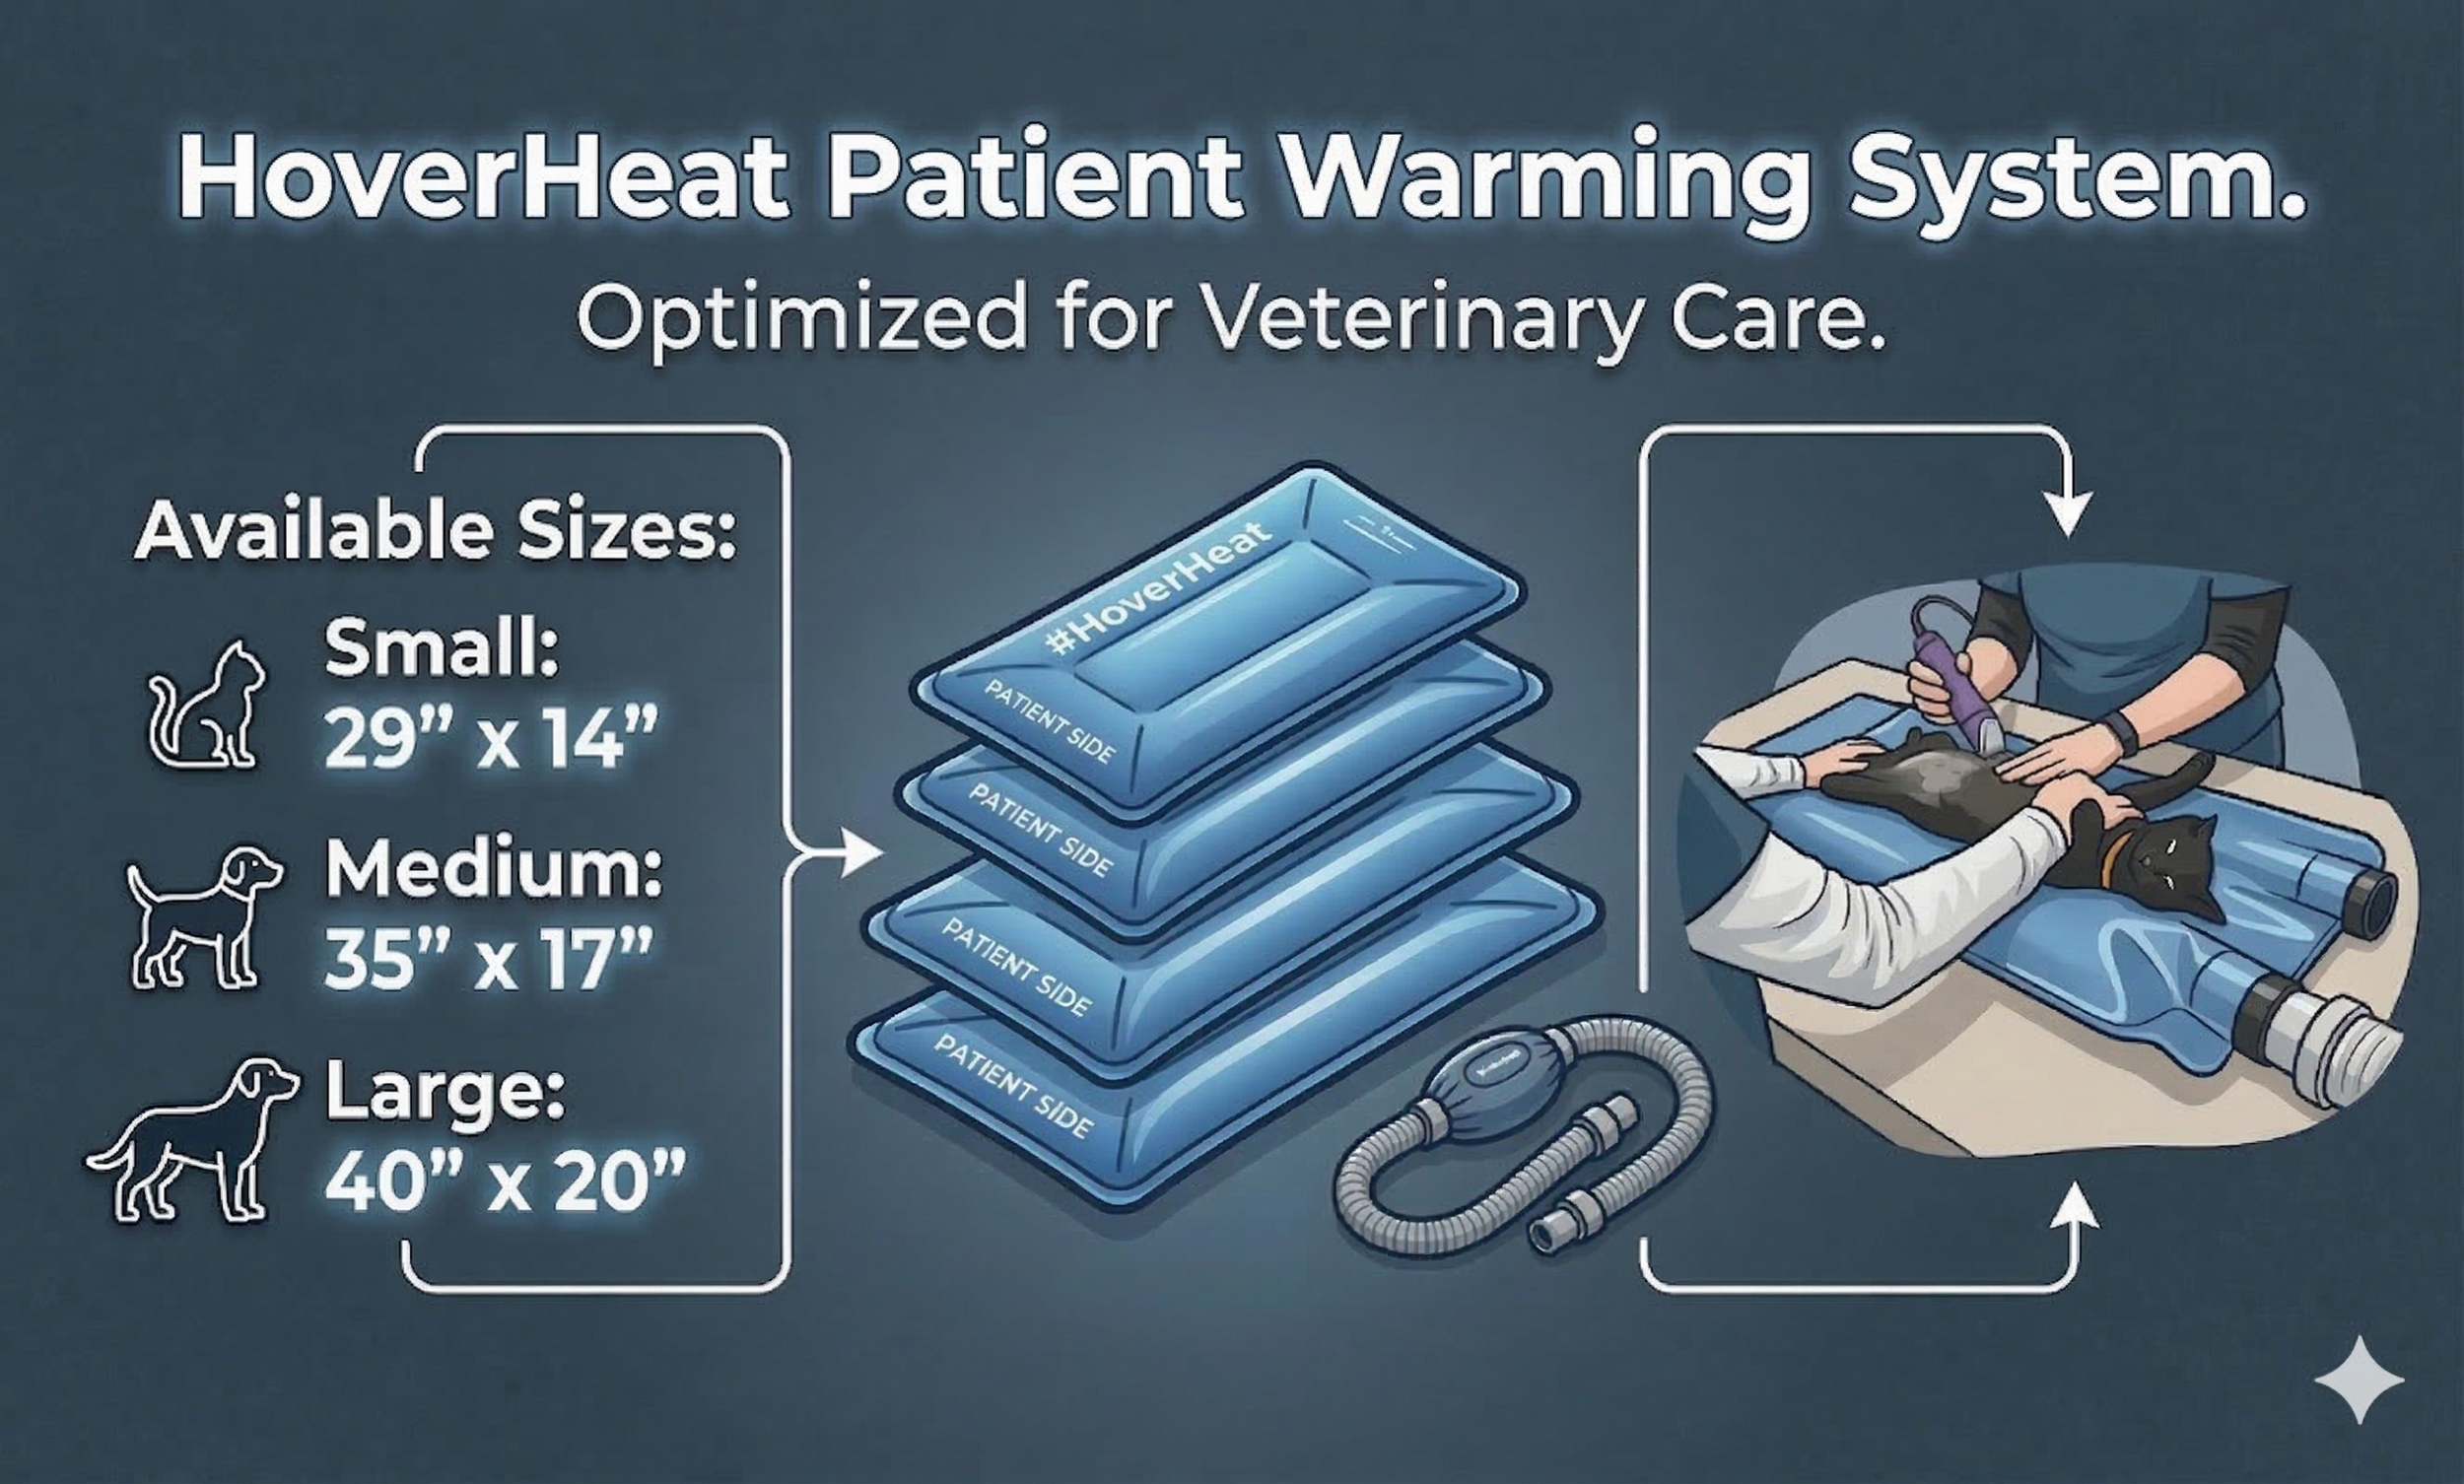
Every veterinary team has experienced this:
You glance at the patient monitor halfway through a procedure and notice the body temperature slowly drifting downward. You add another towel, turn up the warm water blanket, maybe grab a heated air blanket—and still, keeping the patient warm can feel like an uphill battle.
Hypothermia during anesthesia is one of the most common challenges in veterinary surgery and dentistry. But with the right veterinary patient warming system, maintaining an ideal body temperature becomes far more manageable.
That’s exactly where the HoverHeat warming blanket is making a difference for veterinary hospitals.
Why Patient Warming Should Be a Priority in Veterinary Medicine
When your patient is under anesthesia, their body loses the ability to regulate temperature effectively. Combined with hair clipping, surgical prep, and exposure to a cool operating room, body heat begins to drop quickly.
That temperature drop matters more than many people realize. Anesthetic hypothermia can lead to:
Slower anesthetic recovery
Increased anesthetic complications
Delayed drug metabolism
Longer patient recovery times
In smaller patients, such as cats, puppies, or toy breeds, the temperature drop can occur even more quickly. That’s why many veterinary hospitals are investing in active warming systems designed specifically for veterinary surgical patients.
How the HoverHeat Warming Blanket Works
The HoverHeat veterinary warming blanket takes a different approach to temperature management than many traditional warming methods.
Instead of simply placing heat on the patient, the system uses a cushion of circulating warm air beneath the patient. This allows warm air to move evenly under the body, warming one of the largest heat-loss areas during surgery.
The result is more consistent heat distribution and improved patient warming throughout the procedure. For veterinary hospitals performing procedures like:
Routine spays and neuters
Dental procedures
Orthopedic surgeries
Soft tissue surgeries
…this type of active warming can make a noticeable difference in maintaining stable body temperatures.
Multiple Ways to Warm Patients
One advantage of the HoverHeat warming system for veterinary practices is its versatility.
The system can be used for:
Surgical Procedures: helping to maintain patient temperature throughout anesthesia, especially during longer procedures.
Veterinary Dental Procedures: dentals often involve extended anesthesia times and significant heat loss due to water exposure and patient positioning. Active warming helps keep temperatures stable during these cases.
Recovery: Patients recovering from anesthesia are often still prone to hypothermia. Maintaining warmth during recovery helps support smoother, more comfortable wake-ups.
Designed for Busy Veterinary Hospitals
Veterinary teams need equipment that works with their existing workflow, not something that adds extra complexity to surgery days. The HoverHeat is designed with practicality in mind.
Key features include:
Multiple pad sizes to accommodate different patient sizes
Compatibility with common warm air blowers already used in veterinary practices
Reusable design that reduces disposable blanket costs
Easy cleaning with standard hospital disinfectants
The ability to connect two units for additional warming coverage
For practices focused on improving veterinary surgical efficiency and patient safety, these small workflow improvements can make a big difference over time.
Supporting Better Surgical Outcomes
Veterinary medicine has advanced significantly in patient care standards, particularly in anesthesia monitoring and safety. Today, most hospitals routinely monitor:
ECG
Blood pressure
Oxygen saturation
End-tidal CO₂
Temperature
But monitoring temperature is only half the battle. Preventing hypothermia requires reliable warming tools that work throughout the entire procedure.
Using an active veterinary surgical warming system helps maintain stable patient temperatures from induction through recovery.
And when patients stay warm, everything tends to go more smoothly, from anesthesia recovery to overall patient comfort.
A Simple Upgrade That Makes a Big Difference
You’re always looking for ways to improve patient care while keeping procedures efficient and safe. Sometimes the biggest improvements come from solving everyday problems, like keeping anesthetized patients warm.
The HoverHeat warming blanket is a simple, reliable way to address one of the most common anesthesia challenges in veterinary medicine.
Because when patients stay warm, they recover better, and that’s something every veterinary team hopes for.