


Who Needs a C-Arm? A Breakdown of Veterinary Practices That Benefit Most
How C-Arms Improve Outcomes in Modern Veterinary Care
As more veterinary hospitals expand their surgical and interventional capabilities, the question isn’t just “What does a C-arm do?”, it’s “Do we actually need one?”
C-arms provide real-time fluoroscopic imaging that can elevate surgical accuracy, open the door to new procedures, and streamline workflows. But like any major equipment purchase, they’re most valuable for practices that can truly utilize them.
If you’re trying to determine whether a C-arm fits your caseload and growth plans, this guide breaks down which hospitals benefit most.
1. Orthopedic-Focused General Practices
If your hospital performs a high volume of orthopedic procedures, a C-arm can quickly become indispensable.
Orthopedic benefit:
Real-time visualization during fracture repairs
Precision alignment for TPLOs and other corrective osteotomies
Ability to confirm implant placement instantly
Fewer retakes, fewer anesthesia adjustments, and fewer post-op surprises
In orthopedics, a few millimeters can make the difference between a smooth recovery and a complication. Fluoroscopy reduces guesswork and increases surgical confidence.
Common Cases Include:
TPLO and TTA procedures
Long bone fracture repair
Luxating patella corrections requiring implant placement
Angular limb deformity corrections
Joint evaluations
For surgical GPs looking to elevate their ortho offerings or reduce their reliance on referral hospitals, a C-arm can be a turning point for clinical capability.
2. Specialty Hospitals
Specialty practices tend to see the broadest range of cases in which fluoroscopy improves outcomes. Their higher caseload also spreads the cost across more procedures, making ROI easier to calculate.
Specialty benefits:
High surgical volume
Advanced ortho, soft tissue, and neurological procedures
Interventional radiology availability
On-site specialists who rely on real-time imaging
Common Cases Include:
Complex fracture repairs
Vascular and cardiac procedures
Tracheal stent placement
Pacemaker implantation
Subtotal colectomy foreign body checks
Urethral and ureteral stenting
For these hospitals, a C-arm isn’t just helpful, it’s often a clinical requirement.
3. Emergency & Critical Care Hospitals
ER/ICU environments regularly encounter cases where fluoroscopy changes the course of treatment within minutes.
ER / ICU benefit:
Ability to identify and remove GI foreign bodies rapidly
Real-time visualization for unstable orthopedic injuries
Support for urgent cardiac or vascular interventions
Faster decision-making when minutes matter
Common Cases Include:
GI foreign body retrieval (particularly linear objects)
Urethral obstruction diagnostics
Fracture stabilization
Pericardiocentesis guidance
Contrast-based urinary or vascular studies
In ER settings, a C-arm reduces delays, minimizes patient movement, and improves efficiency during high-acuity cases.
4. Mobile Surgeons and Traveling Specialists
Mobile surgical teams often work with varying setups and caseloads, so easy positioning and real-time imaging can drastically improve workflow consistency across clinics.
Mobile/Travel benefit:
Standardized imaging, no matter where they operate
More predictable surgical efficiency
Ability to offer specialized procedures to general practices
Mobile surgeons offering TPLOs, fracture repair, or interventional procedures often rely on a C-arm to maintain high standards across diverse environments.
Understanding DSA: When Digital Subtraction Angiography Matters
Some C-arm systems include DSA (Digital Subtraction Angiography)—a powerful imaging tool that reveals blood flow with exceptional clarity.
What DSA Does (in simple terms)?
DSA subtracts pre-contrast images from post-contrast images to highlight only the motion of contrast material. In practice, it produces obvious vascular images in which bones and soft tissue are “subtracted out.”
When Veterinary Practices Use It:
Diagnostic vascular studies
Portosystemic shunt (PSS) identification
Cardiac pacemaker lead visualization
Fluoroscopy-guided biopsies where vasculature is a concern
Why DSA Matters:
Reveals tiny vessels that are difficult to see with standard fluoroscopy
Improves safety in contrast-guided procedures
Enhances accuracy for vascular interventions and catheter placement
While DSA isn’t necessary for every hospital, it’s a significant advantage for practices performing advanced imaging or interventional radiology.
How to Estimate Your C-Arm Utilization Before Purchasing
Before investing, assess your current and potential case volume.
Ask yourself:
1. How many orthopedic procedures do we perform monthly?
Even 4–6 orthopedic surgeries per month can justify consistent use.
2. Are we seeing frequent foreign bodies or emergency cases?
If so, fluoroscopy may significantly shorten procedure times.
3. Are we looking to add new services?
TPLOs, TTAs, stent placements, and interventional radiology are all enabled or improved by C-arms.
4. Do we refer cases out that we’d prefer to keep in-house?
Keeping one or two high-value procedures per month can substantially improve ROI.
5. Are there specialists (or mobile surgeons) in our network who could use the equipment?
Shared utilization can strengthen financial justification.
Does Your Practice Need a C-Arm?
If your hospital is performing regular orthopedic or emergency procedures—or plans to expand into these services—there’s a strong chance a C-arm will elevate both clinical capability and practice profitability.
But even more importantly, it enhances veterinarians' ability to diagnose and treat challenging cases, giving teams the confidence and clarity they need to deliver exceptional care.


C-Arms in Veterinary Medicine: Why They’re a Diagnostic Game-Changer
The Rising Value of C-Arm Imaging in Veterinary Care
As veterinary medicine continues to advance, one imaging tool is quietly becoming a staple in modern practices: the C-arm.
Whether you’re a high-volume orthopedic hospital or a general practice beginning to expand your surgical offerings, mobile fluoroscopy can dramatically enhance the way you diagnose, treat, and manage complex cases.
If you’ve ever wished you could “see what you’re doing” in real time—especially in tricky orthopedic or foreign-body cases—a C-arm may be the tool that changes everything.
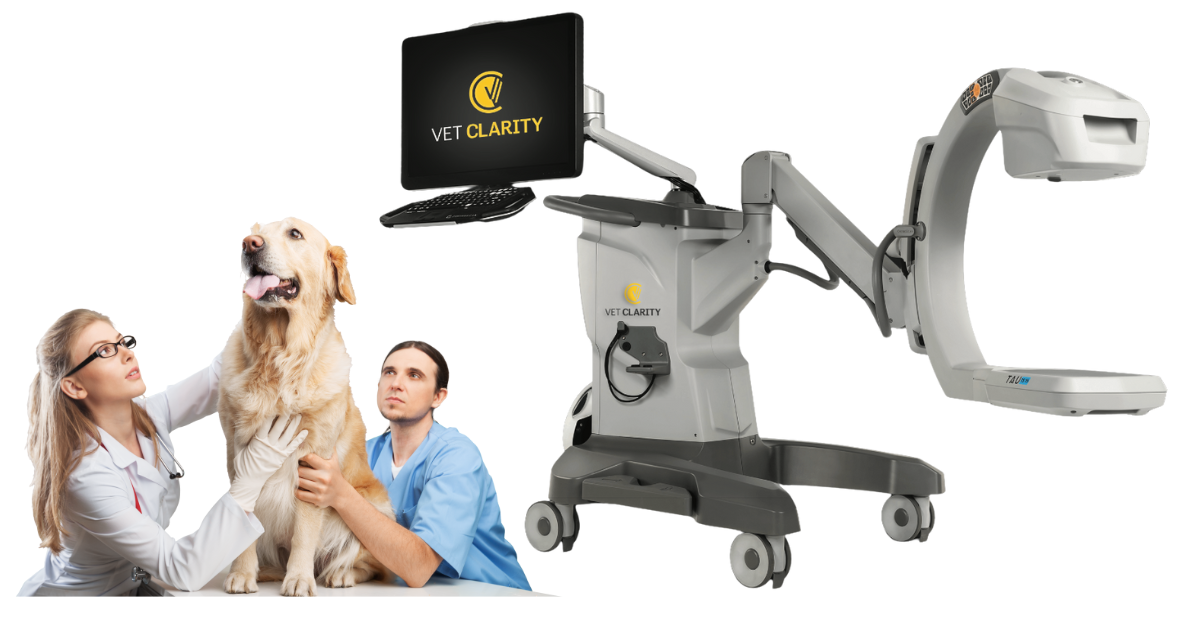
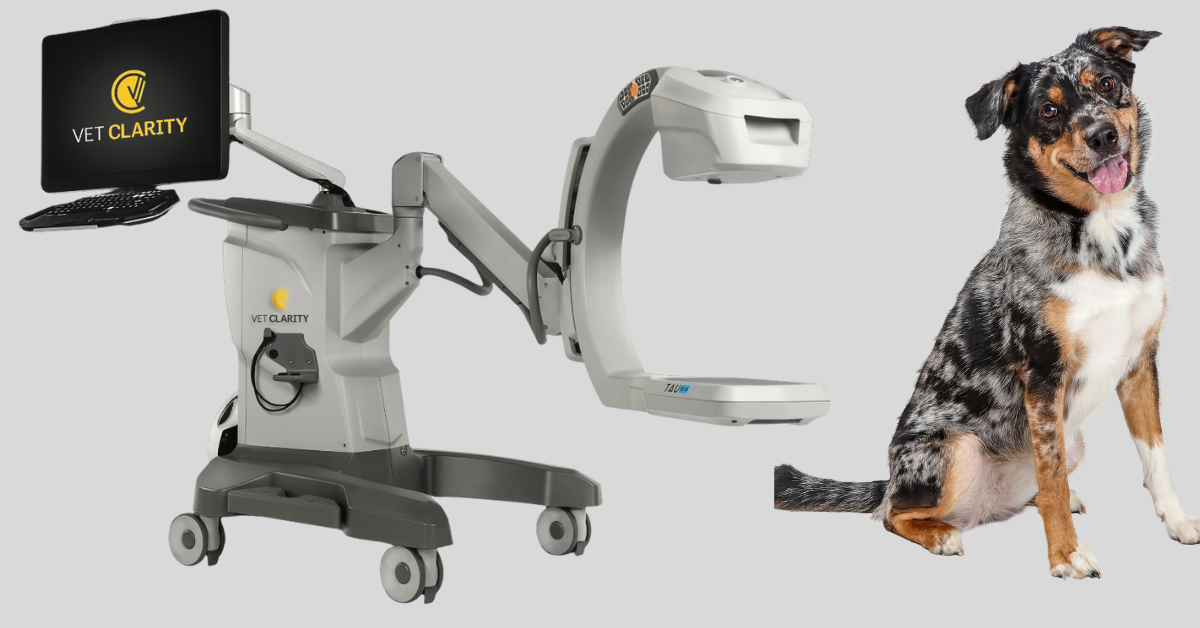
What Exactly Is a C-Arm?
A C-arm is a mobile fluoroscopy unit shaped like the letter “C,” allowing you to position the X-ray source and detector around your patient.
Unlike standard radiography, which gives you a single static image, a C-arm provides continuous, real-time imaging during procedures. That alone is a significant shift in efficiency and surgical precision!
Why C-Arms Are Becoming So Valuable in Veterinary Medicine
1. Real-Time Imaging Improves Surgical Precision
In orthopedic surgery, millimeters matter. A C-arm allows you to visualize fracture alignment, implant placement, joint spaces, and angles as you work—not after the fact.
Instead of taking a radiograph, repositioning the patient, retaking views, and hoping the alignment is correct, surgeons can adjust in the moment. The result?
More accurate repairs
Shorter anesthesia times
Fewer surprises post-op
For busy practices, this can significantly increase surgical efficiency.
2. Better Outcomes With Fewer Repeat Procedures
When you can see your hardware placement or foreign body extraction in real time, you reduce the risk of missed pathology, implant misalignment, or incomplete removal.
That translates directly to:
Decreased complication rates
Higher client satisfaction
Stronger clinical outcomes
More predictable case progression
For hospitals offering advanced procedures, this is a significant competitive advantage!
3. A Game-Changer for Complex Soft Tissue and Emergency Cases
While C-arms are often associated with orthopedics, their usefulness extends beyond bone.
They’re invaluable for:
GI foreign body retrieval (especially linear or oddly shaped objects)
Urethral obstructions and stent placement
Hepatobiliary procedures
Interventional radiology cases (coiling, embolization, biopsies, contrast studies)
Being able to visualize contrast flow or track movement in real time can significantly improve the efficiency of a case.
4. Faster Workflows and Less Guesswork
Because fluoroscopy allows for continuous guidance, you’ll spend less time repositioning patients, capturing additional radiographs, and navigating blindly.
This means:
Shorter procedure times
Reduced radiation exposure overall
Less staff fatigue
More predictable scheduling
For practices trying to increase surgical caseload while maintaining quality of care, efficiency matters.
How C-Arms Strengthen ROI for Veterinary Hospitals
Investing in a C-arm is often easier to justify when you understand where the return comes from. Practices typically recover their investment through:
1. Increased Surgical Case Volume: Offering fluoroscopy-guided procedures attracts more referrals and allows general practices to expand into higher-value services.
2. Higher Value Procedures Per Case: Fluoroscopy enables procedures that often carry higher revenue, like fracture repairs, interventional procedures, and advanced foreign body removals.
3. Improved Efficiency: Shorter anesthesia times and quicker surgeries mean you can complete more procedures safely within the same day.
4. Reduced Post-Op Complications: Fewer rechecks, fewer corrective surgeries, and fewer client issues all bolster profitability and client trust.
Even modest increases in monthly surgical volume, 1–3 additional fluoroscopy-guided cases, can rapidly close the gap on costs.
Why More Practices Are Considering a C-Arm Right Now
As more veterinary hospitals expand their orthopedic and soft-tissue capabilities, and as pet parents increasingly expect (and seek) advanced care, the demand for real-time imaging is growing.
C-arms offer:
Diagnostic clarity
Enhanced surgical confidence
The ability to perform procedures once reserved for specialty hospitals
And with modern systems becoming more cost-effective and user-friendly, they’re no longer limited to large specialty centers.
A C-arm is truly a tool that changes how surgeries are performed and how confidently your team can navigate complex cases.
Suppose your practice is looking to elevate its surgical offerings, reduce complications, or simply streamline procedures with more precision. In that case, a C-arm may be one of the best diagnostic tools to consider.

Affordable Vet Imaging with the Vetus E5 Ultrasound
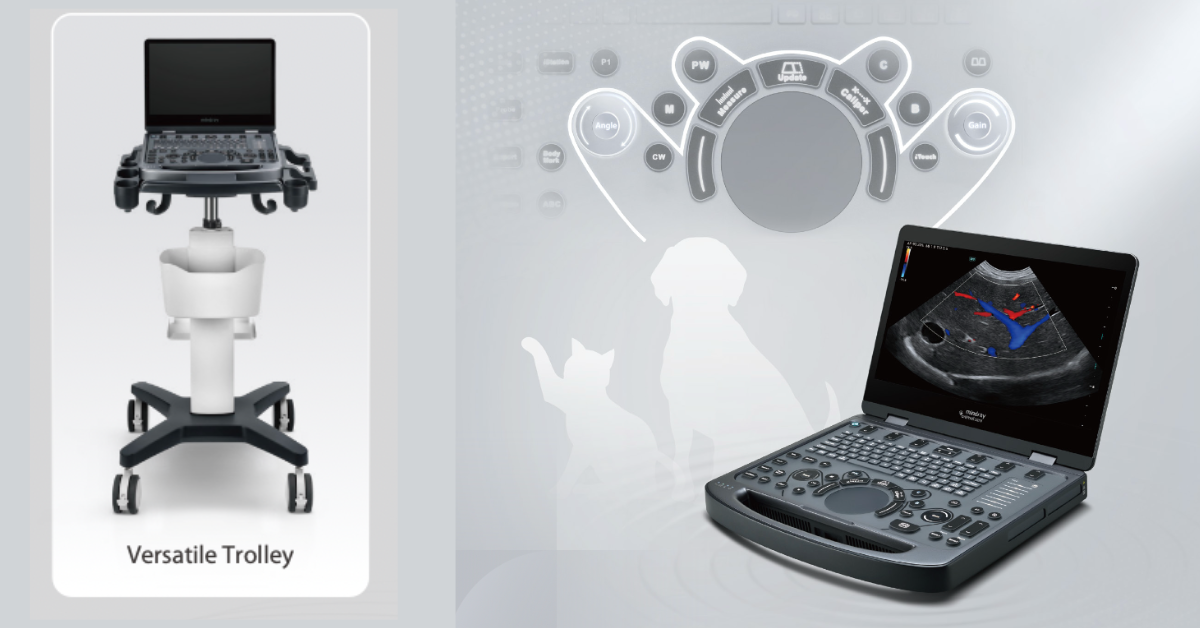
If you’re looking to expand your diagnostic services while keeping budgets in check, then you’re in the right place. It’s the perfect time to take a closer look at the Vetus E5 ultrasound. This system bridges the gap between basic ultrasound units and premium machines, offering veterinary-specific features in a value-focused package.
Why Invest in an Ultrasound Now?
In today’s fast-paced veterinary environment, clients expect more, and it’s become a standard for practices to deliver high-quality diagnostics faster. Here are a few motives driving investment:
Broader diagnostic scope: With ultrasound, you can offer services such as soft-tissue evaluation, cardiac screening, reproductive imaging, abdominal scans, and more.
Improved case flow and retention: In-house scanning means fewer referrals, faster turnaround, and better client satisfaction.
Revenue diversification: Ultrasound opens up billable procedures and follow-ups. Even a modest increase in scan volume can pay off.
Upgrading your diagnostic tools is a strategic investment in your practice’s financial growth.
Meet the Vetus E5 — What It Offers
First, the question that’s always top of mind - price and support. We offer financing too.
Here are some of its key features that matter most:
Touch-sensitive gain adjustment: fingertip precision helps when you’re scanning fast or in low-light exam rooms.
Advanced imaging tools: HR Flow for detailed blood-flow visualization, iClear speckle noise reduction, one-click image optimization (iTouch), natural-touch elastography, contrast imaging.
Vet-specific workflow features: Smart Calc (automatic lesion tracing/measurement), Smart HRI (quantitative liver steatosis assessment), iWorks animal-specific scanning protocols, and iReport customizable professional report templates.
Portable and adaptable: Lightweight for mobility (if you offer mobile service, or move between treatment rooms), multiple connectivity options, quick probe switching, and ample storage capacity.
All of these features make this a standout option when you’re seeking more than just “basic” without stepping into ultra-premium cost territory.
ROI: How to Make the Numbers Work
Let’s look at a hypothetical ROI scenario for a hospital adding the Vetus E5.
Assumptions:
You perform four extra ultrasound scans per week that you couldn’t before (let’s say conservatively).
Charge $250 per scan (typical value will vary by region and case type).
That’s $1,000 in additional weekly revenue → roughly $52,000 per year.
Even if you account for consumables, training time, and service/support costs, you could recoup the investment within the first year and then benefit from what follows.
Other benefits to consider:
Fewer referrals out, meaning more revenue stays within your hospital.
Enhanced client confidence, resulting in more return visits and more word-of-mouth.
Faster diagnostics = better outcomes = higher throughput.
Marketing value, meaning you can promote “in-house advanced ultrasound” and attract clients who previously went elsewhere.
In other words, for a one-time investment, you can unlock significantly more diagnostic capacity and revenue potential.
How to Decide if It’s Right for Your Hospital
Here are a few questions to think about:
What’s your patient mix and demand? Do you have a volume of cases where soft-tissue imaging, cardiac screening, and abdominal ultrasound are becoming more frequent?
What are your current limitations? Are you referring out because you don’t have an in-house unit? Are you missing revenue because you can’t scan quickly or confidently?
Probe and accessory plan: What probes will you need right away (convex, linear, phased array)? What future add-ons might you want?
Service/support and total cost of ownership: What support is provided? What warranty, what response time? What consumables or service contracts will you need?
Integration into your hospital’s workflow: Can the system connect to your practice management/PACS system? Are image-sharing/reporting features compatible?
If you answer these honestly and the Vetus E5 meets the criteria, you’re making a firm decision.
Practical Tips for Implementing Your New Ultrasound
Plan a “go live” day: Set aside time for staff training and run sample scans before full use. Make sure your team feels comfortable using the new tool before you’re in full swing.
Create scanning protocols: Standardize for common cases (e.g., feline abdominal, canine cardiac, reproductive scans) to make your team more efficient, consistent, and confident.
Advertise your new capability: Use your website, newsletters, and social media to let clients know you now offer comprehensive in-house ultrasound.
Monitor usage: After implementation, track the number of scans per week, average revenue per scan, and the reduction in referrals. Use these metrics to evaluate success.
Schedule maintenance and service reviews: Keep the system at peak performance and avoid downtime that could delay cases or cause referral leakage.
Expand Your Service Capacity
Upgrading diagnostic capabilities doesn’t have to mean spending top dollar. With the Vetus E5, your hospital can invest in a robust, veterinary-specific ultrasound system and dramatically expand your service capacity. You gain advanced imaging tools and workflow efficiency—and a clear path to ROI.
The right imaging tool doesn’t just make your life easier—it elevates your practice. It allows you to say “yes” more often to cases, it keeps clients in-house, and it helps your team deliver better patient care.

Proving ROI: Making the Case for In-House Veterinary Imaging

Investing in new imaging equipment, whether it's a digital X-ray system, dental X-ray, or ultrasound, can feel like a big leap. The price tag is upfront and very real… but so is the return when the equipment is used effectively.
The challenge can be convincing everyone else on your team of their value.
The good news: in-house imaging is one of the easiest investments to justify when you know which metrics to measure.
Let’s break down the key numbers that actually matter and how to present them so your team understands and supports them.
1. Start With Imaging Volume
Most practices use imaging more often than they realize.
But because they’re outsourcing cases or relying on outdated equipment, they underestimate the number of opportunities available to them.
What to measure:
How many X-rays or ultrasounds do you currently perform each month
How many do you refer out
How many cases do you skip altogether because of logistics, client cost, or scheduling limitations
A practical example:
Let’s say a 3-doctor practice:
Takes ~70 in-house X-rays/month
Refers out 20+ imaging cases/month
Has an estimated 10–15 “missed opportunities” where imaging would have helped, but wasn’t pursued
That’s 100+ cases per month that a modern digital X-ray system or ultrasound system could capture.
If your average imaging fee is $150–$250, that’s:
$15,000–$25,000 per month in potential revenue.
Even if you estimate conservatively, you can quickly show that the equipment pays for itself—often in less than a year.
2. Case Conversion Rate: The Metric Nobody Talks About
You’ve probably seen this… when imaging is easy, fast, and available right now, more clients say “yes.”
When imaging requires a referral, a second trip, or more money upfront… fewer clients say yes.
What to measure:
Percent of recommended imaging that clients accept today
The percent you expect once imaging is same-day and in-house
Some practices that started offering same-day digital X-rays increased their acceptance rate from 43% to 78% in the first 3 months.
Why? When imaging is immediate, convenient, and clearly explained, clients see the value.
This means:
More complete diagnostics
More accurate treatment plans
More revenue per visit
Better medical outcomes—your team will care about this point as much as the financials.
Increasing your case conversion rate by even 15–20% can add thousands in monthly revenue without adding any new clients.
3. Referral Retention
Referrals aren’t bad by any means; you often need specialists.
But referring out basic imaging is one of the biggest hidden drains on revenue.
What to measure:
How many imaging referrals do you send out monthly
Average cost clients pay externally
Percent of referred clients who don’t return for follow-up care
Missed procedure revenue because the patient went to another hospital
If you refer out 20–30 ultrasounds per month at ~$300 each, that’s $6,000–$9,000 monthly handed to another practice.
Keeping even half those cases in-house often justifies the cost of a mid-range ultrasound system or DR panel on its own.
4. Cost Avoidance
Sometimes, it’s not about the revenue you gain but the expenses you stop paying.
What to measure:
Outsourcing fees (radiographs, dental films, ultrasounds)
Additional sedation or handling charges caused by slow equipment
Time cost from workflow delays
The cost of retakes with outdated systems
A practice relying on outdated or low-resolution ultrasound equipment might:
Spend 15–20 extra minutes per scan due to slow boot-up times, poor image acquisition, or difficult navigation
Require additional restraint or sedation for anxious or painful patients because older probes take longer to capture clear images
Delay treatment decisions while waiting for images to be reviewed, re-taken, or sent out for interpretation
Upgrading to an ultrasound system can save:
10+ hours/month of staff time through faster image acquisition and streamlined workflows
5–10 sedation or heavy restraint events by reducing scan times and improving patient comfort
Countless repeat scans and workflow disruptions, thanks to enhanced image quality and intuitive controls
That’s real money saved, even before you consider the revenue side.
Putting It All Together
Most veterinary practices already have the patient volume to justify in-house imaging; they haven’t measured it yet. When you break down the numbers, the ROI becomes obvious:
More case conversions
Higher client satisfaction
Better patient outcomes
Faster workflows and a rapidly recouped investment
If you’re preparing to make the case to your team, this framework gives you everything you need to build confidence and get buy-in.

A Veterinary Ultrasound Buyer’s Guide

Choosing the Right Veterinary Ultrasound
For veterinary practices, investing in the right ultrasound system is more than just buying a machine — it’s about choosing a tool that fits your patients, workflow, and long-term goals.
Below is your guide to making smart, confident decisions when selecting the best ultrasound for your hospital.
1. Key Factors When Purchasing a Veterinary Ultrasound
Imaging Performance and Probes
The types of patients you serve — small animals, equine, or exotics — will determine your probe requirements. Look for technologies such as Doppler flow imaging, speckle reduction, and image clarity enhancements, and make sure probe switching is simple and efficient.
Workflow Integration and Veterinary-Specific Features
Ease of use is crucial, especially in a busy practice. Look for intuitive controls, veterinary presets, reporting tools, and connectivity to PACS or practice management software. If your practice includes mobile or fieldwork, portability should be a top priority.
Service, Warranty, and Support
The best technology is only as strong as the support behind it. Check for service plan options, local support, parts availability, and software upgrade pathways to ensure long-term reliability.
Investment and ROI
The initial investment is just the beginning. Include maintenance, training, probes, and consumables when evaluating overall value. Estimate how many scans you’ll perform weekly or monthly, and your revenue per scan, to calculate your break-even point and expected ROI.
2. Value-Focused Option for Small or General Animal Practices
For practices seeking high capability and a balanced investment, the Mindray Vetus E5 is an excellent choice.
Key Features
- Touch-sensitive gain adjustment for fingertip precision
- Intuitive control panel designed for veterinary use
- Advanced imaging: one-click optimization (iTouch), speckle-reduction (iClear), HR Flow, natural-touch elastography, and contrast imaging
- Lightweight and portable for in-clinic or mobile use
Why It Matters
This system offers strong value and a fast ROI. Its versatility across small and mixed animal applications — abdominal, soft tissue, cardiac, and reproductive — makes it a solid all-around investment for general practices.
3. Specialized Option for Equine and Large-Animal Practices
For equine or mixed-animal veterinarians, the Mindray Vetus EQ is a purpose-built system that delivers premium performance and portability.
Key Features
- Includes two transducers from options such as C5-1s convex, L13-3Ns linear, P4-2s phased array, or 6LE5Vs probes
- Extremely portable: weighs only 6.5 lbs and just 1.73″ thick
- 15.6″ LED monitor plus 12.3″ anti-glare touchscreen for barn or field use
- Preloaded equine presets: musculoskeletal, cardiac, abdomen, and reproduction
- Powered by ZST+ Zone Imaging technology for excellent image clarity and penetration
Why It Matters
Large animals require deeper imaging, a wider field of view, and durable equipment that performs well in challenging environments. The Vetus EQ is designed for these conditions — offering the portability, clarity, and ruggedness needed for on-farm or mobile work.
4. Key Questions to Ask Your Equipment Distributor
- What is included in the base package (probes, software, warranty)?
- What upgrade options are available (additional probes, software modules, reporting tools)?
- What service and support plans are offered (onsite vs. remote, response time, preventive maintenance)?
- How is training handled for your team?
- What are the consumable costs, warranty terms, and what happens if a probe fails?
- How compatible is the system with your current digital workflow (DICOM, PACS, practice management software)?
- What ROI timeline can you expect based on your case volume and patient mix?
5. Smart Decisions Made Easy
Ultrasound remains one of the most versatile and profitable diagnostic tools in veterinary medicine. Choosing the right system helps you improve patient care, expand diagnostic capabilities, and grow revenue.
Partner with a trusted distributor who provides not only the hardware, but also training, support, and integration guidance. That’s how your new ultrasound becomes more than just another machine — it becomes a vital tool for better diagnostics and sustainable practice growth.

8 Workflow Mistakes Undermining Your Diagnostic Equipment Investment

Diagnostic Imaging for Veterinary Practices
Explore our most requested systems, then review the workflow playbook below to maximize your ROI.
Avoid These 8 Imaging Workflow Errors in Vet Clinics
Investing in new diagnostic equipment, whether it’s a digital X-ray, ultrasound, or in-house lab analyzers, is one of the most impactful decisions a veterinary practice can make. But even the best technology can fall short if efficient workflows don’t support it.
It’s not uncommon for practices to purchase cutting-edge equipment only to find it underutilized, creating bottlenecks or staff frustration. The good news? These issues usually come down to workflow—not the equipment itself.
Here are eight common workflow mistakes that can quietly undermine your investment—and how to fix them.
-
Inadequate Staff Training
One brief demo at installation isn’t enough. Inconsistent or incomplete training leads to errors, slowdowns, and missed diagnostic opportunities.
The fix: Schedule comprehensive hands-on training for all relevant staff and create clear SOPs for each device. Assign a “champion user” to support ongoing training, maintenance, and onboarding.
-
Poor Equipment Placement and Room Layout
Cramped or inconvenient placement disrupts flow—staff travel farther, cross paths, and squeeze around tables, increasing time per case.
The fix: Map the workflow before installation. Place frequently used equipment near treatment/exam areas and ensure proper clearance for patients and staff.
-
Not Integrating With Your Practice Software
Without PIMS integration, teams waste time on manual data entry and risk transcription errors.
The fix: Work with your provider to ensure full integration. Enable direct image uploads and automatic results imports to save time and improve accuracy.
-
Overlooking Preventive Maintenance
Skipping maintenance or calibration causes inconsistent image quality and unexpected downtime.
The fix: Treat maintenance like patient appointments. Use a service plan for inspections, cleanings, and calibrations on schedule.
-
Not Adjusting Scheduling and Staff Roles
New technology changes patient flow. If schedules and roles don’t adapt, you’ll see idle time or backlogs.
The fix: Reassess after installation. Consider dedicated techs for diagnostics during peak times, or add “diagnostic blocks” to your calendar.
-
Ignoring Change Management
Team resistance can mean inconsistent use or reluctance to adopt new processes.
The fix: Involve the team early. Share the “why,” invite feedback, and celebrate quick wins to build buy-in.
-
Underutilizing the Equipment’s Full Capabilities
Advanced features—contrast tools, cloud storage, automated reporting—often go unused.
The fix: Schedule periodic check-ins with your distributor or manufacturer. Ask about updates, features, and best practices to unlock more value.
-
Failing to Measure Performance
If you don’t measure usage and outcomes, you can’t prove ROI or improve bottlenecks.
The fix: Track studies per month, time from imaging to diagnosis, and referral cost reductions. Use insights to refine workflows and highlight clinical/financial impact.
Supportive Workflow Makes a Difference
A successful diagnostic upgrade isn’t just about the technology—it’s about the workflow that supports it. With thoughtful planning, proper training, and regular review, your new equipment can enhance efficiency, patient care, and profitability for years to come.

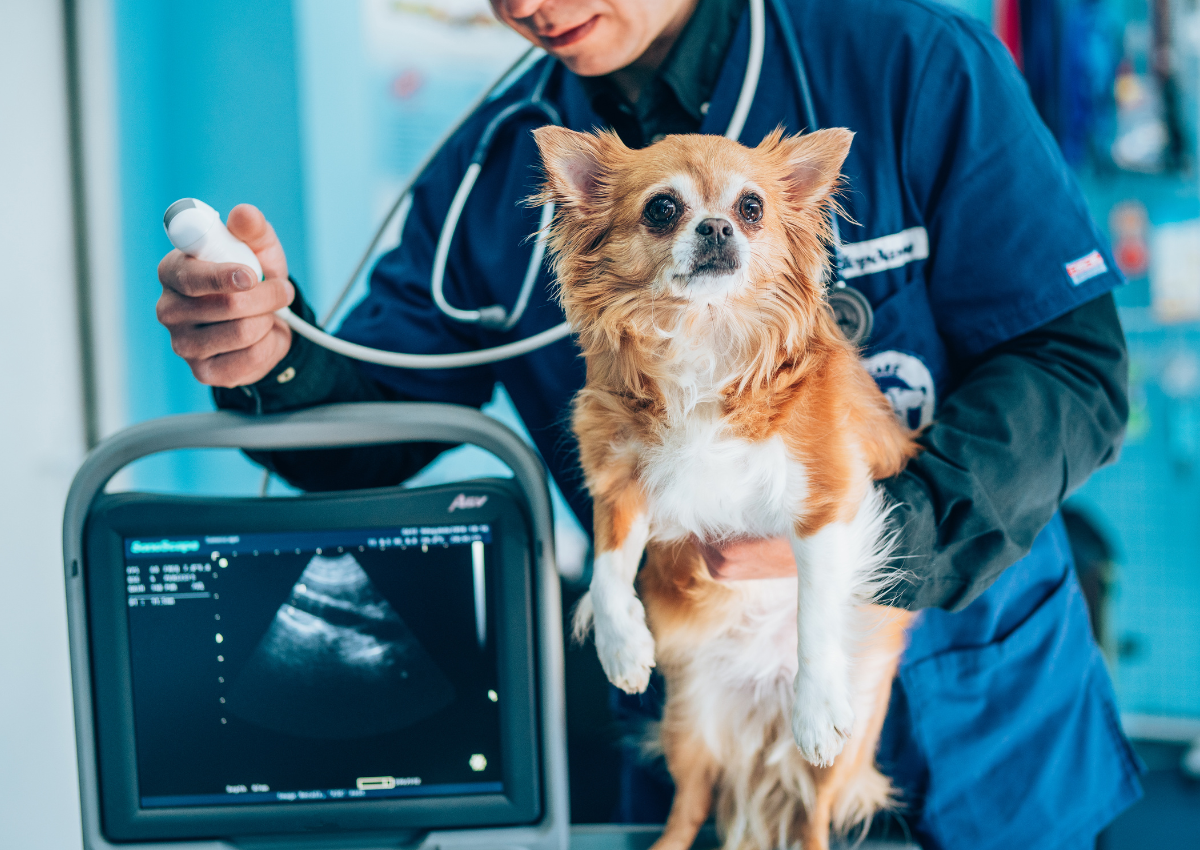
Why Your Vet Clinic Needs Ultrasound for Safer Cystocentesis

Ultrasound Makes Cystocentesis Less Stressful for All
In veterinary medicine, minor improvements in technique can make a big difference.
One of those game-changing tools is ultrasound, particularly when it comes to performing safer, more reliable cystocentesis.
Suppose your practice doesn’t already use ultrasound for this everyday procedure. In that case, you may be missing an opportunity to improve diagnostic quality, reduce stress (for everyone involved), and elevate the standard of care you offer.
Here’s why it’s worth investing in — and how it can transform how you approach even routine diagnostics.
Cystocentesis Without Guesswork
If you’ve ever performed a blind cystocentesis on an obese dog, a wiggly cat, or a patient with a tiny, poorly palpable bladder, you know how tricky it can get.
Even with years of experience and skilled hands, there’s a level of uncertainty — are you truly in the bladder? Is it full enough? Are you avoiding other organs?
Ultrasound eliminates the guesswork
With real-time imaging, you can see exactly where the bladder is and guide your needle precisely, even when the bladder is small, displaced, or hidden by fat or intestines.
This not only improves your confidence but also makes the procedure faster and less stressful for the patient.
Let’s look at an example…
Take Blaze, for instance—a senior cat with chronic kidney disease who presents for a urine culture. On palpation, her bladder feels small and challenging to locate. With ultrasound, you can quickly find the small dorsal bladder and collect a sample without repeated attempts — a win for you, your patient, and the client.
Why Safer Matters — Beyond the Obvious
Of course, accuracy is essential, but safety is equally critical. Blind cystocentesis carries risks that can be mitigated with ultrasound:
Puncturing the intestines or uterus by mistake
Traumatizing bladder tumors or inflamed tissue
Causing unnecessary discomfort with multiple unsuccessful attempts
With ultrasound, you can avoid these pitfalls by choosing the safest access point and observing the bladder’s walls and contents before you proceed.
It also builds trust with clients. Being able to explain, “We used ultrasound to guide our sample collection and avoid complications,” reassures pet owners that you’re providing the best care possible.
Unexpected Perks for Your Practice
Adding ultrasound for cystocentesis also brings less obvious benefits:
Team empowerment: Veterinary technicians can be trained to perform ultrasound-guided cystocentesis under supervision, freeing doctors for more complex tasks.
Time savings: Fewer failed attempts mean shorter appointments and happier patients.
Professional pride: Offering a more advanced and refined approach sets your clinic apart, signaling to clients that you prioritize precision and patient comfort.
Overcoming Barriers to Getting Started
You might wonder: Isn’t ultrasound overkill for something as simple as cystocentesis?
Not anymore.
Modern ultrasound units are more affordable, portable, and user-friendly than ever — and they’re designed with veterinary needs in mind.
Training doesn’t have to be a hurdle, either. Many manufacturers offer resources to help you and your team get comfortable with the technology quickly.
And once you’re familiar with it, you’ll find yourself reaching for ultrasound not just for cystocentesis but for countless other applications — from pregnancy checks to identifying abdominal masses.
Ready to Upgrade Your Standard of Care?
By incorporating ultrasound into cystocentesis, your team can make this routine procedure safer, more precise, and less stressful for everyone involved.
From improving sample quality to reducing complications, ultrasound guidance offers clear benefits that elevate patient care and strengthen client trust.
It’s a simple-but-powerful way to advance the quality of medicine you provide every day.
Explore the ultrasound systems we offer:

Mastering Cystocentesis: Benefits of Ultrasound Guidance in Veterinary Medicine

Top Benefits of Ultrasound-Guided Cystocentesis
Cystocentesis is a cornerstone diagnostic procedure in veterinary medicine; however, even for experienced teams, it can present its challenges.
Fortunately, ultrasound guidance has revolutionized how we perform this critical task, making it safer, more accurate, and more efficient.
Let’s take a moment to explore the benefits of ultrasound-guided cystocentesis and discuss common challenges — as well as how to overcome them — so your team can master this procedure with confidence.
Why Upgrade to an Ultrasound-Guided Cystocentesis Method?
Traditionally, cystocentesis was done “blind,” using only palpation to locate the bladder. While this can work well in ideal patients — those who are lean, cooperative, and have a full bladder — not all patients fit that description.
Ultrasound-guided cystocentesis gives you:
Precision: Visualize the bladder in real time and guide your needle directly into it, reducing the risk of accidental injury.
Cleaner samples: Essential for urine cultures, especially when diagnosing infections or bladder disease.
Improved safety: Paramount in patients with small bladders, obesity, or abdominal masses, where blind cystocentesis risks puncturing other organs.
Confidence under challenging cases: For example, in a tense cat with hematuria, ultrasound helps you find and access even a small, hard-to-palpate bladder.
Let’s say Johnny, a middle-aged male cat, presents with straining and blood in his urine. On palpation, his bladder feels small and difficult to isolate. With ultrasound, you can see the partially contracted bladder nestled beneath intestinal loops, allowing you to confidently and safely obtain a diagnostic sample on the first attempt.
Tips and Best Practices for Success
Choose the proper probe:
A microconvex or linear transducer is ideal for small animal abdominal imaging because it offers good resolution and fits easily against the body wall.
Positioning matters:
Most patients do well in dorsal or lateral recumbency. Ensure the patient is calm — sometimes gentle sedation or a quiet room can make all the difference.
Scan before you poke:
Before inserting the needle, take a moment to thoroughly scan the bladder. Identify its borders, note any stones, masses, or unusual anatomy, and plan your needle path.
Use the in-plane approach:
Whenever possible, guide your needle within the ultrasound beam so you can watch its entire length — and the tip — enter the bladder.
Have an assistant help:
A trained veterinary technician can hold the probe steady while you guide the needle, keeping your hands free and maintaining a clear image.
Common Challenges and How to Overcome Them
Even with Ultrasound, you may encounter some hurdles. Let’s talk it through…
The bladder is too small: Some patients present after voiding or have a chronically small bladder (e.g., due to polyuria).
Solution: If the sample isn’t urgent, wait and give the patient access to water. You can also use a fluid bolus and monitor until the bladder refills enough to access safely.Obese or tense patients: In these patients, the bladder can be obscured by fat or muscle tension.
Solution: Position them carefully to minimize pressure on the abdomen and consider mild sedation to relax abdominal muscles.Needle not visible: If you can’t see the needle on the ultrasound screen, it’s likely off-plane.
Solution: Adjust your angle and make small movements while watching the screen until the needle comes into viewPatient movement: Sudden movements can make it hard to keep the bladder in view and the needle steady.
Solution: Enlist a skilled technician to hold the patient securely and calmly. In some cases, light sedation may be appropriate.
A Team Effort — And a Growth Opportunity
Ultrasound-guided cystocentesis isn’t just a skill for veterinarians — it’s also an excellent way for veterinary technicians to grow professionally. With appropriate training, technicians can perform this procedure competently, freeing up doctors for more complex tasks and improving overall hospital efficiency.
Invest in the Right Tools
Of course, mastering ultrasound-guided cystocentesis starts with the right equipment. High-quality imaging, ergonomic probes, and user-friendly interfaces make it easy for your team to perform accurate, confident diagnostics every day.
With the right equipment, a little practice, and teamwork, this procedure can become second nature — and a true diagnostic advantage!
Links to the systems we offer:
https://newvetequipment.com/vetus-e7-ultrasound
https://newvetequipment.com/vetus-9-veterinary-ultrasound-system
https://newvetequipment.com/vetus-eq-ultrasound-system
https://newvetequipment.com/basic-bladder-scanner-by-mindray

Ultrasound-Guided Cystocentesis: Precision for Veterinary Diagnostics

Why Ultrasound Is Now Standard for Cystocentesis
In our line of work, accuracy is one of the most crucial factors in ensuring a clean sample collection and an accurate diagnosis. When it comes to diagnostic procedures like cystocentesis, precision has a direct impact on patient outcomes, sample quality, and client satisfaction. That’s why ultrasound-guided cystocentesis is becoming the gold standard in veterinary practices everywhere.
Whether you're a seasoned practitioner or building a new hospital, integrating ultrasound guidance into routine procedures like cystocentesis can enhance the quality of care and improve diagnostic reliability.
It’s a win-win! But, before we get ahead of ourselves, let’s break it down…
What is Ultrasound-Guided Cystocentesis?
Cystocentesis is the percutaneous aspiration of urine from the bladder using a needle and syringe.
Traditionally, it’s performed by palpating (or feeling) the bladder manually, which can be effective in some cases, but not all.
Ultrasound-guided cystocentesis takes this a step further by using real-time imaging to guide the needle directly into the bladder, offering unmatched precision and reducing guesswork.
Why Use Ultrasound Guidance?
1. Increased Accuracy
One of the main advantages of ultrasound guidance is visual confirmation of bladder location, size, and wall integrity. This is especially helpful in:
Obese patients where palpation is difficult
Nervous or tense animals that guard their abdomen
Patients with small or partially voided bladders
Critical care patients who cannot be positioned ideally
By directly visualizing the bladder, we can ensure correct needle placement and avoid surrounding structures such as the intestines or uterus, significantly reducing the risk of complications.
2. Improved Sample Quality
When you’re aiming for a sterile urine sample for culture or cytology, contamination is a concern.
Palpation-based cystocentesis increases the risk of dry taps or puncturing non-target tissues, which can compromise the quality of the sample.
Ultrasound guidance minimizes these risks, resulting in cleaner samples, a higher diagnostic yield, and greater confidence in the results. This is particularly valuable when investigating things like:
Urinary tract infections
Hematuria
Bladder masses
3. Greater Safety for Challenging Cases
In some instances, like patients with transitional cell carcinoma (TCC), cystoliths, or anatomical abnormalities, can be more safely evaluated with ultrasound guidance. You can:
Avoid needle contact with neoplasms
Visualize and avoid stones
Confirm bladder fullness before attempting the procedure
This reduces the chance of iatrogenic injury (injuries caused by the needle) and aligns with best practices for minimally invasive care.
Now that we’ve got the basics covered, let’s unpack what good looks like for this particular procedure.
Tips and Best Practices for Ultrasound-Guided Cystocentesis
1. Use the Right Equipment
Invest in an ultrasound machine with high-resolution imaging and a microconvex or linear transducer; both are ideal for abdominal imaging in small animals. Having a veterinary-specific machine ensures preset parameters are optimized for soft tissue visualization.
Pro Tip: Use a hands-free probe holder or enlist a trained assistant to hold the transducer while you guide the needle. This helps maintain image stability and needle visibility.
2. Positioning Matters
Dorsal or lateral recumbency usually works best. Use gentle restraint to reduce stress and abdominal guarding. A calm, cooperative patient makes the procedure easier and more comfortable for everyone.
3. Visualize the Entire Path
Before inserting the needle, scan the full path from the skin surface to the bladder. This helps you identify any vessels, intestines, or abnormalities that could interfere with the procedure.
4. Use the In-Plane Technique (When Possible)
The “in-plane” approach is an ultrasound-guided technique in which the needle is inserted along the same plane as the ultrasound beam, allowing the entire length of the needle (including the tip) to be visible on the screen as it advances toward the target (in this case, the bladder).
Let’s look at it in action…
A 9-year-old spayed female Labrador retriever, Mila, presents with hematuria and pollakiuria, resulting in blood in her urine and frequent urges to urinate. On abdominal palpation, the bladder feels small and difficult to isolate. Rather than risk multiple blind attempts, her veterinarian uses ultrasound guidance. The bladder is visualized dorsal to the pubis, partially obscured by intestinal loops.
With the ultrasound probe held steady, a 22-gauge needle is guided in-plane, avoiding bowel loops and penetrating the bladder wall cleanly. A 7 mL urine sample is collected with no complication, and the diagnostic yield from both urinalysis and culture is high.
The client receives fast, accurate results, and the patient avoids the stress of repeat attempts or complications.
Is Your Practice Equipped for Precision?
Integrating ultrasound-guided techniques like this one isn’t just about upgrading your technology; it’s about upgrading your standard of care.
Not to mention, this is an excellent opportunity for veterinary technicians to enhance their clinical skill set while improving workflow efficiency within the practice.
With proper training, technicians can confidently perform this procedure, ensuring accurate sample collection and patient comfort.
By taking on this advanced task, technicians help free up the veterinarian’s time for more complex diagnostics, treatments, or client communication—ultimately enhancing the hospital’s overall productivity and quality of care.
Ultrasound-guided cystocentesis brings precision, safety, and diagnostic confidence to a routine veterinary procedure. As pet owners increasingly expect modern and accurate diagnostics, ultrasound is becoming the gold standard.
Links to the systems we offer:
https://newvetequipment.com/vetus-e7-ultrasound
https://newvetequipment.com/vetus-9-veterinary-ultrasound-system
https://newvetequipment.com/vetus-eq-ultrasound-system
https://newvetequipment.com/basic-bladder-scanner-by-mindray

How to Evaluate the Urinary Bladder Effectively on Ultrasound

An ultrasound of the urinary bladder can be recommended for a number of reasons, including suspected uroliths, cystitis, and neoplasia—to name a few.
Often, the evaluation includes the entire abdomen and any other parts of the urinary tract that can be visualized.
Given all the conditions that can affect the bladder, as well as important information from an ultrasound study to help guide the treatment plan, it’s beneficial to gain proficiency in evaluating the bladder via ultrasound.
Use a Systemic Approach to Evaluating the Bladder
A systemic approach to the whole abdomen is good, and a bladder evaluation is usually just one part of an abdominal ultrasound study. So while it may be tempting to jump to the bladder right away if the patient is having urinary symptoms, it’s best to complete your abdominal ultrasound study in the same order that you usually do it.
Once you reach the urinary bladder, a systemic approach is again useful, to ensure nothing is missed. Here is one method for a stepwise evaluation…
Is the overall bladder shape normal and as expected? Through practice, a veterinarian can get a good feel for what shape is normal for canine and feline patients, and how it may change if the bladder is full versus empty or nearly empty.
How does the lumen of the bladder look? If urine is present, is the urine is anechoic? Is there sludge, sediment, crystalline material, a polyp, or anything else that is abnormal?
If there are uroliths present, they generally appear as hyperechoic structures inside the lumen of the bladder. There may be acoustic shadowing, and the calculi may move freely depending on how large they are.
Is the bladder wall smooth, a normal thickness, and well-defined? Be sure to evaluate the entire bladder. If cystitis is present the wall may be focally or generally thickened or have irregularities in the mucosa, depending on the severity and duration of the cystitis. Keep an eye out for polyps or masses/tumors, too. Also, look for deviations in the wall that could indicate a urinary bladder diverticulum.
If a mass is present, make note of the size, appearance, and location. Transitional cell carcinoma, the most common neoplasia of the bladder, tends to occur in the bladder wall near the neck and trigone. Commonly, these masses are hyperechoic or mixed echoic and have been compared to cauliflower in appearance. Evaluate nearby blood vessels and regional lymph nodes, too. Avoid cystocentesis or aspiration for samples, because of the risk of seeding the neoplasia into the abdominal cavity when the needle is withdrawn. Sometimes, it’s easy to confuse blood clots with masses, so keep this in mind and re-evaluate as needed.
Be sure to evaluate other urogenital structures, including the kidneys and ureters (the latter are often not visible unless there’s an abnormality), as well as blood vessels and lymph nodes in the region. Remember to look for the uterus/ovaries in intact females and the prostate in males, although it might not be possible to visualize these structures in all patients, especially if they are normal.
Whenever abnormalities are noticed, describe them in detail and take measurements. Include all of this in the notes. Even if things look normal, it’s still a good idea to take some measurements (such as bladder wall thickness) and describe what you’re seeing, as a baseline for comparison in case anything changes in the future.
A Few Tips
A full bladder can help with visualizing certain lesions (such as hyperechoic uroliths) by providing “contrast” or a backdrop to help make abnormalities stand out. Also, a full bladder smooths out the bladder wall, whereas an empty bladder may lead to false readings of wall thickening or masses. Additionally, a large bladder allows for an easier ultrasound-guided cystocentesis. So whenever possible, try to ultrasound with a full, or at least partly full, bladder. In some cases, it may be appropriate to give the patient water or IV/SQ fluids and wait for the bladder to fill prior to the study.
Pressure from the transducer can alter the bladder’s shape.
So be sure to practice with various pressures and become familiar with how the appearance of the bladder might change.
Repositioning the patient can also be helpful.
This may give you a better viewing angle and position for certain structures. Having the patient stand up may put gravity in your favor by decreasing the distance between the bladder and the probe. Also, patient movement may cause sludge/sediment to move around or disperse so that it’s not mistaken for a urolith.
Have appropriately sized needles, syringes, and collection materials available.
In case an aspiration/cystocentesis is needed, it’s best to have supplies ready to go.

Ultrasound of the urinary bladder is a very valuable skill, and it works well in conjunction with information gained from x-ray studies. Training and practice in ultrasound of the urinary bladder are often well worth it for patient care and for additional income from ultrasound studies.
Written by: Dr. Tammy Powell, DVM

Adrenal Ultrasound in Big Dogs: Step-by-Step Techniques

A thorough abdominal ultrasound includes evaluating the adrenal glands.
Common reasons to look at the adrenals include searching for signs of neoplasia, Cushing’s, or Addison’s disease. And even in animals where adrenal disease isn’t suspected, sometimes growths or other changes to the gland(s) are discovered incidentally.
Unfortunately, sometimes adrenals can play “hide and seek” and be tough to find. That’s true for any dog—but especially for large dogs with deep abdomens, since the abdomen may be too thick for the ultrasound waves to penetrate well.
Having a repeatable system for where to look can help. Here are some steps for finding those tiny glands inside of a big dog…
Perform an Abdominal Ultrasound in the Same Order Every Time
Just like reading an x-ray or performing a physical exam, a systemic approach helps ensure that nothing is missed.
Each veterinarian may have their own preference for how to go through a scan in a stepwise fashion. For example, some may scan cranially to caudally. Others may scan clockwise, or have some other system. Any system is fine, so long as it covers everything you need to see and is easy to repeat on each patient. So choose what works best for you.
In addition to revealing unexpected abnormalities of the adrenal gland(s) sometimes, systemically examining the entire abdomen will also help a veterinarian gain experience. Then, when it’s time to locate the glands on a patient with suspected adrenal disease, you’ll have plenty of practice to fall back on and may feel less pressure.
Where to Find the LEFT Adrenal Gland
To narrow the search, first, find the left kidney by scanning the left dorsal mid-abdomen.
Next, narrow the search even further by finding the vascular landmarks: the aorta (in long view) and the left renal artery.
Look for the spot where the left renal artery branches off from the aorta. The left adrenal gland should be just cranial to this junction.
Where to Find the RIGHT Adrenal Gland
First, locate the right kidney by scanning the right cranial abdomen.
Next, locate the vascular landmarks: the caudal vena cava (in long view) and the cranial mesenteric artery.
Apply some pressure, which will cause compression of the caudal vena cava and allow better visualization of the adrenal gland. The gland is dorsolateral to the vena cava and just cranial to the cranial mesenteric artery.
A Few Tips
It may be tempting to use the kidneys as a primary landmark since the adrenal glands are located near each kidney. However, the kidneys may overshadow the small glands. So while the kidneys are a good starting point, it’s also important to use vascular landmarks.
Color Doppler can be a big help, too. It often makes it easier to find and view vascular landmarks.
Minimize the distance between the probe and the adrenal glands as much as possible. This can be done by moving the probe as needed, and by applying gentle pressure if the patient allows.
What to Include In the Medical Record
Be sure to describe any abnormalities. Additionally, rather than just noting ‘normal’ or ‘abnormal’, it’s good to provide specific details in case a comparison is needed in the future. Here are some things to note, even if the glands look normal…
Measure and record the size of each gland. Measurements are typically taken from the cranial to caudal pole, as well as a measurement of the thickness of each pole.
Note if the glands are hypoechoic to surrounding fat or if their appearance is different than expected.
Classic adrenal gland shape has been compared to a ‘peanut’, or sometimes an ‘arrowhead’ for the right adrenal. Note if the shape is as expected or if it’s abnormal.
If any abnormalities are noted, list the most likely rule-outs and a recommendation for follow-up/monitoring or further diagnostics if indicated.

With practice, locating the adrenal glands will become second nature. It may still be challenging on some patients, but having a repeatable system and gaining experience will help.
Written by: Dr. Tammy Powell, DVM

Diagnosing Bladder Stones in Pets: What You Need to Know

Sometimes, diagnosing urinary bladder stones in dogs and cats is simple: one set of x-rays and the mineral-dense uroliths glow bright white on your viewing screen.
Other times, it’s not so straightforward… especially for small or radiolucent stones.
Here’s how radiographs and ultrasound can be used to help you find pesky, hard-to-view bladder stones.
Are bladder stones on your differential diagnosis list?
Bladder stones may be at the forefront of your mind if you see a dog or cat who’s…
Having blood in their urine.
Urinating more frequently, and in short streams.
Having urinary accidents in the home.
Straining or experiencing pain during urination.
Excessively grooming around their genitals.
Usually, a client will bring their pet into you for these concerns, and your physical exam will help to determine that there’s no urinary obstruction.
With urinary bladder stones, you may notice some discomfort on palpation of the caudal abdomen. On a cat or small dog, you may even feel stones or crepitus in the area of the bladder.
Some patients, on the other hand, may exhibit minimal symptoms and their physical exam may be normal (sometimes bladder stones are an incidental finding).
Either way, most pets will need some type of imaging to confirm that bladder stones are there. Radiographs are a great place to start…
Finding uroliths via radiographs
In addition to any other needed tests—such as a urine analysis or bloodwork—radiographs are often recommended for pets with urinary symptoms, in order to look for uroliths or other abnormalities.
Typically, you’ll start with two simple views of the abdomen—a lateral and a VD.
Take a close look at the urinary bladder to look for radiopaque stones, which should show up as a white opacity relative to soft tissues thanks to their mineral composition.
Stones can range in size from small sand-like grains to more than two inches across. There may be just one or two stones present… or a small group… or even more than 100.
Remember to check the urethra for small stones that could be stuck—especially if the patient is straining or in pain during urination.
For better visualization of the entire urethra in male dogs, consider taking another lateral view with the hindlimbs pulled forward.
Also, check the kidneys and the areas of the ureters. While much less common in pets than in people, occasionally uroliths may be seen higher up in the urinary tract.
If you see stones now—you have your answer.
If you suspect urinary bladder stones but still don’t see them, a contrast study may allow better visualization.
For finding bladder stones, a double-contrast study is ideal.
This includes using both a positive contrast agent (soluble iodinated contrast medium) and a negative contrast agent (room air, or ideally carbon dioxide to reduce the risk of an air embolus) in the bladder together.
Anesthesia or sedation may be needed for the patient’s safety and comfort since the contrast agents are administered via a urinary catheter.
In addition to radiographs, an ultrasound is a useful tool…

Finding uroliths via ultrasound
An ultrasound study is another great option for finding bladder stones, especially radiolucent ones.
The fluid-filled bladder provides contrast for the ultrasound waves so that stones can be found (and often emphasized by acoustic shadowing).
Besides radiolucent stones, you may also see…
Bladder stones (radiopaque or radiolucent) that were too small to visualize radiographically (smaller than 1-3mm).
Other problematic issues in the bladder, such as ‘sludge’ buildup in cats with crystalluria.
Damage to the urinary bladder itself, such as inflammation.
The condition of the upper urinary tract—the kidneys and ureters.
Unexpected findings, such as tumors or anatomical abnormalities of the bladder.
Because of this, ultrasound imaging is a valuable tool for helping you diagnose and treat problems of the bladder, including urinary stones.
Follow-up
Depending on your findings, you may recommend a diet change for dissolvable stones, or a cystotomy to remove the stones.
For dissolution, follow-up imaging can help to track the patient’s progress and see whether or not the stone is dissolving.
When a cystotomy is recommended, remember to use imaging on the day of surgery…
Take pre-op radiographs to confirm the stones are still there, and that your urinary catheter is in place.
Include post-op views to confirm and document that all stones were successfully removed.
Since most stones are radiopaque, standard radiographs are a good option for follow-ups—and typically the imaging choice on the day of surgery.
But ultrasound can also be used in conjunction with other diagnostic tests to monitor the health of the urinary system long-term and to look for early signs of a problem such as a reoccurrence of stones.

Catching stones early, when they’re small, may allow less invasive treatment options such as voiding urohydropropulsion.
With the right combination of imaging modalities, you can help your clients stay on top of treating, monitoring, and preventing urinary bladder stones in their pets.
Written by: Dr. Tammy Powell, DVM
Disclaimer: This article is for general informational purposes only, and not intended as a guide to the medical treatment of any specific animal.

How to Choose the Best Veterinary Ultrasound System

Investing in an ultrasound machine is a big decision for any veterinary practice, impacting diagnostic capabilities and patient care.
Choosing the right ultrasound requires careful consideration, Whether you focus on companion animals, large animals, or a combination.
Why Invest in a Veterinary Ultrasound System?
Veterinary ultrasounds offer advanced imaging capabilities for both routine diagnostics and complex cases. There’s a range of reasons why they’re ideal:
Non-invasive: often reducing the need for exploratory surgery in many cases
Real-time imaging: allows for immediate evaluation of organs
Guided procedures: enable precise guidance for fine-needle aspirates and biopsies.
These invaluable tools help diagnose various diseases and abnormalities in veterinary patients. Most commonly:
Abdominal disorders: detecting changes in liver, spleen, and kidney size and the presence of masses or cysts - helping to diagnose hepatitis, liver tumors, bladder stones, and renal cysts.
Cardiac Conditions: evaluating congenital heart defects, cardiomyopathy, and fluid accumulation around the heart.
Reproductive health: early detection of pregnancy, uterine abnormalities, and ovarian conditions.
Fluid accumulation: identify abnormal fluid buildup causing pleural effusion.
Oncology: detection of benign and malignant masses and lymph node enlargement
Let’s move on to unpack some key factors to consider when upgrading or adding an ultrasound to your diagnostic portfolio.
1. Image Quality
First and foremost, high-resolution imaging is essential for accurate diagnoses. Look for systems that offer advanced imaging technologies that provide clear images for superficial and deep tissue examinations.
For instance, the Vetus 9 Ultrasound System by Mindray utilizes ZONE Sonography Technology+ (ZST+), delivering exceptional image clarity across various applications.
Avoid older systems that offer beam-forming technology. You’ll often find this compromises the quality of the image and can decrease your confidence in an accurate diagnosis.
2. Versatility and Application Range
Your ultrasound machine should accommodate the diverse needs of your practice, from small companion animals to large livestock.
Look for ultrasound systems that are designed with this versatility in mind, offering specialized transducers and settings suitable for a wide range of species and medical scenarios.
3. Ease of Use
Technology should enhance your practice’s ways of working, not contribute to bottlenecks.
An intuitive interface and user-friendly controls can impact an efficient workflow, especially in busy practices. Be sure the prospective system is easy to navigate through imaging options and patient data.
4. Portability and Ergonomics
Depending on your practice's needs, portability may be a significant factor. Look for systems that are relatively light weight and provide a slim design.
Ultrasounds like the Vetus 9 have an added bonus: the ability to fold to a height of one meter making it convenient for mobile services and easy storage, without compromising on performance.
5. Advanced Diagnostic Features
Consider those that offer advanced diagnostic tools such as elastography, doppler imaging, and specialized cardiac assessment capabilities.
Doppler ultrasound systems are particularly useful in evaluating blood flow patterns and detecting abnormal heart function.
6. Support and Training
Comprehensive training and reliable technical support will maximize your investment.
Be sure your ultrasound provider offers extensive training sessions, ensuring your team can fully leverage the system's capabilities.
7. Budget and Return on Investment
While high-end ultrasound systems represent a significant investment, their advanced features can lead to improved diagnostic accuracy and increased revenue through enhanced service offerings.
Selecting the right one can feel overwhelming, but this checklist should give you a good place to start in choosing the one that’s best for you and your team!

Top Features of the Mindray Vetus 9 for Veterinarians

Transforming Veterinary Diagnostics with the Mindray Vetus 9 Ultrasound System
In the growing field of veterinary medicine, staying at the forefront of diagnostic technology is key to providing exceptional care to patients.
Adding or upgrading to an advanced ultrasound system not only benefits your practice, but your staff, and your patients.
More notably, it’s a way to uphold our ongoing promise to our clients and community to provide the best possible patient care.
The Mindray Vetus 9 Ultrasound System is a transformative tool that can significantly enhance your practice's in-house diagnostic capabilities. It delivers advanced imaging and user-friendly features, positioning it as a leader in the market.
Let’s take a moment to unpack some features that make this a dynamic and innovative diagnostic resource.
Unparalleled Imaging Quality
Many veterinary ultrasound systems on the market still rely on older beam-forming technologies, which may compromise clarity and consistency, especially in deeper or more complex imaging.
The Vetus 9 is powered by the innovative ZONE Sonography Technology+ (ZST+), which shifts from traditional beamforming to advanced channel-based processing.
This evolution enables real-time imaging with remarkable clarity, ensuring that superficial and deep anatomical structures are displayed precisely.
Features like Zone Imaging and Dynamic Pixel Focusing maintain consistent focus across the entire field of view, helping to enhance our confidence in discoveries and diagnoses.
Versatility Across Veterinary Specialties
While other systems might excel in specific niches, the Vetus 9 provides a well-rounded solution that caters to needs ranging from routine diagnostics to specialized cases.
Designed to meet the needs of veterinary practices, the Vetus 9 ultrasound offers specialized solutions for both abdominal and cardiac assessments. Let’s look a little closer:
Abdominal Imaging: Enhanced Contrast Imaging (UWN+) utilizes second harmonic and non-linear fundamental signals. This means you can expect improved sensitivity to subtle lesions and discrete abnormalities.
Cardiac Imaging: The Tissue Doppler Imaging Quantitative Analysis (TDI QA) feature allows for detailed myocardial movement and synchronization assessment. This feature offers insights into cardiac functions crucial for diagnosing and managing cardiovascular conditions in veterinary patients.
While some systems may include elastography (an ultrasound technique used to measure elasticity or stiffness of tissue) or Doppler imaging, they often lack the same level of veterinary-specific customization found in the Vetus 9.
Its Sound Touch Elastography (STE) provides real-time analysis of tissue stiffness, helping to evaluate conditions like tumors or liver fibrosis.
Enhanced Workflow and User Experience
The Vetus 9 is designed with user-friendly features that streamline workflow, including:
Advanced Display: A 23.8-inch full-screen display provides crisp, large images, while a 15.6-inch full-HD touch screen offers intuitive interaction, making it easier to navigate through imaging options and patient data.
Portability: Many high-end ultrasound systems are bulky, limiting mobility and convenience. This system's compact design, folding down to a height of just one meter, makes for easy transport for mobile veterinary services. Its slim 55 cm body width allows smooth navigation through doorways and clinical settings.
Other systems may offer smaller displays or lack the combination of a high-definition touchscreen and a large viewing screen, which can affect the overall ease of evaluation.
Comprehensive Support and Training
Investing in the Vetus 9 comes with the assurance of comprehensive support in the form of:
Training: Your team will receive 16 one-hour remote training sessions, allowing time for practice and questions and ensuring proficiency in using the system's full capabilities.
Warranty: A five-year warranty provides peace of mind, reflecting the system's quality and a commitment to customer satisfaction.
Elevate Your Practice
Incorporating the Mindray Vetus 9 Ultrasound System into your practice enhances diagnostic accuracy and elevates the standard of care you provide to your patients.
Its advanced imaging capabilities, versatility across specialties, and user-friendly design make it a valuable addition to any veterinary practice committed to upholding its promise of exceptional patient care.
For more information or to learn more about how the Vetus 9 can meet your practice's specific needs, check out the Mindray Vetus 9 Ultrasound System page on our website.

Buy Veterinary Digital X-ray Equipment with Confidence

How to Buy Veterinary Digital X-ray Equipment without Experiencing Buyer's Remorse
Have you ever bought something and regretted the purchase?
I think I have at one time or another. However, it’s one thing to regret ordering a cheeseburger and fries, but quite another when I regret buying a $50,000 car or truck.
When I make a big purchase, I want to feel good about my decision. I want to make sure that I made the right choice.
I want you to feel great about buying from me! I understand it is no small thing for a Veterinarian to spend $20,000 or $30,000 on digital x-ray equipment, and I want you to feel great about buying from us.
So, here is my “purchase without buyer's remorse” plan:
The 30-day satisfaction guarantee, or your money-back offer. When you make a digital x-ray system purchase, I will give you 30 days so that you feel comfortable and confident that you made the right choice.
And if you are not satisfied, return your digital x-ray equipment for a full refund.
Yes, that is correct! A FULL refund!!
I know that after the vet digital x-ray equipment is installed in your clinic, and once you learn how to use the software, you will be very happy with the results you get.
I can offer this guarantee because I am very confident with the quality of the digital x-ray equipment we sell, and I want you to be completely satisfied.
Here is the fine print:
Equipment must be returned in original packaging.
Equipment cannot be returned if damaged by the user during your 30 days.
The buyer pays the cost of shipping/packing/insurance of all returned equipment.
You must give us a reasonable chance to correct any dissatisfaction.
The main reason I am offering this “30-day satisfaction guarantee or your money back” is to give you peace of mind.
I understand I’m not as big as Idexx, Cuattro, or Sound-Eklin. Perhaps that makes you think twice about trying us out.
But I am confident that our equipment is as good, if not better, and now we have a “30-day satisfaction guarantee or your money back” - which the big boys do not offer!

The bottom line is simple:
I am offering quality digital x-ray equipment for the veterinary industry at an amazing price, with a great warranty, and now a 30-day guarantee.
I want to do the right thing, treat you with respect, and help you be successful in your veterinary practice.
Call or text me - Brad Haven, Jr. - 530-355-5886

Picking the Perfect Small Animal Ultrasound Probe
Small Animal Veterinary Ultrasound Probes: What To Look For
Ultrasound imaging has become an indispensable tool in modern veterinary medicine. Offering real-time, non-invasive visualization of internal organs and tissues, it aids in diagnosing a wide range of conditions, from abdominal pathologies to cardiac malformations. However, for optimal image quality and diagnostic accuracy, the right veterinary ultrasound probe is crucial. This blog delves into the key considerations when choosing probes for your small animal practice.
Understanding Probe Types:
Veterinary ultrasound probes come in various shapes and sizes, each tailored to specific anatomical regions and applications. Here are the most common ones:
Micro-convex Probes: The workhorses of small animal abdominal ultrasonography, offer a good balance between image resolution and penetration depth. Their small footprint allows access to tight spaces like intercostal gaps, making them ideal for visualizing organs like the liver, kidneys, and bladder.
Linear Probes: With a flat footprint and high-frequency range, linear probes excel at providing high-resolution images of superficial structures like muscles, tendons, and joints. They are also valuable for cardiac examinations and evaluating delicate structures like the eyes.
Phased-array Probes: Offering electronic beam steering, phased-array probes enable detailed visualization of deeper structures like the heart and blood vessels without requiring probe manipulation. Additionally, some models enable 3D reconstruction, enhancing diagnostic capabilities.
Endocavity Probes: For internal examinations of the female reproductive tract or urinary bladder, specialized endocavity probes are available. These miniature probes feature sterile sheaths for safe insertion and provide clear visuals of organs within body cavities.
Frequency Matters:
Frequency refers to the number of sound waves emitted by the probe per second, directly impacting image resolution and penetration depth. Higher frequencies (5-12 MHz) generate sharper images but struggle to penetrate deeper tissues. Conversely, lower frequencies (2-5 MHz) offer deeper penetration but with less detail. The ideal frequency range depends on the target organ and patient size. Consult your ultrasound manufacturer's recommendations for specific applications.
Image Quality and Advanced Features:
Beyond probe type and frequency, several features influence image quality and diagnostic utility:
Field of View: Indicates the area covered by the ultrasound beam, impacting the number of organ sections captured in a single image. Wider fields of view are helpful for general surveys, while narrower fields provide a more focused examination of specific structures.
Tissue Harmonic Imaging (THI): Reduces image noise generated by tissue interfaces, resulting in sharper and clearer visualization of organ borders and internal structures.
Doppler Modes: Enables evaluation of blood flow within vessels, aiding in diagnoses related to cardiovascular and circulatory disorders.
Ergonomics and Handling: Probe weight, grip design, and cable length can significantly impact user comfort and scanning efficiency. Choose probes that feel comfortable in your hand and minimize fatigue during prolonged examinations.
Considerations for Your Practice:
When selecting probes for your practice, consider the following factors:
Patient Population: The typical size and species of animals you see will influence the appropriate probe sizes and frequencies.
Common Examination Types: Regularly performed procedures like abdominal scans, echocardiography, or musculoskeletal assessments will guide your probe selection.
Budget: Probe prices vary widely, depending on technology, features, and brand. Determine your budget constraints and prioritize must-have features versus optional ones.
Compatibility: Ensure the chosen probes are compatible with your existing ultrasound machine.
Conclusion:
Selecting the right veterinary ultrasound probes is vital for accurate diagnoses and effective patient care. By understanding probe types, frequencies, and advanced features, you can tailor your equipment to your practice's specific needs and optimize your diagnostic capabilities. Investing in high-quality probes not only enhances your clinical acumen but also improves workflow efficiency and patient comfort.
Remember, consulting with your ultrasound equipment provider and colleagues can offer valuable insights during the selection process.
By making informed choices, you can equip your practice with the best tools to provide exceptional veterinary care for all your furry (and feathered) patients.

Small Animal Veterinary Ultrasound Probes: What to Look For

Ultrasound probes, or transducers, are a necessary part of any veterinary ultrasound system. Without a good quality probe, veterinarians would have difficulty producing high-resolution images with their ultrasound machine.
But since probes can also be a big financial investment, it’s important to select one that’s a good fit for your practice.
How Do Veterinary Ultrasound Probes Work?
These devices have piezoelectric crystals built into the probe’s working surface, which convert electrical energy into sound waves. These sound waves interact with tissues at different depths within an animal’s body, reflecting back to be picked up by those same crystals. The information is transmitted back to the ultrasound machine to produce an image for interpretation.
However, not all probes are created equally. Different probes work better than others for different patients or types of studies.
Goals for Your Veterinary Ultrasound System
What will the doctors, specialists, technicians, or other team members be using the ultrasound for?
If specialty ultrasounds, like echocardiograms and detailed abdominal studies, are performed frequently, it probably makes sense to invest in high-quality probes. On the other hand, if the ultrasound is used primarily for cystocentesis, the fanciest probe on the market might not be a great investment.
Some practices might want to invest in handheld or portable veterinary ultrasound units that connect to a smartphone or tablet. This is probably best in scenarios like triage with a focused check for fluids (A-FAST or T-FAST).
Of course, another important consideration is the type of patients your practice sees. A feline-only practice might have different needs than a practice that sees large dogs.
Goals may change over time and with additional experience. It’s not necessary to buy all the probes upfront, before practitioners are ready to use them. But it might make sense to select an ultrasound machine with additional functionalities that offer room to grow, so more probes can be added in the future when they are needed.
Veterinary Ultrasound Probe Types and What They’re Used For
Here are some important factors to consider when choosing a transducer…
Frequency and depth. Frequency is measured in MHz. Higher frequency probes offer better image resolution.
Depth refers to how deeply the sound waves penetrate into tissue.
While each of these factors are important in their own right, they are often grouped together because they are inversely related: a higher frequency probe has shallower penetration, and vice versa.
Thankfully, newer technology means many probes offer an adjustable range of frequencies and depths, so a single probe can be used on a variety of patients. There are even some that auto-adjust when viewing different depths.
Size. Probe size generally refers to the “footprint,” or the area of the probe in contact with a patient. For cats and small dogs, a smaller probe is more easily placed under the ribs, which offers an advantage for seeing certain organs. Footprint is also relevant for cardiac studies since the probe must be placed between ribs.
Shape. This refers to the shape of the footprint of the probe, and properties that tend to be associated with that category. The most commonly used probes in small animal medicine typically fall into one of these categories…
Linear. A linear probe has a footprint in a straight line. This creates a square or rectangular image with less distortion at the edges. Typically, these probes are higher frequency and low depth. Ideal for surface structures (like muscles, joints, and ligaments), some practitioners prefer linear probes for abdominal studies in cats and small dogs. A smaller, hockey stick-shaped version is also available, which may be a good fit for exotics or small structures like the eyes.
Convex and microconvex. Convex probes have a curved footprint. They vary in frequency and can be used for a variety of studies. They create a more triangular image, with some distortion at the edges.
Microconvex probes, which have a smaller footprint, are probably the most commonly used, versatile probe in small animal medicine. They’re often a good fit for those who want to invest in a good “all around” probe for cats and most dogs, for abdominal and basic cardiac exams.
However, a standard convex probe might be needed to see deep structures in very large dogs.
Phased array. This is considered a more “advanced” probe. It’s a common choice for echocardiography. It facilitates easier passage of the beam between ribs, while still generating high-quality images. Phased array probes also offer a higher frame count, for documenting small changes with the heart’s movements. They typically have several functions, including Doppler.
Additional Considerations
As with any equipment investment, it’s important to research the equipment itself and consider factors like financing, tax advantages, warranties, and service plans.
Talk to veterinary ultrasound suppliers. Ask to try out the machine you’re considering. Many offer a sample or demo machine that you can keep in the clinic for a short period of time, or at least can offer a demo in your office. Speak to colleagues or check veterinary forums for recommendations, too.
And of course, remember to protect your investment. Dropping a probe can cause permanent damage. Have a system to prevent this, including proper storage, as well as a tie or leash to hold the probe to the operator’s arm in case of accidental drops, so it won’t hit the floor.

All things considered, an ultrasound probe can be a great investment in patient care and generating income for the practice. But since they can be pricey, it’s important to choose wisely and find a probe that’s a good fit for your practice’s needs.
Written by: Dr. Tammy Powell, DVM

Veterinary Ultrasound Tables: How to Choose One

What’s the best type of veterinary ultrasound table to purchase? Are ultrasound-specific tables even necessary?
It all depends on the specific needs of your veterinary practice. Here are some factors to consider…
Which Types of Ultrasound Studies Are Performed—And How Frequently?
The first thing to think about is whether a separate ultrasound table is truly needed, or if ultrasounds can be performed cage-side or on a regular exam or surgical table.
This can be answered by thinking about which types of ultrasounds your veterinary team performs (or plans to perform in the near future, if anyone is seeking additional training and planning to expand services).
Many general practices have limited ultrasound capabilities. There’s nothing wrong with that if it works for your practice and your clients’ needs. For example, maybe a small animal general practice simply performs A-FAST and T-FAST cage-side or in the exam room for triage—or uses their ultrasound primarily for performing a cystocentesis. In these cases, investing in an ultrasound-dedicated table might not be high priority or necessary at all.
The next stage of ultrasound usage would probably include practices where a team member (or possibly a mobile ultrasonographer) performs occasional abdominal or cardiac studies in select patients who could benefit from one. In these cases, it might make sense to “borrow” a procedure table for an ultrasound rather than purchasing a new table.
Finally, for busy or specialty practices where in-depth ultrasound studies are frequently performed, it might make sense to invest in a dedicated ultrasound table for veterinary patients—especially one that facilitates echocardiograms.
Are Clients Present for Patient Ultrasounds?
This question goes beyond sheer table functionality and instead focuses on client experience and perception.
At the time of this writing, veterinary practices are busier than they’ve been in many years. According to market research, younger generations of pet owners are seeking high-quality pet care, and their experience as a consumer matters in terms of where they choose to bring pets.
While individual client preferences may vary, it’s probably safe to say that having the right equipment, organized in a clean and efficient way, can make a good impression. It can convey that a veterinary practice is professional and proficient and that they care about the patient’s comfort.
One example would be a proper echocardiography table. These have at least one hole or cutout for placement of the ultrasound probe on the recumbent side of the patient’s thorax. They might also be padded so the patient can lie comfortably.
Another option that some practices use is to build a make-shift echocardiogram examination station, such as a cardboard box with a hole cut in the side. Some clients won’t mind this, but for others, it might make a negative impression.
A good in-between option for cardiac evaluation might be a portable, padded add-on that sits on top of an exam table, essentially converting a regular procedure table into one that can be used for echocardiography studies. Some can be folded for storage when not in use.
Which Features Are Most Important in a Veterinary Ultrasound Table?
Here are some table characteristics that might aid a veterinarian in performing ultrasounds…
Height Adjustability. Ergonomics are being recognized more and more as a crucial factor for long-term veterinary careers. Not only do better ergonomics help protect team members’ health, they can also facilitate better care in each procedure by reducing operator fatigue and pain. Proper table height is an important component, whether using an ultrasound-specific table or not. Height adjustments can also make for easier patient transfers to the table.
Portability. Mobile tables are important for practices that plan to perform evaluations in more than one room or location, who want a table to transport patients with reduced mobility, or who want to store their ultrasound table out of the way when not in use.
V-Top. A V-top table, especially one that allows for tilting, could potentially help facilitate abdominal scans. But it’s important to add padding for patient comfort.
Equipment Storage. In addition to the ultrasound table itself, think about where your ultrasound machine will go. This could be on an attached “arm” of the table designed to hold equipment, or it could be a separate countertop or cart. Set it up in such a way that your arms don’t get tangled trying to view the machine, change settings, and hold the probe to the patient all at once.
Patient Facilitation. This is a combination of ease-of-use, practical considerations, and patient comfort to help ensure they don’t wiggle around during examinations. Consider factors like waterproof padding, table size, and weight limit, and how many cutouts you want in the table and where they should be placed.
Whether you purchase an ultrasound table or convert a regular exam or surgery table, there are ways to boost client experience. Add comfy non-slip mats with pretty (not torn up or bleached) blankets on top. Set up the room with soothing lighting, white noise or soothing music, or other things to help keep everyone (patient and client alike) calmer during the experience. Add pet-friendly items like DAP or Feliway.
As with any piece of veterinary equipment, do your research and seek reviews from colleagues. Consider factors such as maintenance and repair costs, and ease of cleaning.

These purchasing considerations, along with planning your hospital’s ultrasound service offerings, will help ensure you find the best ultrasound table for your veterinary practice.
Written by: Dr. Tammy Powell, DVM

What to Know About the Mindray Vetus E7 Ultrasound

Purchasing a new veterinary ultrasound machine is an exciting, yet complex, decision. A veterinarian may feel overwhelmed by choices. There are many systems available at all different price points, with different features—many of which are hard to compare side by side for vets who are new to performing ultrasounds.
In this article, we’ll look at some of the features of the Mindray Vetus E7 Ultrasound, a veterinary-specific model, to see if it might be a fit for your practice.
What Is the Mindray Vetus E7 Ultrasound?
The Vetus E7 is a laptop-type portable ultrasound unit made specifically for veterinary practitioners. It’s designed for use on both small and large animals, for abdominal studies, cardiology, musculoskeletal and small parts studies, and even some reproductive applications.
This 2022 model features a lot of new and advanced technology. Some of the key features that might appeal to a veterinarian are discussed below.
Features of the Vetus E7
While every practice has unique needs, these features may be beneficial to veterinarians in many clinical settings…
Small size and portability. The Vetus E7 is a laptop design, so it can be transported as needed. There is a 15.6-inch, high-resolution color LED monitor. The unit is 1.7 inches thick and weighs 3.0 kg (6.6 lbs) without the battery and 3.5 kg (7.7 lbs) with the battery. Battery life is about 1.5 hours on the laptop alone, or up to 8 hours with the included U-bank battery.
Durability and ease of cleaning. The unit is basically “sealed” in, making it more difficult for liquids and stray hairs to get inside the unit or under the buttons. This includes an anti-liquid touchpad that replaces the standard rollerball, and seamless keys/buttons. Materials are said to be durable and chemical resistant. It stands to reason that the seamless design might also be helpful for protecting the unit from dust and humidity when out in the field.
ZONE Sonography Technology+ (ZST+). This is the first laptop-based system to use the technology, which is supposed to provide excellent image clarity and quality. A simplified way to describe this technology would be to say that it uses software to process acoustic data in large “zones” at a fast speed. This large amount of acoustic data creates a detailed image and can help reduce tissue motion artifacts. Dynamic pixel focusing means good special resolution and the ability to focus at various depths without the user needing to manually adjust the focal point.
Dedicated veterinary presets and user-friendly workflow. Presets are available according to species (canine, feline, equine, bovine, ovine, and customizable), and further subdivided by body size (including dog ranges of <5 kg, 5-15 kg, and >15 kg). The iWorks feature offers smart scanning protocols that standardize the workflow and allow automatic addition of annotations, marks, and measurements. The company claims this can reduce exam time by 50% and reduce keystrokes by 80%, for faster and more efficient studies.
iScanhelper, a built-in learning tool that provides tips on how to scan, as well as anatomical illustrations, patient positioning and probe placement pictures, and ultrasound images for comparison with real-time scanning.
Additionally, the Vetus E7 system includes many standard features such as Doppler and compatibility with image storage software.
Conclusion
Is the Vetus E7 right for your veterinary practice? It depends on exactly what you’re looking for, what your practice plans to budget, and what you plan to use the machine for, i.e., what’s the return on investment based on the expected number and types of studies that would be performed at your practice.
Also, it’s important to ask your supplier questions to ensure you know exactly what you are purchasing. Check how many probes are included (and which types), whether there’s a warranty and what it covers, and anything else you might want to know. See if it’s possible to get a demo, too.
All that being said, the Mindray Vetus E7 does offer some exciting features for veterinarians. In addition to the practical considerations that make it easier to keep the machine clean, many vets would appreciate the features that may make it easier to learn and use this ultrasound unit, such as intuitive workflows and processing capabilities for high-quality images at multiple depths.

It’s common knowledge that ultrasound can require a lot of training and practice before a vet feels confident in the modality. So, anything that makes the process a little easier or more intuitive, and helps with obtaining high-quality images, can certainly be a plus.
Written by: Dr. Tammy Powell, DVM

Can Veterinary Technicians Perform Ultrasounds?

With the growing demand for veterinary services—and many vet hospitals being fully booked—many vets are delegating tasks to skilled veterinary technicians when possible. But is an ultrasound something that can be delegated to vet techs?
Here, we’ll cover what separates the duties of a veterinarian and a veterinary technician, and how that applies to performing ultrasounds on companion animals.
Which Duties Can a Vet Tech Legally Perform?
Credentialing, as well as the laws and rules governing what veterinary technicians can or cannot do, vary widely from state to state. So, it’s important to check your state’s rules and regulations for specifics.
However, as a general overview, trained technicians are allowed to perform many of the same duties that veterinarians perform. But they must operate under the supervision of a licensed veterinarian.
There are a few things that vet techs aren’t legally able to do, though. This includes making a diagnosis, prescribing treatments and diagnostic tests, performing surgery, and giving a prognosis.
How Do a Vet Tech’s Training and Legal Restrictions Apply to Performing an Ultrasound?
With the above rules in mind, think about what’s involved in an ultrasound study.
The person performing the study must be familiar with the ultrasound machine and how to use the controls to operate it. They must know how to find the organs/anatomic structures of interest and take the correct views (images and videos) of those structures, along with any relevant measurements.
So far, all of these tasks are something a vet tech could learn how to do.
Although it can take time to learn and practice ultrasound technique, vet techs are smart and educated, and capable of doing many of the challenging tasks a veterinary hospital requires on a daily basis.
So, given the right training and opportunities to hone their skills, it stands to reason that many vet techs could be taught to perform ultrasound studies.
What About Interpreting the Images?
The tricky part comes in when it’s time to interpret the images or videos that were captured during an ultrasound study.
Even though a highly trained and experienced vet tech will probably understand the significance of what they are seeing on an ultrasound study, there are legal limitations to what a vet tech can do with that information.
Interpreting the images would involve making a diagnosis (or at least a diagnostic rule out list) and possibly giving a prognosis. Plus, based on that information, prescribing treatments or additional diagnostic tests (such as performing an FNA or obtaining a biopsy) could be the next step.
Those things would fall into the realm of services limited to a licensed veterinarian.
So, a vet tech could perform the ultrasound study and capture images. But it would be up to a veterinarian to interpret the study.
In many ways, this is very similar to how x-ray studies are already performed in veterinary medicine. It’s also similar to the way ultrasound techs operate in human medicine.
So, it’s not a stretch to imagine a similar system could work for ultrasound studies in vet med.
Potential Pitfalls to Consider
With ultrasound studies, there is value in someone being able to interpret the studies in real-time.
For example, if a mass is noted in the liver, a veterinarian might recommend an FNA of the mass. However, a vet tech wouldn’t necessarily be able to prescribe this next step.
Also, certain findings may require veterinary knowledge to put into context and alter the course of the scan. One example is finding a splenic mass, which might prompt a veterinarian to also look and see if a right atrial mass is present.
One solution is to have veterinarians present (or at least be accessible for questions) during the study. That way, additional views, and procedures could be performed as needed.
However, even veterinarians who are new to ultrasound themselves may run into shortcomings with image interpretation. So, there may be limitations no matter who is performing the study, until a person gains years of practice.
A good place to start is to have whoever is performing the study—whether it’s a vet or a vet tech—use a standardized list of views to obtain. Then those views can be sent to a specialist for interpretation, which will help everyone learn.
Training and hands-on practice are also crucial. Skills will need to improve over time.
Does It Make Sense for Veterinary Technicians to Perform Ultrasounds?
With veterinary practices being so busy since the pandemic, it makes sense to utilize staff (veterinarians, techs, CSRs, and the rest of the team) to their full potential.
This is one reason why the discussion of a mid-level practitioner (veterinary nurse practitioner) role has become more prominent.
Giving additional roles and responsibilities to educated, trained vet techs could carry a lot of benefits. One would be to take some of the time-consuming duties off the doctors.
This could improve the overall efficiency and profitability of the practice by freeing up more time for the vets and allowing them to see more patients or perform more medical procedures.
Additionally, new roles and skills for vet techs could provide much-needed pay increases, job satisfaction, and career advancement opportunities.
While performing ultrasound studies isn’t a full solution to these industry-wide concerns, it’s one example of a skill set that could contribute to the expanding role of technicians in the profession.

Each vet practice must decide what will work best in their individual practice and adhere to the laws of their state. But there are many reasons to believe that vet techs learning to perform ultrasounds could be beneficial to the whole practice.
Written by: Dr. Tammy Powell, DVM