


How to Find Vacant Veterinary Hospitals Before Everyone Else

A practical guide to finding vacant and off-market veterinary properties before they reach the broader market.
If you're hoping to open your own veterinary practice, buying an existing hospital isn't the only path to consider.
Across the country, former veterinary practices sit vacant after owner retirements, corporate consolidations, relocations, or business closures. Many are already equipped with important necessities, potentially saving hundreds of thousands of dollars compared to building from scratch.
A Former Veterinary Hospital May Already Include:
```- Exam rooms and treatment areas
- Kennels
- Plumbing
- Medical-grade electrical infrastructure
The challenge isn't finding these properties once they're publicly listed. The challenge is finding them before everyone else does.
The good news? With a little detective work, strong networking, and the smart use of AI tools, you can find opportunities that many buyers never see.
Start With Google Maps and Street View
One of the simplest ways to locate former veterinary hospitals is by virtually exploring the communities where you'd like to practice.
Using Google Maps, search for terms such as:
- Veterinary hospital
- Animal hospital
- Veterinary clinic
- Emergency veterinarian
As you browse Google Maps, pay attention to clinics marked as “Permanently Closed.” While not every listing is accurate, it creates an excellent starting point.
Next, switch to Street View and look for clues such as:
- Empty parking lots
- Removed or faded signage
- Vacant-looking buildings
- “For Lease” or “Available” signs
- Buildings that still feature veterinary architecture, such as outdoor runs or multiple exam-room entrances
Even if a building has already changed ownership, it may still be available for lease or redevelopment.
Search Commercial Real Estate Websites
Many former veterinary hospitals eventually appear on commercial real estate marketplaces, although they aren't always advertised as veterinary facilities.
Instead of searching only for “veterinary clinic,” try keywords such as:
- Medical office
- Healthcare building
- Former medical office
- Commercial office
- Freestanding medical building
- Specialty healthcare property
Some listings intentionally avoid mentioning the property's previous veterinary use. This is where some of that detective work comes in.
Floor-plan photos may reveal treatment areas, kennels, surgical suites, or specialized plumbing.
Build Relationships With Commercial Real Estate Brokers
Commercial brokers often hear about available properties before they're officially listed. Introduce yourself to brokers who specialize in:
- Medical offices
- Healthcare properties
- Commercial redevelopment
Let them know you're specifically looking for former veterinary hospitals.
Many brokers will happily add you to their contact list and notify you when a property matching your criteria becomes available.
The more specific you are about your preferred city, square footage, budget, and timeline, the easier it becomes for brokers to think of you when opportunities arise.
Join Veterinary Facebook Communities
Veterinary professionals often hear about closures long before the public does.
Facebook groups can be valuable sources of local information, including:
- Practice owners nearing retirement
- Clinics preparing to relocate
- Hospitals reducing locations
- Corporate closures
- Equipment liquidation announcements
Rather than immediately asking, “Does anyone know of a clinic for sale?” become an active participant in these communities. Over time, conversations naturally reveal opportunities.
Stay Connected With Veterinary Practice Brokers
Although practice brokers are known for selling operating hospitals, they frequently know about clinics that never officially reach the market.
Some owners simply want to retire. Others close after being unable to recruit veterinarians.
Maintaining relationships with veterinary-specific brokers increases the likelihood of hearing about these opportunities early. Practice brokers often maintain extensive buyer networks and may become aware of off-market opportunities before public listings appear.
Talk With Veterinary Equipment Dealers
Equipment representatives visit practices every day. They often know when practices are:
- Closing or downsizing
- Relocating
- Renovating
- Preparing for ownership transitions
While they can't always disclose confidential information, developing relationships can position you to hear about opportunities as they become public.
Let AI Do the Research
Artificial intelligence isn't replacing your search; it's helping you search smarter.
Tools such as ChatGPT, Perplexity, and Claude can dramatically reduce the amount of manual research required to identify potential acquisition targets.
For example, you can ask AI to:
- Find recently closed veterinary clinics in a specific city or state
- Search local news for hospital closures
- Summarize corporate announcements involving practice consolidations
- Monitor news related to veterinary real estate
- Organize findings into spreadsheets
- Build prospect lists for outreach
- Draft personalized introduction emails to property owners or brokers
Example AI Research Prompt
```“Research veterinary clinics, animal hospitals, and veterinary practices that permanently closed, relocated, merged, or became vacant within a 50-mile radius of Columbus, Ohio, between [START DATE] and [END DATE].
For each location, provide:
- Business name
- Full street address
- Type of veterinary facility
- Closure, relocation, or vacancy date
- Current property status, if known
- Building size and acreage, if available
- Asking price or lease rate, if listed
- Property owner, listing broker, and contact information
- Source links
- A brief explanation of the evidence confirming the location is closed or vacant
Search commercial real estate listings, veterinary industry publications, local news, business closure announcements, social media pages, Google Business profiles, county property records, broker websites, auction notices, and archived web pages.
Separate the results into:
- Confirmed permanently closed or vacant veterinary properties
- Clinics that relocated, merged, or were acquired
- Possible closures that require further verification
Do not include clinics that are temporarily closed, operating under a new name at the same location, or lacking credible evidence of closure.
Prioritize properties that still appear suitable for use as a veterinary hospital. Present the findings in a table and clearly label any missing or uncertain information.”
```AI won't uncover confidential deals, but it can help connect publicly available information far faster than manually searching dozens of websites.
Like any research tool, however, AI-generated results should always be verified against original sources before making business decisions.
Remember: The Best Opportunities Rarely Advertise Themselves
The most desirable former veterinary hospitals often fail to appear on major listing websites. Instead, they're discovered through relationships, conversations, and consistent outreach.
The buyers who find the best deals aren't necessarily searching harder; they're searching in more places.
Through traditional networking and modern research tools such as AI, you can dramatically expand the number of opportunities you uncover while staying ahead of competing buyers.
Sometimes the next great veterinary hospital isn't hidden at all; it simply hasn't been discovered yet.


Patient Injury & Complications In Veterinary Dentistry

The nature of anesthesia brings risk in general. In veterinary medicine, during dental procedures, pets are often placed in vulnerable positions which can lead to increased risk of injury and medical complications.
These risks can be minimized or entirely avoided with careful consideration, and proper training and continuing education of staff. Listed are a few of the more common injuries that can occur during a dental procedure.
Aspiration Pneumonia
Aspiration pneumonia in pet patients occurs when the patient inhales a foreign substance and develops lung inflammation and infection as a result.
The most common occurrence during dentistry is water and debris entering an unprotected airway, hence allowing fluid and debris to enter the lungs. This can occur from an underinflated tracheal tube, or repositioning during the procedure that allows fluid to enter the airway.
Aspiration pneumonia can also occur if the patient vomits or regurgitates during anesthetic recovery.. To reduce the incidence of dental-related aspiration pneumonia, maintaining the patient on their back during the procedure, and avoiding repositioning has proven to not only lessen the risk of aspiration but also lessens the amount of anesthesia needed during the procedure.
In addition, antiemetic medications given during the premedication phase can help reduce the incidence of post-anesthetic nausea and vomiting. Caution should be taken during the recovery phase to wait until the patient is alert and responsive enough to deflate the cuff and remove the tracheal tube.
Tracheal rupture
Tracheal rupture in dogs and cats are more frequent during dental procedures than any other medical procedure. Seventy-five percent of tracheal ruptures are thought to be associated with oral surgical procedures with the incidence more common in cats than dogs.
Tracheal injury can cause symptoms such as mild dyspnea, and even death. The most likely cause of tracheal rupture is thought to be due to an overinflated tracheal cuff, as well as failing to detach the tracheal tube from the anesthesia hose during repositioning, which can cause a torque on the inflated cuff resulting in a tear of the dorsal membrane of the trachea.
Another common cause of tracheal rupture is a patient that is not adequately anesthetized and coughs or lunges upward during intubation, tearing the trachea.
Pressure from an overinflated cuff can cause pressure necrosis of the trachea, showing delayed symptoms of inflammation and scarring.
Avoiding over-inflation of the cuff, using new tracheal tubes, testing the cuff to ensure proper inflation prior to use, avoiding repositioning as much as possible, and ensuring a level plane of anesthesia prior to intubation can help minimize the risk of tracheal rupture.
Artery Damage during Tooth Extractions

Arterial damage to arteries such as the palatine artery which runs the length of the mandible can accidentally occur during routine tooth extractions where the instrument can slip from the practitioner’s hand.
These injuries can be mild to more severe requiring surgical intervention.
The most effective way to avoid this type of injury is to implement extraction techniques involving gingival flaps where the roots are exposed, and more easily undermined, and extracted.
Written by: Dr. Tammy Powell, DVM

The Best Places to Buy Used Vet Equipment at Great Prices

During the economic fallout of this unprecedented global pandemic, it’s more important than ever for businesses to stretch their dollars as far as they will go.
Buying used equipment is a budget-friendly way to purchase high-quality machines and supplies—so you can operate and upgrade your practice the way you want to.
More importantly, you can buy on a friendly, community-based platform that removes all headaches about negotiating, shipping, and payments—so you can securely get the equipment you need without taking time away from your busy schedule.
In case you’re not already familiar with it, we recommend you visit: usedvetequipment.com.
This website was started because veterinarians needed a marketplace just for their industry—somewhere to easily buy and sell quality used veterinary equipment from trusted colleagues.
Here’s what one happy buyer had to say:
“I purchased a digital x-ray system through usedvetequipment.com. The transaction was smooth. I would not have taken the chance without the third party mediator. Brad did a great job and the sellers were great to work with. I would not hesitate to use this service again.”
—Mark Robinson, DVM Montana
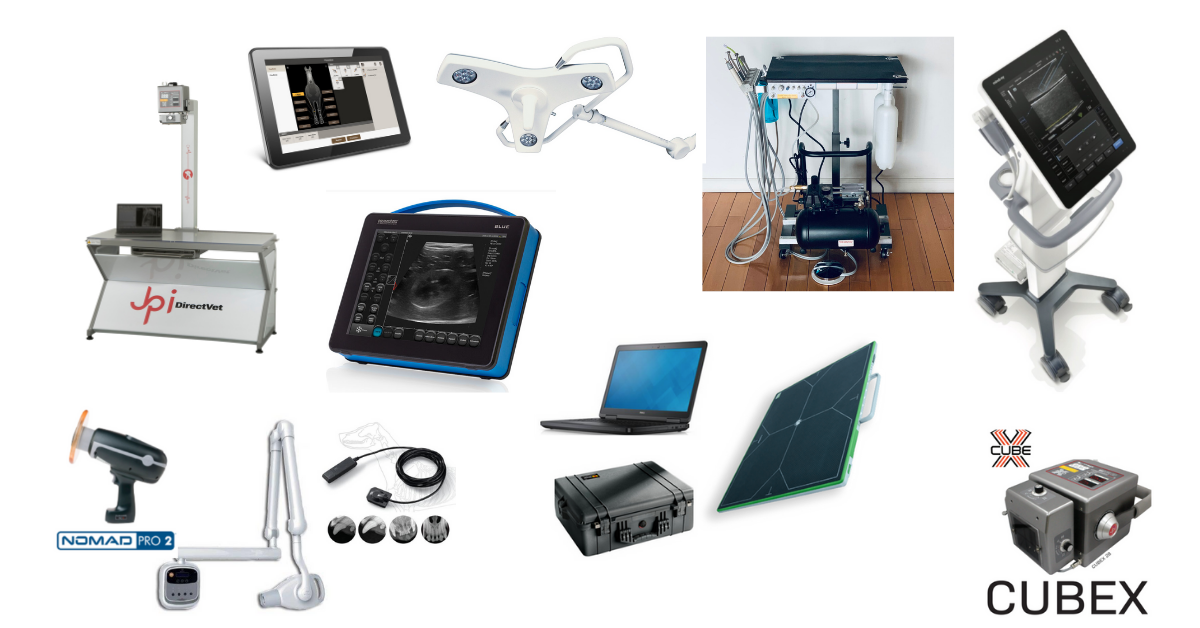
Here are a few advantages that usedvetequipment.com offers to you as a veterinarian buyer…
Quality. On the site, you’ll find products from top manufacturers such as Abaxis, Shoreline, Heska, SurgiVet, Cardell, Welch Allen, Idexx, and much more.
Choices. Whether you’re looking to invest in something as large as a full radiology unit, or something as small as a laryngoscope or warming pad, you can find it on usedvetequipment.com.
There are far too many examples to list here, but other items recently sold include endoscopes, Dopplers, stem cell therapy equipment, surgical tools, cages and floor grates, exam lift tables, and much more.
Easy Payment Options. You’ll be emailed an invoice for convenient online payment.
Good for Animals and the Environment. Reusing and repurposing equipment is not only a great way for the veterinary community to share resources to improve animal care everywhere—it can also help keep materials out of landfills.
Safety and Security. We’ve found the veterinary community to be honest in their descriptions of the equipment they are selling—and the standard buying process lets you inspect the equipment upon arrival before your payment is processed.
Stellar Service. Just check the site, and you’ll find reviews from tons of happy buyers and sellers!
If you’re ready to get started, head over to usedvetequipment.com.
Here are some things to keep in mind as you shop…
Compare your options. If there’s more than one listing for the equipment you need (a common scenario), search around and make obligation-free offers. And if you’re not in a big hurry, search over time to see what else pops up.
Ask Questions. This isn’t a big, faceless online store—instead, it’s all about community! You’re free to reach out to sellers with any questions you may have and to ask us about the details of shipping and payments.
Expect the Best Experience. The goal is for you to feel comfortable (and very happy!) with your purchase.
More interested in SELLING equipment rather than buying? Check out our next article, which will have detailed suggestions for how to successfully sell on usedvetequipment.com.
Until then, take a look around the site to browse what’s available, and be sure to bookmark usedvetequipment.com in case you need to come back to it to make a purchase in the future.
Wishing you good luck in your search—we’re sure you’ll find just the right equipment you need for all the services you’d like to offer at your practice.
A community marketplace like this is the perfect place to buy and sell with colleagues as you build the practice of your dreams.
“… 10,000 times better than any eBay / Amazon kind of purchase! We will definitely look here 1st for future purchases.”
—Sandy Pamplin, Manager Pleasanton Road Animal Hospital San Antonio, Texas

“I recently purchased a film processor through Used Vet Equipment. I was very impressed with the website- pics and descriptions. I received a quick response to my questions. Brad was very professional and thorough in handling the transaction through delivery and tracking info. He made sure I was completely satisfied with the product. I would definitely do business here again! 5-star rating!”
—D Davis, Colorado
Written by: Dr. Tammy Powell, DVM

Sell Your Used Veterinary Equipment On A Community Website

Sell Your Used Veterinary Equipment
Welcome to the other half of our series on buying and selling your used equipment on usedvetequipment.com.
If you’re looking to sell some of your equipment, you’re not alone. There are many reasons why you might pursue this option as a veterinarian…
Maybe that new in-house chemistry analyzer or the extra kennels you purchased didn’t get used as much as you expected—and you’re not seeing the return on investment you wanted…
Maybe you want to upgrade, but you aren’t sure what to do with your current equipment. Or, maybe times are tight and you need to increase your cashflow.
Whatever your reason, selling your used veterinary equipment can put some cash in your pocket, while also helping out a fellow member of the veterinary community who needs the machine, gadget, or gear you’re selling.
If that sounds great to you and you’re ready to get started, we recommend visiting usedvetequipment.com. Here’s why…
List Anything! Whether you’re looking to sell an ophthalmoscope, an autoclave, an x-ray processor, or a vehicle… there’s no item too large or too small.
Set Your Own Price. You choose how much you’d like to sell for, and you can accept or reject any offer that comes your way.
We’re Here to Help. We’ve done this thousand of times—so no matter what you need to ship, we can help you with logistics and also ensure prompt payment from your buyer.
Since this is a community-based platform, you’ll find interactions to be secure, reliable, and honest.
Affordable. There’s no cost to you to list your equipment (including unlimited photos and videos to showcase your items), and no time limit in which to sell.
Good for Animals and the Environment. Reusing and repurposing equipment is not only a great way for the veterinary community to share resources to improve animal care everywhere—but it can also help keep materials out of landfills.
Stellar Service. Just check the site, and you’ll find reviews from tons of happy buyers and sellers! Like this one below…
“I can’t say enough about the great job Brad did in selling our cages and floor grates. It was quick and everyone is happy. Brad found the right buyers and made all the arrangements. I highly recommend this website.”
—JS in NY
Selling is simple on usedvetequipment.com. But, we also have some tips to help you get the most success out of your listing.
For the most success when you sell your equipment, be sure to include…
Pictures! You can include as many pictures as you’d like to on your listing, and video if that will help to show your item.
Images will help your equipment sell—and most smartphones are perfectly capable of producing the high-quality photos you need.
Try photographing from different angles, cleaning the items before you take pictures, and removing any distracting clutter from your shot so the focus is solely on the equipment you’re selling.
Detailed Descriptions. Include all relevant details about the brand name, manufacture date, current condition, size and weight, the reason for selling, etc.
Also, let potential buyers know how the item has helped you in your daily practice—and how it can help them.
A Smart Pricing Strategy. Sometimes, pricing used equipment appropriately can be difficult—you know there will be some depreciation, but what’s a fair price?
The easiest way to get a starting point is to research similar items that have recently sold.
And, if you’re hoping to sell fast—it helps to go a little under the going rate or to include shipping in your price.
And that’s it! Once your equipment is listed on usedvetequipment.com, you can easily connect with colleagues who are interested in buying.
With each sale, that’s money you can invest back into your practice for expanding, upgrading, marketing, or compensating your amazing team members.
Plus, you’d be helping out a fellow practitioner in the veterinary community—someone who really wants the equipment you don’t need anymore. It’s a win-win for both of you.
Good luck, and happy selling!
“I had an entire Veterinary Clinic of items to sell and Brad sold them all! He is diligent in getting items sold and payment is speedy. Brad and UsedVetEquipment.com are The Best!”
—S.F. in Colorado

“Brad was able to sell my cages within a week of posting the items. He had great communication and payment was prompt. I will list my items with him again.”
—Wes Godwin - Texas
Written by: Dr. Tammy Powell, DVM

Mastering Ultrasound-Guided Cystocentesis in Dogs and Cats

There are several ways to collect a urine sample from your patient, including free catching, using a urinary catheter, and doing a cystocentesis.
A cystocentesis—which involves obtaining a urine sample via a needle placed directly into the bladder—may be the preferred method in many cases.
This is especially true when you need a sterile urine sample, such as for culture and sensitivity testing for UTIs. And in general, a cystocentesis will provide more accurate results than a free catch urine sample, since it reduces contamination from cells or pathogens of the skin.
It’s possible to perform a cystocentesis by palpating the bladder or using anatomical landmarks alone. However, an ultrasound can make the process easier by removing the guesswork and allowing you to visualize everything.
Here’s how it works…
How to perform an ultrasound-guided cystocentesis for dogs and cats
Prepare for the procedure.
Use an appropriate size syringe (usually 3ml to 12ml) based on the size of your patient.
Choose a needle size and length based on your patient size. A 22g needle works well for many patients.
Use a towel, trough, or other cushioning to make your patient more comfortable during the procedure. This may help minimize their movement.
Use appropriate patient restraint.
For some dogs and cats, this could mean having a trained team member hold them. For very anxious or fractious patients, this might mean chemical restraint.
Dorsal recumbency is generally the best way to position your patient.
Be sure to clean the area of skin where you’ll be performing the cystocentesis. If needed, consider clipping the fur, too.
Estimate the bladder location.
You’ll use your ultrasound to see the bladder, but anatomical landmarks will give you a good starting point for where to place the probe. Try one of these methods…
Locate the caudal four mammary nipples and mentally draw an ‘X’ between them. The bladder will often be near the cross point of the ‘X’.
Place a small amount of alcohol on the caudal abdomen so it pools. Often, the bladder is located directly under where the alcohol naturally pools on the midline.
Visualize the bladder.
Place your probe onto the caudal abdomen. You should be able to see the urinary bladder on the screen—it’s a fluid-filled structure that has the appearance of a ‘black balloon’ with gray or white walls.
Check for any abnormalities.
You could focus on just doing the cystocentesis. However, while you’re visualizing the bladder, it may help to do a cursory exam (or even a more in-depth evaluation, if indicated) to look for any problems contributing to the patient’s urinary symptoms.
For example, note if you see any thickenings, masses, calculi, or other issues in the urinary bladder.
Obtain the urine sample.
Place the needle directly through the abdominal wall, just in front of the ultrasound probe.
Aim the needle slightly caudally.
You should see the needle on your ultrasound screen. Use this visual to guide you, to be sure you get a good, clean sample rather than aspirating part of the bladder wall.
Prepare your sample for analysis.
Right after the cysto, replace the needle on the syringe with a sterile one.
Then, divide and prepare the sample in a timely manner (the fresher the sample, the better for testing) for any tests you need to perform, whether that’s in-house or at an outside lab.
In many veterinary hospitals, cystocentesis is safely performed several times per day, and complications are very rare. However, as with all medical procedures, some risks exist.
These may include…
Hematuria (usually mild and transient).
Much rarer complications such as bladder injury, leakage of urine into the abdomen, puncture of internal organs or blood vessels, or vagal reactions (retching, panting, hypersalivation, collapse).
Seeding of tumors.
If you suspect your patient has a bladder tumor such as transitional cell carcinoma, it may be best to avoid a cystocentesis. Otherwise, the needle could ‘seed’ the tumor as you withdraw your sample from the bladder, allowing cancer to spread into the abdominal cavity.
An ultrasound may help you to notice abnormalities such as bladder tumors during the procedure, in which case your recommendation to the client may change.

Fortunately for most pets, a cystocentesis is a quick outpatient procedure that provides a lot of valuable information. And many dogs and cats don’t show any side effects at all.
For patients with urinary symptoms, a cystocentesis is often the way to go for the most accurate diagnostic testing results and to get to the bottom of the issue faster for healthy pets and happy clients.
Written by: Dr. Tammy Powell, DVM

Good Exam Room and Dental Lighting: Why It Matters

When it comes to upgrading your veterinary practice, maybe the first things that come to mind are new exam tables, high-tech anesthesia monitoring equipment, or an in-house chemistry analyzer.
Was a new LED exam room light also on your list? If not, it should be. Here’s why…
While lighting is often overlooked, just think about how many times per day a good, strong light could make your life easier.
Times, when a high-quality LED light could come in handy in your exam room, include the evaluation of…
Lesions and wounds.
Dental disease or oral lesions.
Ocular health (you’ll use your ophthalmoscope and other equipment for a more detailed exam, but good room lighting can help you pick up subtle lesions during a routine checkup).
Paw pads and the spaces between the paw pads.
External ear structures.
Dander, fleas, and other skin and coat issues.
These are a few good examples—but really, good lighting can help with much of the physical exam by making it easier for you to accurately document tissue colors, textures, lesions, and other notable abnormalities in your medical record.
Good lighting is essential for dental procedures and surgeries
In our last blog post, we gave some advice on how to pick a good surgical light.
And along those same lines, don’t forget about dental procedures!
The mouth is like a dark cave, making it difficult for you and your staff to see what you’re working on if you don’t have good lighting.
Some things a good light will help you visualize include…
Calculus that needs to be cleaned—and verifying that all calculus was removed.
Enamel defects and small chips or fractures.
Staining, or other color changes such as pulpitis.
Subtle bleeding or mild gingivitis.
Oral abnormalities such as masses or inflammation.
Pharyngeal or tonsillar abnormalities.
Extraction sites—before, during, and after the extraction.
Placement and manipulation of small sutures.
Not to mention, a good overhead light can aid your laryngoscope light during intubation.
How affordable are good LED lights?
In the past, LED lights were very expensive compared to halogen bulbs—so it’s understandable if you’ve not purchased one before.
However, some brands are now 30-40% less than previous LED prices.
So, LEDs don’t have to be expensive anymore. And considering their performance and efficiency, a good LED light can be a great addition to your practice.
Plus, many cities, counties, states, and even electric power companies offer rebates for upgrading to LED lights, due to the decrease in power used.
Specific requirements for rebates vary by location—so be sure to check with your local municipality and utility providers to see what’s available in your area. Because it’s always great to get a cash rebate that can help cover the cost of your upgrades!
How do you choose a good exam room or dental light?
When it comes to selecting the best lighting, there are many things to consider…
Affordability. LED lights are much more affordable now than they used to be, so shop around and be sure you’re getting a good deal (to be sure you’re comparing apples to apples, check for the other factors on this list, too).
Quality and dependability. Plus, a good-value warranty helps to back up your investment.
Lighting adjustability in terms of intensity and dimming options, as well as area of focus.
Precise positioning. The light head and arm should be easy to move and manipulate—but then, stay right where you put it without drifting.
Easy to clean.
User-friendly, with simple controls on or near the handle.
Shadow-free illumination—or at least a design that minimizes shadows as much as possible.
Mounting options that match the layout of your rooms.
Comfortable and safe for pets, with adjustable settings you can change as needed, and low heat output.
Here’s what we recommend…
We recommend the new Burton veterinary LED exam light because it checks all the boxes listed above.
Plus, it has a high-quality LED (virtually heat-free and with a 75% energy savings compared to halogen), is assembled in the USA, and is backed by an industry-leading 5-year warranty.
At a competitive price point that optimizes design, performance, and value, it’s pretty hard to pass up!
Why invest in new lighting?
As we said, lighting is often overlooked in terms of equipment upgrades…
But, just think of how many times per day you’ll use a good-quality light in your exam rooms or dental area.
In terms of cost per use, that can make new lighting a great investment—something you’ll benefit from using many times per day.
And if your new light makes your life easier in terms of visualizing the patient and making accurate medical notes… that’s an investment that could save you time and headaches, and be well worth it!

Why Fear Free Certification® Gives Your Practice an Edge

As a veterinarian, you go out of your way to make your patients comfortable.
So, if you can do something to help dogs and cats have a better, less stressful doctor visit—while also giving your practice a competitive advantage—it’s a win-win!
Fear Free Helps Patients and Clients
Fear Free is a voluntary set of standards that can be implemented to the benefit of your patients’ mental and emotional health. It helps dogs and cats feel more at ease while visiting your practice.
As the Fear Free motto says, you’ll be “taking the ‘pet’ out of ‘petrified’.”
This improves your patients’ wellbeing. It can also make it easier for clients to bring their pets to see you since clients are more comfortable when their pets are at ease during a visit.
Also, Fear Free principles involve client education and empowerment. There are even online resources you can recommend to clients at Fear Free Happy Homes.
What Does It Mean to Be Fear Free?
Fear Free involves alleviating fear, anxiety, and stress in pets. To do this, it’s important to think about the visit from a pet’s perspective.
Along these lines, there are a few different aspects to think about for your practice, including…
A pet’s physical and emotional comfort. To improve their experience, you could…
Have a calm, quiet place for treatments and procedures, with nonslip surfaces on floors and tables.
Use treats to distract pets during any unpleasant procedures such as vaccines or blood draws.
Make all needles single use only (i.e. change to a new needle to administer a vaccine after drawing it up).
Offer elevated platforms and hiding places for cats.
If possible, use separate entrances and waiting rooms for dogs and cats.
Consideration for a pet’s sensitive nose.
Clean with products that don’t have irritating, residual odors or cause “nose blindness” (this is where a strong odor causes temporary loss of a pet’s ability to explore the environment via smell, and this can create fear or nervousness).
Use pheromone products.
Consider air sterilizers to reduce odors that may be distressing to a dog or cat, such as odors of other pets, cleaning supplies, etc.
Consideration for other senses such as hearing.
Instruct all staff to use calm behavior and “inside voices.”
If possible, integrate insulated walls to block noises from barking, or background noise from medical equipment.
Client education.
Schedule appointments in a way that not only gives enough time for pets to acclimate to the environment but also allows for non-rushed appointments and adequate client education.
Make take-home Fear Free resources available to clients.
Medical records.
Add standardized measures of the patient’s emotional health, physical pain, and level of stress during each visit to the medical record.
Use this information to improve a patient’s experience and emotional health.
Team culture and training.
Educate all team members on Fear Free principles, and use standard operating procedures.
Recognize and celebrate successes.
Maintaining a high standard of Fear Free care.
Teach staff to observe a pet’s body language so improvements can be made if a pet shows signs of fear, anxiety, or stress.
Include pre-visit preparation to help clients bring their pet in as calm a state as possible.
How to Seek Fear Free Certification®
If you decide to implement Fear Free principles, you can seek certification.
This certification is something you can display so clients understand the measures you’ve taken to set yourself apart as a practice, and how it all makes for a better experience for their pets.
Fear Free Certification® can be sought by individual veterinarians, by pet professionals (trainers, groomers, etc.) and by animal shelters.
You can also seek certification as a veterinary practice.
Individual certification is great. But, certification of your entire practice promotes Fear Free culture as a part of everything your team does.
To seek certification, check out the Fear Free website, where you can do a self-assessment, and when you’re ready to schedule an onsite visit with a Practice Certification Veterinarian to get your Fear Free Certification®.

Certification even includes marketing materials, to help you show off your amazing achievement to clients so they understand the value you deliver.
Written by: Dr. Tammy Powell, DVM

Equipment Options for Your New Veterinary Practice: New-Used
If you’re ready to take the leap and open the veterinary practice of your dreams—or if you’re still exploring options and seeing if practice ownership is right for you—finding the veterinary equipment you need is an important part of the process.
After all, it’s difficult to diagnose and treat patients without the proper tools.
Depending on the type of practice you open, your equipment wish list may include…
X-ray and ultrasound machines.
In-house bloodwork analyzers.
Surgical lights, an autoclave, and anesthesia monitoring equipment.
IV pumps.
Exam room tables.
Kennels.
A scale to weigh patients.
A tonometer for measuring intra-ocular pressures.
A dental cleaning unit.
Computers, and veterinary clinic software.
Credit card processors for payments.
A washer and dryer.
Separate refrigerators for medications and for your staff to keep their lunches in, and a freezer for cadavers.
Specialty equipment, such as a vehicle for a mobile practice, and pneumatic drills, and an MRI for a neurology practice.
Plus, there are smaller items to consider, like otoscopes, blood pressure cuffs, staff uniforms, and all your daily supplies like needles, syringes, and gloves.
With all this in mind, it’s not surprising that your equipment costs could add up to tens of thousands of dollars—or more—making your equipment a vital consideration when opening and financing a veterinary practice.
Not to worry, though, because you do have options.
Considerations for Purchasing Veterinary Equipment
Purchasing new equipment is certainly an option many practice owners pursue. It’s exciting to get the latest technology delivered to your practice’s door, and—depending on the type of equipment—installed by experts. And, the equipment should be in excellent condition because it’s brand new.
When buying new, it’s important to do your research, though. Be sure you’re getting good quality and the best value for your dollar.
Also, check the manufacturer’s or seller’s warranty—because there would be nothing worse than investing your money only to have a malfunction (less likely with new equipment, but possible) or have something get dropped or broken during the grind of daily practice.
And finally, ask about support and training. For example, who do you call when you have a question about the machine? And, does the company offer training to your staff, to ensure the equipment is used to its maximum potential?
Purchasing used veterinary equipment can also be an excellent option. Many machines are designed to last for years, and your colleagues may want to sell relatively new equipment in order to upgrade. This can be a great benefit to you because you can catch a real bargain.
For used equipment, we recommend usedvetequipment.com, a site exclusive to veterinary professionals looking to buy or sell veterinary equipment, with guidance on shipping and a moderator for payments. But, you may find quality used equipment through other online sellers or medical equipment specialist resellers, too.
With used equipment, inquire about the condition. Also, ask if there is a warranty still in place—you don’t want to miss out if it is still in place and transferrable.
Finally, consider maintenance costs with any equipment you buy. Maintenance is crucial for keeping your equipment running for as many years as possible, potentially saving you lots of money in the long run if you can avoid replacing your machines sooner than necessary. So, these maintenance costs should be factored into your budget.
Financing for Veterinary Equipment
If you have some cash saved up, you may be able to purchase some of your equipment outright. But, chances are you’ll need to finance at least some of your purchases.
For financing new equipment, check with the manufacturer to see if they allow payments over time. Some may have monthly payment plans. These plans take away some of your initial financial pressure since the money you bring in with the equipment can fund the monthly payment (for example, your x-ray fees can support your monthly payments for a good quality x-ray machine).
Alternatively, you could seek financing from a bank or other lender. The bank you’re working with on practice financing may include equipment costs as part of your loan, or as a separate negotiation. Or, you may reach out to another lender.
Typically, lenders refer to these loans for equipment as “capital leases,” and they may offer monthly payment plans.
The lender would own your equipment until the loan is paid in full, but there’s usually an affordable (as low as $1 for some institutions) purchase option for you once you finish all the loan payments.
When evaluating a lender or other equipment payment plan, here are some things to look for…
What’s the interest rate?
What fees are associated with the loan?
What is the loan’s term, or how long will you be paying?
Is there a purchase option once the loan is paid in full, and how much it will cost?
What penalties exist for late payments, paying off the loan early, or if you would like to get out of the lease?
The reputability of your lender (if it’s not the lender you’re already working with, do they have recommendations from the equipment sales representative or other veterinarians? Do they routinely work with veterinarians?).
Also, talk to a tax professional to find out if the depreciation and interest payments on your veterinary equipment are tax-deductible.
Your Overall Financial Picture
Before purchasing any equipment, it’s important to think through what the equipment will do for your patients, and what sort of return on investment you can expect.
For example, will you use the equipment often, or will it only be on rare occasions?
What training is required to learn how to use this equipment? What about client education on the benefit of the service? How many years is the equipment expected to perform?

A veterinary consultant, or financial professional who’s familiar with veterinary businesses, can guide you through these analyses and include these considerations in your business plan so your new practice can find the right balance of initial equipment purchases, then grow and thrive over time.
Written by: Dr. Tammy Powell, DVM

10 Strategies to Boost Your Vet Practice Online & Offline

Even in the beginning stages of planning your veterinary practice, it helps to think about marketing alongside all the practical considerations like financing, equipment, and staffing.
Marketing is how you let potential clients know who you are, and what sets you apart from the competition. It’s what helps you bring in more and more clients as your practice grows.
With that in mind, today we have a list of marketing ideas for veterinary practices.
We’ll have in-depth articles on some of these topics down the line, so you can learn more. But for now, here are 10 ideas to inspire your plan for your very own practice…
1. Make Sure Your Website is Mobile-Friendly
Today, the largest pet-owning population in the US is Millennials. As you may have guessed, Millennials spend a lot of time online, especially on devices like smartphones.
So, it’s important to make sure your website shows up clearly and quickly not just on a computer screen, but also on a small, vertical smartphone screen. If you’re not sure whether or not your practice’s website is optimized for mobile, talk to your website host or manager.
2. Claim Your “Google My Business” Listing
This online listing is connected to Google Maps, and optimizing it can improve your rankings in online search results.
3. Content Marketing
This broad category includes things such as…
Blog posts and articles.
Email newsletters.
Client handouts and educational materials.
Testimonials or case studies (success stories of some of your patients, published with their owner’s permission).
Content marketing works like this…
Clients read informative content from you. Then, when the time comes for their pet to receive care, they won’t even look anywhere else… They’ll want to bring their pet to you, because they already feel like they’ve gotten to know you—and that they can trust you—after reading your blog posts or newsletter.
So, this is a long-term strategy. The good news is, the work you put in can help to develop long-term client relationships and promote client retention.
Plus, this is a convenient way to update current clients on new services you’ve added to your practice, as well as any specials or promotions.
If you’re not sure where to start—or, if you don’t enjoy writing—consider working with a professional veterinary copywriter, who can guide you and help you create content.
4. Online Reviews
Don’t leave your online reviews to chance, or in the hands of difficult-to-please clients (who are often the only ones who remember to take the time to leave a review).
We’ll have a more in-depth article later, but some simple strategies to encourage good reviews are simply asking happy clients if they would mind leaving a review (but don’t place pressure, or tell them what to say), and making it easy with a “Review us now” button on your website or in a post-visit email.
5. Use Social Media
Your social media platforms can be great places to engage with your clients (and thus reinforce their bond to your practice). It’s also great for announcing updates to your practice, and sharing specials and promotions.
The occasional fun contest or giveaway (such as having a small prize for captioning a cute pet photo) can also encourage clients to interact with you, and strengthen your client relationships.
6. Create Videos
Next to Google, YouTube is the most used search engine.
So, creating useful or cute videos for pet owners can help your practice show up higher in online search results and nurture a client’s bond to your practice.
Fortunately, nowadays you don’t have to be a tech whiz or own an expensive camera to produce a reasonable quality video. Most modern smartphones have a great camera that can be used for this purpose.
Video ideas include a tour of your facilities, introductions to staff members, short educational content for pet owners, and “how-to” videos such as a demonstration on how to properly clean a pet’s ears or give a pet medicine.
Post the videos on your website and social media, and ideally on YouTube, too.
7. Start a Rewards Program
Consider punch cards for products such as parasite prevention or pet food, to encourage pet owners to return to you for purchasing these supplies.
8. Start a Referral Program
Create an incentive—such as a small discount on the next visit—for current clients to refer friends to you.
9. Build Relationships With Other Community Businesses
For example, offer a first free exam to pets adopted from the local shelter or rescue organization, so that these businesses will refer new clients to you.
Or, develop a relationship with a local grooming or boarding facility. They can refer to you, and vice versa.
10. Hold Classes at Your Practice
This could mean puppy or kitten, socialization classes.
Or, it could mean an educational evening for pet parents on nutrition, first aid, or other topics of interest.
Consider holding these classes a couple of times per month to create a positive perception of your clinic, and to find new clients who are interested in providing a high level of care to their pets.

There are many other marketing techniques out there, but this should give you a great place to start—and hopefully, it’s sparked some ideas for seeing your veterinary practice grow and thrive!
Written by: Dr. Tammy Powell, DVM

Ultrasound Techniques: Visualizing the Adrenal Glands

The adrenal glands, those tiny but very important glands, can be tricky to find and evaluate during an ultrasound exam.
However, having a system and knowing where to look can make your job much easier.
There are many reasons you want to visualize the adrenal glands on every scan, including checking for neoplasia and other masses and looking for any changes that could be associated with Cushing’s or Addison’s disease.
Here are some tips to help save you time and allow for a clearer view of these small glands…
Have a repeatable system
When you perform an abdominal ultrasound, it’s important to have a systematic approach to look at everything. And that includes keeping small structures like the adrenal glands and abdominal lymph nodes on your list, so they don’t get overlooked.
Do your scan in the same order every time—whether that’s cranial to caudal, clockwise, or some other system that works for you—and it’s much less likely that anything will be missed or any abnormalities overlooked.
Adrenal gland landmarks
The right and left adrenal glands are respectively located near the right and left kidneys. However, the kidneys are relatively large, whereas the adrenal glands are small. So, the kidneys can overshadow these small glands.
The kidneys are the first things you’ll locate because they’ll point you in the right general direction. After that…
Vascular landmarks are most helpful when it comes to locating the adrenals.
Specifically, the aorta, caudal vena cava, renal vessels, and mesenteric artery are what you’re going to be looking for.
Color Doppler can help you visualize the vessels.
Also note, if the patient allows you to apply gradual pressure, it helps to minimize the distance between your probe and the glands as much as possible.
Finding the LEFT adrenal gland
The left adrenal gland is located ventrolateral to the aorta and cranial to the left renal artery.
Start by scanning the left dorsal mid-abdomen and visualizing the aorta in a long view.
Find the spot where the left renal artery branches off from the aorta, and just cranial to that you’ll see the left adrenal gland.
Finding the RIGHT adrenal gland
The right adrenal gland is dorsolateral to the caudal vena cava, and just cranial to the cranial mesenteric artery. It’s also more cranial and dorsal compared to the left adrenal gland.
Scan the right cranial abdomen, with the caudal vena cava in long view.
Apply some pressure with the transducer which will cause compression of the caudal vena cava and help you visualize the right adrenal gland. The gland is right next to the vessel, slightly oblique to it.
Are the adrenal glands normal?
Evaluate the qualitative properties of the gland, and then measure the glands from their cranial pole to caudal pole. Also, measure the thickness of each pole.
Normal adrenal glands are hypoechoic to surrounding fat, and have a characteristic “peanut” shape (although the right adrenal may have more of an “arrowhead” appearance). Typically, adrenals are 4-7mm thick in dogs and 3-4mm thick in cats.
Abnormalities may include…
Evidence of hyperadrenocorticism.
If pituitary-dependent, the adrenal glands may be normal in appearance, or they may be “plump” (symmetrically enlarged). An ultrasound exam alone is not enough to diagnose Cushing’s, but may be helpful in context with additional diagnostic tests.
If adrenal-tumor related, you may be able to visualize a mass.
Evidence of Addison’s disease or hypoadrenocorticism.
You may notice smaller or thinner adrenal glands. As with Cushing’s, you’ll want to use this information in conjunction with clinical symptoms and other diagnostic tests.
Adrenal masses.
Many are incidental findings only.
Pheochromocytoma is a possibility.
Malignancies are possible and may lead to invasion of adjacent tissues, especially blood vessels.
You’ll use your clinical judgment and the patient’s clinical signs to help you determine whether more diagnostics are needed, or to start by monitoring the growth with repeat ultrasound exams over time.
Age-related changes.
Nodular changes and remodeling may be normal in old adrenal glands. Practice will help to develop clinical judgment of what’s normal and what’s not.

The ability to find the adrenal glands quickly will come with experience, and knowing the right tips and techniques will make it easier to get the information you need even when you’re first learning.
Written by: Dr. Tammy Powell, DVM

Autoclave Sterilization: A Necessity in Veterinary Medicine

In 2021, you’ve probably thought more about sterilization and disinfection than you ever have before.
Of course, you’ve always practiced safely and hygienically. But, this year’s pandemic brought the need for drastic measures like curbside service, face masks during everyday interactions, and washing your hands even more frequently…
… and, you and your staff probably feel like you’re cleaning, cleaning, cleaning all day long!
Best practices for cleaning surfaces and equipment
According to many experts, the best way to avoid viral exposure is the elimination of the risk.
This is where isolation and social distancing protocols come in. Your distancing measures of curbside service, telemedicine, and a limited number of people inside your hospital can all help.
Social distancing within the practice and avoiding the sharing of spaces and equipment as much as possible can also help.
Then, there’s PPE to help minimize any potential exposures—as well as your cleaning and disinfection protocols.
You wear gloves and face masks, you wash your hands and use hand sanitizers, and you clean the surfaces and equipment in your practice.
During your cleaning efforts, don’t forget about a powerful piece of sterilization equipment you probably use frequently…
Maximize your use of this key piece of veterinary equipment…
If your own or work at a veterinary practice, there’s a good chance you have at least one autoclave available for use.
Autoclaves use steam under pressure to kill microbes and are one of the most powerful disinfecting tools you have in your arsenal.
Surgical equipment—and beyond!
An autoclave is a tried and true method of sterilization for surgical packs, drapes, and tools.
But, maybe there are a few more items you don’t always think of that could be put into an autoclave for quick, thorough disinfection.
Things your autoclave can be used for include…
Gowns for surgery, isolation, or general use as an extra layer of protection.
Cloth caps.
Cloth face masks.
Surgery light handles.
Nitrile exam gloves or surgical gloves (ideally these would be single-use, but there are procedures described to maximize the lifespan of your PPE during shortages).
Dentistry tools.
Wound care items such as Penrose drains.
Cones/specula for otoscopes.
Pipette tips.
Certain muzzles.
Certain nail clippers.
Biological waste—in case you suspect viral contamination and want to sterilize waste prior to disposal.
There may be other items you can sterilize, too—so get creative!
Just be sure to check the manufacturer’s guidelines before you sterilize a new item—they’ll guide you on what’s safe or not safe to go in your autoclave.
But, once you get into the habit, this will save you time and do a more thorough job of eliminating microbes than most hand cleanings could ever do.
Why invest in a top-of-the-line autoclave?
In modern times, we can’t help but think of an autoclave as a potent killer of coronavirus!
But really, a good autoclave is useful to you all the time, pandemic or no pandemic. It ensures your equipment is properly sterilized from all microbes prior to use.
A good quality autoclave is dependable and makes your life easier via the simplicity of use. Here’s what we recommend you look for…
Several setting options including solid or liquid items, and wrapped or unwrapped items.
The option to choose a preset that suits your needs.
Large water reservoir so you don’t have to refill as often.
A tabletop model with a large chamber capacity so you can fit more items per cycle.
Locking mechanisms for safety.
A strong warranty and excellent customer service.
Our pick is this Full-Size Veterinary Autoclave because it meets all of these criteria, and has an industry-leading 3-year warranty (which includes a loaner autoclave if yours ever needs to be serviced).
How to keep your autoclave healthy
It’s always important to protect your investments by caring for your equipment—and that’s even more true during times when the business may be slower due to social distancing.
Here are a few tips to keep your autoclave in tip-top shape…
Use distilled water, not tap water.
Post guidelines for routine maintenance (otherwise, it’s easy to forget!).
Look for debris when the autoclave is cool, and clean it as needed.
Wipe the trays clean weekly.
Note any water or steam leaks.
Listen for any unusual sounds.
Observe the tape indicator each time, to ensure the autoclave is functioning as it should.
With a little attention and care, your autoclave will stay healthy—and in turn, it can help keep your equipment pathogen-free!

Old X-ray Table and Generator Be Used with a New Digital X-ray System?
Can My Old Universal Easymatic X-ray Table and Generator Be Used with a New Digital X-ray System?

Some of the Universal Easymatic systems look like this
Some veterinarians purchased their x-ray table and generator 25+ years ago and they still work perfectly!
Through care and good maintenance, they have been able to produce diagnostic images over the years using film.
For some veterinarians, 2017 is the year they would like to stop using chemicals and standard film.
However, they do not want to spend the 17k-25k on a new table and generator when their old system is producing excellent mas/kvp options for each case.
The good news is your existing system can work well with proper installation with your new digital x-ray equipment. For computed radiography or CR it is a simple calibration that will enable the old table and generator be ready for use the day of the installation.
This installation should be carried out by the installer on the day of installation and prior to the training session with the veterinary staff.
For direct radiography or DR, the plate may be wired into the foot switch as a prep switch. The old universal Easymatic x ray table and generator send out a 120-volt prep and expose signal.
A conversion box is brought by our onsite installers so that the cesium technology can convert the voltage down to a high of 5 volts and a low of 0 volts.
Another item that we include with our system is a new foot pedal switch. Often times the old switch can be worn out and the wiring loose.
A new foot pedal switch ensures a smooth transition from prep to exposure. In some instances, we also include a hand switch which can be mounted on the wall.
This secondary option is nice especially if the foot switch was to go out you always have another backup to take a high-quality digital x-ray.
You do not always need to buy a new table and generators to enjoy the speed, safety, and quality of digital x-rays.
Contact us today.
We can help you upgrade your system to digital.
Here is a video showing the conversion from film to digital using the old table and generator.

Buy Veterinary Digital X-ray Equipment with Confidence

How to Buy Veterinary Digital X-ray Equipment without Experiencing Buyer's Remorse
Have you ever bought something and regretted the purchase?
I think I have at one time or another. However, it’s one thing to regret ordering a cheeseburger and fries, but quite another when I regret buying a $50,000 car or truck.
When I make a big purchase, I want to feel good about my decision. I want to make sure that I made the right choice.
I want you to feel great about buying from me! I understand it is no small thing for a Veterinarian to spend $20,000 or $30,000 on digital x-ray equipment, and I want you to feel great about buying from us.
So, here is my “purchase without buyer's remorse” plan:
The 30-day satisfaction guarantee, or your money-back offer. When you make a digital x-ray system purchase, I will give you 30 days so that you feel comfortable and confident that you made the right choice.
And if you are not satisfied, return your digital x-ray equipment for a full refund.
Yes, that is correct! A FULL refund!!
I know that after the vet digital x-ray equipment is installed in your clinic, and once you learn how to use the software, you will be very happy with the results you get.
I can offer this guarantee because I am very confident with the quality of the digital x-ray equipment we sell, and I want you to be completely satisfied.
Here is the fine print:
Equipment must be returned in original packaging.
Equipment cannot be returned if damaged by the user during your 30 days.
The buyer pays the cost of shipping/packing/insurance of all returned equipment.
You must give us a reasonable chance to correct any dissatisfaction.
The main reason I am offering this “30-day satisfaction guarantee or your money back” is to give you peace of mind.
I understand I’m not as big as Idexx, Cuattro, or Sound-Eklin. Perhaps that makes you think twice about trying us out.
But I am confident that our equipment is as good, if not better, and now we have a “30-day satisfaction guarantee or your money back” - which the big boys do not offer!

The bottom line is simple:
I am offering quality digital x-ray equipment for the veterinary industry at an amazing price, with a great warranty, and now a 30-day guarantee.
I want to do the right thing, treat you with respect, and help you be successful in your veterinary practice.
Call or text me - Brad Haven, Jr. - 530-355-5886
10 Marketing Ideas for Your New Veterinary Practice
Even in the beginning stages of planning your veterinary practice, it helps to think about marketing alongside all the practical considerations like financing, equipment, and staffing.
Marketing is how you let potential clients know who you are, and what sets you apart from the competition. It’s what helps you bring in more and more clients as your practice grows.
With that in mind, today we have a list of marketing ideas for veterinary practices.
We’ll have in-depth articles on some of these topics down the line, so you can learn more. But for now, here are 10 ideas to inspire your plan for your very own practice…
1. Make Sure Your Website is Mobile-Friendly
Today, the largest pet-owning population in the US is Millennials. As you may have guessed, Millennials spend a lot of time online, especially on devices like smartphones.
So, it’s important to make sure your website shows up clearly and quickly not just on a computer screen, but also on a small, vertical smartphone screen. If you’re not sure whether or not your practice’s website is optimized for mobile, talk to your website host or manager.
2. Claim Your “Google My Business” Listing
This online listing is connected to Google Maps, and optimizing it can improve your rankings in online search results.
3. Content Marketing
This broad category includes things such as…
Blog posts and articles.
Email newsletters.
Client handouts and educational materials.
Testimonials or case studies (success stories of some of your patients, published with their owner’s permission).
Content marketing works like this…
Clients read informative content from you. Then, when the time comes for their pet to receive care, they won’t even look anywhere else… They’ll want to bring their pet to you, because they already feel like they’ve gotten to know you—and that they can trust you—after reading your blog posts or newsletter.
So, this is a long-term strategy. The good news is, the work you put in can help to develop long-term client relationships and promote client retention.
Plus, this is a convenient way to update current clients on new services you’ve added to your practice, as well as any specials or promotions.
If you’re not sure where to start—or, if you don’t enjoy writing—consider working with a professional veterinary copywriter, who can guide you and help you create content.
4. Online Reviews
Don’t leave your online reviews to chance, or in the hands of difficult-to-please clients (who are often the only ones who remember to take the time to leave a review).
We’ll have a more in-depth article later, but some simple strategies to encourage good reviews are simply asking happy clients if they would mind leaving a review (but don’t place pressure, or tell them what to say), and making it easy with a “Review us now” button on your website or in a post-visit email.
5. Use Social Media
Your social media platforms can be great places to engage with your clients (and thus reinforce their bond to your practice). It’s also great for announcing updates to your practice, and sharing specials and promotions.
The occasional fun contest or giveaway (such as having a small prize for captioning a cute pet photo) can also encourage clients to interact with you, and strengthen your client relationships.
6. Create Videos
Next to Google, YouTube is the most used search engine.
So, creating useful or cute videos for pet owners can help your practice show up higher in online search results and nurture a client’s bond to your practice.
Fortunately, nowadays you don’t have to be a tech whiz or own an expensive camera to produce a reasonable quality video. Most modern smartphones have a great camera that can be used for this purpose.
Video ideas include a tour of your facilities, introductions to staff members, short educational content for pet owners, and “how-to” videos such as a demonstration on how to properly clean a pet’s ears or give a pet medicine.
Post the videos on your website and social media, and ideally on YouTube, too.
7. Start a Rewards Program
Consider punch cards for products such as parasite prevention or pet food, to encourage pet owners to return to you for purchasing these supplies.
8. Start a Referral Program
Create an incentive—such as a small discount on the next visit—for current clients to refer friends to you.
9. Build Relationships With Other Community Businesses
For example, offer a first free exam to pets adopted from the local shelter or rescue organization, so that these businesses will refer new clients to you.
Or, develop a relationship with a local grooming or boarding facility. They can refer to you, and vice versa.
10. Hold Classes at Your Practice
This could mean puppy or kitten, socialization classes.
Or, it could mean an educational evening for pet parents on nutrition, first aid, or other topics of interest.
Consider holding these classes a couple of times per month to create a positive perception of your clinic, and to find new clients who are interested in providing a high level of care to their pets.
There are many other marketing techniques out there, but this should give you a great place to start—and hopefully, it’s sparked some ideas for seeing your veterinary practice grow and thrive!
Written by: Dr. Tammy Powell, DVM

Five Essential Veterinary Practice Financing Questions

When it comes to opening your own veterinary practice, financing may be one of the most important—and most daunting—hurdles to overcome.
Since most practice-owners-to-be don’t have a large cash reserve saved up or an angel investor waiting in the wings, chances are you’ll need to look for financing.
Every situation is different, and working with financial experts and veterinary consultants can help you make the best decision for your future.
Here are a few good questions to ask yourself along the way…
What Do I Need Financing For?
530-722-4977
Evaluating the following factors can help you figure out how much you’ll need to borrow…
The Practice Space
The most obvious thing you’ll need to finance is the space in which you intend to practice.
This could mean acquiring an existing practice, leasing a new space, or breaking ground and building your own practice from the ground up.
Less commonly, this could also mean a buy-in option at a practice where you currently work as an associate, or even a franchise opportunity.
Major Equipment
Your veterinary practice can’t operate without equipment like an x-ray machine, exam room tables, surgery lighting, a dentistry unit, computers, and more…
Fortunately, you have options
Financing may be available directly from the equipment seller, or from a bank (often called a “capital lease”), so you can pay as you go and start making a return on your investment right away.
Also, consider purchasing used equipment. Sites such as usedvetequipment.com offer high-quality used equipment you can score at a great bargain.
Daily Supplies
All those little costs add up, including needles, syringes, pharmaceuticals, cleaning supplies, surgical scrub, gloves, and anything else you need for your practice’s daily operation.
Other Operating Costs
When making a business plan, don’t forget to factor in costs such as wages, insurance, utilities, landscaping, licenses, and more.
How Much Can I Afford to Live On?
Most new businesses don’t make a profit for the first 1-3 years… and unfortunately, veterinary practices are no exception.
It takes time to grow a business to the point where the money coming in each month is more than your expenses. And until that happens, you might not be taking home a salary.
This doesn’t impact everyone in the same way, though. For example…
Purchasing an established practice may mean you have more clients initially than if you start up a brand-new practice.
Some new practice owners have a spouse whose income can cover all of their household expenses in the meantime, while others do not.
You may have other life factors that limit you from taking risks with a new business, such as dependents or health considerations.
If owning a practice is your dream but you’re concerned about limited income while your practice gets up and running, talk to a veterinary consultant to figure out if practice ownership is right for you, and see what’s the safest path for you to realize your dream.
How Do My Student Loans Factor In?
According to an article in Today’s Veterinary Business, veterinary lenders don’t typically expect you to have your student loans paid off before you start a practice of your own.
That makes sense because with today’s growing costs of veterinary education, paying off student debt quickly isn’t always a realistic expectation.
However, be sure your student loan and other debts are in good standing. Very few lenders are going to trust you with a practice loan if your student debt is in default.
And, of course, you’ll have to factor your student loan payments into your own income needs and overall financial picture.
When in doubt, it never hurts to find out more, rather than assuming student loan debt would prevent you from starting the veterinary practice of your dreams. You’ll never know for sure if you don’t do the research.
Where Do I Find a Good Lender?
There are some veterinary-specific lenders out there. These businesses can be a good option because they understand your industry and may have realistic expectations in terms of starting costs and a repayment timeline.
Small Business Administration loans (government-backed lending funded and serviced by banks) may be another good option, with flexible terms and conditions.
And, local banks or lenders may offer great customer service and community knowledge.
So, explore your options and see which lender works best for you.
Ask a lot of questions to see what your lender’s customer service and communication style are like, and to find out important information such as…
The required down payment.
The term of the loan.
The interest rate.
Fees associated with the loan.
Penalties for late payments or pre-payment.
Any available special arrangements, such as graduated repayments (loan payments that start small when your business is new, then gradually increase over time as your business becomes more established and successful).
In general, many lenders require a business plan and financial projections to fund your new practice.
How Do I Figure All of This Out?
While there are never any guarantees when you start a new business, doing your due diligence before you finance will help you make the best possible investment.
This will likely involve a CPA or financial advisor, a veterinary management consultant, and experts in demographics and feasibility for new practices—to name a few.
These experts can offer invaluable advice, and also help you with the business plan and financial projections you’ll need.
Be sure to put in the time to research. And, invest in expert advice to help you make the best decisions for yourself and your future.

If you need help with financing, Call me - I can help you - 530-722-4977 Brad Haven, Jr.
Written by: Dr. Tammy Powell, DVM

Tips for Starting a New Veterinary Hospital or Clinic

If you’re looking to start your own veterinary practice, congratulations!
You’ll have a lot to think about and plan. But, there’s nothing like being able to run your practice exactly the way you want to—to make your dream come to life.
This article is the first in a 10-part series discussing the different aspects of practice ownership—everything from location, to staffing, to equipment, to marketing.
This will help you think through some of the key decisions that come with opening a practice of your own.
Veterinary Practice Location
Of course, one of the very first questions you might ask yourself is where your new business should be located.
In some cases—such as if you have a spouse with a long-term local job commitment—you may not be able to relocate.
But, even then, you could look at nearby cities within an hour’s drive (or, however long of a commute you are willing to make).
Whether staying in place or relocating, when looking at your desired location, here are some things to ask yourself…
What’s my ideal clientele?
When looking at local socioeconomic factors, does this line up with the level of care and pricing strategy you intend to offer? Also, is your clientele younger and more likely to want things like telehealth and online appointment scheduling?
What’s my competition?
Knowing whether your ideal location is already saturated with veterinary hospitals can help determine whether it’s wise to open a new practice there—or, at least help you think of some way to differentiate your practice from the crowd.
Which logistics do I need to consider?
For example, what’s the parking situation like? Are you conveniently located near major roads or shopping areas? And, where on the property can dogs go to the bathroom?
Services Offered
Are you a general practitioner? A specialist?
Knowing EXACTLY what you offer will help determine where you fit within the local community.
For example, a neurologist or ophthalmologist may fit in nicely even if the area is already filled with GPs.
And, if you are a GP, maybe there’s some other way to distinguish your practice and provide something new and unique to the community. For example…
Emergency hours.
Urgent care hours.
Care for exotic pets.
House calls.
Hospice care.
Acupuncture or holistic care.
Large animal care and farm calls.
Will You Be On Call?
Depending on your state’s practice license requirements, you may need to provide access to 24-hour pet care—whether at your hospital alone or by recommending a local 24-hour facility to your clients.
So, if you don’t intend to be on call for emergencies, research what’s available in your area to fill this need for round the clock emergency services.
To Build or Not To Build?
Do you want to build an entirely new facility, tailored to your specific vision?
This may be to your benefit, especially if you want to integrate some of the Fear Free standards for lighting, insulation, separate entrances, and more.
On the other hand, you may have found a practice for sale at a location that’s hard to beat, with an established clientele.
While less common, franchising may also be an option.
In any case, you’ll also have to decide whether to buy or lease the property.
The Legal Stuff
If you don’t have the right business permits and licenses, that could result in severe financial or disciplinary penalties.
You’ll need to research what’s required in your area, but examples include…
Veterinary licenses for yourself and all associates.
A veterinary practice permit.
Local business licenses for your city or state.
Registration for taxes.
Forming an LLC, corporation, or other legal entity.
A DEA license for controlled substances.
And in addition to licenses and permits, you’ll also need to plan for…
A CPA or other professional for bookkeeping, financial planning, and filing your taxes.
Liability insurance.
Occupational health and safety requirements (OSHA).
Hazardous waste and EPA requirements.
Employment contracts.
Developing a business plan.
Considerations for Modern Times
Modern times have resulted in the need for changes to the way most veterinarians practice.
At the time of this writing, curbside service is the norm because of the coronavirus pandemic. And, telemedicine is being added to many practices.
Because of the convenience of telemedicine in your clients’ busy schedules, many pet owners may expect this service to continue even after social distancing precautions are lifted.
So, what modern services and conveniences do you think your potential clients will want? How can you stay competitive?
It’s Best to Work With A Consultant
Before you make a big investment, it’s a good idea to work with a consultant—or, more likely, a team of several experts and advisers.
These specialists can walk you through legal, financial, demographic/feasibility information for start-ups, valuation for the sale of established practices, HR management and compliance, real estate, equipment and supplies, and various other aspects of practice ownership.
This will not only save you time but also ensure you’ve considered all angles and have the best chance of finding success as a veterinarian and business owner.
One helpful resource is Vet Partners, where you can search for experts and consultants by location and specialty.
Look for veterinary consultants, and for businesses (such as banks and real estate agents) who are used to working with veterinary practices and understand the nuances of your business.
Also, consider talking to other veterinarians who have been in your shoes and purchased a practice recently, who can share the wisdom of their experience.
How Will Your Clients Find You?
Once you establish your dream practice, you need to ensure new clients know you exist, and that they want to bring their pets to you.
In this day and age, your online presence (your website and social media) will play a large role in helping new clients find you.

So, in the next article, we’ll have some tips for making sure your online presence truly conveys how great your practice is.
Stay tuned!
Written by: Dr. Tammy Powell, DVM
Patient Injury & Complications In Veterinary Dentistry
The nature of anesthesia brings risk in general. In veterinary medicine, during dental procedures, pets are often placed in vulnerable positions which can lead to increased risk of injury and medical complications.
These risks can be minimized or entirely avoided with careful consideration, and proper training and continuing education of staff. Listed are a few of the more common injuries that can occur during a dental procedure.
Aspiration Pneumonia
Aspiration pneumonia in pet patients occurs when the patient inhales a foreign substance and develops lung inflammation and infection as a result.
The most common occurrence during dentistry is water and debris entering an unprotected airway, hence allowing fluid and debris to enter the lungs. This can occur from an underinflated tracheal tube, or repositioning during the procedure that allows fluid to enter the airway.
Aspiration pneumonia can also occur if the patient vomits or regurgitates during anesthetic recovery.. To reduce the incidence of dental-related aspiration pneumonia, maintaining the patient on their back during the procedure, and avoiding repositioning has proven to not only lessen the risk of aspiration but also lessens the amount of anesthesia needed during the procedure.
In addition, antiemetic medications given during the premedication phase can help reduce the incidence of post-anesthetic nausea and vomiting. Caution should be taken during the recovery phase to wait until the patient is alert and responsive enough to deflate the cuff and remove the tracheal tube.
Tracheal rupture
Tracheal rupture in dogs and cats are more frequent during dental procedures than any other medical procedure. Seventy-five percent of tracheal ruptures are thought to be associated with oral surgical procedures with the incidence more common in cats than dogs.
Tracheal injury can cause symptoms such as mild dyspnea, and even death. The most likely cause of tracheal rupture is thought to be due to an overinflated tracheal cuff, as well as failing to detach the tracheal tube from the anesthesia hose during repositioning, which can cause a torque on the inflated cuff resulting in a tear of the dorsal membrane of the trachea.
Another common cause of tracheal rupture is a patient that is not adequately anesthetized and coughs or lunges upward during intubation, tearing the trachea.
Pressure from an overinflated cuff can cause pressure necrosis of the trachea, showing delayed symptoms of inflammation and scarring.
Avoiding over-inflation of the cuff, using new tracheal tubes, testing the cuff to ensure proper inflation prior to use, avoiding repositioning as much as possible, and ensuring a level plane of anesthesia prior to intubation can help minimize the risk of tracheal rupture.
Artery Damage during Tooth Extractions
Arterial damage to arteries such as the palatine artery which runs the length of the mandible can accidentally occur during routine tooth extractions where the instrument can slip from the practitioner’s hand.
These injuries can be mild to more severe requiring surgical intervention.
The most effective way to avoid this type of injury is to implement extraction techniques involving gingival flaps where the roots are exposed, and more easily undermined, and extracted.
Written by: Dr. Tammy Powell, DVM
Ultrasound-Guided Cystocentesis: How and Why to Do One
There are several ways to collect a urine sample from your patient, including free catching, using a urinary catheter, and doing a cystocentesis.
A cystocentesis—which involves obtaining a urine sample via a needle placed directly into the bladder—may be the preferred method in many cases.
This is especially true when you need a sterile urine sample, such as for culture and sensitivity testing for UTIs. And in general, a cystocentesis will provide more accurate results than a free catch urine sample, since it reduces contamination from cells or pathogens of the skin.
It’s possible to perform a cystocentesis by palpating the bladder or using anatomical landmarks alone. However, an ultrasound can make the process easier by removing the guesswork and allowing you to visualize everything.
Here’s how it works…
How to perform an ultrasound-guided cystocentesis for dogs and cats
Prepare for the procedure.
Use an appropriate size syringe (usually 3ml to 12ml) based on the size of your patient.
Choose a needle size and length based on your patient size. A 22g needle works well for many patients.
Use a towel, trough, or other cushioning to make your patient more comfortable during the procedure. This may help minimize their movement.
Use appropriate patient restraint.
For some dogs and cats, this could mean having a trained team member hold them. For very anxious or fractious patients, this might mean chemical restraint.
Dorsal recumbency is generally the best way to position your patient.
Be sure to clean the area of skin where you’ll be performing the cystocentesis. If needed, consider clipping the fur, too.
Estimate the bladder location.
You’ll use your ultrasound to see the bladder, but anatomical landmarks will give you a good starting point for where to place the probe. Try one of these methods…
Locate the caudal four mammary nipples and mentally draw an ‘X’ between them. The bladder will often be near the cross point of the ‘X’.
Place a small amount of alcohol on the caudal abdomen so it pools. Often, the bladder is located directly under where the alcohol naturally pools on the midline.
Visualize the bladder.
Place your probe onto the caudal abdomen. You should be able to see the urinary bladder on the screen—it’s a fluid-filled structure that has the appearance of a ‘black balloon’ with gray or white walls.
Check for any abnormalities.
You could focus on just doing the cystocentesis. However, while you’re visualizing the bladder, it may help to do a cursory exam (or even a more in-depth evaluation, if indicated) to look for any problems contributing to the patient’s urinary symptoms.
For example, note if you see any thickenings, masses, calculi, or other issues in the urinary bladder.
Obtain the urine sample.
Place the needle directly through the abdominal wall, just in front of the ultrasound probe.
Aim the needle slightly caudally.
You should see the needle on your ultrasound screen. Use this visual to guide you, to be sure you get a good, clean sample rather than aspirating part of the bladder wall.
Prepare your sample for analysis.
Right after the cysto, replace the needle on the syringe with a sterile one.
Then, divide and prepare the sample in a timely manner (the fresher the sample, the better for testing) for any tests you need to perform, whether that’s in-house or at an outside lab.
In many veterinary hospitals, cystocentesis is safely performed several times per day, and complications are very rare. However, as with all medical procedures, some risks exist.
These may include…
Hematuria (usually mild and transient).
Much rarer complications such as bladder injury, leakage of urine into the abdomen, puncture of internal organs or blood vessels, or vagal reactions (retching, panting, hypersalivation, collapse).
Seeding of tumors.
If you suspect your patient has a bladder tumor such as transitional cell carcinoma, it may be best to avoid a cystocentesis. Otherwise, the needle could ‘seed’ the tumor as you withdraw your sample from the bladder, allowing cancer to spread into the abdominal cavity.
An ultrasound may help you to notice abnormalities such as bladder tumors during the procedure, in which case your recommendation to the client may change.
Fortunately for most pets, a cystocentesis is a quick outpatient procedure that provides a lot of valuable information. And many dogs and cats don’t show any side effects at all.
For patients with urinary symptoms, a cystocentesis is often the way to go for the most accurate diagnostic testing results and to get to the bottom of the issue faster for healthy pets and happy clients.
Written by: Dr. Tammy Powell, DVM

5 Tips for Radiation Safety During Uncertain Times
Your x-ray unit is something you use frequently—probably every day, or multiple times per day—in your practice.
You know radiation safety is important. But recently, if you’ve had to reduce the number of team members in the building at any given time, maybe it feels like there aren’t enough hands on deck for patient restraint and positioning.
The good news is, some of the same principles that reduce radiation exposure can also help your team operate more efficiently.
Here are some tips to maintain safety, even when you’re shorthanded…
A.L.A.R.A.: A Brief Reminder
A.L.A.R.A. stands for “As Low As Reasonably Achievable,” and it’s the guiding set of principles that help you reduce radiation exposure to yourself, your staff, and your patients.
This is important because ionizing radiation from x-rays can damage cells, and cumulative exposure can lead to health risks such as cancer and genetic damage to reproductive cells.
To minimize exposure, there are 3 principles to keep in mind:
Time
Distance
Shielding
Decreasing exposure times, increasing the distance between your team and the x-ray source, and using PPE, all can help to decrease radiation exposure.
Tips for Radiography Safety and Efficiency
Hands-Free Restraint
Increasing the distance between your team members and the x-ray source is one of the most effective ways to decrease x-ray exposure.
Think of the inverse square law, which states that doubling your distance away from the x-ray source results in ¼ of the dose of x-ray radiation.
That’s a significant decrease!
Also, scatter radiation comes from the patient—so by not touching the patient, you’re reducing your exposure.
This can be accomplished by using:
Chemical restraint.
Positioning aids such as sandbags and tape.
A combination of both.
In addition to contributing to safety, hands-free restraint also increases staffing efficiency.
Especially for large or wiggly patients, it takes fewer staff members to position the patient when hands-free restraint is used.
Patient Comfort
A patient who wiggles at the last moment can lead to a crooked radiographic image—and thus, the need to retake that view.
The more shots you take, the higher the x-ray exposure to your team members.
Keeping a dog or cat’s comfort in mind can help you get the shot you need the first time—and decrease the need for retakes.
Here’s how you can do this…
Minimize fear and pain (for example, pain from stretching a sore leg to get the right position) by using chemical restraint.
Use a trough or other aid for comfort. Lying with their back on a cold, hard table can cause even the most cooperative of pets to squirm. Giving them a cozy place to settle into can really help.
Play white noise or background music. This helps make the big buzzing and beeping sounds from the x-ray machine less startling to a dog or cat.
In addition to a better patient experience and less x-ray exposure, these methods help save your staff time by getting your views more quickly.
Getting Things Right the First Time
The fewer images you take, the less radiation exposure there will be.
In addition to the measures listed above, here are some ideas for taking the fewest views possible…
Good planning. Be sure to know exactly which views you need ahead of time and what position the patient needs to be in for those views. Communicate these expectations clearly with your staff.
Proper measurement. Measure the patient in the position they will be in during the shot (lying down rather than standing).
Have a technique chart, or use appropriate settings in your digital unit. Teach team members how to make quick and accurate adjustments in settings, too.
Use collimation. In addition to producing a higher-quality image, collimation decreases scatter radiation.
A thorough understanding of x-ray positioning and machine settings will save your staff time and headaches—in addition to minimizing radiation exposure.
Who Should Be in the X-Ray Suite?
Only the team members taking the radiographs should be near the machine. Clients shouldn’t be in the x-ray suite, and other team members should be fulfilling other duties—especially when you’re shorthanded.
Rotating the staff you have on x-ray duty can also help minimize their cumulative exposures.
So, it’s smart to invest in training multiple team members. That way, you’ll also avoid delays if your “go-to” x-ray staff member ever needs to call out sick or otherwise miss a day.
PPE Care and Use
Even though the nature of your daily practice may have changed, it’s still important to keep up with x-ray safety measures, such as making sure your PPE is in good condition.
Experts recommend checking PPE every six months, and this includes radiographing your aprons, gloves, and thyroid shields to check for cracks. Of course, check and replace sooner if there are any notable defects.

Uncertain times may be stressful, but you and your team can continue to help the patients who need you while keeping yourselves safe.
Written by: Dr. Tammy Powell, DVM
Good Exam Room and Dental Lighting: Why It Matters
When it comes to upgrading your veterinary practice, maybe the first things that come to mind are new exam tables, high-tech anesthesia monitoring equipment, or an in-house chemistry analyzer.
Was a new LED exam room light also on your list? If not, it should be. Here’s why…
While lighting is often overlooked, just think about how many times per day a good, strong light could make your life easier.
Times, when a high-quality LED light could come in handy in your exam room, include the evaluation of…
Lesions and wounds.
Dental disease or oral lesions.
Ocular health (you’ll use your ophthalmoscope and other equipment for a more detailed exam, but good room lighting can help you pick up subtle lesions during a routine checkup).
Paw pads and the spaces between the paw pads.
External ear structures.
Dander, fleas, and other skin and coat issues.
These are a few good examples—but really, good lighting can help with much of the physical exam by making it easier for you to accurately document tissue colors, textures, lesions, and other notable abnormalities in your medical record.
Good lighting is essential for dental procedures and surgeries
In our last blog post, we gave some advice on how to pick a good surgical light.
And along those same lines, don’t forget about dental procedures!
The mouth is like a dark cave, making it difficult for you and your staff to see what you’re working on if you don’t have good lighting.
Some things a good light will help you visualize include…
Calculus that needs to be cleaned—and verifying that all calculus was removed.
Enamel defects and small chips or fractures.
Staining, or other color changes such as pulpitis.
Subtle bleeding or mild gingivitis.
Oral abnormalities such as masses or inflammation.
Pharyngeal or tonsillar abnormalities.
Extraction sites—before, during, and after the extraction.
Placement and manipulation of small sutures.
Not to mention, a good overhead light can aid your laryngoscope light during intubation.
How affordable are good LED lights?
In the past, LED lights were very expensive compared to halogen bulbs—so it’s understandable if you’ve not purchased one before.
However, some brands are now 30-40% less than previous LED prices.
So, LEDs don’t have to be expensive anymore. And considering their performance and efficiency, a good LED light can be a great addition to your practice.
Plus, many cities, counties, states, and even electric power companies offer rebates for upgrading to LED lights, due to the decrease in power used.
Specific requirements for rebates vary by location—so be sure to check with your local municipality and utility providers to see what’s available in your area. Because it’s always great to get a cash rebate that can help cover the cost of your upgrades!
How do you choose a good exam room or dental light?
When it comes to selecting the best lighting, there are many things to consider…
Affordability. LED lights are much more affordable now than they used to be, so shop around and be sure you’re getting a good deal (to be sure you’re comparing apples to apples, check for the other factors on this list, too).
Quality and dependability. Plus, a good-value warranty helps to back up your investment.
Lighting adjustability in terms of intensity and dimming options, as well as area of focus.
Precise positioning. The light head and arm should be easy to move and manipulate—but then, stay right where you put it without drifting.
Easy to clean.
User-friendly, with simple controls on or near the handle.
Shadow-free illumination—or at least a design that minimizes shadows as much as possible.
Mounting options that match the layout of your rooms.
Comfortable and safe for pets, with adjustable settings you can change as needed, and low heat output.
Here’s what we recommend…
We recommend the new Burton veterinary LED exam light because it checks all the boxes listed above.
Plus, it has a high-quality LED (virtually heat-free and with a 75% energy savings compared to halogen), is assembled in the USA, and is backed by an industry-leading 5-year warranty.
At a competitive price point that optimizes design, performance, and value, it’s pretty hard to pass up!
Why invest in new lighting?
As we said, lighting is often overlooked in terms of equipment upgrades…
But, just think of how many times per day you’ll use a good-quality light in your exam rooms or dental area.
In terms of cost per use, that can make new lighting a great investment—something you’ll benefit from using many times per day.
And if your new light makes your life easier in terms of visualizing the patient and making accurate medical notes… that’s an investment that could save you time and headaches, and be well worth it!

Vivamus pellentesque vitae neque at vestibulum. Donec efficitur mollis dui vel pharetra.