


Sell Your Used Veterinary Equipment On A Community Website

Sell Your Used Veterinary Equipment
Welcome to the other half of our series on buying and selling your used equipment on usedvetequipment.com.
If you’re looking to sell some of your equipment, you’re not alone. There are many reasons why you might pursue this option as a veterinarian…
Maybe that new in-house chemistry analyzer or the extra kennels you purchased didn’t get used as much as you expected—and you’re not seeing the return on investment you wanted…
Maybe you want to upgrade, but you aren’t sure what to do with your current equipment. Or, maybe times are tight and you need to increase your cashflow.
Whatever your reason, selling your used veterinary equipment can put some cash in your pocket, while also helping out a fellow member of the veterinary community who needs the machine, gadget, or gear you’re selling.
If that sounds great to you and you’re ready to get started, we recommend visiting usedvetequipment.com. Here’s why…
List Anything! Whether you’re looking to sell an ophthalmoscope, an autoclave, an x-ray processor, or a vehicle… there’s no item too large or too small.
Set Your Own Price. You choose how much you’d like to sell for, and you can accept or reject any offer that comes your way.
We’re Here to Help. We’ve done this thousand of times—so no matter what you need to ship, we can help you with logistics and also ensure prompt payment from your buyer.
Since this is a community-based platform, you’ll find interactions to be secure, reliable, and honest.
Affordable. There’s no cost to you to list your equipment (including unlimited photos and videos to showcase your items), and no time limit in which to sell.
Good for Animals and the Environment. Reusing and repurposing equipment is not only a great way for the veterinary community to share resources to improve animal care everywhere—but it can also help keep materials out of landfills.
Stellar Service. Just check the site, and you’ll find reviews from tons of happy buyers and sellers! Like this one below…
“I can’t say enough about the great job Brad did in selling our cages and floor grates. It was quick and everyone is happy. Brad found the right buyers and made all the arrangements. I highly recommend this website.”
—JS in NY
Selling is simple on usedvetequipment.com. But, we also have some tips to help you get the most success out of your listing.
For the most success when you sell your equipment, be sure to include…
Pictures! You can include as many pictures as you’d like to on your listing, and video if that will help to show your item.
Images will help your equipment sell—and most smartphones are perfectly capable of producing the high-quality photos you need.
Try photographing from different angles, cleaning the items before you take pictures, and removing any distracting clutter from your shot so the focus is solely on the equipment you’re selling.
Detailed Descriptions. Include all relevant details about the brand name, manufacture date, current condition, size and weight, the reason for selling, etc.
Also, let potential buyers know how the item has helped you in your daily practice—and how it can help them.
A Smart Pricing Strategy. Sometimes, pricing used equipment appropriately can be difficult—you know there will be some depreciation, but what’s a fair price?
The easiest way to get a starting point is to research similar items that have recently sold.
And, if you’re hoping to sell fast—it helps to go a little under the going rate or to include shipping in your price.
And that’s it! Once your equipment is listed on usedvetequipment.com, you can easily connect with colleagues who are interested in buying.
With each sale, that’s money you can invest back into your practice for expanding, upgrading, marketing, or compensating your amazing team members.
Plus, you’d be helping out a fellow practitioner in the veterinary community—someone who really wants the equipment you don’t need anymore. It’s a win-win for both of you.
Good luck, and happy selling!
“I had an entire Veterinary Clinic of items to sell and Brad sold them all! He is diligent in getting items sold and payment is speedy. Brad and UsedVetEquipment.com are The Best!”
—S.F. in Colorado

“Brad was able to sell my cages within a week of posting the items. He had great communication and payment was prompt. I will list my items with him again.”
—Wes Godwin - Texas
Written by: Dr. Tammy Powell, DVM
Advanced Veterinary Dentistry: The Role of Digital X-Rays

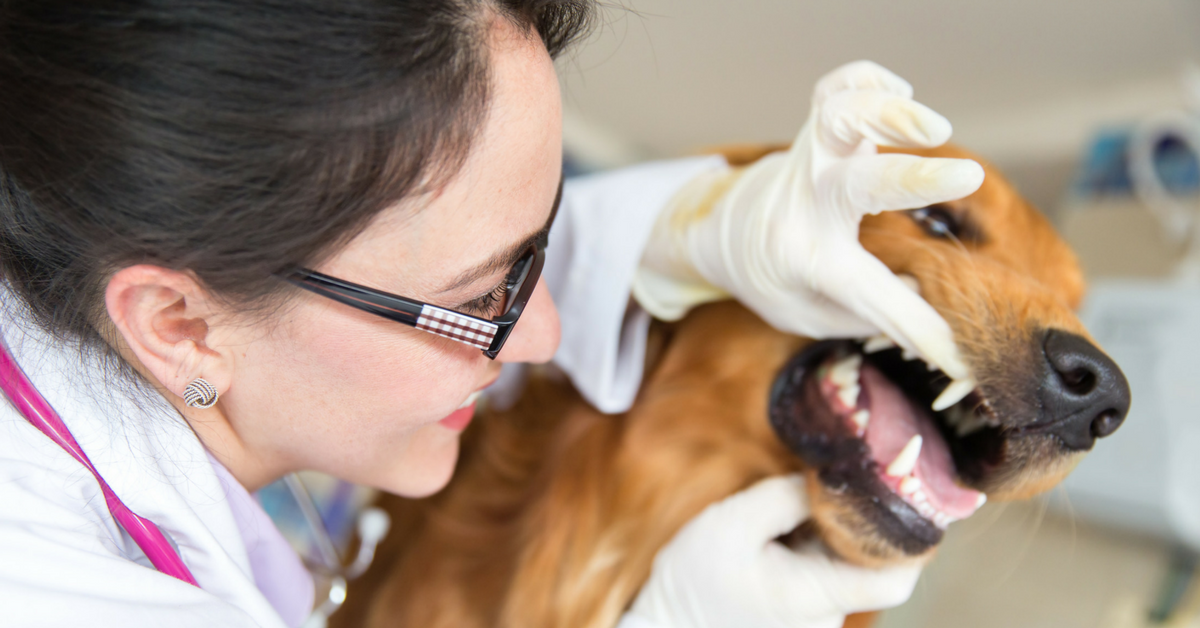
Veterinary dentistry has become advanced over recent years, particularly with the advent of oral dental radiographs.
The idea of regular dental care for our pets is new to many pet owners who are beginning to realize the importance of regular exams, teeth cleaning, and oral radiographs.
Practice standards are changing, and pet dentistry has become sophisticated and cutting edge. Similar to when humans have an oral examination and teeth cleaning, the dentist will request radiographs to check for underlying problems or concerns.
The same should be expected for pets when they go to the veterinarian for teeth cleaning. Dental radiology is at the forefront of ever changing veterinary practice standards.
With most of a tooth lying below the gum surface (think of an Iceberg), problems cannot be appreciated until a radiograph is taken and reviewed.
It is virtually impossible to practice veterinary dentistry without dental radiographs, which allow visualization of tooth roots, bone, and surrounding structures not visible otherwise.
Dental radiographs today are not taken with the conventional x-ray unit seen at most veterinary clinics.
Today’s advanced dental x-ray units give exceptional detail and clarity. Dental x-rays are easy to use and typically located adjacent to the patient. They are made using small radiographic films or digital sensors placed inside the patient’s mouth, and can generally be accomplished within 10 or 15 minutes when performed by an experienced and trained technician.
Typically 6-8 images are taken during a routine pet dental cleaning. The radiation risk to the patient from dental radiographs is minimal and outweighs the risk of missing underlying dental problems.
Dental radiographs should be performed early to establish a baseline for future comparison.
Ideally, this can be accomplished at the same time puppies and kittens are undergoing routine spay and neutering and should be performed under anesthesia to effectively diagnose and assist in treating a patient with periodontal disease or underlying pathologic complications.
Anesthesia is important to obtain dental radiographs because the sensor or films must be placed in the pet’s mouth, which would be difficult to accomplish awake.
Studies show that without dental radiographs, up to 75% percent of significant dental problems are missed in pets undergoing routine teeth cleaning.
In addition, the AAHA (American Animal Hospitals Association) Dental Care Guidelines for Dogs and Cats state that preoperative and postoperative dental radiographs are mandated for all tooth extractions.
Dental radiographs taken prior to extractions ensure that a procedure can be properly planned and that no underlying issues such as developmental defects surprise the individual performing the extractions.
Post extraction radiographs ensure that all root fragments are removed and that no inadvertent damage was caused.
A pet can be left in discomfort for years if problems are missed during a dental.
Pets showing dental problems may avoid hard food, have red or bleeding gums, bad breath, have problems picking up and dropping food, make noises when they yawn, chew on one side of the mouth, excessively sneeze, express facial discomfort by pawing at the mouth, excessively salivate, exhibit ropey drool, and more.
Any pet exhibiting these signs should have a dental with oral radiographs to allow the veterinarian to make an accurate diagnosis. Once a diagnosis has been established, the proper treatment plan can then be instituted. Without dental radiographs, an accurate diagnosis is not possible, and pets may needlessly suffer.
Indications for dental radiographs in pets:
Periodontal Disease and Extractions: Radiographs help to determine a treatment plan, identify retained tooth roots, follow each pet’s dental progression as they age, and to assist the operator during extractions to avoid potential injury such as jaw fractures.
Trauma: Identify a fracture or foreign body such as shrapnel or other material.
Defects and Variations in Tooth Density: Identify cavities or resorption lesions in cats.
Endodontic Issues: Determine if a tooth requires a root canal.
Developmental Defects/Anomalies: Detection of supernumerary teeth, missing teeth or teeth that have failed to erupt.
Swellings, Cysts, Tumors: Help determine the source of facial swelling and pain.
Advanced procedures: Pets receiving advanced procedures such as crowns, braces, jaw fracture repair, oral tumor removal.
With modern medical advances in veterinary dentistry, dental radiographs should always be implemented in the complete periodontal exam and treatment of pets undergoing dental cleaning with extractions.
It is otherwise not possible to provide good quality dental care and documentation without utilizing radiographs.

Dental radiography is the number one diagnostic tool in the practice of complete pet dentistry.
Written by: Dr. Tammy Powell, DVM

Veterinary Solutions for Pet Oral Health and Periodontal Care

Periodontal disease is an inflammation and infection in the gums around your pet’s teeth caused by bacteria which adheres to a sticky substance called plaque.
Left untreated, this turns into hard tarter (calculus), which builds up under the gum line and surface of the teeth. Periodontal disease is characterized as gingivitis and periodontitis. Gingivitis is inflammation or reddening of the gums (gingiva), and periodontitis is loss of bone and soft tissue around the teeth leading to non-salvageable loose teeth, malodorous breath, and potential jaw fractures.
This is a very common issue in pets. Periodontal disease is a painful disease and is thought now to be an epidemic. When it starts, periodontal disease shows no outward signs and symptoms, and many pet owners are unaware of the problem in the pet’s mouth until the disease has advanced.
Some symptoms of severe periodontal disease include:
Pawing at the mouth
Red or bleeding gums with bad breath
Loose teeth
Problems picking up food and dropping food
A swelling on the muzzle near the eye caused by an abscessed tooth root (often pet owners think this is a bite).
Making noises when a pet eats or yawns
Head shyness
Bloody or ropey saliva seen in water or toys
Chewing on one side of the mouth
Sneezing or nasal discharge – the nasal cavity can become infected
All breeds and sizes of dogs and cats are at risk of periodontal disease.
This disease not only affects the mouth, but bacteria entering the bloodstream affects the immune system. The risk of associated health complications can be reduced by proper dental hygiene.
Multiple health problems linked to periodontal disease include internal organ problems such as heart and lung disease, liver and kidney disease, bladder infections, pancreatitis, weight loss, and behavioral issues such as biting or suddenly becoming isolated, among others.
Periodontal disease can almost always be prevented or minimized with a combination of home dental care and veterinary dental cleaning.
Once tartar is formed, it cannot be brushed off with a toothbrush. Routine daily teeth brushing can remove the sticky plaque, however, not the tarter.
Trying to brush the teeth when the mouth is inflamed and teeth are loose and Infected will cause your pet to resent brushing and oral care.
Once your pet has undergone a thorough dental and the mouth heals, daily brushing will prevent further dental disease.
A deep thorough subgingival cleaning under the gum line is important and necessary to remove the tarter and infected teeth and must be performed under anesthesia. Non-anesthesia teeth cleaning is solely cosmetic and does not address the source of the problem laying under the gum line. It is important to start brushing as a puppy and kitten and make this a daily routine.
As long as the surfaces of the teeth are cleaned frequently, the gums will stay healthy. The sooner you start to clean your pet’s teeth, the less likely your pet will need extractions.
Periodontal disease prevention includes:
A veterinary examination of your pet’s mouth and teeth at all ages is important. Early detection of problems such as teeth crowding and retained baby teeth can be addressed and resolved.
On-going plaque and tarter control are key to the prevention of oral disease. Teeth brushing daily is the most important way to prevent gum disease. Many pet owners are concerned that they will not be able to perform this task. Many dogs and cats will actually enjoy the daily interaction and like the taste of the dental products.
Look for products with the Veterinary Oral Health Council (VOHC) seal of approval such as toothpaste, oral rinse, and water additives, made to keep your pet’s teeth clean and the gums and bone healthy.
Canned food tends to stick to the teeth more than dry food. Look for dental diets that help pet’s teeth as they chew. A good quality dry kibble works best. Your veterinarian has information about dental based diets.
Offer Dental treats and chews. This is a good way to help prevent periodontal disease in pets. Look for bendable, soft toys and treats and avoid hard treats such as antlers. Use rope toys, rubber balls, and rubber toys where you can hide treats.

Oral health is fundamental to the general health of pets and essential to preventing periodontal disease. Teaching the pet owners that your animal hospital serves to get into the habit of daily dental care with their pet allows bonding time, and can be fun and looked at as “treat time” for their pet.
Written by: Dr. Tammy Powell, DVM

Mastering FORLs: X-Ray Insights for Better Dental Procedures

To extract or not to extract that tooth root?
Is a crown amputation all that’s needed?
When it comes to feline odontoclastic resorptive lesions (FORLs), these may be the questions you’re asking yourself.
FORLs can cause loss of the protective surfaces (enamel, cementum, and dentin) of both the crown and the root(s) of a tooth, resulting in pain.
These lesions come in two varieties:
Type 1: Where the root appears radiographically normal.
Type 2: Where the root is radiographically hard to distinguish from the surrounding bone, with loss of visibility of the periodontal ligament space.
As you know, the treatment for these lesions is different—full extraction of the root(s) for Type 1, versus just a crown amputation for Type 2.
Performing a crown amputation and leaving a root in place for Type 1 could result in problems or complications, not to mention continued pain for the patient.
On the other hand, trying to extract the root of a true Type 2 lesion could be a monumental task and a big headache.
So, it’s very important to determine what type of lesion you’re dealing with. Here’s how…
Diagnosing FORLs
Patient presentation:
A client brings their pet to you because of halitosis, food dropping, and occasional jaw chattering.
During the physical exam, you notice bright red, inflamed gums and gingival hyperplasia near one of the mandibular premolars.
You suspect a FORL—and given that FORLs are one of the most common dental problems in cats, you’re probably right.
You suggest a dental procedure, including dental radiographs, a full cleaning, oral exam, and possible extraction. The client agrees with the plan.
The day of the procedure
After the patient is anesthetized, your technician obtains radiographic images of the entire mouth, which takes just a few minutes to perform.
Then, you look at the radiographs in conjunction with your oral exam.
While probing the tooth in question, you feel a rough patch under the gingival hyperplasia, consistent with a resorptive lesion.
The x-ray confirms your diagnosis.
Determining the best treatment plan
In this case, the patient’s tooth is clearly Type 1, with a periodontal ligament space still visible. So, you perform a full extraction.
While evaluating the dental rads, you also notice the premolar on the opposite side is starting to show radiographic evidence of a lesion.
Even though it’s mild, you call the owner and inform them of the likelihood of progression.
To prevent a painful lesion from developing between dentals, the owner decides to go forward with a pre-emptive extraction of that tooth as well.
Documenting the extraction
In addition to being an integral part of your treatment plan decisions, dental radiographs can also help you document that extraction was performed successfully.
A post-procedure x-ray image is a great way to document that there are no root tips left behind.
And, in cases where a crown amputation was indicated, dental rads provide visual proof that this was an appropriate treatment course.
In this way, dental radiographs not only help you to plan and implement a very high quality of medicine—but they also give you peace of mind and are a valuable part of your medical records.
Talking to clients about dental radiographs
Maybe you already know the benefits of dental radiography—but you’re concerned about discussing the additional cost with clients.
Often, it helps to include the x-rays as part of the dental procedure package. List them on the estimate so the client understands the value they are receiving—just don’t itemize the cost of the radiographs separately.
Be sure to adjust the estimate of the dental package accordingly, to cover your costs. And remember, with a monthly payment plan for your dental radiography system, just a couple of dental procedures per month can cover your investment.

Client education also helps. Explain how the results of the radiographs allow you to provide the best possible treatment and reduce the likelihood of future complications.
With clients who want the best for their pets, it’s a win-win for both of you.
Written by: Dr. Tammy Powell, DVM

Why Dental X-Rays Are Vital for Veterinary Extractions
Dental Extractions And Radiographs Go Hand In Hand
Teeth extractions are performed when a patient has an obvious or underlying periodontal disease with bone loss, gingivitis, or pathology where extraction of the affected teeth will improve and benefit the overall health of the patient.
Extractions are performed to remove diseased and infected teeth, broken and retained tooth roots, supernumerary teeth, as well as various other conditions including stomatitis, and are also performed on pets with healthy teeth where there is an anatomical anomaly such as malocclusion and crowding causing damage to surrounding structures.
Decrease your dental extraction stress: with dental radiographs
Extractions are performed at any age in the dog and cat.
For some animals, tooth extraction is the only option to resolve oral problems. The extraction of the tooth is only part of the treatment.
Eliminating the disease in the tissue and the bone is important to the proper healing of tooth extraction sites, and includes curetting the alveolus after extraction, and proper closure of the surgical site.
Dental extractions can be either surgical or nonsurgical in nature. In both cases, the extraction site should be sutured to prevent infection, pain, and complications.
Nonsurgical extractions can be performed on patients with severe gingivitis or advanced periodontal disease, where the teeth are mobile and often easily extracted, but do not need actual drilling of the alveolar bone to extract the tooth and root.
Teeth extractions should be performed by licensed veterinarians who are very familiar with dental and craniofacial anatomy, particularly blood supply, and who have appropriate tools, skills and training.
Tooth fractures, eye injuries, oronasal fistulas, injury to the salivary duct, misplacement of root fragments into the sinus cavity or into the mandibular canal, leaving retained roots, traumatic bleeding and jaw fractures are complications associated with dental extractions.
Teeth with fractured roots must be surgically extracted, or a root tip will be left behind. Patience is important when performing extractions and flaps, and intra-oral anesthesia is important for pain management.
Before beginning a dental with extractions, intraoral x-rays should be the first step in every dental procedure to better understand each case. For instance, there may be curved tooth roots that if known ahead of time, will help facilitate extraction.
Furthermore, dental x-rays are used after extractions to verify the extractions were complete and that the operator did not inadvertently cause injury to surrounding teeth and structures.
Dental x-rays before and after extractions are an important tool in diagnosing problems, as well as helping determine an appropriate and effective treatment plan in dental patients.
Dental x-rays are taken to confirm that the entire tooth has been extracted, as well as help ensure no root or bone fragments are left behind in the alveolus.
The first step to proper tooth extraction is to have high quality, sanitized sharp dental instruments. A dull instrument can damage the surrounding bone while attempting to break down the periodontal ligament.
An important aspect of extraction is to gently twist and hold around the perimeter of the tooth root, thus allowing the operator to easily elevate and complete the extraction.
Sectioning multirooted teeth with a high-quality high-speed drill with the appropriate burr, will facilitate effective extraction and lessen damage to surrounding areas.
Keeping the fingertip close to the end of the elevator prevents inadvertent trauma from accidentally running the elevator into surrounding structures.
Surgical flaps should be implemented to allow access to the alveolar bone, then the high-speed drill used to expose the roots.
The gingival flaps and surrounding soft tissues should be handled carefully as they are used to close the extraction site and prevent debris from getting into the site, as well as alleviate pain for the patient.
Once the roots are exposed and removed, the socket is cleaned free of debris, and the flap closed. Occasionally a flap may break down for various reasons, necessitating the need for second intention healing.
How do dental x-rays help with difficult extractions?

In summary, early dental examination in dogs and cats is important. Intraoral x-rays will help establish a treatment plan to ensure optimal dental health in dogs and cats. Extractions should be carefully performed by a skilled operator with advanced training and knowledge in craniofacial anatomy to avoid injury, and intraoral x-rays before and after a dental with extractions should always be performed.
Lastly, gingival flaps to close extraction sites are important for optimal healing and comfort to the patient.
Written by: Dr. Tammy Powell, DVM

Equipment Options for Your New Veterinary Practice: New-Used
If you’re ready to take the leap and open the veterinary practice of your dreams—or if you’re still exploring options and seeing if practice ownership is right for you—finding the veterinary equipment you need is an important part of the process.
After all, it’s difficult to diagnose and treat patients without the proper tools.
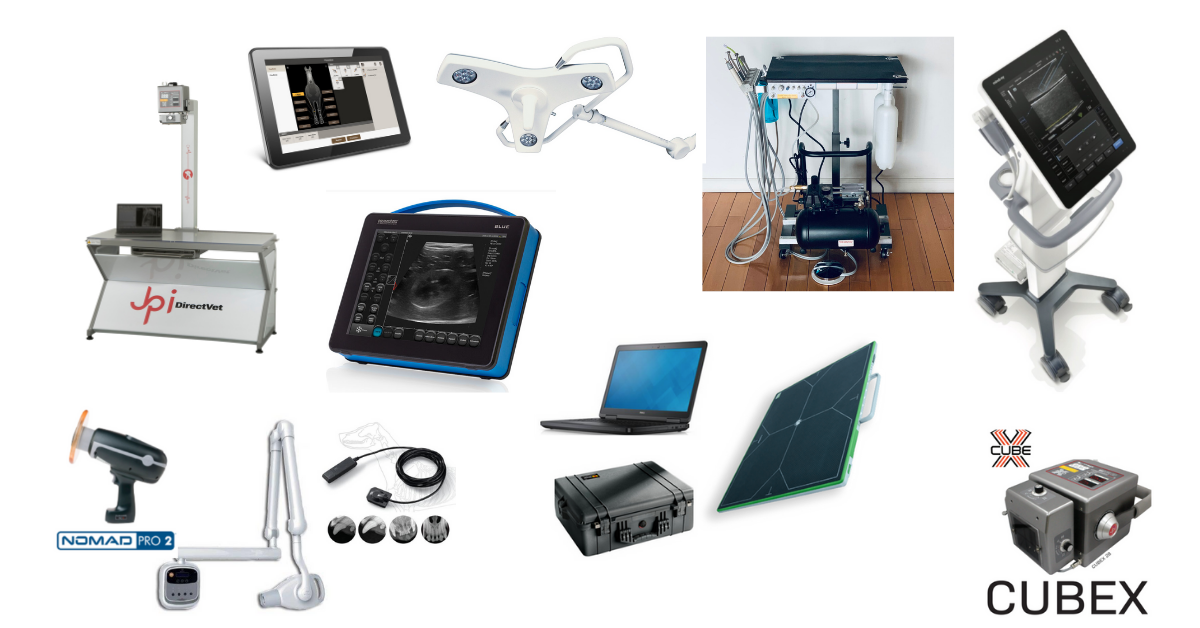
Depending on the type of practice you open, your equipment wish list may include…
X-ray and ultrasound machines.
In-house bloodwork analyzers.
Surgical lights, an autoclave, and anesthesia monitoring equipment.
IV pumps.
Exam room tables.
Kennels.
A scale to weigh patients.
A tonometer for measuring intra-ocular pressures.
A dental cleaning unit.
Computers, and veterinary clinic software.
Credit card processors for payments.
A washer and dryer.
Separate refrigerators for medications and for your staff to keep their lunches in, and a freezer for cadavers.
Specialty equipment, such as a vehicle for a mobile practice, and pneumatic drills, and an MRI for a neurology practice.
Plus, there are smaller items to consider, like otoscopes, blood pressure cuffs, staff uniforms, and all your daily supplies like needles, syringes, and gloves.
With all this in mind, it’s not surprising that your equipment costs could add up to tens of thousands of dollars—or more—making your equipment a vital consideration when opening and financing a veterinary practice.
Not to worry, though, because you do have options.
Considerations for Purchasing Veterinary Equipment
Purchasing new equipment is certainly an option many practice owners pursue. It’s exciting to get the latest technology delivered to your practice’s door, and—depending on the type of equipment—installed by experts. And, the equipment should be in excellent condition because it’s brand new.
When buying new, it’s important to do your research, though. Be sure you’re getting good quality and the best value for your dollar.
Also, check the manufacturer’s or seller’s warranty—because there would be nothing worse than investing your money only to have a malfunction (less likely with new equipment, but possible) or have something get dropped or broken during the grind of daily practice.
And finally, ask about support and training. For example, who do you call when you have a question about the machine? And, does the company offer training to your staff, to ensure the equipment is used to its maximum potential?
Purchasing used veterinary equipment can also be an excellent option. Many machines are designed to last for years, and your colleagues may want to sell relatively new equipment in order to upgrade. This can be a great benefit to you because you can catch a real bargain.
For used equipment, we recommend usedvetequipment.com, a site exclusive to veterinary professionals looking to buy or sell veterinary equipment, with guidance on shipping and a moderator for payments. But, you may find quality used equipment through other online sellers or medical equipment specialist resellers, too.
With used equipment, inquire about the condition. Also, ask if there is a warranty still in place—you don’t want to miss out if it is still in place and transferrable.
Finally, consider maintenance costs with any equipment you buy. Maintenance is crucial for keeping your equipment running for as many years as possible, potentially saving you lots of money in the long run if you can avoid replacing your machines sooner than necessary. So, these maintenance costs should be factored into your budget.
Financing for Veterinary Equipment
If you have some cash saved up, you may be able to purchase some of your equipment outright. But, chances are you’ll need to finance at least some of your purchases.
For financing new equipment, check with the manufacturer to see if they allow payments over time. Some may have monthly payment plans. These plans take away some of your initial financial pressure since the money you bring in with the equipment can fund the monthly payment (for example, your x-ray fees can support your monthly payments for a good quality x-ray machine).
Alternatively, you could seek financing from a bank or other lender. The bank you’re working with on practice financing may include equipment costs as part of your loan, or as a separate negotiation. Or, you may reach out to another lender.
Typically, lenders refer to these loans for equipment as “capital leases,” and they may offer monthly payment plans.
The lender would own your equipment until the loan is paid in full, but there’s usually an affordable (as low as $1 for some institutions) purchase option for you once you finish all the loan payments.
When evaluating a lender or other equipment payment plan, here are some things to look for…
What’s the interest rate?
What fees are associated with the loan?
What is the loan’s term, or how long will you be paying?
Is there a purchase option once the loan is paid in full, and how much it will cost?
What penalties exist for late payments, paying off the loan early, or if you would like to get out of the lease?
The reputability of your lender (if it’s not the lender you’re already working with, do they have recommendations from the equipment sales representative or other veterinarians? Do they routinely work with veterinarians?).
Also, talk to a tax professional to find out if the depreciation and interest payments on your veterinary equipment are tax-deductible.
Your Overall Financial Picture
Before purchasing any equipment, it’s important to think through what the equipment will do for your patients, and what sort of return on investment you can expect.
For example, will you use the equipment often, or will it only be on rare occasions?
What training is required to learn how to use this equipment? What about client education on the benefit of the service? How many years is the equipment expected to perform?

A veterinary consultant, or financial professional who’s familiar with veterinary businesses, can guide you through these analyses and include these considerations in your business plan so your new practice can find the right balance of initial equipment purchases, then grow and thrive over time.
Written by: Dr. Tammy Powell, DVM

Dental X-Rays: Tips for Accurate Vet Imaging Success

When it comes to evaluating a pet’s teeth, dental x-rays are the best way to see what’s happening “under the surface.” That is, under the gumline.
Dental radiographs help you obtain a full picture of tooth roots, evaluate for periodontal disease and damage, differentiate between different types of FORLs, and look for any other defects that may not be visible with your eyes alone.
Even though the value of dental radiographs (to both your patients and your practice) is hard to deny, there can be a learning curve when your team first begins to use them.
This is important, because in order for your x-ray images to be diagnostic, they need to be good quality.
Fortunately, with practice, dental x-rays become simple and routine—a process your team can quickly replicate for each patient.
Establishing a Dental X-Ray Routine
To make the dental radiograph process easy for you and your team—and as quick as possible for your patients—it’s best to establish a repeatable routine.
This means taking the same shots, in the same order, each time.
You may need a larger number of views depending on the patient’s size and the angle of their mouth, but in general you can start in the same place each time and move through your views systematically until images of all teeth and their roots are captured.
Use your digital software to set up the views in the order you prefer.
Once you establish a routine, it will only take a few minutes to shoot all views for a small patient. And large dogs should take a maximum of 15-20 minutes.
Positioning the Patient
Your patients will be under general anesthesia for their dental procedure, including dental x-rays.
After intubation, leave the patient in sternal recumbency, and simply place a towel under their chin to keep their maxilla parallel to the table. Then obtain your views of the maxillary teeth.
When you finish the views of the maxilla, move the patient to dorsal recumbency, this time using a towel or other prop under their neck to keep the mandible parallel to the table as you obtain your views of the mandibular teeth.
You can use a trough or sandbags to stabilize the patient and keep them from tilting to the side, if needed.
Adjust this plan if you find that another method better suits your needs. For example, you may find that lateral recumbency works best for you for some views.
Whatever system you choose, we recommend repeating the same steps each time and using a method that minimizes the number of times you need to move the patient.
Sensor or Film Placement
Select the right size sensor or film for your patient. For most veterinary patients, this would be either a size 2 (for small dogs and cats, or views focusing on a single tooth) or a size 4 (for large dogs, or for full-mouth/whole quadrant radiographic views).
Whether you’re using a sensor for digital x-rays, or regular dental film, placement is important to ensure you can see all of each tooth root. Remember the roots are much longer than the crowns (twice as long with canine teeth), so position your sensor accordingly.
Finally, determine which side of the sensor or film should be positioned toward the x-ray beam. This may be indicated by a small dot or “dimple” on films. If you have a digital sensor, the cord side should face away from the tube and the cord should exit the front of the patient’s mouth.
Beam Placement
A parallel angle is used for the mandibular premolar and molar teeth. For many pets, this part of the mouth allows the sensor to be placed parallel to the teeth, and the beam to be shot straight forward (perpendicular) into the sensor.
The rest of the mouth, however, prevents this placement (the palate and mandibular symphysis get in the way). So, you’ll need to use a bisecting angle for the rest of your shots (and possibly for the rostral mandibular premolars).
A bisecting angle might seem complicated, but it’s important—choosing the correct angle prevents distortion (lengthening or shortening of the tooth root in your image).
Here is how to determine the bisecting angle:
Position the sensor within the mouth behind the teeth you want to x-ray, as if the patient is biting on it (use gauze or other aids to hold the mouth open so there is no pressure from the teeth that could damage the sensor).
Estimate the angle between the tooth root and the plate.
Divide this angle in half, and draw an imaginary line with your mind.
Position the x-ray beam perpendicular (at a right angle, or 90 degrees) to this line you’ve just imagined.
If the tooth root is too long on your image, raise the angle of the tube relative to the sensor. If the root is too short, lower the angle of the beam (move it more parallel toward the sensor).
Developing a Simplified Technique
Using a simplified technique can allow you to skip the bisecting angle measurement. For example, one described technique uses just three angles for all oral views…
90 degrees for mandibular molars/premolars.
70 degrees for maxillary molars/premolars.
45 degrees for canines and incisors.
Since you can position these angles on your tube head without measuring (many units have predetermined angles marked by the tube head), this makes positioning much easier and faster for you and your staff.
Exceptions, Views of Specific Teeth, and Further Training
These guidelines are a good starting point for many patients. But, you may find you need to adjust your views to accommodate certain dogs and cats, depending on the shape of their mouth and tooth roots.
Cats in particular may need steeper angles than dogs to minimize interference from the zygomatic arch. And some patients will have tooth roots that curve significantly.
For all of these reasons, and for the benefit of hands-on experience, it helps to schedule a demo of your equipment, or to find an in-person training opportunity for your staff. That way, you can maximize your return on investment by using your dental radiography unit to its fullest potential.

Any time spent developing the proper technique for positioning will be well worth it, as you’ll be able to quickly take views that aid your treatment decisions and deliver value to your clients.
Disclaimer: This article is for general informational purposes only, and not intended as a guide to the medical treatment of any specific animal.
Written by: Dr. Tammy Powell, DVM

Autoclave Sterilization: A Necessity in Veterinary Medicine

In 2021, you’ve probably thought more about sterilization and disinfection than you ever have before.
Of course, you’ve always practiced safely and hygienically. But, this year’s pandemic brought the need for drastic measures like curbside service, face masks during everyday interactions, and washing your hands even more frequently…
… and, you and your staff probably feel like you’re cleaning, cleaning, cleaning all day long!
Best practices for cleaning surfaces and equipment
According to many experts, the best way to avoid viral exposure is the elimination of the risk.
This is where isolation and social distancing protocols come in. Your distancing measures of curbside service, telemedicine, and a limited number of people inside your hospital can all help.
Social distancing within the practice and avoiding the sharing of spaces and equipment as much as possible can also help.
Then, there’s PPE to help minimize any potential exposures—as well as your cleaning and disinfection protocols.
You wear gloves and face masks, you wash your hands and use hand sanitizers, and you clean the surfaces and equipment in your practice.
During your cleaning efforts, don’t forget about a powerful piece of sterilization equipment you probably use frequently…
Maximize your use of this key piece of veterinary equipment…
If your own or work at a veterinary practice, there’s a good chance you have at least one autoclave available for use.
Autoclaves use steam under pressure to kill microbes and are one of the most powerful disinfecting tools you have in your arsenal.
Surgical equipment—and beyond!
An autoclave is a tried and true method of sterilization for surgical packs, drapes, and tools.
But, maybe there are a few more items you don’t always think of that could be put into an autoclave for quick, thorough disinfection.
Things your autoclave can be used for include…
Gowns for surgery, isolation, or general use as an extra layer of protection.
Cloth caps.
Cloth face masks.
Surgery light handles.
Nitrile exam gloves or surgical gloves (ideally these would be single-use, but there are procedures described to maximize the lifespan of your PPE during shortages).
Dentistry tools.
Wound care items such as Penrose drains.
Cones/specula for otoscopes.
Pipette tips.
Certain muzzles.
Certain nail clippers.
Biological waste—in case you suspect viral contamination and want to sterilize waste prior to disposal.
There may be other items you can sterilize, too—so get creative!
Just be sure to check the manufacturer’s guidelines before you sterilize a new item—they’ll guide you on what’s safe or not safe to go in your autoclave.
But, once you get into the habit, this will save you time and do a more thorough job of eliminating microbes than most hand cleanings could ever do.
Why invest in a top-of-the-line autoclave?
In modern times, we can’t help but think of an autoclave as a potent killer of coronavirus!
But really, a good autoclave is useful to you all the time, pandemic or no pandemic. It ensures your equipment is properly sterilized from all microbes prior to use.
A good quality autoclave is dependable and makes your life easier via the simplicity of use. Here’s what we recommend you look for…
Several setting options including solid or liquid items, and wrapped or unwrapped items.
The option to choose a preset that suits your needs.
Large water reservoir so you don’t have to refill as often.
A tabletop model with a large chamber capacity so you can fit more items per cycle.
Locking mechanisms for safety.
A strong warranty and excellent customer service.
Our pick is this Full-Size Veterinary Autoclave because it meets all of these criteria, and has an industry-leading 3-year warranty (which includes a loaner autoclave if yours ever needs to be serviced).
How to keep your autoclave healthy
It’s always important to protect your investments by caring for your equipment—and that’s even more true during times when the business may be slower due to social distancing.
Here are a few tips to keep your autoclave in tip-top shape…
Use distilled water, not tap water.
Post guidelines for routine maintenance (otherwise, it’s easy to forget!).
Look for debris when the autoclave is cool, and clean it as needed.
Wipe the trays clean weekly.
Note any water or steam leaks.
Listen for any unusual sounds.
Observe the tape indicator each time, to ensure the autoclave is functioning as it should.
With a little attention and care, your autoclave will stay healthy—and in turn, it can help keep your equipment pathogen-free!


5 Tips for Radiation Safety During Uncertain Times
Your x-ray unit is something you use frequently—probably every day, or multiple times per day—in your practice.
You know radiation safety is important. But recently, if you’ve had to reduce the number of team members in the building at any given time, maybe it feels like there aren’t enough hands on deck for patient restraint and positioning.
The good news is, some of the same principles that reduce radiation exposure can also help your team operate more efficiently.
Here are some tips to maintain safety, even when you’re shorthanded…
A.L.A.R.A.: A Brief Reminder
A.L.A.R.A. stands for “As Low As Reasonably Achievable,” and it’s the guiding set of principles that help you reduce radiation exposure to yourself, your staff, and your patients.
This is important because ionizing radiation from x-rays can damage cells, and cumulative exposure can lead to health risks such as cancer and genetic damage to reproductive cells.
To minimize exposure, there are 3 principles to keep in mind:
Time
Distance
Shielding
Decreasing exposure times, increasing the distance between your team and the x-ray source, and using PPE, all can help to decrease radiation exposure.
Tips for Radiography Safety and Efficiency
Hands-Free Restraint
Increasing the distance between your team members and the x-ray source is one of the most effective ways to decrease x-ray exposure.
Think of the inverse square law, which states that doubling your distance away from the x-ray source results in ¼ of the dose of x-ray radiation.
That’s a significant decrease!
Also, scatter radiation comes from the patient—so by not touching the patient, you’re reducing your exposure.
This can be accomplished by using:
Chemical restraint.
Positioning aids such as sandbags and tape.
A combination of both.
In addition to contributing to safety, hands-free restraint also increases staffing efficiency.
Especially for large or wiggly patients, it takes fewer staff members to position the patient when hands-free restraint is used.
Patient Comfort
A patient who wiggles at the last moment can lead to a crooked radiographic image—and thus, the need to retake that view.
The more shots you take, the higher the x-ray exposure to your team members.
Keeping a dog or cat’s comfort in mind can help you get the shot you need the first time—and decrease the need for retakes.
Here’s how you can do this…
Minimize fear and pain (for example, pain from stretching a sore leg to get the right position) by using chemical restraint.
Use a trough or other aid for comfort. Lying with their back on a cold, hard table can cause even the most cooperative of pets to squirm. Giving them a cozy place to settle into can really help.
Play white noise or background music. This helps make the big buzzing and beeping sounds from the x-ray machine less startling to a dog or cat.
In addition to a better patient experience and less x-ray exposure, these methods help save your staff time by getting your views more quickly.
Getting Things Right the First Time
The fewer images you take, the less radiation exposure there will be.
In addition to the measures listed above, here are some ideas for taking the fewest views possible…
Good planning. Be sure to know exactly which views you need ahead of time and what position the patient needs to be in for those views. Communicate these expectations clearly with your staff.
Proper measurement. Measure the patient in the position they will be in during the shot (lying down rather than standing).
Have a technique chart, or use appropriate settings in your digital unit. Teach team members how to make quick and accurate adjustments in settings, too.
Use collimation. In addition to producing a higher-quality image, collimation decreases scatter radiation.
A thorough understanding of x-ray positioning and machine settings will save your staff time and headaches—in addition to minimizing radiation exposure.
Who Should Be in the X-Ray Suite?
Only the team members taking the radiographs should be near the machine. Clients shouldn’t be in the x-ray suite, and other team members should be fulfilling other duties—especially when you’re shorthanded.
Rotating the staff you have on x-ray duty can also help minimize their cumulative exposures.
So, it’s smart to invest in training multiple team members. That way, you’ll also avoid delays if your “go-to” x-ray staff member ever needs to call out sick or otherwise miss a day.
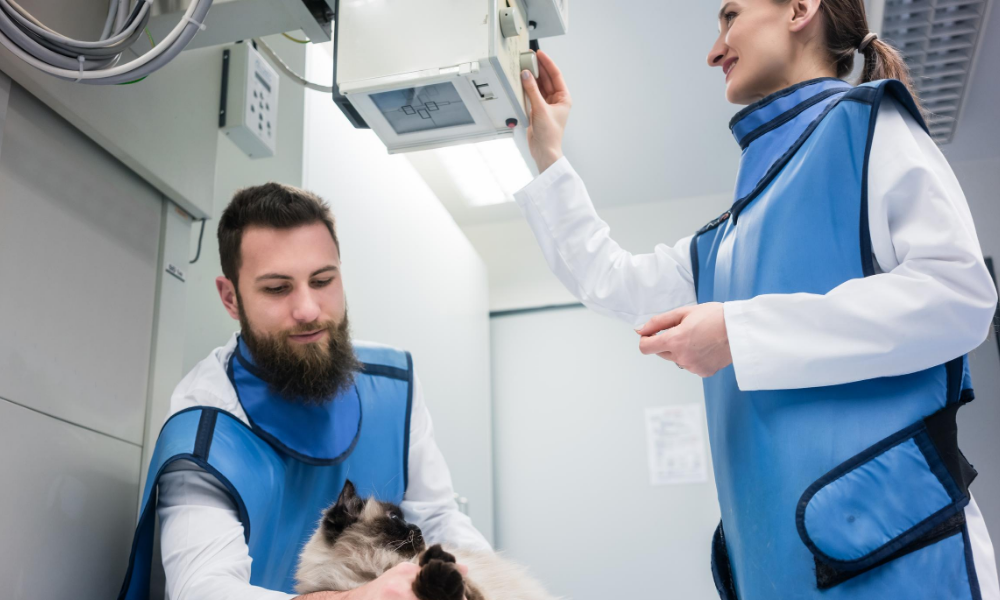
PPE Care and Use
Even though the nature of your daily practice may have changed, it’s still important to keep up with x-ray safety measures, such as making sure your PPE is in good condition.
Experts recommend checking PPE every six months, and this includes radiographing your aprons, gloves, and thyroid shields to check for cracks. Of course, check and replace sooner if there are any notable defects.

Uncertain times may be stressful, but you and your team can continue to help the patients who need you while keeping yourselves safe.
Written by: Dr. Tammy Powell, DVM