

Why Cat-Specific Cages Matter in Rescue Facilities (More Than You Might Think)
The goal of a cat rescue isn’t just to provide a home for these furry creatures; it’s to help them heal, decompress, and to help them get adopted by a loving family.
Rescue environments are full of good intentions and hard realities, such as limited space, high intake, unknown medical histories, and cats arriving stressed, scared, or shut down. In that setting, the type of cage system you use can quietly make—or break—everything that follows.
Cat-specific cage systems give cats the best possible chance to recover, socialize, and move on to a permanent home.
Stress Is Often the Biggest Barrier to Adoption
Many rescued cats don’t show their true personalities right away. Instead, stress takes over.
You see it as:
Hiding in the back of the cage
Refusing food
Aggression or shutdown behavior
Over-grooming or stress-induced illness
When cats are confined in cages not designed for feline behavior, stress compounds quickly. Loud noises, lack of vertical space, no separation between litter, food, and resting areas—it all sends the same message to the cat: “You’re not safe here.”
A cat-specific cage system helps change that narrative.
Cats are territorial and routine-driven animals. When a cage respects those instincts, cats settle faster. Cat-specific systems typically allow for:
Separate zones for litter, food, and rest
Vertical space so cats can perch or retreat upward
Visual barriers to reduce overstimulation
Easy-to-clean surfaces that minimize lingering stress pheromones
These design elements reduce cortisol levels, which directly impacts appetite, immune function, behavior, and sociability.
Recovery and Behavioral Assessment All Improve
Rescue facilities juggle multiple stages of care at once:
Intake and quarantine
Medical treatment or recovery
Behavioral observation
Adoption readiness
Cat-specific cage systems make it easier to do things like:
Monitor eating, litter use, and demeanor
Perform daily care without escalating fear
Identify real behavioral issues versus stress responses
When cats aren’t constantly in survival mode, staff and volunteers get a more accurate picture of who that cat really is. Allowing their personality to really shine through.
Better Cages Support the Humans, Too
Rescue work is emotionally and physically demanding. Cat cages not only benefit those being housed in them, but also those who are maintaining that space by:
Reducing the risk of bites and scratches
Allowing for easier spot-cleaning and full sanitation
Improving workflow during feeding and medication rounds
Making daily care less stressful for staff and volunteers
When cats are calmer, the people caring for them feel the difference, too.
Adoption Outcomes Improve
Potential adopters are drawn to cats who:
Are visible and relaxed
Show curiosity or social interest
Aren’t crouched in fear at the back of the cage
A cat cage system helps cats present their best selves. It doesn’t change who they are—it simply removes the barriers that keep their personalities hidden. That leads to:
Shorter length of stay
Higher adoption rates
Better matches between cats and adopters
It’s Really About Compassion, Not Perfection
No rescue has unlimited resources. And no cage system can fix everything.
But choosing a cage system designed specifically for cats sends a powerful message to the animals, your team, and your supporters: “We understand cats, and we’ve built our care around them.”
That intention alone can transform a rescue space from a holding area into a place of healing.
In rescue work, every small improvement matters. And few changes have as wide-reaching an impact as giving cats a space that truly meets their needs.

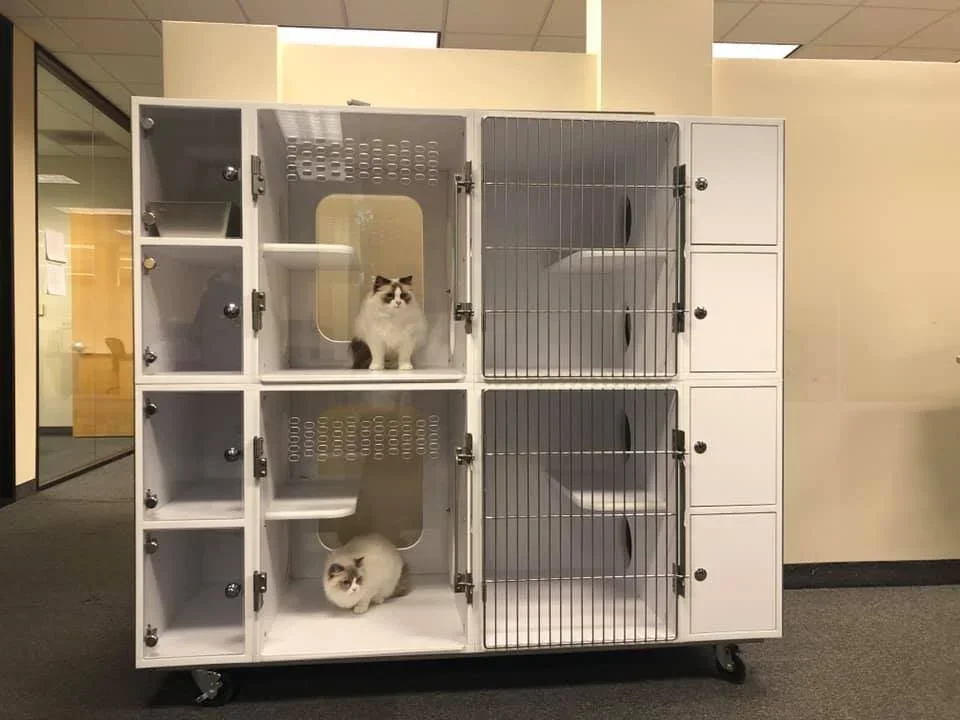
Cat-Only Cages: Not a Luxury—Basic Standard of Care

Feline-Friendly Housing Starts with Cat-Only Cages
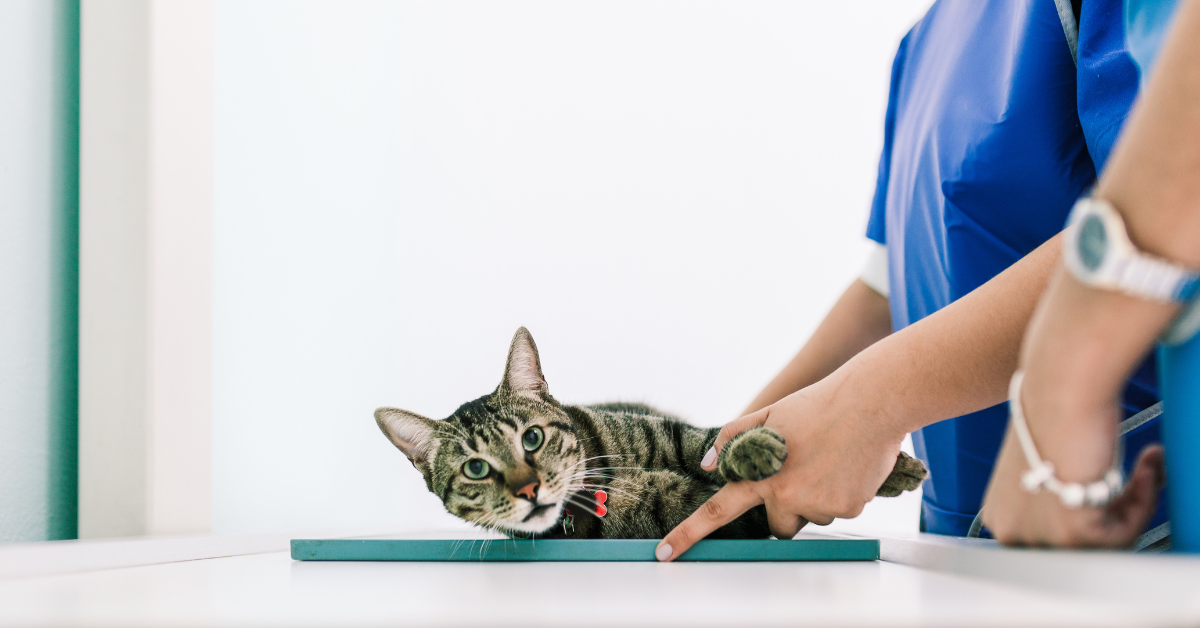
If you’ve worked in a veterinary hospital for more than five minutes, you already know a cat’s experience the hospital very differently from dogs.
To us, it’s a routine appointment…
To a cat, it’s a sensory overload: new smells, unfamiliar sounds, barking dogs, restraint by strangers, and a total loss of control.
By the time many feline patients reach treatment or recovery, they’re already operating in fight-or-flight mode.
That’s where cat-only cages come in—and why they’re far more than a “nice to have.”
Stress Isn’t Just Emotional, It’s Clinical
Stress in cats doesn’t just look like hissing or hiding in the back of the cage. It shows up in measurable, clinically relevant ways:
Elevated heart and respiratory rates
Increased blood pressure
Stress-induced hyperglycemia
Masked pain or illness
Delayed recovery post-procedure
When cats are housed next to barking dogs or in high-traffic treatment areas, their stress levels remain elevated longer, which directly affects diagnostics, anesthesia recovery, and overall outcomes.
A calmer cat is a more accurate patient.
Cat-Only Cages Create a Quieter, More Predictable Environment
Dedicated feline housing helps reduce:
Noise exposure from dogs
Visual stressors (direct line of sight to other animals)
Vibrations and constant movement
Even small changes, such as raising cat cages, using solid dividers, or dedicating a separate bank of cages, can significantly improve a cat’s perceived sense of safety.
And when cats feel safer, they typically:
Eat sooner
Recover faster
Require less chemical restraint
Are easier (and safer) for staff to handle
Better for Cats = Better for Your Team
Let’s talk about your staff for a moment. Handling a highly stressed or fractious cat increases:
Bite and scratch injuries
Emotional fatigue and burnout
Time spent on restraint rather than care
Cat-only cages reduce the number of “on-edge” feline patients, which means:
Safer handling
Smoother treatments
More efficient workflows
That adds up, especially in busy hospitals where every minute and every staff injury matters.
Clients Notice More Than You Think
Cat owners are already anxious about bringing their cat in, often delaying care because they don’t want to stress them out.
When clients see:
A quiet feline-only area
Thoughtful cage placement
A team that clearly understands cat behavior
…it builds immediate trust.
This aligns closely with Fear Free and Cat Friendly Practice principles, but even outside of formal certification, dedicated feline housing sends a clear message:
“We understand cats, and we’ve designed our hospital with them in mind.” That perception influences client loyalty and compliance.
It’s About Intention, Not Square Footage
You don’t need a full feline-only ward to make a difference. Many hospitals successfully start with:
A designated cat-only cage bank
Physical barriers between cat and dog housing
Covered cage fronts for visual security
Separate recovery cages for feline patients
The Bottom Line
Cat-only cages improve:
Patient stress levels
Diagnostic accuracy
Recovery times
Staff safety
Client confidence
Feline care deserves the same thoughtful consideration we give to anesthesia protocols, imaging equipment, and surgical tools. Because when your patients feel safer, everyone wins.

Vomiting in Cats: Common Causes and Diagnostic Steps

Cats are good at hiding illness and pain. So, for some feline patients, it’s hard to tell what’s behind a bout of vomiting.
A few of the many possible causes include:
Hairballs.
Food sensitivities.
Dietary indiscretion.
Infections or parasites.
Stress.
Pain.
GI foreign bodies.
Inflammatory conditions.
Internal issues such as kidney disease or hyperthyroidism.
Cancer.
Is it serious?
Often, it’s obvious whether the patient needs aggressive treatment right away or just needs a little bit of supportive care and observation at home.
However, other times it’s more difficult to know for sure. Those are the cases that may stay on your mind, making you wonder if the vomiting will continue or even become more severe.
It’s especially nerve-wracking if the patient went home for observation, but you’re concerned they may get worse overnight.
Reaching a diagnosis
Depending on the patient’s signalment, history, and physical exam findings, you’ll recommend the appropriate diagnostic tests.
Bloodwork
Bloodwork is a key factor in determining overall health status, and in establishing a baseline to monitor the patient for improvement or worsening of their condition.
These labs may be especially valuable in senior cats who have lost weight, when kidney disease, hyperthyroidism, or other internal medicine issues may be what comes to mind as the most likely diagnosis.
Imaging with x-rays and ultrasound
For some patients—especially if the vomiting is severe, or if you feel something abnormal on abdominal palpation—imaging may be needed right away. For patients with milder signs, you may decide to hold off on imaging at the first visit, but recommend the client bring their cat back if symptoms don’t improve.
And even if an obvious abnormality is noted on bloodwork (such as elevated thyroid hormone), imaging is still a good idea to rule out concurrent conditions, and to establish a baseline to compare any changes that show up on future imaging tests.
Either way, when it comes to imaging, radiographs are a good place to start.
Radiographs give you a good overview of what’s going on inside the abdomen. You can look for masses, abnormal-looking organs, constipation, bladder issues, pyometra, signs of a GI obstruction, and much more.
However, sometimes more information is needed. Often, x-rays and ultrasound work well together to give you the full picture.
Ultrasound gives you additional clues about soft tissue structures, including:
Differentiating a mass (size, what the borders look like, texture, thickness, etc.) from surrounding normal soft tissues. Silhouetting may make this interpretation challenging on x-ray images.
Viewing bladder stones that aren’t radiopaque.
Looking at small structures that are hard to see on x-rays, such as the adrenal glands.
Inflammation of the GI tract or other internal organs.
Finding evidence of a GI obstruction when it’s not obvious on radiographs (or, ruling out an obstruction—which may help you worry less if you decide to send the patient home for monitoring).
The list goes on, but the point is, x-rays and ultrasound can complement each other to give you the information you need, which can help you confidently diagnosis the mysterious vomiting cat.
Additional tests
Sometimes additional tests—for example, biopsies and infectious disease testing—may be needed to reach a diagnosis.
However, bloodwork, x-rays, and ultrasound are a great place to start. And often, these modalities will need to be completed prior to other modalities such as surgically obtained biopsies.
Lifestyle changes and monitoring
If the vomiting is due to a factor such as stress or hairballs, this may require a simple lifestyle change like providing Feliway diffusers and adding mental enrichment at home, or changing to a special diet.
But even in these cases, it’s good to rule out other, treatable medical causes—so a medical workup with diagnostic tests may still be recommended.
Keeping the vomiting at bay
If you have a patient with a chronic condition, you may recommend repeating the bloodwork, x-rays, and ultrasound at regular intervals.
A wellness checkup package that includes testing may be a good option for many patients—especially seniors. The wellness tests can be offered at checkups before the patient ever becomes ill, which gives you a great baseline for comparison with future test results.

Even though cats may not like to show symptoms of illness until a disease has progressed, wellness bloodwork and imaging (x-rays and ultrasound) can help to catch abnormalities early on, when the chances for treatment are better.
Disclaimer: This article is for general informational purposes only, and not intended as a guide to the medical treatment of any specific animal.
Written by: Dr. Tammy Powell, DVM

Dental X-Rays: Tips for Accurate Vet Imaging Success

When it comes to evaluating a pet’s teeth, dental x-rays are the best way to see what’s happening “under the surface.” That is, under the gumline.
Dental radiographs help you obtain a full picture of tooth roots, evaluate for periodontal disease and damage, differentiate between different types of FORLs, and look for any other defects that may not be visible with your eyes alone.
Even though the value of dental radiographs (to both your patients and your practice) is hard to deny, there can be a learning curve when your team first begins to use them.
This is important, because in order for your x-ray images to be diagnostic, they need to be good quality.
Fortunately, with practice, dental x-rays become simple and routine—a process your team can quickly replicate for each patient.
Establishing a Dental X-Ray Routine
To make the dental radiograph process easy for you and your team—and as quick as possible for your patients—it’s best to establish a repeatable routine.
This means taking the same shots, in the same order, each time.
You may need a larger number of views depending on the patient’s size and the angle of their mouth, but in general you can start in the same place each time and move through your views systematically until images of all teeth and their roots are captured.
Use your digital software to set up the views in the order you prefer.
Once you establish a routine, it will only take a few minutes to shoot all views for a small patient. And large dogs should take a maximum of 15-20 minutes.
Positioning the Patient
Your patients will be under general anesthesia for their dental procedure, including dental x-rays.
After intubation, leave the patient in sternal recumbency, and simply place a towel under their chin to keep their maxilla parallel to the table. Then obtain your views of the maxillary teeth.
When you finish the views of the maxilla, move the patient to dorsal recumbency, this time using a towel or other prop under their neck to keep the mandible parallel to the table as you obtain your views of the mandibular teeth.
You can use a trough or sandbags to stabilize the patient and keep them from tilting to the side, if needed.
Adjust this plan if you find that another method better suits your needs. For example, you may find that lateral recumbency works best for you for some views.
Whatever system you choose, we recommend repeating the same steps each time and using a method that minimizes the number of times you need to move the patient.
Sensor or Film Placement
Select the right size sensor or film for your patient. For most veterinary patients, this would be either a size 2 (for small dogs and cats, or views focusing on a single tooth) or a size 4 (for large dogs, or for full-mouth/whole quadrant radiographic views).
Whether you’re using a sensor for digital x-rays, or regular dental film, placement is important to ensure you can see all of each tooth root. Remember the roots are much longer than the crowns (twice as long with canine teeth), so position your sensor accordingly.
Finally, determine which side of the sensor or film should be positioned toward the x-ray beam. This may be indicated by a small dot or “dimple” on films. If you have a digital sensor, the cord side should face away from the tube and the cord should exit the front of the patient’s mouth.
Beam Placement
A parallel angle is used for the mandibular premolar and molar teeth. For many pets, this part of the mouth allows the sensor to be placed parallel to the teeth, and the beam to be shot straight forward (perpendicular) into the sensor.
The rest of the mouth, however, prevents this placement (the palate and mandibular symphysis get in the way). So, you’ll need to use a bisecting angle for the rest of your shots (and possibly for the rostral mandibular premolars).
A bisecting angle might seem complicated, but it’s important—choosing the correct angle prevents distortion (lengthening or shortening of the tooth root in your image).
Here is how to determine the bisecting angle:
Position the sensor within the mouth behind the teeth you want to x-ray, as if the patient is biting on it (use gauze or other aids to hold the mouth open so there is no pressure from the teeth that could damage the sensor).
Estimate the angle between the tooth root and the plate.
Divide this angle in half, and draw an imaginary line with your mind.
Position the x-ray beam perpendicular (at a right angle, or 90 degrees) to this line you’ve just imagined.
If the tooth root is too long on your image, raise the angle of the tube relative to the sensor. If the root is too short, lower the angle of the beam (move it more parallel toward the sensor).
Developing a Simplified Technique
Using a simplified technique can allow you to skip the bisecting angle measurement. For example, one described technique uses just three angles for all oral views…
90 degrees for mandibular molars/premolars.
70 degrees for maxillary molars/premolars.
45 degrees for canines and incisors.
Since you can position these angles on your tube head without measuring (many units have predetermined angles marked by the tube head), this makes positioning much easier and faster for you and your staff.
Exceptions, Views of Specific Teeth, and Further Training
These guidelines are a good starting point for many patients. But, you may find you need to adjust your views to accommodate certain dogs and cats, depending on the shape of their mouth and tooth roots.
Cats in particular may need steeper angles than dogs to minimize interference from the zygomatic arch. And some patients will have tooth roots that curve significantly.
For all of these reasons, and for the benefit of hands-on experience, it helps to schedule a demo of your equipment, or to find an in-person training opportunity for your staff. That way, you can maximize your return on investment by using your dental radiography unit to its fullest potential.

Any time spent developing the proper technique for positioning will be well worth it, as you’ll be able to quickly take views that aid your treatment decisions and deliver value to your clients.
Disclaimer: This article is for general informational purposes only, and not intended as a guide to the medical treatment of any specific animal.
Written by: Dr. Tammy Powell, DVM

Choosing and Interpreting In-House FIV/FeLV Combo Tests

Feline immunodeficiency virus (FIV) and feline leukemia virus (FeLV) are contagious retroviruses that can cause serious illness in cats.
Infected cats may develop bone marrow suppression, chronic inflammatory conditions, and cancer (especially lymphoma), and be more susceptible to other infectious diseases due to a weakened immune system.
With all these health consequences, it’s no surprise that a retroviral infection may significantly shorten a cat’s lifespan.
Prevention is key for limiting the prevalence of these diseases. Since these viruses are typically spread by close contact (mutual grooming, catfights, etc.), it’s important to identify and isolate infected cats, to prevent exposure and spread of the disease to other cats.
For all these reasons, the American Association of Feline Practitioners (AAFP) recommends testing for FIV and FeLV when a cat is first adopted, prior to initial vaccination against these diseases, after a potential exposure, and if clinical signs of retroviral infection develop.
Which Tests are Available for FIV/FeLV Testing in Cats?
Tests are available for in-house (point of care) use. Laboratory testing is also available, which includes a wider range of testing options and confirmatory testing.
For point of care tests, here are two popular options for veterinary practices…
IDEXX SNAP FIV/FeLV Combo Test
IDEXX claims to have high sensitivity and specificity, with reference lab quality technology. Results are available in 10 minutes, using 3 drops of sample. A SNAP Pro Analyzer is available to automatically activate and read tests, and add results to the medical record.
Zoetis WITNESS FeLV/FIV Rapid Test
The WITNESS test is meant to be easy to use and affordable. It works with just 1 drop of sample, with results available in 10 minutes. The test offers room temperature storage, an extended (12-month) shelf life, and no need to snap the test.
Zoetis also offers the VETSCAN FeLV/FIV Rapid Test, which appears to have very similar specifications to the WITNESS. One difference is that the VETSCAN test has a single test window, versus two separate test windows for the two diseases in the WITNESS test.
Considerations for FIV/FeLV Testing
To get the most accurate results, it’s best to use serum or plasma rather than whole blood. Although test instructions specify whole blood (and most of the time this works just fine), many experts note that occasionally, whole blood can result in a faint false positive. This is due to a protein or interference from red blood cells.
It’s also important to note that the FeLV test is an antigen test, and the FIV test is an antibody test. Therefore, the FIV test may pick up on an antibody response from a vaccination rather than a natural infection. This may complicate testing in some cases, and it’s recommended to know a cat’s FIV status prior to vaccination.
Additionally, in-house testing is often considered a screening test, in the sense that confirmatory testing is recommended for positive results. This commonly includes IFA testing for FeLV, and Western Blot testing for FIV.
Purchasing Considerations
Here are a few important considerations before making a purchase…
Brand preference. Maybe a veterinarian or their team has had good experience with a particular brand. Or, if the company has any additional equipment or tests (such as hematology or chem analyzers) the practice is also interested in, it might be possible to negotiate a better deal for everything together.
Contracts. It’s always important to check the contract closely when making a purchase, to see if there’s a minimum requirement of tests per month or any other stipulations.
Quantity sold and expiration dates. See if you’ll be able to use all the tests before they expire, or if the company will refund any unused tests.
Available support. Is there a helpline for any technical questions or for help with confusing or inconsistent results? And does the company help with confirmatory testing, especially if in-house test results are inconsistent or don’t seem to line up with the cat’s history or symptoms?

Details and specifics of these tests may evolve over time. It’s important to check directly with the company for the most up-to-date information before making a purchase.
With all these factors in mind, see which option works best for the needs of your individual practice.
Written by: Dr. Tammy Powell, DVM

Feline Radiograph Techniques for Sedation-Free Imaging
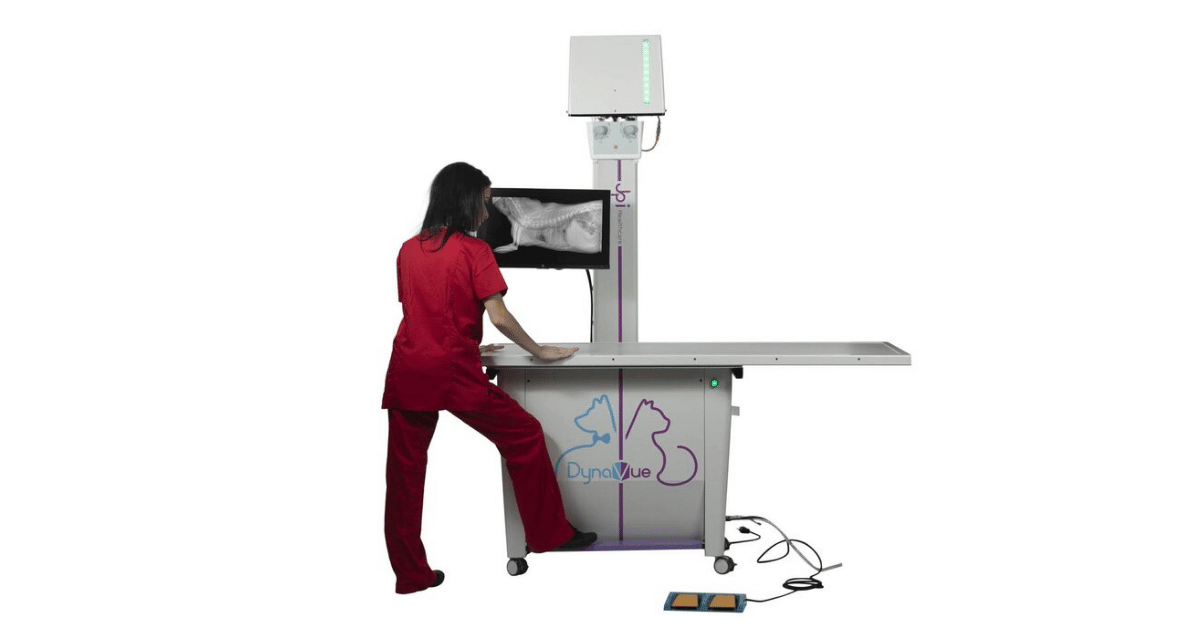
X-rays are a commonly used diagnostic tool in many veterinary clinics for our feline patients. Radiographs can provide a wealth of diagnostic information, as long as they are of good quality and well-positioned.
However, cats aren’t known for their trainability, or their propensity to lie perfectly still for periods of time in a veterinary hospital, to allow veterinarians and technicians to work around them! So how do you get an X-ray of good diagnostic quality in a cat without sedation?
Do you need X-rays without sedation?
The first question to be asked is if the radiographs really need to be taken without sedation or anesthesia. Safety is paramount – for both patients and veterinary staff.
Taking X-rays conscious is not worthwhile if the process ends up having to be repeated multiple times due to poor positioning or movement blur, increasing both stress and levels of radiographic exposure to the patient and staff alike.
In many cases, a short-acting sedation or anaesthesia is the safest option to gain radiographs.1 There are many protocols now in use for a variety of situations, including drugs which are more cardiac-safe, those which avoid either renal or hepatic metabolism, and those with short half-lives for those quick X-ray procedures.
However, there are scenarios in which a veterinarian may prefer to attempt a conscious X-ray. These may include:
Cats with advanced cardiac disease
Cats with severe renal or hepatic impairment
If a cat has eaten recently and there is concern for aspiration, but needs urgent X-rays
A known previous reaction to sedation or anesthesia
A moribund patient who requires urgent assessment but is clinically unstable
Techniques for conscious radiographs in cats
If you have a feline patient requiring X-rays in your veterinary hospital, there are a few ways to make the procedure safer and less stressful for all involved.
The welfare of the cat, and the safety of all involved, should always be at the forefront of decision making in a veterinary clinic.
Preparation
When taking X-rays conscious, it’s hugely important to be prepared – time is of the essence. Use an exposure chart to predict your kV and mA settings,1 have restraint equipment ready to go and veterinary staff primed as to their roles. Have a plan of which order the radiographs will be taken in, and how positioning is going to be achieved.
The process with be smoother if both staff and patient are relaxed. Practice feline-centric protocols: calm voices, quiet areas, pheromone diffusers, and minimal handling. Speed is helpful, but not to the detriment of calm handling and a low-stress environment.
Positioning
Firstly, keep the X-ray area secure by closing or locking doors: as well as being a distraction, doors opening suddenly can be an escape route for a stressed cat!
Positioning aids will be required
These may include:
Perspex box – if it is not possible to restrain the cat in a specific position, or the cat is very sick and/or recumbent, a clear Perspex box can be used to gain rapid radiographic assessment. Specific positioning will not be achieved, but a radiographic overview of a certain area – or even a full ‘catogram’ – can be achieved very quickly without the need for chemical or more aggressive physical restraint. Some boxes also allow oxygen to be piped in for those cats with respiratory concerns.
Sandbags, troughs, and foam wedges – cats who are mobile will require physical restraint. Wedges can be used to elevate anatomic areas, or to ensure correct alignment. Sandbags are useful mostly for limb restraint – they are heavy, so avoid placing them across the thorax as this can affect respiration. Always try and ensure positioning is comfortable for the patient, as this will aid them to lie still and not panic.
Be aware that “less is more” when restraining cats; and that cats with dyspnoea are brittle and require minimal restraint. In these patients, initial stabilization, thoracic ultrasonography, and general anesthesia for radiography (if cardiac failure can be excluded) is often the most appropriate approach.3
Taking the radiographs
A veterinary team member can stay with the cat until the machine is ready to go and the positioning is perfect, providing reassurance and extra restraint. Once the area is safe, personnel can exit and take the radiograph. The ‘beep’ or ‘click’ of the X-ray machine can cause cats to move, so you may need some background music or white noise to distract from this.
Allow the cat to rest and hide in a covered box in between X-rays. Provide reassurance, and reward (if clinically appropriate). If the patient is becoming distressed, consider moving to chemical restraint or postponing the radiographs.
There are many potential pitfalls when taking conscious radiographs, and it is more likely that these X-rays will be affected by poor positioning, movement blur or sub-optimal exposure. Wherever possible, sedation or anesthesia is preferable to achieve radiographs safely.
References
Larson, M. Feline Diagnostic Imaging. Published 2020 John Wiley. Ed. Holland & Hudson. ISBN:9781118840948
Lavin L: Small animal soft tissue, in Lavin L (ed): Radiology in Veterinary Technology, ed 3. Philadelphia, WB Saunders, 2003
Borgeat, K. and Pack, M. (2021), Approach to the acutely dyspnoeic cat. In Practice, 43: 60-70. https://doi.org/10.1002/inpr.15
Treatment for Blocked Cats: The Power of Fluoroscopy

Urinary obstructions in cats are a life-threatening issue that vets see and treat commonly.
And while most vets have a system for caring for these unfortunate felines, it is exciting to learn about new technology that may provide value during the treatment of these critical patients.
One such development is fluoroscopy technology, which is now more accessible than ever to general practitioners. Here are three ways fluoroscopy may help while unblocking a cat…
Confirming Placement of the Urinary Catheter
Depending on the type of indwelling catheter used, it may be of value to check the placement of the catheter on radiographs.
This is especially true for red rubber catheters—which can double back on themselves or even tie into a knot if too much of the catheter is placed into the urinary bladder—or for any catheter long enough to cause additional trauma if passed so far that the tip contacts and irritates the bladder wall.
While traditional x-rays may be used for this purpose, fluoroscopy offers the advantage of being able to adjust the catheter placement in real time. That way, the catheter can be quickly adjusted prior to placing sutures.
Real-Time Contrast Studies of the Bladder and Urethra
Blocked cats with severely distended urinary bladders are at risk for bladder rupture—whether from the condition itself or from manipulation (pressure or cystocentesis) while the bladder is excessively full.
A large bladder rupture is often obvious since a full bladder will suddenly become difficult or impossible to palpate. However, a small tear or leak may be more difficult to detect.
A positive contrast cystourethrogram can help to identify small ruptures, by looking for contrast outside the borders of the urinary bladder on radiographs.
While traditional radiographs can certainly be used for this purpose, fluoroscopy may prove useful because of the ability to see things moving in real time, and the ability to move the patient and quickly see the abdomen at multiple angles without taking a lot of x-ray shots.
In addition to the bladder, this can be very useful for tracking the movement of contrast through the urethra (to identify obstructing materials, strictures, etc.), versus only seeing a couple of snapshots in time on traditional x-rays.
Since contrast media can be irritating to tissue that is already compromised, a vet must weigh the pros and cons of doing a contrast study right after unblocking a cat. But this procedure could also be useful after the cat has had time to heal, to ensure the bladder is intact before the urinary catheter is removed and the patient is sent home.
Evaluating for Uroliths and “Sludge”
In cats, sludge, sand, or gritty material—which may be a combination of crystals, blood clots, mucus, etc.—can accumulate in the urinary bladder. And while less common than in dogs, uroliths are sometimes diagnosed in cats.
On radiographs, sludge may be confused with a bladder mass or even sometimes with uroliths. Fluoroscopy can help with characterizing this material inside the urinary bladder (and distinguishing it from a bladder mass) by seeing how it moves in real time, as the patient is moved.
Additionally, a vet could use fluoroscopy to track the progress of flushing this material out of the bladder (or urethra) after relieving a blockage.
Conclusion
For many years, traditional radiographs have been included as part of the workup for blocked cats, and a vet can provide excellent care to feline patients with current protocols.

However, as fluoroscopy technology continues to evolve and become more accessible to general practitioners, it’s exciting to see the ways in which this modality can make a vet’s job easier and provide more information for patient care.
Written by: Dr. Tammy Powell, DVM

Essential Tips for Feline Dental Health: Best Practices

As a veterinarian, you already know how important dental health is to your patients—and you also know that dental health concerns can vary by species.
Today, we’ll be covering some tips for dental care in cats, both before and after the dental procedure.
Knowing Your Way Around a Cat’s Mouth
Quick—how many teeth should an adult cat have?
Clients often ask questions like this. A timely, confident answer will help inspire confidence when they leave their pet with you for oral care.
Plus, knowing the normal dental formula for each species serves an important purpose DURING a dental procedure.
For example, it helps a veterinarian or vet tech easily determine whether or not there are any missing teeth—a discovery that could prompt further exploration and potentially diagnose a problem that needs to be addressed.
Similarly, when performing extractions, it’s important to know how many roots the tooth has, to ensure no root tips get left behind. Knowing the approximate length and direction of each root will also help a vet extract the tooth more efficiently.
Know the Most Common Issues to Look For
Of course, dental tartar and periodontal disease are common concerns in both dogs and cats. But each species also carries their own unique dental problems that occur commonly.
For example, FORLs/resorptive lesions are fairly common in cats, but not so much in dogs. Felines are also more prone to certain inflammatory conditions such as stomatitis.
While it’s important to keep a look out for anything that could be part of a disease process, knowing the common issues in each species could help a vet pick up on subtle or early changes.
Also, be aware of normal structures that could be confused for a mass or lesion—such as the lingual molar salivary gland in cats.
Dental Radiographs: Why, When, and How
The WHY is simple: Dental x-rays are important because they allow a veterinarian to see the whole picture of a pet’s dental health—which frequently includes problems brewing below the gumline.
But, WHEN and HOW should dental x-rays be performed?
Many experts recommend taking a full set of dental radiographs immediately after anesthesia induction. Usually, this task is performed by a skilled vet tech or nurse, along with anesthesia monitoring.
It’s worthwhile to invest in training for this important skill. Consider sending team members to a conference or course, or asking the company that sold the dental x-ray equipment if they offer training. And setting up a standard technique (performing the views in the same order each time) can improve efficiency.
Performing radiographs prior to the cleaning gives the vet a chance to review the radiographs. These findings, along with a visual assessment of the patient’s mouth (including charting), gives a lot of information to support a call to the owner, if needed for additional treatments.
For routine cleanings, this may be all that is needed. But for patients who are receiving extractions or more advanced procedures, it’s beneficial to perform post-op dental x-rays. This confirms that everything was done properly and safely, in case any new concerns arise later.
Tips for Cleaning a Cat’s Teeth During a Dental Procedure
After charting is done, the typical dental procedure consists of scaling and polishing.
Scaling of the enamel can be done with an ultrasonic/and or hand scaler, while curettes (sometimes in combination with a specialized, “periodontal tip” on the ultrasonic scaler) are used to clean below the gumline.
Polishing is performed using a low-speed handpiece, usually with disposable prophy angles and fine-grit prophy paste.
Dental extractions may be done at the point during the procedure that works best for that patient’s needs and the veterinarian’s preference. For example, it may make sense to pull very loose teeth prior to cleaning (no point in spending time cleaning a tooth that is about to fall out), while more complicated extractions might be performed further into the procedure.
Here are a few tips for dental cleaning:
Make sure to stock the right size tools (scalers, etc.) in the practice, which means a range of sizes if you see everything from cats to large dogs. Smaller tools for cats allow for getting into crevices and cleaning more efficiently.
Use time limits to avoid overheating of the teeth, i.e. no more than 10 seconds at a time on any tooth with the ultrasonic scaler, or 5 seconds with the polisher.
In cats, due to the small size and shape of their skull, the eye sits very close to the maxillary teeth. Therefore, be careful while probing or cleaning deep periodontal pockets in that area (not to mention during nerve blocks or extractions) to avoid traumatic injuries to the eye.
Due to the prevalence of periodontal disease, and the abundance of oral and dental diseases that can occur in cats, there’s no doubt that dental health is important for their overall health and comfort.
Client expectations are evolving. Many devoted pet owners research dental procedures online and expect a high level of care for their cat’s oral health needs.

By investing in dentistry—and then communicating the value of each step to their clients—a veterinary practice can bring in income while providing excellent care to their feline patients.
Written by: Dr. Tammy Powell, DVM