


Proving ROI: Making the Case for In-House Veterinary Imaging

Investing in new imaging equipment, whether it's a digital X-ray system, dental X-ray, or ultrasound, can feel like a big leap. The price tag is upfront and very real… but so is the return when the equipment is used effectively.
The challenge can be convincing everyone else on your team of their value.
The good news: in-house imaging is one of the easiest investments to justify when you know which metrics to measure.
Let’s break down the key numbers that actually matter and how to present them so your team understands and supports them.
1. Start With Imaging Volume
Most practices use imaging more often than they realize.
But because they’re outsourcing cases or relying on outdated equipment, they underestimate the number of opportunities available to them.
What to measure:
How many X-rays or ultrasounds do you currently perform each month
How many do you refer out
How many cases do you skip altogether because of logistics, client cost, or scheduling limitations
A practical example:
Let’s say a 3-doctor practice:
Takes ~70 in-house X-rays/month
Refers out 20+ imaging cases/month
Has an estimated 10–15 “missed opportunities” where imaging would have helped, but wasn’t pursued
That’s 100+ cases per month that a modern digital X-ray system or ultrasound system could capture.
If your average imaging fee is $150–$250, that’s:
$15,000–$25,000 per month in potential revenue.
Even if you estimate conservatively, you can quickly show that the equipment pays for itself—often in less than a year.
2. Case Conversion Rate: The Metric Nobody Talks About
You’ve probably seen this… when imaging is easy, fast, and available right now, more clients say “yes.”
When imaging requires a referral, a second trip, or more money upfront… fewer clients say yes.
What to measure:
Percent of recommended imaging that clients accept today
The percent you expect once imaging is same-day and in-house
Some practices that started offering same-day digital X-rays increased their acceptance rate from 43% to 78% in the first 3 months.
Why? When imaging is immediate, convenient, and clearly explained, clients see the value.
This means:
More complete diagnostics
More accurate treatment plans
More revenue per visit
Better medical outcomes—your team will care about this point as much as the financials.
Increasing your case conversion rate by even 15–20% can add thousands in monthly revenue without adding any new clients.
3. Referral Retention
Referrals aren’t bad by any means; you often need specialists.
But referring out basic imaging is one of the biggest hidden drains on revenue.
What to measure:
How many imaging referrals do you send out monthly
Average cost clients pay externally
Percent of referred clients who don’t return for follow-up care
Missed procedure revenue because the patient went to another hospital
If you refer out 20–30 ultrasounds per month at ~$300 each, that’s $6,000–$9,000 monthly handed to another practice.
Keeping even half those cases in-house often justifies the cost of a mid-range ultrasound system or DR panel on its own.
4. Cost Avoidance
Sometimes, it’s not about the revenue you gain but the expenses you stop paying.
What to measure:
Outsourcing fees (radiographs, dental films, ultrasounds)
Additional sedation or handling charges caused by slow equipment
Time cost from workflow delays
The cost of retakes with outdated systems
A practice relying on outdated or low-resolution ultrasound equipment might:
Spend 15–20 extra minutes per scan due to slow boot-up times, poor image acquisition, or difficult navigation
Require additional restraint or sedation for anxious or painful patients because older probes take longer to capture clear images
Delay treatment decisions while waiting for images to be reviewed, re-taken, or sent out for interpretation
Upgrading to an ultrasound system can save:
10+ hours/month of staff time through faster image acquisition and streamlined workflows
5–10 sedation or heavy restraint events by reducing scan times and improving patient comfort
Countless repeat scans and workflow disruptions, thanks to enhanced image quality and intuitive controls
That’s real money saved, even before you consider the revenue side.
Putting It All Together
Most veterinary practices already have the patient volume to justify in-house imaging; they haven’t measured it yet. When you break down the numbers, the ROI becomes obvious:
More case conversions
Higher client satisfaction
Better patient outcomes
Faster workflows and a rapidly recouped investment
If you’re preparing to make the case to your team, this framework gives you everything you need to build confidence and get buy-in.


8 Workflow Mistakes Undermining Your Diagnostic Equipment Investment

Diagnostic Imaging for Veterinary Practices
Explore our most requested systems, then review the workflow playbook below to maximize your ROI.
Avoid These 8 Imaging Workflow Errors in Vet Clinics
Investing in new diagnostic equipment, whether it’s a digital X-ray, ultrasound, or in-house lab analyzers, is one of the most impactful decisions a veterinary practice can make. But even the best technology can fall short if efficient workflows don’t support it.
It’s not uncommon for practices to purchase cutting-edge equipment only to find it underutilized, creating bottlenecks or staff frustration. The good news? These issues usually come down to workflow—not the equipment itself.
Here are eight common workflow mistakes that can quietly undermine your investment—and how to fix them.
-
Inadequate Staff Training
One brief demo at installation isn’t enough. Inconsistent or incomplete training leads to errors, slowdowns, and missed diagnostic opportunities.
The fix: Schedule comprehensive hands-on training for all relevant staff and create clear SOPs for each device. Assign a “champion user” to support ongoing training, maintenance, and onboarding.
-
Poor Equipment Placement and Room Layout
Cramped or inconvenient placement disrupts flow—staff travel farther, cross paths, and squeeze around tables, increasing time per case.
The fix: Map the workflow before installation. Place frequently used equipment near treatment/exam areas and ensure proper clearance for patients and staff.
-
Not Integrating With Your Practice Software
Without PIMS integration, teams waste time on manual data entry and risk transcription errors.
The fix: Work with your provider to ensure full integration. Enable direct image uploads and automatic results imports to save time and improve accuracy.
-
Overlooking Preventive Maintenance
Skipping maintenance or calibration causes inconsistent image quality and unexpected downtime.
The fix: Treat maintenance like patient appointments. Use a service plan for inspections, cleanings, and calibrations on schedule.
-
Not Adjusting Scheduling and Staff Roles
New technology changes patient flow. If schedules and roles don’t adapt, you’ll see idle time or backlogs.
The fix: Reassess after installation. Consider dedicated techs for diagnostics during peak times, or add “diagnostic blocks” to your calendar.
-
Ignoring Change Management
Team resistance can mean inconsistent use or reluctance to adopt new processes.
The fix: Involve the team early. Share the “why,” invite feedback, and celebrate quick wins to build buy-in.
-
Underutilizing the Equipment’s Full Capabilities
Advanced features—contrast tools, cloud storage, automated reporting—often go unused.
The fix: Schedule periodic check-ins with your distributor or manufacturer. Ask about updates, features, and best practices to unlock more value.
-
Failing to Measure Performance
If you don’t measure usage and outcomes, you can’t prove ROI or improve bottlenecks.
The fix: Track studies per month, time from imaging to diagnosis, and referral cost reductions. Use insights to refine workflows and highlight clinical/financial impact.
Supportive Workflow Makes a Difference
A successful diagnostic upgrade isn’t just about the technology—it’s about the workflow that supports it. With thoughtful planning, proper training, and regular review, your new equipment can enhance efficiency, patient care, and profitability for years to come.

Three Best Practices for Increasing Revenue Using Your Veterinary Diagnostic Tools

Investing in diagnostic technology is one of the most impactful steps a veterinary practice can take; however, the real value lies in how these tools are utilized daily.
Whether you’re opening a new hospital or looking to maximize the tools you already have, understanding how to get the most out of your diagnostic tools ensures you’re delivering the best possible care to your patients—and building trust with clients.
Let’s explore three practical ways to use these tools more effectively in your daily workflow and boost your hospital’s revenue.
1. Incorporate IOP Checks into Wellness Visits Using the TonoVet Tonometer
One of the best ways to catch early signs of ocular disease is to make intraocular pressure (IOP) measurement a routine part of senior pet exams, not just ophthalmic referrals.
Take this example…
A 9-year-old Golden Retriever named Joey comes in for a wellness check. Joey’s owner mentions he's “been bumping into things at night.” Using the TonoVet Plus Tonometer, your tech quickly identifies asymmetrical pressure between the eyes, prompting further investigation. You might have missed the early warning signs without that quick, painless IOP check.
Best Practice: Train your team to use the TonoVet Plus confidently during routine exams, especially for high-risk breeds or geriatric pets. Its rebound tonometry design requires no topical anesthetic, making it ideal for a fast and low-stress assessment.
2. Optimize Positioning and Minimize Retakes with Digital X-Ray
Digital radiography is one of the most powerful tools in your diagnostic arsenal—but only if your images are clear and accurate the first time.
Poor positioning not only wastes time but also increases unnecessary radiation exposure for staff and stress for the patient.
Imagine Casey, a limping Labrador, comes in after a suspected car accident.
A well-positioned lateral pelvic X-ray gives you immediate insight into a subtle acetabular fracture—no retakes, no delays.
Best Practice: Integrate digital radiography into your initial exam protocols for acute and chronic cases, not just emergencies.
For example, a senior dog with intermittent lameness may not seem urgent, but early imaging can uncover osteoarthritis or early neoplastic changes before they become advanced.
Making digital X-rays part of routine workups, especially for geriatrics, trauma, or unexplained symptoms, allows you to detect issues sooner and provide more accurate prognoses.
3. Treat What You Can’t See with Dental X-Ray
Dental disease certainly isn’t rare, yet it’s one of the most underdiagnosed conditions because so much of it is hidden below the gumline.
Dental x-rays provide a comprehensive view, enabling you to detect painful pathology that a visual exam alone might miss.
Take, for example, a seemingly healthy 7-year-old cat that presents for a routine dental cleaning…
Everything looks fine—until your dental X-ray reveals resorptive lesions on multiple premolars. With this insight, you can develop a complete treatment plan and address the issue early.
Best Practice: Make dental radiographs a standard protocol before and after extractions. Schedule time for imaging in your dental practice and help clients understand the value of seeing what lies beneath. This not only enhances patient care but also underscores the importance of preventive dentistry.
Diagnostics Are Only as Good as How You Use Them
These tools enable you to make faster and more accurate diagnoses in fields ranging from ophthalmology to orthopedics to oral health. But integrating them thoughtfully into your workflow truly elevates care.
Whether it’s empowering technicians to perform routine IOP checks, refining your radiographic technique, or committing to full-mouth dental imaging, these best practices will help your team maximize the impact of your equipment, increase revenue, and achieve more promising outcomes for your patients.
Are you looking to upgrade or expand your diagnostics? Explore our reliable, practice-ready solutions, which support outstanding veterinary care from day one!

4 Diagnostic Tools for Your New Veterinary Practice

Launching a new veterinary hospital is an exciting adventure that involves the responsibility of providing top-tier care from day one.
Kick-starting your practice with the proper diagnostic tools is paramount for accurate diagnoses, effective treatments, and building trust with pet owners—all of which are huge contributing factors to a successful veterinary hospital.
Let's explore some key diagnostic equipment that can lay a good foundation for your diagnostic workflow and patient care.
TonoVet Plus Tonometer: Quick and Painless Intraocular Pressure Measurement
Eye health is a core element of veterinary care, and early detection of conditions like glaucoma can prevent irreversible damage. The TonoVet Plus Tonometer provides a non-invasive, anesthesia-free method for measuring intraocular pressure (IOP) in dogs, cats, rabbits, and horses.
Key Features:
Species-specific calibration modes
Red/green positioning lights for accurate alignment
Automated averaging of six measurements
Lightweight and ergonomic design for single-hand operation
To put it into perspective, let’s take a sneak peek at a routine wellness exam, where a 12-year-old indoor cat, Chloe, presents with mild lethargy and a slightly dilated pupil—subtle signs that might easily be overlooked.
Using the TonoVet Plus, your technician quickly detects a noticeable difference in intraocular pressure between the two eyes.
This prompts further investigation and timely intervention, allowing you to address the issue early and provide care that could prevent more serious complications, giving both your patient and the client the benefit of proactive, attentive medicine (what a great first impression!).
Digital X-Ray: Comprehensive Imaging for Accurate Diagnoses
There is no replacement for high-quality imaging in diagnosing such a wide range of conditions. Digital x-ray systems provide clear images with reduced radiation exposure and faster processing times.
Benefits:
Immediate image capture and viewing
Enhanced image quality for better diagnostic accuracy
Reduced need for retakes, minimizing patient stress
Efficient storage and sharing of images
Imagine a cat presenting with nonspecific abdominal pain. A digital x-ray quickly reveals a foreign object in the gastrointestinal tract, allowing for timely surgical intervention and, thankfully, an uneventful recovery!
Dental X-Ray Units: Unveiling Hidden Oral Pathologies
Dental health is easily overlooked but is vital to overall well-being. Dental x-ray units enable veterinarians to detect issues beneath the gum line that are not visible during a standard oral examination.
Advantages:
High-resolution imaging of teeth and jaw structures
Early detection of periodontal disease, tooth resorption, and fractures
Improved treatment planning and client communication
Take Penny, a senior dog here for a routine dental cleaning with no visible issues. Dental X-rays reveal advanced periodontal disease affecting multiple teeth. Early intervention prevents further complications, enhances her quality of life, and restores her love for food.
Laser Therapy Devices: Promoting Healing and Pain Relief
Laser therapy is a non-invasive treatment that accelerates tissue repair and reduces inflammation. It benefits various conditions, including arthritis, wound healing, and post-surgical recovery.
Benefits:
Decreased pain and inflammation
Accelerated tissue regeneration
Improved blood circulation
Non-invasive and well-tolerated by patients
Picture this… Johnny, a rabbit with a non-healing wound, receives a short series of laser therapy sessions. His treatment results in faster healing and reduced discomfort, leading to a more comfortable healing experience and increased owner satisfaction with the care provided.
Investing in Diagnostic Excellence
Equipping your new veterinary hospital with advanced diagnostic tools is a strategic investment in both patient care and practice efficiency.
Advanced diagnostics, such as the TonoVet Plus Tonometer, digital X-ray, dental X-ray, and laser therapy, elevate patient care by enabling earlier and more accurate detection and treatment of health issues, often before clinical signs become apparent.
These tools enable veterinary teams to make data-driven decisions quickly, thereby reducing guesswork and enhancing diagnostic confidence.
Whether they detect subtle changes in intraocular pressure, identify hidden dental disease beneath the gum line, or visualize fractures or internal concerns with radiography, these technologies enable veterinarians to treat proactively rather than reactively.
Ultimately, that means less discomfort, faster recovery, and better quality of life for our patients.

10 Steps To Complete Dental Cleaning Procedures In Pets

Perform a pre-anesthetic checklist, including patient history, exam, lab work, chest X-rays, and prophylactic medications, especially for senior patients.
Ensure all equipment is functioning properly and that all essential instruments are available and sanitized. Ensure the CPR plan and CPR medications are in place, as well as resuscitation status for each patient.
Provide a safe heat source such as a warm air blanket.
Continually check the patient by placing your hand directly on the patient under the heat source. Include this step on your anesthesia monitoring sheet.
Ensure the patient is warm during the pre-anesthetic phase where a patient’s body temperature can lower.
1. During the onset of anesthesia while intubating, use caution when handling the tongue, ensuring it is not pulled forcefully. Gently place the patient in position – note; placing a pet on their back during the entire procedure minimizes anesthesia time and is an effective and expeditious way to perform a dental.
Ensure the tracheal tube is adequately inflated, and an aspiration guard or gauze is in place. Consider the use of intraoral suction to prevent aspiration of water and debris during the procedure.
Continually replace gauze as it becomes saturated with water. Continually check the tracheal tube during the procedure as it may need adjusting depending on the depth of anesthesia and tracheal relaxation
2. While under anesthesia, take before and after photographs of all areas of the mouth to show the pet parent, as well as keep for documentation in the medical record.
3. Begin by irrigating the pet’s mouth with a dilute Veterinary Oral Health Council approved Chlorhexidine based rinse such as CET. Evaluate the oral cavity, and remove obvious calculus at this time to expose gingiva and soft tissues.
4. Perform intraoral regional nerve blocks prior to probing the teeth and gingival tissues, as this procedure may cause pain in the anesthetized patient, requiring a deeper plane of anesthesia.
5. Thoroughly probe and chart each tooth, and perform full-mouth radiographs
6. Clean the teeth, perform extractions, and required orthodontic procedures needed. Ensure hand scalers and a curette are employed to remove subgingival calculus, particularly where periodontal pockets have been identified.
7. Thoroughly irrigate and lavage away oral debris.
8. Polish all surfaces of each tooth and subgingival areas thoroughly and carefully.
9. Rinse the mouth and each tooth with air and water and ensure all debris is removed from the tongue. Take post-procedure photographs.
10. Finally, apply a plaque prevention gel or dental sealant

Recover the patient quietly and employ pain management and anti-inflammatory medication. The post-anesthetic patient should be monitored closely post-surgically.
Written by: Dr. Tammy Powell, DVM

Ultrasound Tips: Evaluating GI Tract Issues in Cats and Dogs

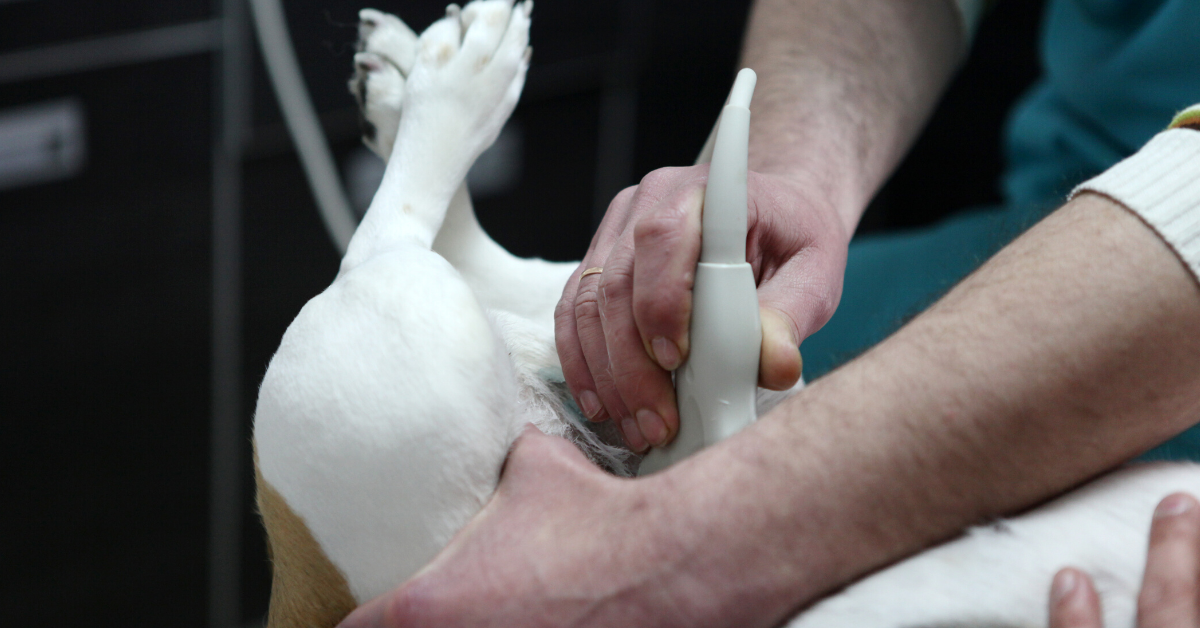
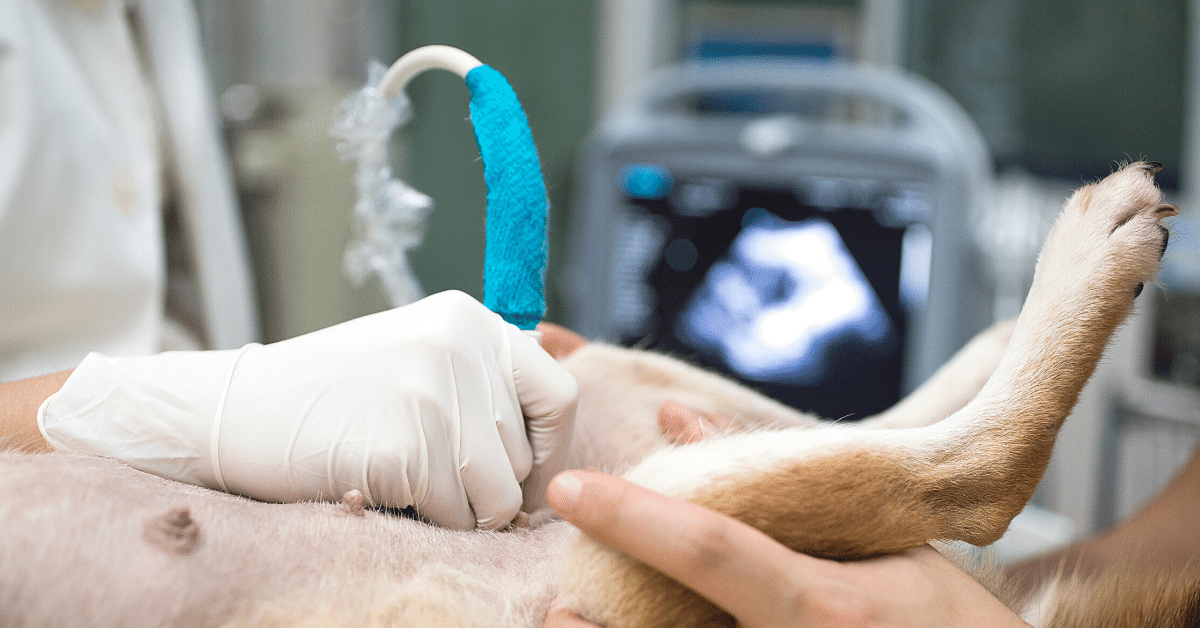
An abdominal ultrasound is a tool that can help you with visualizing and diagnosing a variety of conditions in your canine and feline patients.
Today, we’ll be talking about evaluating the gastrointestinal tract.
Depending on your patient, you may be doing an ultrasound exam of the stomach, small intestines, and colon to look for…
Inflammation and wall thickening
Foreign bodies
Neoplasia
Pyloric outflow obstructions
Intussusceptions
Enlarged mesenteric lymph nodes
This isn’t an exhaustive list…
But basically, if the patient is having GI symptoms and your x-rays haven’t provided the answer you need, an ultrasound is often a good next step.
That’s because it provides more details about tissue structure in real-time, as opposed to just the silhouette of radiographs. Often, x-rays and ultrasound work well together.
It may take a little bit of practice, but with experience you can catch on to ultrasound technique and do your ultrasound exams in-house rather than referring.
Here are a few tips for getting the diagnostic information you need during a simple ultrasound evaluation of the GI tract…
If possible, have the patient fast beforehand. That way, you can get a clear picture of the GI tract without a lot of food or fecal matter to block your view of certain structures or create artefacts such as shadowing. You can also consider an enema if needed.
Position the patient. Dorsal recumbency is most common, although lateral recumbency may also be used, especially for visualization of deeper structures. Use a trough for comfort, and if appropriate consider sedation (most patients don’t need to be sedated, though).
Experts recommend having a systematic approach to look at the entire abdomen. Whichever viewing order works best for you, it’s good to be consistent so nothing is forgotten. And, the GI tract will be an important part of your evaluation.
Choose a machine and probe that work best for your needs, then practice and develop comfort using the different settings, especially adjusting depth and gain (brightness). That way, you can focus on seeing what you want to see, rather than fussing with settings during your ultrasound exam.
Start at the stomach by locating it just caudally to the liver. Rock and fan the probe to systematically obtain orthogonal views of the whole stomach from fundus to pylorus.
Next, examine the intestines and cecum.
The duodenum, ileum, cecum, and colon are examined individually.
For the jejunum, you don’t need to follow every loop from beginning to end. Instead, scan the abdomen starting at the level of the stomach. Slide or sweep the probe from side to side, gradually moving cranially to caudally until you’ve visualized the entire field (usually you would stop at the level of the urinary bladder trigone).
Along the way, take notes to help you prepare your report for your patient’s medical record. Be sure to include what was normal, as well as any abnormalities you found, such as masses or thickened intestinal walls.
While scanning, you can freeze images for your records and take measurements if you feel anything may be enlarged.
When you develop your ultrasound skills, having this tool at your disposal can often give you quick information when you need it—for example, looking for a GI mass or obstruction when x-rays were inconclusive.

It’s a great way to offer an additional service to your patients and clients, and possibly to stand out from other clinics in your region.
Written by: Dr. Tammy Powell, DVM

The Best Places to Buy Used Vet Equipment at Great Prices

During the economic fallout of this unprecedented global pandemic, it’s more important than ever for businesses to stretch their dollars as far as they will go.
Buying used equipment is a budget-friendly way to purchase high-quality machines and supplies—so you can operate and upgrade your practice the way you want to.
More importantly, you can buy on a friendly, community-based platform that removes all headaches about negotiating, shipping, and payments—so you can securely get the equipment you need without taking time away from your busy schedule.
In case you’re not already familiar with it, we recommend you visit: usedvetequipment.com.
This website was started because veterinarians needed a marketplace just for their industry—somewhere to easily buy and sell quality used veterinary equipment from trusted colleagues.
Here’s what one happy buyer had to say:
“I purchased a digital x-ray system through usedvetequipment.com. The transaction was smooth. I would not have taken the chance without the third party mediator. Brad did a great job and the sellers were great to work with. I would not hesitate to use this service again.”
—Mark Robinson, DVM Montana
Here are a few advantages that usedvetequipment.com offers to you as a veterinarian buyer…
Quality. On the site, you’ll find products from top manufacturers such as Abaxis, Shoreline, Heska, SurgiVet, Cardell, Welch Allen, Idexx, and much more.
Choices. Whether you’re looking to invest in something as large as a full radiology unit, or something as small as a laryngoscope or warming pad, you can find it on usedvetequipment.com.
There are far too many examples to list here, but other items recently sold include endoscopes, Dopplers, stem cell therapy equipment, surgical tools, cages and floor grates, exam lift tables, and much more.
Easy Payment Options. You’ll be emailed an invoice for convenient online payment.
Good for Animals and the Environment. Reusing and repurposing equipment is not only a great way for the veterinary community to share resources to improve animal care everywhere—it can also help keep materials out of landfills.
Safety and Security. We’ve found the veterinary community to be honest in their descriptions of the equipment they are selling—and the standard buying process lets you inspect the equipment upon arrival before your payment is processed.
Stellar Service. Just check the site, and you’ll find reviews from tons of happy buyers and sellers!
If you’re ready to get started, head over to usedvetequipment.com.
Here are some things to keep in mind as you shop…
Compare your options. If there’s more than one listing for the equipment you need (a common scenario), search around and make obligation-free offers. And if you’re not in a big hurry, search over time to see what else pops up.
Ask Questions. This isn’t a big, faceless online store—instead, it’s all about community! You’re free to reach out to sellers with any questions you may have and to ask us about the details of shipping and payments.
Expect the Best Experience. The goal is for you to feel comfortable (and very happy!) with your purchase.
More interested in SELLING equipment rather than buying? Check out our next article, which will have detailed suggestions for how to successfully sell on usedvetequipment.com.
Until then, take a look around the site to browse what’s available, and be sure to bookmark usedvetequipment.com in case you need to come back to it to make a purchase in the future.
Wishing you good luck in your search—we’re sure you’ll find just the right equipment you need for all the services you’d like to offer at your practice.
A community marketplace like this is the perfect place to buy and sell with colleagues as you build the practice of your dreams.
“… 10,000 times better than any eBay / Amazon kind of purchase! We will definitely look here 1st for future purchases.”
—Sandy Pamplin, Manager Pleasanton Road Animal Hospital San Antonio, Texas

“I recently purchased a film processor through Used Vet Equipment. I was very impressed with the website- pics and descriptions. I received a quick response to my questions. Brad was very professional and thorough in handling the transaction through delivery and tracking info. He made sure I was completely satisfied with the product. I would definitely do business here again! 5-star rating!”
—D Davis, Colorado
Written by: Dr. Tammy Powell, DVM

Post-Dental Care for Dogs & Cats: Prevent Periodontal Issues

Much attention is focused on the time leading up to and during dental work in dogs and cats, with much attention being placed on the dental procedure itself.
Without education of the pet parent, preventative care can fall to the wayside, leading to continued periodontal problems in the pet.
Dental calculus can form hours after teeth cleaning, thus making the education of the pet parent a vital part of their pet’s dental health.
Properly educating the pet parent about post-dental preventative care entails a recheck visit a week or sooner after the dental, where the pet’s mouth is rechecked, handouts and dental preventative products are introduced to the pet parent, and a demonstration performed to demonstrate proper oral care techniques.
The best way of preventing gum and tooth disease in dogs & cats is to actively brush the pet’s teeth at least 3 to 4 times weekly.
There are some excellent products, including enzymatic toothpaste-like C.E.T. which can break down much of the tartar and debris on the teeth.
During their recheck examination, pet parents can be shown how to brush their pet's teeth using a standard toothbrush, finger brush, and even gauze.
Emphasis should be placed on emphasizing the importance of making the effort to get the habit of home oral care started.
Other products that the pet parent can offer their dog or cat are chewable products such as C.E.T Hygiene chews, Greenies, and other over the counter dental products such as powders, sprays, and gels, as well as water additives.
During the post dental recheck visit, importance should be placed not only on the aforementioned but mentioning diet as well.
Pets eating canned food may be more susceptible to periodontal disease due to the sugars in the food, as well as the wet food sticking to the teeth.

Regular visits to the veterinarian for an oral health exam can give the pet owner an indication of how well they are maintaining the oral health of their pet.
Written by: Dr. Tammy Powell, DVM

What Dental Radiographs Reveal Beneath the Gumline in Pets

When it comes to dentistry, sometimes teeth are like icebergs—there’s a lot going on “below the surface.” In this case, under the gumline.
Unfortunately, the parts of the tooth you can see don’t always tell the whole story.
That’s where dental radiography comes in.
Here are a few situations when dental x-rays could make your client communications easier, help you provide better patient care, and improve your bottom line…
Finding pesky root tips
If you’re extracting a tooth with a fractured root—whether the root splintered prior to the dental procedure or the tip happened to break off during a difficult extraction—you generally want to be sure you’ve removed each and every piece.
In many cases, root tips left behind can lead to infection, pain, or an abscess, plus another procedure to retrieve the piece and an unhappy client.
Radiographs help because you have confirmation that you’ve removed all pieces of the tooth roots.
For extractions, it can be useful to take “before and after” images that clearly document the successful removal of the tooth and its root(s).
Informing owners of the risk of jaw fractures
Sometimes, periodontal disease has caused so much bone loss that it leads to a pathological fracture in the jaw.
Or, the jaw could have so much bone loss that there’s a high risk of iatrogenic jaw fracture during a dental procedure and extraction.
You can probably imagine what could go wrong without radiographs…
When you extract the bad tooth, a jaw fracture can occur if that area of the mandible is already severely compromised due to disease and bone loss. But without radiographic proof of the underlying condition, the client may be inclined to blame your technique, rather than recognizing the severity of their pet’s periodontal disease.
Taking radiographs beforehand helps to set up realistic expectations of risk.
Discovering retained and impacted teeth
Whenever teeth are missing, dental x-rays are a good idea.
Sometimes, below the gumline, you’ll find retained or impacted teeth. Left in place, they could lead to dentigerous cysts or other problems.
Without radiographs, these “hidden” teeth can be difficult to find and treat.
Detecting damage to neighboring teeth
Maybe there’s one tooth that’s obviously bad… But, bone loss and infection have also affected the integrity of the neighboring teeth.
Dental radiographs will help you determine whether or not neighboring teeth are viable. And, the images provide tangible evidence that a neighboring tooth needs to be extracted.
This visual aid can make it easier to show a client exactly what you’re talking about, and help to reinforce your recommendations.
And more…
Dental radiographs can also help you look for oral neoplasias, feline resorptive lesions, tooth root abscesses, and more.
Sometimes this will help to confirm your clinical suspicions based on the patient’s presentation and symptoms. Other times, the findings may come as a surprise—allowing you to treat before the problem becomes worse.
With all the information dental x-rays provide, they can really help you create a thorough treatment plan that covers everything a patient needs during their dental procedure.

Your treatment recommendations can help to improve your dentistry revenue. And, importantly, your dental images can also help you provide excellent patient care and increase client knowledge and compliance.
Ask us about a free demo for your hospital, to see how dental radiography can fit into your practice space and daily appointment flow.
Written by: Dr. Tammy Powell, DVM

Mastering FORLs: X-Ray Insights for Better Dental Procedures

To extract or not to extract that tooth root?
Is a crown amputation all that’s needed?
When it comes to feline odontoclastic resorptive lesions (FORLs), these may be the questions you’re asking yourself.
FORLs can cause loss of the protective surfaces (enamel, cementum, and dentin) of both the crown and the root(s) of a tooth, resulting in pain.
These lesions come in two varieties:
Type 1: Where the root appears radiographically normal.
Type 2: Where the root is radiographically hard to distinguish from the surrounding bone, with loss of visibility of the periodontal ligament space.
As you know, the treatment for these lesions is different—full extraction of the root(s) for Type 1, versus just a crown amputation for Type 2.
Performing a crown amputation and leaving a root in place for Type 1 could result in problems or complications, not to mention continued pain for the patient.
On the other hand, trying to extract the root of a true Type 2 lesion could be a monumental task and a big headache.
So, it’s very important to determine what type of lesion you’re dealing with. Here’s how…
Diagnosing FORLs
Patient presentation:
A client brings their pet to you because of halitosis, food dropping, and occasional jaw chattering.
During the physical exam, you notice bright red, inflamed gums and gingival hyperplasia near one of the mandibular premolars.
You suspect a FORL—and given that FORLs are one of the most common dental problems in cats, you’re probably right.
You suggest a dental procedure, including dental radiographs, a full cleaning, oral exam, and possible extraction. The client agrees with the plan.
The day of the procedure
After the patient is anesthetized, your technician obtains radiographic images of the entire mouth, which takes just a few minutes to perform.
Then, you look at the radiographs in conjunction with your oral exam.
While probing the tooth in question, you feel a rough patch under the gingival hyperplasia, consistent with a resorptive lesion.
The x-ray confirms your diagnosis.
Determining the best treatment plan
In this case, the patient’s tooth is clearly Type 1, with a periodontal ligament space still visible. So, you perform a full extraction.
While evaluating the dental rads, you also notice the premolar on the opposite side is starting to show radiographic evidence of a lesion.
Even though it’s mild, you call the owner and inform them of the likelihood of progression.
To prevent a painful lesion from developing between dentals, the owner decides to go forward with a pre-emptive extraction of that tooth as well.
Documenting the extraction
In addition to being an integral part of your treatment plan decisions, dental radiographs can also help you document that extraction was performed successfully.
A post-procedure x-ray image is a great way to document that there are no root tips left behind.
And, in cases where a crown amputation was indicated, dental rads provide visual proof that this was an appropriate treatment course.
In this way, dental radiographs not only help you to plan and implement a very high quality of medicine—but they also give you peace of mind and are a valuable part of your medical records.
Talking to clients about dental radiographs
Maybe you already know the benefits of dental radiography—but you’re concerned about discussing the additional cost with clients.
Often, it helps to include the x-rays as part of the dental procedure package. List them on the estimate so the client understands the value they are receiving—just don’t itemize the cost of the radiographs separately.
Be sure to adjust the estimate of the dental package accordingly, to cover your costs. And remember, with a monthly payment plan for your dental radiography system, just a couple of dental procedures per month can cover your investment.

Client education also helps. Explain how the results of the radiographs allow you to provide the best possible treatment and reduce the likelihood of future complications.
With clients who want the best for their pets, it’s a win-win for both of you.
Written by: Dr. Tammy Powell, DVM

How to Explain Halitosis Risks to Concerned Pet Owners

Bad breath, or halitosis, is one of those health problems that’s easy for pet parents to overlook.
Sure, it’s inconvenient. Stinky breath can certainly put a damper on a pet owner’s cuddle time or other interactions with their dog or cat.
However, many pet owners don’t realize that halitosis can mean something much worse… such as periodontal disease, or even an internal problem.
As a veterinarian, you know this very well—but it can be a challenge to communicate the dangers lying “under the surface” when it comes to bad breath.
Explaining halitosis to pet parents
The first step is figuring out where the bad breath is coming from, and explaining the potential risks to clients.
Dental problems such as periodontal disease are the most common cause of bad breath in pets.
But sometimes, halitosis begins somewhere in the body other than the mouth.
Possible sources of halitosis include…
Periodontal disease and other dental issues.
A health condition such as kidney disease (an ammonia-like or unpleasant smell) or diabetic ketoacidosis (more of a sweet smell).
Respiratory diseases.
Digestive issues or dietary indiscretions.
Objects (like branches or chicken bones) stuck somewhere in the mouth.
Oral neoplasias.
Certain toxins.
Based on your patient’s history and physical exam, you’ll determine the most likely cause of the bad breath and decide if diagnostic testing is needed.
If the patient in front of you seems otherwise healthy but has apparent terrible dental disease, you can probably assume the smell (or at least, a large portion of the scent) is coming directly from their mouth.
If a dental procedure is indicated, you’ll likely do pre-op bloodwork, which will help confirm that the patient is otherwise healthy.
A recap of periodontal disease
It all starts with plaque, that thin film that forms on teeth due to food and saliva. We get plaque as humans, too, but fortunately, plaque can be removed by tooth brushing.
If not brushed away, plaque hardens into calculus (tartar) within as little as 24-36 hours. Then, it accumulates more and more over time and harbors bacteria. Calculus can’t be removed by toothbrushing alone.
Soon, this calculus (and its resident bacteria) become very irritating to the gums—and they like to grow below the gum line, where it’s harder to observe the process visually. This results in gingivitis, an early stage of periodontal disease (a disease process affecting the structures that hold teeth in place) where the gums become red and inflamed and may bleed.
From here, as the periodontal disease worsens, it creates pockets in the gumline, destruction of the periodontal ligament, and even bone loss in the maxilla and mandible. In severe cases, this bone loss can cause jaw fractures.
This all leads to pain and tooth loss. And, opportunistic bacteria may enter the bloodstream via inflamed gums, traveling to and causing problems in organs such as the heart or kidneys.
Reminding clients of the dangers of periodontal disease can help them understand their pet’s bad breath is true health and quality of life problem—not just an inconvenience.
Evaluating and treating dental and periodontal disease
Your initial pre-op exam will be done while the patient is awake—ideally with the owner present so you can show them what you’re seeing.
However, awake exams don’t allow for a full oral assessment. And, dogs or cats who are painful might not let you get a good look.
So you’ll make a dental cleaning estimate based on your initial exam but explain to the client that the full assessment will be done during the procedure.
This assessment should include dental radiographs. Since much of the disease process starts below the gumline, x-rays are the only way to see the full extent of damage from periodontal disease.

Some patients will just need routine cleaning, while others may need significant dental extractions. And, you can talk to your clients about continuing dental care at home through tooth brushing and dental treats.
By providing this valuable service, you’ll be not only keeping your canine and feline patients in great health—but also increasing the human-animal bond by preventing halitosis from interfering with the quality time between a pet and their owner.
Disclaimer: This article is for general informational purposes only, and not intended as a guide to the medical treatment of any specific animal.
Written by: Dr. Tammy Powell, DVM

What Does a Portable/Equine Veterinary X-Ray Machine Cost?

Portable x-ray equipment can be valuable to equine practitioners, mobile veterinarians, veterinary practices with limited space for equipment, or anyone else who could benefit from equipment that is compact and easy to transport.
Radiology equipment is an important investment. Here are some tips to make sure you get the best value and make a return on your portable X-ray system purchase.
How Much Do Portable Veterinary X-Ray Systems Cost?
Here, we’ll focus on digital x-ray equipment. An average price range is about $25,000-60,000. Of course, this depends on whether you are buying new or used, as well as on what’s included in the system.
For example, you’ll need a generator and a plate or sensor. Not all systems include a generator in the price, so be sure to check exactly what’s included. And if using CR rather than DR technology, a plate reader is needed.
Additionally, many systems include software and a laptop for capturing and storing images. Some software has extra perks that could come in handy, such as the ability to make measurements right on the images.
When deciding which x-ray equipment to purchase, consider how it will be used at your practice.
For example, if you have a mobile small animal practice, how much room do you have for equipment storage?
If you’re in a barn with limited electrical outlet access, would it be better to purchase a cordless unit? What about WiFi or Bluetooth access for wireless sensors or a protective cover for the equipment?
Consider getting opinions from other vets that use a portable system, to see what they recommend.
Could These Factors Help with the Purchase Price?
Some things to consider when it comes to finding the best deal include…
Ask around for different quotes once you know which system you are interested in. Ask vendors for any special deals they may offer, and see if they can beat an offer you already have.
Consider different financing options. Does it make sense to pay upfront or to do a monthly payment plan at a reasonable interest rate? And will you finance through the equipment seller, a bank, or another option?
What are the tax implications (and potential savings) on your equipment purchase? In some cases, tax savings could make up for the expense of buying new equipment.
Look at Long-term Expenses in Addition to the Purchase Price
Of course, the purchase price is important. But long-term costs are also crucial to consider since expensive maintenance could end up canceling out the initial savings on a cheaper but lower-quality equipment purchase.
So, look at the warranty for starters. When does it expire? What does it cover? Can the warranty be renewed, and how much will it cost to renew? Is there an expected charge for routine maintenance? And for older technology, are replacement parts still being manufactured?
And speaking of maintenance, how durable is the equipment? This could make a huge difference, depending on when and where you plan to use the equipment.
For example, if you do farm calls, can the generator and sensor stand up to the elements (dust, humidity, etc.)? Can it function well after being transported in the car during hot or cold weather? If equipment gets damaged easily, that could really add to long-term expenses, and that must be considered in your purchasing decision.
What about software? How often does it need to be upgraded, and are upgrades included in your costs?
Crunch the Numbers
All of the above factors will be part of your financial considerations. Additionally, it helps to plan ahead for how much income the new equipment is expected to bring in—to ensure the purchase makes financial sense for your practice.
For example, how much would the practice charge for various types of x-ray studies?
How many x-ray studies are expected per week or per month—and does this cover the monthly payment on the equipment while also bringing in a profit?
Before investing in new equipment for your practice, it’s helpful to consult a financial advisor or veterinary business consultant.
Make Sure Your Equipment Gets Used Safely and Efficiently
Radiation safety is always important. For mobile units, there may not be a dedicated x-ray suite available, so it’s necessary to ensure that everyone is present (the vet team operating the equipment, as well as any pet owners who are present during the visit) and follow all safety recommendations.
Additionally, training the vet team on the new equipment will ensure they can use the equipment quickly and effectively. This could potentially mean saving time and scheduling more procedures—which could help with the ROI on your equipment purchase.
The right portable veterinary x-ray system purchase will vary from practice to practice, depending on the circumstances under which the machine will be used (in a clinic or out in the field), how busy the practice is, finances, and other factors.

But by carefully considering all these things ahead of time, it will be easier to determine which system suits your practice’s needs and to find the best possible deal to ensure your investment pays off.
Written by: Dr. Tammy Powell, DVM
The Veterinarian’s Guide to Diagnosing Heart Tumors in Pets

Cancers of the heart are uncommon in dogs and cats. When they do occur, it’s important to differentiate a tumor from other conditions that could cause generalized or focal enlargement of the heart and cardiovascular symptoms.
Which Cancers Occur In Cardiac Tissues?
A cancerous lesion based at the heart could be a primary tumor, or due to metastasis.
Primary tumors that occur at the heart include:
Hemangiosarcomas—the most common heart cancer in dogs, usually occurring at the right atrium. These occur most frequently in larger dogs with longer noses, such as Golder Retrievers, Doberman Pinschers, and German Shepherds.
Chemodectomas, also known as aortic body tumors or heart base tumors. Generally thought to be slow-growing, these tumors occur most commonly in brachycephalic breeds like Boxers, Bulldogs, and Boston Terriers.
Myxomas.
Sarcomas.
Ectopic thyroid tumors.
Lymphoma/lymphosarcoma—the most common heart cancer in cats.
Other cancers are possible, but these are the most commonly diagnosed types. Breeds may vary as noted above, but most pets with tumors of the heart are middle-aged or older.
How Are Heart Tumors Diagnosed?
If slow-growing, tumors near the heart base are often an incidental finding, seen on thoracic radiographs that are taken for another reason.
Other times, diagnostics are pursued because of clinical symptoms—which are often sudden in onset.
Once a mass is large enough to push on the heart and major blood vessels, many cardiovascular symptoms are possible, such as:
Coughing
Ascites
Lethargy
Weakness
Vomiting
Loss of appetite
Difficulty breathing
Collapse
Sudden death
Note: If a dog presents with some of these symptoms, especially sudden weakness and collapse, a quick ultrasound scan may help to identify pericardial effusion and aid in guiding a needle for emergency pericardiocentesis.
Finding Heart Masses Early
As with most cancers and disease processes, discovering a problem earlier rather than later can allow for more treatment options.
General screening radiographs or ultrasound checks—such as with a senior wellness health check—can be a good opportunity to discover heart base tumors before they cause cardiovascular dysfunction and symptoms.
An echocardiogram performed via ultrasound can help to provide more information on the location, size, and invasiveness of the mass.
In some cases, a presumptive diagnosis may be made based on the appearance and location of the mass on an ultrasound study, along with the patient’s signalment. If possible to perform without undue risk, an ultrasound-guided aspirate of the mass can provide more information about which type of tumor is present.
Treatment Options For Cancers Of The Heart
Treatment will be based on the type of neoplasia, how fast the mass is growing, whether metastasis is present, and whether or not the pet is symptomatic.
When a tumor of the heart is diagnosed, a good next step is to screen for metastasis and concurrent conditions via chest x-rays (if not already done), bloodwork, lymph node evaluation, and abdominal ultrasound.
Once a diagnosis is made, treatment options may include:
Periodic monitoring with a cardiologist (especially for slow-growing chemodectomas/heart base tumors) prior to pursuing more invasive treatments.
Surgery to remove the tumor.
Pericardiectomy to remove the pericardium and prevent life-threatening cardiac tamponade or pericardial effusion.
(A pericardiocentesis may be necessary on an emergency basis prior to diagnostics in a pet who presents with acute symptoms. After that, a planned pericardiectomy can help to prevent further emergency episodes of fluid buildup around the heart.)
Chemotherapy, often in conjunction with surgery.
Radiation therapy—either conventional, or via Cyberknife therapy.
Even though cancers of the heart are uncommon in pets, they can be scary to pet owners because of the possibility of sudden onset of serious clinical symptoms (especially with hemangiosarcomas).
By performing diagnostics, referring to specialists as needed, and giving your clients as much information as possible, you can help them make an informed decision for their pet.

Disclaimer: This article is for general informational purposes only, and not intended as a guide to the medical treatment of any specific animal.
Written by: Dr. Tammy Powell, DVM

Choosing the Best X-Ray System for Animal Shelters & Non-Profits

X-ray equipment is an important purchasing decision for animal rescues, state and county-run shelters, and 501(c)(3) organizations.
Animal shelters and non-profits have a mission to help as many pets as possible, including those pets who have nowhere else to turn.
As a veterinarian working for a non-profit or rescue organization, you know that every dollar counts. The more you can save on expenses, the more money can be used to care for pets.
With that in mind, here are some considerations for purchasing x-ray equipment…
What Radiographic Equipment Does Your Shelter or Non-Profit Need?
Here are some questions to ask to help evaluate your organization’s radiographic needs…
Which services will you offer that require radiographs? For example, limited-service operations like vaccine or spay/neuter clinics may not have a strong need for radiography. Some rescue organizations will use x-ray equipment moderately—say, for diagnosing bone fractures and creating a plan for stabilization, or for counting the number of puppies in a pregnant dog. And some well-funded non-profits may offer full-service diagnostics and treatment, including dental imaging. Your clinic’s needs will determine which type of equipment is a practical investment.
Do you need an entirely new system—or do you already own some components such as a table, generator, software, etc. that are still in working order?
Are you looking for film or digital x-rays—and if digital, CR, or DR technology? Digital offers many advantages such as the speed of obtaining images, while film may be more affordable. Although, by the time the cost of a processor (and maintenance), as well as physical film purchases and disposal, are taken into consideration, the savings might not be as much as expected. So it’s important to factor in all associated costs over the expected lifespan of your equipment.
Where to Obtain X-Ray Equipment for Shelters or Non-Profits
Here are a few options…
Purchase new equipment. This may be the most expensive option upfront. Although if a warranty for service is offered, it’s possible this may be a cost-effective option for some organizations.
Purchase used equipment. This option may provide a lower upfront investment for equipment that’s still in pretty good shape. Of course, it’s important to do your research. Ask the seller about the condition of the equipment and whether there is still a warranty in place (and if that warranty can be transferred to a new owner). Figure out what legal rights you have to recoup your money if the equipment doesn’t work as advertised. If it’s from a nearby practice, ask about coming to try out the equipment in person.
Ask for donations. Sometimes, veterinary practices may be willing to donate their used equipment to a good cause when they want to upgrade. This can be an exciting opportunity that’s difficult to pass up, especially for new rescue and non-profit organizations that don’t have a lot of cash flow yet. Just check the condition of the equipment, and see if excessive maintenance and repairs are expected.
Conclusion
Shelters, rescues, and non-profit organizations can benefit from minimizing expenses whenever possible.
The x-ray equipment needs of each operation are unique.
Factoring in your organization’s services, budget, and available supplies will help with the decision of which equipment is the best fit for your clinic.

Written by: Dr. Tammy Powell, DVM
Editor’s Note:
Our Complete DirectVet X-Ray System is available for $29,995, which includes the table, generator, DR plate, software, and acquisition computer, as well as a 5-year warranty.
Convenient, affordable monthly payments are also available. Learn more and contact us with any questions, Click Here
Looking for used equipment? Be sure to also check out usedvetequipment.com.
Get the Full Picture: GI Obstruction Diagnosis Tips

Sometimes, Foreign Bodies In A Pet’s Stomach Or Intestines Are Obvious On X-Ray Images—For Example, A Bright White Metallic Object, Or A Whopping Big Children’s Dinosaur Toy.
However, sometimes GI foreign bodies and obstructions are trickier to detect…
For example, certain fabric objects—like socks or pieces of a blanket—don’t show up well on radiographs.
Here’s a quick guideline for how to get the “whole picture” and diagnose GI foreign bodies with confidence…
Clinical Evaluation
If you suspect a foreign object in the stomach or intestines, there’s a good chance the patient presented to you with symptoms—may be protracted vomiting with a full obstruction, or milder GI upset if there’s an object in the stomach that’s not digestible but also not causing an obstruction yet.
You proceed by taking a thorough history from the owner and then performing a physical exam.
Then, based on your findings, you perform radiographs.
Radiographs
Be sure to take orthogonal views to get as much information as possible about the dog or cat’s digestive tract.
For some patients, this may be enough information to give you a clear answer. Maybe you see obvious signs of an intestinal blockage, such as plications or extreme fluid and gas retention that doesn’t move over time. Or, maybe you see a mineral-dense rock or other radiopaque objects.
If you don’t have an obvious answer, there are some additional tactics you can pursue, including…
Repeating the radiographs later for comparison, if the patient is healthy enough to wait.
Performing a barium contrast study. This is a good option for many patients, but something you may wish to avoid if the patient is vomiting a lot, due to the risk of barium aspiration.
Performing an ultrasound evaluation. This is a quick and non-invasive way to get more information but may require a waiting period or referral if you don’t have an ultrasound in-house.
Performing abdominal exploratory surgery. This may give you a definitive answer and allow you to treat right away if a foreign body is present, but is obviously more invasive and requires a thorough discussion with the client to set up expectations.
Ultrasound
An ultrasound is a great way to gain additional information about your patient’s digestive tract, and it can work hand-in-hand with x-rays.
Now that your radiographs have given you a good overview, the ultrasound allows you to “zoom in” on the finer detail of soft tissue structures.
For example, if there’s a radiolucent cloth or foam children’s toy stuck in the intestines, the ultrasound can help you locate and characterize the obstruction.
These additional details may help you decide what to do next, and determine whether or not the patient needs surgery.
If you don’t have an ultrasound in-house, you may need to refer to a specialist or emergency center, and there may be a short waiting period if you use a mobile ultrasonographer.
By having an ultrasound in-house, and gaining the training and confidence to use it, you can potentially have your answers sooner—for more peace of mind for you, and the ability to provide faster answers to your worried client.
Treatment
Based on your findings, you’ll use your clinical judgment to decide the next step—whether that’s surgery right away or a period of observation and supportive care followed by a recheck and a repeat of your images.

As you know, some GI foreign bodies are harder to diagnose than others…
However, the more tools you have in your toolbelt, the easier it is for you to make timely decisions about the best care for your patients.
Written by: Dr. Tammy Powell, DVM

How Much Is a DR Digital X-Ray System for a Veterinary Hospital?

When choosing equipment such as an X-ray system for your veterinary practice, how do you know how much to spend?
Radiographs are used often—even daily—in many veterinary practices. Also, equipment is one of the largest investments a veterinary practice owner will make.
So, maybe a practice owner feels some pressure when trying to select the best equipment for their hospital but also stay within their budget.
Whether you’re opening a new practice or looking to update your current X-ray system, here are some things that may help with the decisions of what to purchase and how much to spend…
How Much Does a Veterinary X-Ray Machine Cost?
See our price here
The equipment itself can be a big investment, but it doesn’t paint the whole picture. When calculating the total investment, here are some things to consider…
Which equipment do you actually need? For x-rays, do you require an entirely new system, or do you already have a table and generator that could be retrofitted for DR technology?
How will images be acquired? While physical film is used less commonly in recent years if you do use film be sure to calculate the costs of purchasing and disposing of films and supplies for the processor. On the other hand, when calculating how much a digital X-ray machine costs, you’ll need to factor in the software and acquisition computer for viewing and storing images.
Are there shipping and installation costs?
Is a warranty included, and for how long? If it’s possible to renew a warranty, how much does that cost? Or, is there a maintenance plan available after the warranty expires? What is and isn’t covered under these plans (i.e. drops and accidents, loaner equipment if repairs are needed, etc.)?
What’s the expected lifespan of the equipment? Get input from colleagues if you can. Decide if it’s worth paying more upfront for something that will last longer, and which has an affordable warranty or maintenance plan.
How Much Can a Practice Afford to Spend?
Even experienced, savvy business owners can benefit from consulting a CPA or other financial professional when it comes to working out the budget and figuring out the best way to invest in a large equipment purchase.
When deciding how much your practice can spend on new equipment, it’s important to think about the return on investment, or ROI. Basically, this means using the equipment often enough (and charging enough for these services) to pay off the equipment AND earn a profit.
Calculations and questions to ask may include…
Should you rent or buy the equipment? Many experts recommend buying if at all possible, although the recommendation may vary from practice to practice.
If buying the equipment, will you pay everything up front, or use monthly payments over time? Monthly payments may be offered directly from the seller, or via bank financing. If using monthly payments, what is the interest rate?
How often do you expect to use the equipment? Speak to your veterinarians, vet techs, and other team members to get input on the expected demand for the service—as well as what’s involved with communicating the value of this new service to pet owners.
How much will you charge? Multiply your profit on each procedure (i.e. each x-ray study) by how often you expect to use your new equipment, to see if this fee covers the equipment cost and provides you with additional income.
What sort of staff training is involved, to get everyone up to speed on how to use the new equipment? And is the software, equipment, etc. user friendly? This is important, because these factors may impact how easy it is to integrate the new equipment into your daily practice flow, and whether or not the equipment will actually be used the way you planned.
Are there any tax benefits, such as a Section 179 deduction? These tax savings may help to offset some of your equipment costs.

All in all, a large equipment purchase is a big decision for any practice owner. But by analyzing each factor in the decision process one at a time, knowing your practice style and budget, and consulting with a financial professional, you can make the best decision for your hospital—and hopefully see a great return on investment, all while improving patient care!
Written by: Dr. Tammy Powell, DVM

Dental X-Rays: Tips for Accurate Vet Imaging Success

When it comes to evaluating a pet’s teeth, dental x-rays are the best way to see what’s happening “under the surface.” That is, under the gumline.
Dental radiographs help you obtain a full picture of tooth roots, evaluate for periodontal disease and damage, differentiate between different types of FORLs, and look for any other defects that may not be visible with your eyes alone.
Even though the value of dental radiographs (to both your patients and your practice) is hard to deny, there can be a learning curve when your team first begins to use them.
This is important, because in order for your x-ray images to be diagnostic, they need to be good quality.
Fortunately, with practice, dental x-rays become simple and routine—a process your team can quickly replicate for each patient.
Establishing a Dental X-Ray Routine
To make the dental radiograph process easy for you and your team—and as quick as possible for your patients—it’s best to establish a repeatable routine.
This means taking the same shots, in the same order, each time.
You may need a larger number of views depending on the patient’s size and the angle of their mouth, but in general you can start in the same place each time and move through your views systematically until images of all teeth and their roots are captured.
Use your digital software to set up the views in the order you prefer.
Once you establish a routine, it will only take a few minutes to shoot all views for a small patient. And large dogs should take a maximum of 15-20 minutes.
Positioning the Patient
Your patients will be under general anesthesia for their dental procedure, including dental x-rays.
After intubation, leave the patient in sternal recumbency, and simply place a towel under their chin to keep their maxilla parallel to the table. Then obtain your views of the maxillary teeth.
When you finish the views of the maxilla, move the patient to dorsal recumbency, this time using a towel or other prop under their neck to keep the mandible parallel to the table as you obtain your views of the mandibular teeth.
You can use a trough or sandbags to stabilize the patient and keep them from tilting to the side, if needed.
Adjust this plan if you find that another method better suits your needs. For example, you may find that lateral recumbency works best for you for some views.
Whatever system you choose, we recommend repeating the same steps each time and using a method that minimizes the number of times you need to move the patient.
Sensor or Film Placement
Select the right size sensor or film for your patient. For most veterinary patients, this would be either a size 2 (for small dogs and cats, or views focusing on a single tooth) or a size 4 (for large dogs, or for full-mouth/whole quadrant radiographic views).
Whether you’re using a sensor for digital x-rays, or regular dental film, placement is important to ensure you can see all of each tooth root. Remember the roots are much longer than the crowns (twice as long with canine teeth), so position your sensor accordingly.
Finally, determine which side of the sensor or film should be positioned toward the x-ray beam. This may be indicated by a small dot or “dimple” on films. If you have a digital sensor, the cord side should face away from the tube and the cord should exit the front of the patient’s mouth.
Beam Placement
A parallel angle is used for the mandibular premolar and molar teeth. For many pets, this part of the mouth allows the sensor to be placed parallel to the teeth, and the beam to be shot straight forward (perpendicular) into the sensor.
The rest of the mouth, however, prevents this placement (the palate and mandibular symphysis get in the way). So, you’ll need to use a bisecting angle for the rest of your shots (and possibly for the rostral mandibular premolars).
A bisecting angle might seem complicated, but it’s important—choosing the correct angle prevents distortion (lengthening or shortening of the tooth root in your image).
Here is how to determine the bisecting angle:
Position the sensor within the mouth behind the teeth you want to x-ray, as if the patient is biting on it (use gauze or other aids to hold the mouth open so there is no pressure from the teeth that could damage the sensor).
Estimate the angle between the tooth root and the plate.
Divide this angle in half, and draw an imaginary line with your mind.
Position the x-ray beam perpendicular (at a right angle, or 90 degrees) to this line you’ve just imagined.
If the tooth root is too long on your image, raise the angle of the tube relative to the sensor. If the root is too short, lower the angle of the beam (move it more parallel toward the sensor).
Developing a Simplified Technique
Using a simplified technique can allow you to skip the bisecting angle measurement. For example, one described technique uses just three angles for all oral views…
90 degrees for mandibular molars/premolars.
70 degrees for maxillary molars/premolars.
45 degrees for canines and incisors.
Since you can position these angles on your tube head without measuring (many units have predetermined angles marked by the tube head), this makes positioning much easier and faster for you and your staff.
Exceptions, Views of Specific Teeth, and Further Training
These guidelines are a good starting point for many patients. But, you may find you need to adjust your views to accommodate certain dogs and cats, depending on the shape of their mouth and tooth roots.
Cats in particular may need steeper angles than dogs to minimize interference from the zygomatic arch. And some patients will have tooth roots that curve significantly.
For all of these reasons, and for the benefit of hands-on experience, it helps to schedule a demo of your equipment, or to find an in-person training opportunity for your staff. That way, you can maximize your return on investment by using your dental radiography unit to its fullest potential.

Any time spent developing the proper technique for positioning will be well worth it, as you’ll be able to quickly take views that aid your treatment decisions and deliver value to your clients.
Disclaimer: This article is for general informational purposes only, and not intended as a guide to the medical treatment of any specific animal.
Written by: Dr. Tammy Powell, DVM

A Beginner’s Guide to Pathology Using Ultrasound

Sometimes, radiographs just don’t show the whole picture…
That’s especially true for analyzing the details of soft tissue structures—especially in the abdomen, but in other parts of the body as well.
Limitations of radiographs
One problem you may run into with radiographs is a “silhouette sign,” which basically means that two areas with a similar opacity border one another in your x-ray views. This makes it difficult to tell where one structure begins and the other ends.
A good example of a silhouette that could cause confusion is when the abdomen is full of fluid. Since fluid is approximately the same opacity as the abdominal organs, they may blend together, making it difficult to evaluate the abdominal structures.
In cases like this, an ultrasound can provide additional information. And, ultrasound has many other uses…
What an ultrasound is especially useful for
Radiographs can provide a lot of valuable information. But, they can’t always provide fine detail about texture, small defects, or other abnormalities of soft tissue structures. That’s especially true if the abnormalities don’t result in a big change in opacity or in organ size.
Therefore, ultrasound is often superior for detecting changes within an organ, especially if the change is small, in the early stages of a disease, or otherwise difficult to view on radiographs.
This may include conditions such as…
Nodules or masses within an organ such as the liver, which aren’t large enough to change the radiographic silhouette/size of the organ.
Pancreatitis or certain other disorders of the pancreas.
Calculi of the urinary bladder that are radiolucent.
Details of the gallbladder, an organ that is often difficult to see on radiographs since it is overshadowed by the liver.
Abnormal blood vessels, such as a portosystemic shunt.
Detailed cardiac evaluation, including diagnosing enlargements, congenital abnormalities, neoplasia, and more.
These are just a few examples—an ultrasound has many uses clinically!
Of course, there are some lesions that are better diagnosed using radiographs rather than ultrasound, especially in areas of the body that don’t transmit sound waves well (such as the lungs).
And, by looking at your x-ray views and ultrasound study together, you’ll get more information than you would with either technique by itself.
So, it’s not a matter of choosing between radiographs and ultrasound—instead, they work very well when used together to see the whole clinical picture.
How to use an ultrasound
It takes some experience to get the hang of directing your ultrasound probe and interpreting the images. Taking a course is often the best and fastest way to become proficient.
However, even though the process of performing an ultrasound study is different from obtaining radiographic views, some of the basic principles of interpretation remain the same for both.
Rely on the same good practices you do when reading a radiograph, such as…
Have a system and evaluate each organ (and spaces between the organs) in an order that works for you. Do it the same way each time, to be sure you don’t miss anything.
Examine cross-sectional images together—meaning views that are 90-degrees apart—of each area of study. An ultrasound, like an x-ray, produces a two-dimensional image. So, you’ll want to move the probe to look at each area at different angles (just like orthogonal views provide a complete picture when taking radiographs).
When in doubt, seek a consultation with a radiologist who can help you interpret your images.
Just like any other part of your clinical skills, ultrasound technique, and interpretation will come with time.
After all, they call it clinical “practice” for a reason—practice makes perfect.
But with a little time, you’ll likely see a good ROI on your investment since you can diagnose in-house rather than referring—and may find your ultrasound very useful if you need more diagnostic information in a pinch.

Ask for a free demo at your hospital to learn more.
Written by: Dr. Tammy Powell, DVM

Ultrasound Techniques: Visualizing the Adrenal Glands

The adrenal glands, those tiny but very important glands, can be tricky to find and evaluate during an ultrasound exam.
However, having a system and knowing where to look can make your job much easier.
There are many reasons you want to visualize the adrenal glands on every scan, including checking for neoplasia and other masses and looking for any changes that could be associated with Cushing’s or Addison’s disease.
Here are some tips to help save you time and allow for a clearer view of these small glands…
Have a repeatable system
When you perform an abdominal ultrasound, it’s important to have a systematic approach to look at everything. And that includes keeping small structures like the adrenal glands and abdominal lymph nodes on your list, so they don’t get overlooked.
Do your scan in the same order every time—whether that’s cranial to caudal, clockwise, or some other system that works for you—and it’s much less likely that anything will be missed or any abnormalities overlooked.
Adrenal gland landmarks
The right and left adrenal glands are respectively located near the right and left kidneys. However, the kidneys are relatively large, whereas the adrenal glands are small. So, the kidneys can overshadow these small glands.
The kidneys are the first things you’ll locate because they’ll point you in the right general direction. After that…
Vascular landmarks are most helpful when it comes to locating the adrenals.
Specifically, the aorta, caudal vena cava, renal vessels, and mesenteric artery are what you’re going to be looking for.
Color Doppler can help you visualize the vessels.
Also note, if the patient allows you to apply gradual pressure, it helps to minimize the distance between your probe and the glands as much as possible.
Finding the LEFT adrenal gland
The left adrenal gland is located ventrolateral to the aorta and cranial to the left renal artery.
Start by scanning the left dorsal mid-abdomen and visualizing the aorta in a long view.
Find the spot where the left renal artery branches off from the aorta, and just cranial to that you’ll see the left adrenal gland.
Finding the RIGHT adrenal gland
The right adrenal gland is dorsolateral to the caudal vena cava, and just cranial to the cranial mesenteric artery. It’s also more cranial and dorsal compared to the left adrenal gland.
Scan the right cranial abdomen, with the caudal vena cava in long view.
Apply some pressure with the transducer which will cause compression of the caudal vena cava and help you visualize the right adrenal gland. The gland is right next to the vessel, slightly oblique to it.
Are the adrenal glands normal?
Evaluate the qualitative properties of the gland, and then measure the glands from their cranial pole to caudal pole. Also, measure the thickness of each pole.
Normal adrenal glands are hypoechoic to surrounding fat, and have a characteristic “peanut” shape (although the right adrenal may have more of an “arrowhead” appearance). Typically, adrenals are 4-7mm thick in dogs and 3-4mm thick in cats.
Abnormalities may include…
Evidence of hyperadrenocorticism.
If pituitary-dependent, the adrenal glands may be normal in appearance, or they may be “plump” (symmetrically enlarged). An ultrasound exam alone is not enough to diagnose Cushing’s, but may be helpful in context with additional diagnostic tests.
If adrenal-tumor related, you may be able to visualize a mass.
Evidence of Addison’s disease or hypoadrenocorticism.
You may notice smaller or thinner adrenal glands. As with Cushing’s, you’ll want to use this information in conjunction with clinical symptoms and other diagnostic tests.
Adrenal masses.
Many are incidental findings only.
Pheochromocytoma is a possibility.
Malignancies are possible and may lead to invasion of adjacent tissues, especially blood vessels.
You’ll use your clinical judgment and the patient’s clinical signs to help you determine whether more diagnostics are needed, or to start by monitoring the growth with repeat ultrasound exams over time.
Age-related changes.
Nodular changes and remodeling may be normal in old adrenal glands. Practice will help to develop clinical judgment of what’s normal and what’s not.

The ability to find the adrenal glands quickly will come with experience, and knowing the right tips and techniques will make it easier to get the information you need even when you’re first learning.
Written by: Dr. Tammy Powell, DVM

Veterinary X-Ray Systems for Nonprofits and clinics

Many pet rescue organizations can greatly benefit from having radiographs available at their facility.
Here are some reasons to look into veterinary X-ray machines and how to acquire this equipment to offer diagnostic imaging to dogs, cats, or other pets at a nonprofit center.
Reasons to Invest in Veterinary Digital X-rays
Radiographs provide diagnostic value in many situations. Although the level of medical care provided by a nonprofit varies depending on their capacity, funding, staffing, and goals, x-ray images are one of the best tools that can be used on a wide variety of patients with a wide variety of medical conditions.
One example is taking radiographs of a pregnant dog or cat that arrives at the facility, to see how many puppies or kittens are expected and check that they are all delivered safely. Another common use is evaluating a pet for a potentially surgical medical problem, such as an intestinal obstruction. Radiographs can also help a veterinarian evaluate the extent of damage with traumatic injuries like fractured bones and help plan for treatment.
This is just scratching the surface. Radiographs are one of the most widely used diagnostic tools at veterinary clinics. Any rescue offering veterinary services (to facility pets awaiting adoption, or to client-owned pets) can certainly benefit from having a good X-ray system. Exotic pets, and even large animals like horses (typically with a portable X-ray machine), also frequently need imaging for a variety of medical conditions.
What About Digital Versus Film Radiographs?
Digital is largely favored nowadays. Specifically, veterinary DR systems (rather than CR x-rays) are a preferred technology.
DR radiographs offer several advantages, such as the speed of image acquisition (immediate), automatic settings, ease of image sharing, and reduced need for retakes thanks to quick image analysis and automatic settings that help adjust the image.
Additionally, there is no need to purchase further equipment to process images, unlike film and CR technology, which require a film processor and plate processor, respectively. Finally, as technology continues to advance, it’s easier to find replacement parts for newer tech like DR.
The Business Plan
With any new equipment purchase, it’s important to make sure the new machine and financial investment make sense for the organization.
Some private and government-owned nonprofits must provide a business plan or proposal to whomever they are held accountable, whether that is public/government regulations, board members, or other overseeing entities. Even if a formal report or proposal isn’t necessary, it still makes sense to create a plan to ensure the investment is financially feasible.
Here are a few factors to consider for a business and financial plan…
How will the equipment be used? Is it only for pets waiting to be adopted? Or will the organization offer services to client-owned pets in the community?
Which specific services will be offered? While a lot of X-ray studies are standard, the medical team may also have the option to offer contrast studies or other variations.
Who will perform the services? Vet techs can set up and take veterinary X-ray studies. And through experience, many technicians also gain some skill in reading images, or at least checking them for correct alignment and quality to make sure the image is usable. However, radiographic studies should be ordered by a licensed veterinarian. The vet is also the only one who can interpret the images, for making a diagnosis and treatment plan. Some nonprofits might already have qualified staff on their team. Others must consider hiring, either on a full-time or part-time basis or working with experts who are willing to volunteer their time.
Do any other equipment or supplies need to be purchased? A film processor or CR plate reader would be examples—although fortunately, neither is needed with DR technology. However, if the DR unit doesn’t come with a sensor, the organization must add that to its purchase list. Another consideration is sedation or general anesthesia. Chemical restraint is becoming favored in X-ray studies, both for patient comfort and staff safety. Finally, think about props such as positioning troughs.
Remember radiation safety. Don’t forget lead aprons, radiation badges, and other safety/compliance supplies. Setting up an X-ray suite can also require lead-lined walls and other radiation compliance factors in the local jurisdiction.
Will the nonprofit charge for veterinary x-ray studies—and if so, how much? If performing radiographs on adoptable pets, the cost should be factored into the operating costs of the facility. If offering services to client-owned pets, consider how much local pet owners can pay and how much the organization needs to charge per study to maintain financial health.
How to make the purchase of new equipment financially feasible? For many organizations, donations, grants, or a funding drive can really help with this. Think about any money the new equipment will bring in, as well as any associated new costs, such as equipment maintenance, interest/financing charges, staff time, and associated supplies or services.
How to educate pet owners on the value being provided? This is especially important if offering services to client-owned pets.
Are all local regulations and legal requirements for nonprofits in that state/jurisdiction being met?
Finding Veterinary X-ray Systems
A good strategy would be to invest in the best possible X-ray unit within the nonprofit’s budget. But where to look for one or find a good deal?
Used or refurbished X-ray systems may present an affordable option that is still in very good condition. Some will still have warranties and service plans in place, while others will not.
Some nonprofits benefit from donations of new or like-new veterinary equipment. This could come from other veterinarians in the area or even local human hospitals who are upgrading their equipment.
Some vendors or other organizations might offer new equipment as part of their own grant program, nonprofit arm, or effort to save on taxes. Or they might be willing to part with their demo or loaner machines for a very reasonable price.

Veterinary X-ray systems are one of the most universally used pieces of equipment that can help a lot of patients. With some planning and due diligence, it can be an excellent investment for any rescue or nonprofit that offers basic or advanced veterinary services to the animals in their care.
Written by: Dr. Tammy Powell, DVM