


Choosing Vet Diagnostic Equipment: 5 Questions to Consider

5 Questions to Ask Before Purchasing In-House Diagnostic Equipment for Veterinary Rescues
For animal rescues, SPCA facilities, and veterinary non-profits, investing in in-house diagnostic equipment is a big decision that can significantly impact patient care and financial sustainability.
The right equipment can help diagnose conditions faster, reduce outsourcing costs, and improve outcomes for the animals in your care.
But understanding budgets are often tight, it’s essential to choose wisely.
Before purchasing tools like digital X-rays, ultrasound systems, or laser therapy, asking the right questions can help ensure your investment meets your facility’s needs while delivering long-term value.
1. Which Diagnostic Tool Will Benefit Our Patients Most?
Every facility has unique needs depending on the cases it handles most often. Your first step should be identifying which diagnostic equipment will have the most significant impact.
If your facility frequently treats trauma cases or orthopedic injuries, a digital X-ray machine should be a top priority.
An ultrasound system may bring the most value for monitoring pregnancies, diagnosing internal issues, or assessing soft tissue injuries.
Laser therapy might be best if your priority is post-operative recovery, wound and injury care, or treating inflammation.
Jot down the conditions you see most frequently and choose equipment that will directly improve the quality and speed of care for those cases.
2. What Is the Total Cost of Ownership?
The purchase price of diagnostic equipment is only part of the overall cost. Be sure to ask about additional expenses like:
Maintenance and calibration costs
Software updates and licensing fees
Consumables like X-ray plates or ultrasound gels
Staff training and certification
Understanding the total cost of ownership helps you budget and avoid unexpected expenses that could strain your resources.
3. What Is the Expected Return on Investment (ROI)?
While the upfront cost may seem a little steep, the long-term savings from reducing outsourcing fees and transportation costs can make in-house diagnostics a smart decision. Calculate the potential ROI by considering the following:
The number of diagnostic tests you currently outsource each month
The average cost per outsourced test
The time and fuel costs associated with transporting animals
For example, if you refer 20 x-rays per month at $100 each, that’s $2,000 monthly or $24,000 annually. A digital x-ray machine costing $30,000 would pay for itself in just over a year, and every scan after that would represent savings.
4. Is the Equipment User-Friendly and Reliable?
Ease of use is important, especially in fast-paced environments like rescues and shelters. Equipment that’s difficult to operate or prone to malfunctions can slow down your workflow and lead to unnecessary frustration – not to mention making diagnoses more challenging.
Consider asking your distributor questions like:
What’s the learning curve for using the equipment?
Is there training resources and customer support available?
What’s the average lifespan of the equipment and its reliability?
What do maintenance requirements and downtime expectations look like?
Choosing intuitive and reliable equipment ensures that your team can focus on providing care without technical disruptions.
5. What Financing and Support Options Are Available?
Budget constraints are a common challenge for veterinary non-profits. The good news is, that many distributors offer financing options that make it easier to invest in diagnostic equipment without straining your budget.
Here are a few more questions to consider bringing to your distributor:
What leasing vs. purchasing options do you offer?
What payment plans and interest rates do you offer?
Are grants or discounts available for non-profit organizations?
What warranties and service agreements are available?
Choosing the right financing plan helps you access the tools you need without delaying essential upgrades.
A Few Final Thoughts
Bringing diagnostic equipment in-house can pay dividends in both patient care and financial sustainability.
By asking these five essential questions, you and your team can feel confident in selecting equipment that meets your needs, fits your budget, and delivers long-term value.
Evaluating your options carefully will help you provide faster, more effective care—empowering your team to save more lives and support animal welfare in your community!


Spay/Neuter Clinics: The Case for In-House X-Ray & Labs

The Cost-Effective Case for In-House Diagnostic Equipment in Spay/Neuter Clinics
Spay/neuter clinics operate with a single mission in mind: to make a significant impact on animal overpopulation and welfare while working within tight budgets.
Every decision, from staffing to equipment, needs to stretch resources as far as possible without compromising care.
For many of these facilities, perhaps like yours too, investing in in-house diagnostic equipment like x-ray machines or blood analyzers might feel like an expense that’s hard to justify. But truthfully, in-house diagnostics can be a game-changer, offering financial, operational, and patient care benefits that far outweigh the initial cost.
Turning Costs into Savings
Let’s be honest, at first glance the upfront investment for this type of equipment can seem a little daunting.
A digital x-ray machine or hematology analyzer may cost tens of thousands of dollars, and it’s understandable why smaller clinics might hesitate.
However, when viewed as a long-term investment, in-house diagnostics consistently prove their value by reducing their reliance on external providers and creating new revenue opportunities.
Let’s look at an example:
The short term: a spay/neuter clinic refers out 15 patients per month for x-rays at an average cost of $100 per patient. That’s $1,500 per month or $18,000 annually spent on outsourcing radiographs alone.
The long term: by investing in a digital x-ray system costing $30,000, the clinic can recoup that cost in under two years, all while eliminating the recurring expense of outsourcing.
After the break-even point, those savings stay within the clinic, freeing up resources for other needs.
Along with cost savings, in-house diagnostics open up new revenue streams by expanding services to include things like diagnostic imaging and pre-operative bloodwork.
These clinics can now charge modest fees while providing affordable care to pet owners. This added revenue helps them remain financially sustainable and provide more wholistic care to their patients.
Efficiency That Translates to Better Care
Time is one of the most valuable resources in any veterinary clinic, and in spay/neuter facilities, efficiency isn’t a “nice to have” but rather a necessity to keep the ball rolling smoothly.
Outsourcing diagnostics can create frustrating delays, both for your staff and for the patients in your care.
Transporting patients to another facility, waiting for test results, and coordinating follow-up can be time-wasting. Meanwhile, your patients may experience unnecessary discomfort, and staff must juggle logistics instead of focusing on patient care.
In-house diagnostic equipment, like digital x-ray eliminates these bottlenecks. Radiographs can be taken and reviewed immediately, allowing veterinarians to make decisions on the spot.
With in house bloodwork, results are available within minutes helping identify issues like anemia, infections, or organ dysfunction before surgery.
This speed allows your practice to operate more efficiently, offer faster treatment, and ultimately help more patients in less time.
Elevating the Standard of Care
In-house diagnostics don’t just save you money and time—they elevate the quality of care that you’re able to provide. While your primary focus is often on surgical sterilization, many of the patients tend to have additional medical needs.
Stray or neglected animals, for example, may have undiagnosed injuries or chronic health issues that require attention before surgery can safely proceed.
Access to on-site digital x-ray allows veterinarians to detect hidden fractures, internal injuries, or dental disease that could otherwise go unnoticed.
Pre-operative bloodwork can identify conditions like diabetes, kidney disease, or clotting disorders, enabling your team to tailor anesthesia protocols and improve surgical outcomes.
Practical Considerations: Making It Work
If your clinic is worried about the cost of adding diagnostic equipment, there are practical ways to make the investment more manageable:
Financing Options: Many equipment providers offer financing plans that spread the cost over several years, making it easier to fit into a budget.
Grants and Donations: Numerous animal welfare organizations and charitable foundations provide funding for equipment purchases that improve patient care.
Start Small: Prioritize the equipment that will have the biggest immediate impact, such as a basic blood analyzer or a digital x-ray machine. As the clinic grows and reaps the benefits, additional tools can be added.
A Worthwhile Investment
For spay/neuter clinics, in-house diagnostic equipment is more than a convenience—it’s a transformative tool that drives better care, greater efficiency, and financial stability.
While the upfront investment may feel significant, the long-term benefits far outweigh the costs, creating opportunities to save more lives and make a bigger impact.
By taking the leap to implement in-house diagnostics, your clinic can continue such vital work with greater confidence and capability, ensuring a brighter future for the animals they serve.
Ultimately, every dollar saved and every extra hour gained means more animals can be helped. And for the clinics on the front lines of animal welfare, that’s what matters most.

Why Rescue Facilities Need On-Site Digital X-Ray Machines

Faster Care, More Lives Saved: The Impact of On-Site Diagnostics in Rescue Facilities
Every minute counts in animal rescue. Whether you’re treating an injured stray, stabilizing an abandoned puppy, or assessing a neglected senior cat, rescue facilities face the pressure to provide fast, effective care with limited resources.
When time is of the essence, waiting for diagnostic results from an outside lab or imaging facility can mean the difference between life and death.
That’s why more rescue and non-profit veterinary facilities are investing in on-site diagnostic equipment, like digital and dental X-rays, and seeing profound benefits.
The Power of Quick Answers
Imagine this: you receive an emaciated dog at your rescue facility with labored breathing and a history of neglect.
Without on-site diagnostics, your team must transport him to an external facility for x-rays or bloodwork, wait for results, and then determine a treatment plan.
Hours or sometimes even days pass before care can truly begin. Meanwhile, the dog suffers, and his condition worsens.
Now, picture a scenario where you’re equipped with an in-house X-ray machine and maybe even blood analyzers.
Within minutes, the team diagnoses pneumonia, administers treatment, and starts him on the road to recovery—no delays, no unnecessary suffering.
This is on-site diagnostics' real, tangible impact: faster answers, quicker treatment, and better outcomes.
Saving More Lives with Speed and Efficiency
It’s not uncommon for rescues to be overwhelmed with medical cases.
From upper respiratory infections in kittens to trauma cases in stray dogs, the ability to assess and act quickly determines how many animals can be helped.
Relying on external labs or imaging services means losing precious time. Transportation delays, processing times, and communication back-and-forths slow everything down, sometimes leaving animals waiting in pain or even declining before results arrive.
With in-house diagnostics, facilities eliminate these obstacles. X-rays can be taken and interpreted on-site, and treatment plans can be initiated without hesitation.
This efficiency means:
More rapid identification of contagious diseases, reducing outbreaks
Better use of staff time and energy
Improved survival rates, particularly for critical cases
The Financial and Logistical Benefits
While the immediate goal of on-site diagnostics is better patient care, the financial and operational advantages are hard to overlook.
Budgets are tight, and every dollar spent needs to be justified. At first glance, in-house diagnostic equipment might seem like a significant expense, but the long-term savings and revenue potential make it a worthwhile investment.
Reduced Outsourcing Costs: Instead of paying per diagnostic test at an external facility, you’re able to run unlimited tests in-house at a fraction of the per-test cost. As you’d imagine, over time this adds up to significant savings.
Minimized Transport Expenses and Risks: Transporting animals to outside clinics for diagnostics is not only costly but also stressful. Keeping diagnostics on-site reduces travel time, transportation fees, and potential stress-induced health complications.
Increased Capacity for Care: With faster diagnostics, rescue teams can make quicker treatment decisions, clearing space for the next animal in need.
Some facilities even offset costs by offering diagnostic services to nearby shelters or low-cost veterinary programs, creating a sustainable revenue stream that supports their mission.
Elevating the Standard of Care in Rescue Medicine
Rescue facilities are often the last hope for animals who have been abandoned, abused, or left behind.
They deserve the best possible care, including access to timely, accurate diagnostics.
Whether it’s confirming a pregnancy in a stray cat, diagnosing heartworm disease in an emaciated rescue dog, or identifying broken bones in an injured wildlife intake, having in-house equipment empowers rescue teams to provide the level of care their patients deserve.
Veterinary professionals in rescue settings face daily challenges, from emotional exhaustion to resource limitations.
Giving them the tools they need to make faster, more informed decisions saves lives and improves job satisfaction and morale.
Making the Transition to In-House Diagnostics
The transition doesn't have to be overwhelming for rescues and non-profits considering in-house diagnostic equipment.
Many organizations secure funding through grants, donations, or veterinary partnerships. Equipment providers often offer financing options, allowing the spread of costs over time.
Starting with high-impact tools like digital X-rays can provide an immediate return on investment.
Prioritizing equipment that aligns with a particular facility's most common medical cases ensures the most significant impact on patient care.
Giving Every Animal a Fighting Chance
The ability to diagnose and treat quickly is not a luxury in rescue medicine; it’s a necessity.
In-house diagnostic equipment is revolutionizing how rescue and non-profit veterinary facilities operate, making faster care and better outcomes possible for the most needy animals.
For every rescue facility that leaps on-site diagnostics, more lives are saved, and the animal welfare mission is strengthened. Investing in these tools isn’t just about technology—it’s about giving every animal a fighting chance at the future they deserve.

What Does a Portable/Equine Veterinary X-Ray Machine Cost?

Portable x-ray equipment can be valuable to equine practitioners, mobile veterinarians, veterinary practices with limited space for equipment, or anyone else who could benefit from equipment that is compact and easy to transport.
Radiology equipment is an important investment. Here are some tips to make sure you get the best value and make a return on your portable X-ray system purchase.
How Much Do Portable Veterinary X-Ray Systems Cost?
Here, we’ll focus on digital x-ray equipment. An average price range is about $25,000-60,000. Of course, this depends on whether you are buying new or used, as well as on what’s included in the system.
For example, you’ll need a generator and a plate or sensor. Not all systems include a generator in the price, so be sure to check exactly what’s included. And if using CR rather than DR technology, a plate reader is needed.
Additionally, many systems include software and a laptop for capturing and storing images. Some software has extra perks that could come in handy, such as the ability to make measurements right on the images.
When deciding which x-ray equipment to purchase, consider how it will be used at your practice.
For example, if you have a mobile small animal practice, how much room do you have for equipment storage?
If you’re in a barn with limited electrical outlet access, would it be better to purchase a cordless unit? What about WiFi or Bluetooth access for wireless sensors or a protective cover for the equipment?
Consider getting opinions from other vets that use a portable system, to see what they recommend.
Could These Factors Help with the Purchase Price?
Some things to consider when it comes to finding the best deal include…
Ask around for different quotes once you know which system you are interested in. Ask vendors for any special deals they may offer, and see if they can beat an offer you already have.
Consider different financing options. Does it make sense to pay upfront or to do a monthly payment plan at a reasonable interest rate? And will you finance through the equipment seller, a bank, or another option?
What are the tax implications (and potential savings) on your equipment purchase? In some cases, tax savings could make up for the expense of buying new equipment.
Look at Long-term Expenses in Addition to the Purchase Price
Of course, the purchase price is important. But long-term costs are also crucial to consider since expensive maintenance could end up canceling out the initial savings on a cheaper but lower-quality equipment purchase.
So, look at the warranty for starters. When does it expire? What does it cover? Can the warranty be renewed, and how much will it cost to renew? Is there an expected charge for routine maintenance? And for older technology, are replacement parts still being manufactured?
And speaking of maintenance, how durable is the equipment? This could make a huge difference, depending on when and where you plan to use the equipment.
For example, if you do farm calls, can the generator and sensor stand up to the elements (dust, humidity, etc.)? Can it function well after being transported in the car during hot or cold weather? If equipment gets damaged easily, that could really add to long-term expenses, and that must be considered in your purchasing decision.
What about software? How often does it need to be upgraded, and are upgrades included in your costs?
Crunch the Numbers
All of the above factors will be part of your financial considerations. Additionally, it helps to plan ahead for how much income the new equipment is expected to bring in—to ensure the purchase makes financial sense for your practice.
For example, how much would the practice charge for various types of x-ray studies?
How many x-ray studies are expected per week or per month—and does this cover the monthly payment on the equipment while also bringing in a profit?
Before investing in new equipment for your practice, it’s helpful to consult a financial advisor or veterinary business consultant.
Make Sure Your Equipment Gets Used Safely and Efficiently
Radiation safety is always important. For mobile units, there may not be a dedicated x-ray suite available, so it’s necessary to ensure that everyone is present (the vet team operating the equipment, as well as any pet owners who are present during the visit) and follow all safety recommendations.
Additionally, training the vet team on the new equipment will ensure they can use the equipment quickly and effectively. This could potentially mean saving time and scheduling more procedures—which could help with the ROI on your equipment purchase.
The right portable veterinary x-ray system purchase will vary from practice to practice, depending on the circumstances under which the machine will be used (in a clinic or out in the field), how busy the practice is, finances, and other factors.

But by carefully considering all these things ahead of time, it will be easier to determine which system suits your practice’s needs and to find the best possible deal to ensure your investment pays off.
Written by: Dr. Tammy Powell, DVM

Combining X-Rays / Ultrasound for Cat Orthopedic Assessment
X-Rays are a very commonly used diagnostic technique in veterinary clinics.
Feline patients are notoriously reticent when it comes to overt signs of pain and illness, and therefore diagnostic imaging plays a vital role in the assessment of cats in veterinary clinics.
Despite the inherent radiation risks, radiographs are a non-invasive tool with fewer complications or unwanted sequellae than more invasive diagnostic modalities, but a higher sensitivity and specificity for many conditions than most less invasive techniques.
In many ways, we can consider radiographs to be the optimal middle ground in imaging technology for the diagnosis of a remarkable variety of conditions.
Why use radiographs?
X-rays are a common imaging modality used in veterinary clinics due to their ability to penetrate tissue, and so reveal internal structures.
They are therefore used to assess solid structures and are particularly useful in areas with contrasting densities, such as in the thorax.
Radiographs can be an important part of a diagnostic pathway and should be used alongside a full clinical history, physical examination, and other diagnostic tools such as bloodwork and other imaging modalities.
Why not use radiographs?
X-rays are usually considered non-invasive for patients in a veterinary setting, as they are unlikely to alter or exacerbate any underlying pathology.
However, it should be remembered that X-ray exposure can be harmful at certain levels, and positioning cats for X-rays may cause stress and discomfort. For this reason, chemical restraint is always preferred, when clinically possible.
Why are radiographs particularly useful in cats?
Cats are notorious for their ability to mask clinical indicators of pain, illness, and disease. Their tendency to withdraw at times of physiological, physical, and behavioral stress can lead to both owners and veterinarians missing clinical signs, and make a comprehensive physical assessment more difficult.
This means that objective measures of disease are important, with accurate diagnostic methods beyond physical assessment needed.
Indications for X-rays in cats
Radiographs have a role in the diagnosis of many conditions, but they are of particular value in disease processes affecting:
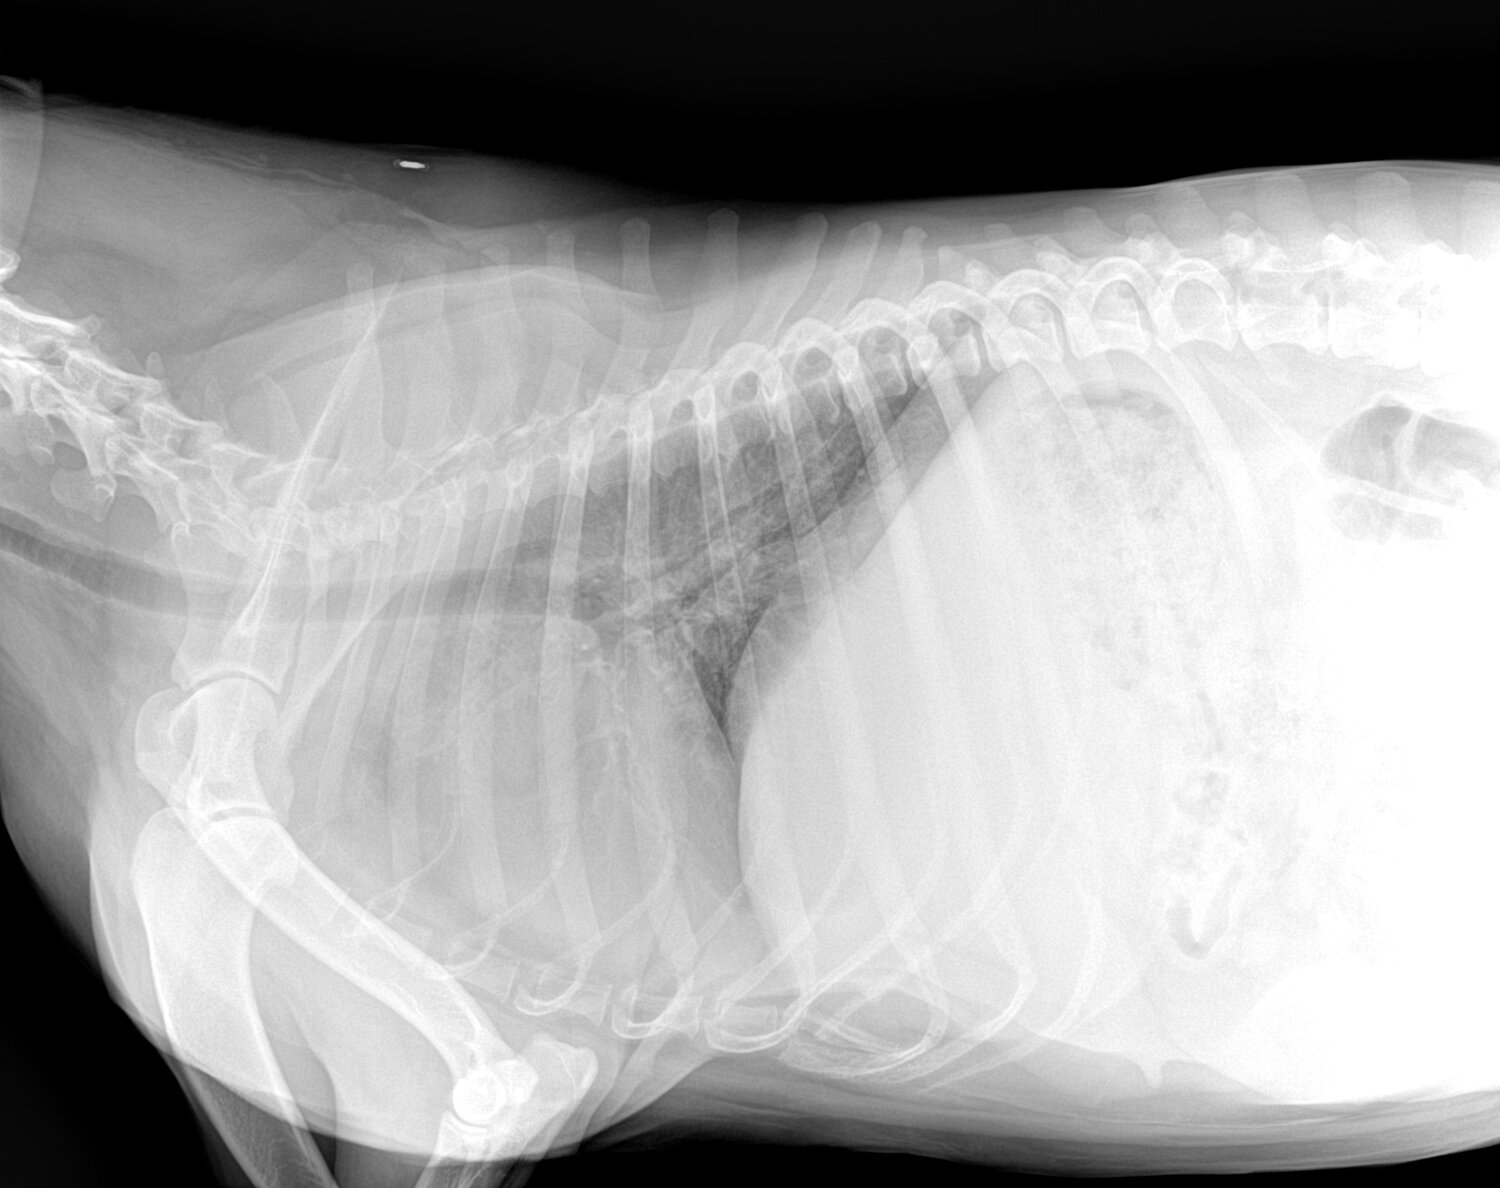
The thorax
One of the most commonly imaged areas in cats is the thorax. Due to the pleural potential space providing mechanical coupling between the chest wall and lung, invasive imaging techniques – such as thoracoscopy – are very high risk. In the acutely dyspnoeic patient, ultrasonography may be more rewarding and lower risk, but in most cases, radiography gives more useful information due to the radiolucent air-filled spaces preventing ultrasound penetration.
X-ray imaging of the thorax may be used for the determination of respiratory, cardiovascular, oncological, and traumatic conditions.
The standard radiographic projections should include left and right lateral and a VD or DV view; although the VD should be avoided in patients with severe pulmonary or cardiac disease, as the resulting V/Q mismatch may prove rapidly fatal in a brittle dyspnoeic cat.
Fortunately, the range of densities from gas-filled lungs to solid bone provides high contrast, meaning that a resting “cat-o-gram" will often prove diagnostically useful, if the patient’s medical status precludes a more correctly positioned radiographic series.
However, findings can be non-specific and require further investigation, in particular, if there is profuse pulmonary, pleural, or pericardial fluid or solid lesions in the lungs.
The abdomen
Abdominal radiographs have many diagnostic uses, including changes to the size, shape, or architecture of organs, foreign bodies, fluid or gas accumulations, and trauma.
Common views taken are the left and right lateral and a DV or VD. However, radiographic interpretation is not always straightforward, as the mass of overlapping soft tissue structures produces a complex palimpsest where three-dimensional relationships are obscured.
Moreover, while different fat: water ratios in different tissues do give subtly different radiographic density (and thus shade), these subtle variations are difficult to appreciate. In many cases, only the major organs are visible on a plain film radiograph. Remember too that obese patients can be more difficult to assess, due to the accumulation of fat around organs.
However, even a simple survey radiograph has its advantages, as being relatively quick and easy, while an ultrasound scan can give different information, it is not possible to visualize the entire abdomen in a single view, unlike with a radiograph.
And while an exploratory laparotomy or even laparoscopy would indeed allow the surgeons to access and examine every structure in the cavity, these are invasive procedures with a relatively high complication rate.
The essence of obtaining – and interpreting – a diagnostic abdominal radiograph is in understanding the contrast. For example, intestinal gas – especially in the colon – shows a clear contrast to the soft tissue around it, as do radio-opaque foreign bodies.
For a more detailed examination of the intestinal or urinary tracts, contrast radiography is an under-utilized and powerful technique that bypasses the fundamental problem of poor tissue differentiation and should always be considered, especially if a structural or functional bowel obstruction is suspected.
Bones and joints
Fractures, deformities, and injuries of bony structures can all be assessed in cats using X-rays. Joint and soft tissue imaging can be more challenging, as the density of ligaments and tendons is extremely similar.
Orthopedic imaging is classically considered to revolve around radiography; however, if soft tissue lesions are suspected (or no bony lesions are detected), the parallel use of radiography and ultrasonography is an exceptionally powerful combination.
When performing orthopedic radiographs, orthogonal views are critical, as the X-ray produced is a two-dimensional image of a three-dimensional anatomic site, requiring the opposing view to fully visualize the area.3 In essence, with the exception of some of the more specialized glenohumeral and coxofemoral views, any limb radiograph can be considered to comprise a dorsopalmar/dorsoplantar view and a mediolateral view.
It is usually important to image limbs from medial to lateral, as the limb being imaged should be as close to the imaging plate as possible. Imaging the upper, rather than lower, limb will result in excessive magnification due to an elongated object-film distance; in addition, due to the resultant angularity of the limb, variable magnification along its length may be seen. In both cases, it is impossible to accurately measure lesions or bones for the selection and fitting of plates.
In some cases, with subtle or highly focal pathology, additional oblique views may also be necessary to skyline the lesions.
These should be selected based on the location, size, and any suspicions based on simple DP and ML views.
However, in the majority of cats, the bone opacity is low enough that most lesions can be appraised from a simple paired view.
Dental X-rays
Dental disease is extremely common in cats, and management can be complex. Radiography allows for a thorough assessment of oral structures, including those below the gingival margin.
Using dental X-rays in cats allows for success in both treatment planning and evaluation.
Radiographs can provide a rapid, non-invasive, and clinically useful assessment of many internal structures in the cat.
However, X-rays should be used alongside other clinical options such as a physical exam, bloodwork, and other imaging. It is important to remember the limitations of a plain film radiograph (the reduction of three-dimensional structures into a flat palimpsest, and the limited differentiation between soft tissue structures).
As a result, a good knowledge of feline-specific anatomy and a good radiographic atlas are invaluable aids in interpreting the images. However, no other imaging modality is as versatile and as quick and easy to perform in the clinic, and with cats frequently presenting late into the course of a range of pathologies due to their masking behaviors, this makes radiography an excellent first choice for imaging most body systems.
References
del Regato JA: Wilhelm Conrad Röntgen, in Radiological Physicists. American Institute of Physics, 1985.
Larson, M. Feline Diagnostic Imaging. Published 2020 John Wiley. Ed. Holland & Hudson. ISBN:9781118840948
Lavin L: Small animal soft tissue, in Lavin L (ed): Radiology in Veterinary Technology, ed 3. Philadelphia, WB Saunders, 2003
DuPont, G. & DeBowes, L. Atlast of Dental Radiography in dogs and cats. Saunders Elsevier Missouri, 2009
Ismael Hernandez-Avalos, Daniel Mota-Rojas, Patricia Mora-Medina, Julio Martínez-Burnes, Alejandro Casas Alvarado, Antonio Verduzco-Mendoza, Karina Lezama-García & Adriana Olmos-Hernandez (2019) Review of different methods used for clinical recognition and assessment of pain in dogs and cats, International Journal of Veterinary Science and Medicine, 7:1, 43-54
Borgeat, K. and Pack, M. (2021), Approach to the acutely dyspnoeic cat. In Practice, 43: 60-70. https://doi.org/10.1002/inpr.15

What is an Overexposed X-Ray and What do they Look Like?

With almost all types of veterinary diagnostic imagery, the effort is in the prep work!
That means getting the correct measurements, exposure settings, and positioning off the bat leads to the best results.
In a previous blog, we discussed why we get underexposed X-rays and how to identify them.
However, it’s easy to overcompensate when adjusting exposure settings and get the opposite effect: overexposed X-rays.
With proper knowledge, practice, and technique, getting a well-balanced exposure rate is simple!
What is an Overexposed X-Ray?
Overexposed X-rays are a result of X-ray settings being too high (using an increased kVp and mAs). This causes too much energy build up in the primary beam.
With excessive energy build-up, the patient absorbs little energy, and an overdose of radiation is absorbed into the detector. A detector starts white and darkens as it’s met with radiation.
As a result, the image will be overexposed (or too dark) to be considered diagnostic. The X-rays are essentially “burning” the plate, causing significant internal structures and tissues to appear less visible.
As you can imagine, this inhibits a clear interpretation by the Veterinarian or Veterinary Specialist and delays a proper diagnosis and treatment.
How Will I Know the X-Ray is Overexposed?
It’s not hard to identify veterinary X-rays that have been overexposed.
Here are a few characteristics that will stand out:
· Image has a darkened appearance
· Poor visibility of internal structures
· Blur or distortion
· Scatter Radiation (reduces image contrast and clarity as a result of the x-ray changing direction –“scattering” - when it meets the patient)
To be appropriately interpreted by a Veterinarian or Veterinary Specialist, you’ll likely need a retake to visualize lesions, growths, or other abnormalities clearly.
Why is My X-ray overexposed?
Capturing an overexposed image is frustrating. Now that we’re pretty clear on what they look like, let’s talk about what may have caused it:
· Incorrect kVp or mAs settings (if settings appear correct, consider re-measuring to confirm measurements were accurate)
· Forgetting to move the x-ray tube head to the correct position (if it’s too close to the cassette, it’s easy to cause overexposure)
· Possible technical error
If I Need a Retake, How Can I Avoid Another Overexposed X-Ray?
Here are a few easy-to-follow tips to avoid overexposed X-rays with your next image:
1. Correctly measure the anatomical part of the patient you’ll be radiographing using a set of calipers (remember, it’s best to measure in the position they’ll be in for the image)
2. Confirm X-ray settings using your veterinary X-ray technique chart
3. Ensure the x-ray tube head is in the correct position (raised if the plate is on the tabletop or lowered if it’s in the bucky tray)
4. Don’t forget to collimate (helps to reduce scatter radiation for a better image quality)
For best results, use computed radiography software tools to reduce artifacts, distortion, and scatter radiation (not to mention hassle-free transfers of DICOM or JPEG images for diagnostic review).
The Quick Take Away
If we think of X-ray exposure like a toaster, when the toaster produces too much energy, we’re left with toast that’s burnt to a crisp.
Just as we’d need to decrease the time on our toaster for a better breakfast, the x-ray settings will need to be reduced on the machine for a balanced diagnostic image.
We want to aim for images that have:
· Sharpness (in focus, clear, and distinct)
· Visual characteristics of density and contrast (adequate representation of tissue density)
· Clear visualization of internal structures
· No distortion or artifacts (no patient motion, technical errors, unnecessary objects, etc.)
Avoid the hassle of retakes by putting effort into the prep work—accurate measuring, exposure settings, and positioning—and getting back to what truly matters to you and your patients.

Why We Get Underexposed X-rays and How to Identify One
Why are Clear Veterinary Diagnostic Images So Important?
Proper diagnostic imagery is the bedrock of developing lifesaving treatment protocols for our patients.
Beyond diagnosis, x-rays enable Veterinary professionals to monitor the effectiveness of ongoing treatment, making adjustments based on the patient’s response (which can affect the patient’s long-term prognosis).
A poor-quality image can snowball into a delayed diagnosis, postpone treatment plans, and defer patient care.
For this reason, it’s important to identify the characteristics of a diagnostically valuable x-ray.
Various factors contribute to an image’s ability to be considered diagnostically worthy. To get started, look at one of the most common causes of retakes: underexposed X-rays.
What Makes Up a Quality Veterinary Diagnostic Image?
Before we dive into what characteristics to look for in an underexposed image, let’s first talk about qualities that make up an image with a balanced exposure rate.
An image with adequate quality will display:
Sharpness (the image is in focus, clear, and distinct)
Visual characteristics of density and contrast (adequate representation of tissue density)
Clear visualization of internal structures
No distortion or artifacts (no patient motion, technical errors, unnecessary objects, etc.)
Proper knowledge and use of a veterinary X-ray technique chart enables consistent exposure rates and image quality.
What is an Underexposed Veterinary X-Ray?
Underexposed X-rays result from X-ray settings being set too low.
When x-ray settings are too low, insufficient energy builds up in the primary beam. With too little energy meeting the X-ray detector (the tool that captures the image, also known as a cassette), the image appears radiopaque (meaning white to light gray).
A few other characteristics you’ll notice in underexposed X-rays are:
Lack of density and contrast (making the image appear “cloudy)
Poor visibility of internal structures
Blur or distortion
Scatter Radiation (reduces image contrast and clarity as a result of the x-ray changing direction –“scattering” - when it meets the patient)
The result of these characteristics will likely require a retake (increasing radiation exposure to both the patient and those capturing the image).
It’s no secret that X-ray retakes are less than ideal. Not only do they increase exposure risks, but they also decrease productivity and hospital efficiency and delay diagnostic review and treatment planning.
When an X-ray image lacks proper exposure, it is considered underexposed and less diagnostically valuable (or not at all).
How to Avoid an Underexposed Veterinary X-Ray
Here are a few easy-to-follow tips to avoid underexposed X-rays with your next patient:
1. Correctly measure the anatomical part of the patient you’ll be radiographing using a set of calipers (for best results, measure in the position they’ll be in for the image. For example, lateral recumbency)
2. Using the measurement, refer to your veterinary x-ray technique chart for correct kVp and mAs settings
3. Ensure the x-ray tube head is in the correct position (raised if the cassette is on the tabletop or lowered if it’s in the bucky tray)
4. Use the collimator on the veterinary X-ray generator to reduce unnecessary scatter radiation
Use image-enhancing algorithms and software tools offered by computed radiography to reduce artifacts, distortion, and scatter radiation for best results.
Risks of Poor Quality Veterinary Diagnostic Images
Just as a good diagnostic image can result in a successful treatment plan, a poor-quality X-ray can create barriers and delays in a confident diagnosis.
Inadequate exposure during an X-ray can lead to:
Misdiagnosis
Inconclusive diagnosis
Failure to resolve discrepancies in interpretation
Something as simple as an underexposed image can lead to potentially life-threatening consequences and compromised patient care.
The Quick Take Away
Think of X-ray exposure like a toaster—if the toaster doesn’t produce enough energy, when it’s finished, you’re left with nothing but a warm piece of white bread.
Just as we’d need to increase the time on our toaster, the machine's X-ray settings will need to be increased for a balanced diagnostic image.
Enhancing Safety in Your Veterinary Radiology Room
Dosimeter badges and a proper X-ray or CT room shield plan are the best ways to protect your veterinary team from radiation exposure.
Want to learn more? For more information on radiation safety at your practice, check out the links below:

How to use a Veterinary X-Ray Technique chart

Mastering Veterinary X-Ray Techniques
Quality diagnostics are the foundation of a confident patient diagnosis. It’s no surprise that veterinary radiography is one of the most commonly used diagnostic tools when confirming (or ruling out) a patient diagnosis.
Although the terms “x-ray” and “diagnostic image” are often used interchangeably, to rule an image as “diagnostic”, it should display quality contrast and dynamic range and avoid any artifacts.
To achieve these characteristics, let’s start with the foundation of what produces a quality diagnostic image: a technique chart.
The Purpose of a Technique Chart for Veterinary Radiography
A digital radiography technique chart is a standard guide to producing the optimum exposure for a diagnostic image.
Put another way, it’s a table of predetermined exposure settings that, when used accurately, ensure consistent image quality and patient exposure.
A reliable, user-friendly chart is important for obtaining clear diagnostic imagery with consistent radiographic density and contrast.
Why do Technique Charts for Veterinary Digital Imagery Matter?
Patient care and wellbeing is always top priority and proper treatment starts with a confident diagnosis.
Veterinarians and Veterinary Specialists rely on quality diagnostic images to rule out suspected diagnoses and confirm findings to develop an accurate treatment plan.
With many veterinary practices upgrading to quality veterinary X-ray software, there’s a little more forgiveness in under/overexposed images (with veterinary X-ray technology advancements, we can manipulate image contrast); however, not all exposure imperfections can be corrected.
Having a precise image from the start is crucial to a proper evaluation.
What Factors Make Up a Technique Chart?
Let’s break it down…
Most technique charts are segmented anatomically by thorax (chest), abdomen, spine, and extremities (arms, legs, tail) since each area varies in density. The measurement of the anatomical body part will determine the exposure settings.
What exactly are exposure settings?
Exposure settings include:
· kVp (kilovoltage peak), which controls the penetrating power of the x-ray beam (or how energetic the x-rays are)
· mAs (milliampere-seconds), which controls the number of x-rays.
Typically, the higher the mAs, the better the image quality; however, it’s important to be judicious with these settings because they can also contribute to the patient's radiation dose.
How to Use a Technique Chart for Veterinary Digital X-Rays
It all starts with accurate measurements. Begin by using a set of calipers to measure the anatomical part of the patient you’ll be radiographing.
Tip: for best results, measure the patient in the position they’ll be in during the radiograph (ex: right lateral recumbency) and measure from the point of x-ray entrance to exit.
Once you’ve got your measurement (in cm), consult the technique chart to determine the kVp and mAs to set the X-ray generator.
Depending on your veterinary hospital’s X-ray system setup, you may also need to determine whether the X-ray cassette needs to be placed on the tabletop or in the bucky tray (also known as the “film tray”).
You can place your technique chart aside and manipulate your tube head and lighting in preparation for your image.
Tip: Remember, the tube head may need to be raised if the cassette is on the table top or lowered if it’s in the Bucky tray.
Remember to place a left/right marker to indicate patient positioning (for example, if the patient is in right lateral recumbency, an “R” label should be included on the image).
Once you’ve confirmed your settings are correct, the cassette and tube head are in the correct position, the label is placed, and the patient is in position, you’re ready to capture your diagnostic image!
Making Adjustments to Exposure Factors
Sometimes adjustments are necessary for a clear visual of injuries or problem areas. Here are a few tips to consider before your retake:
If the initial radiograph is too light, try increasing the kVP by 15% (mAs remain the same)
If the initial radiograph is too dark, try decreasing the mAs by 15% (mAs remain the same)
Want to learn more?
For more tips on achieving quality diagnostic veterinary images, check out these articles below:
Warnings!
Don’t participate in x-ray diagnostic imaging if you’re pregnant to avoid harmful radiation to your little one.
Avoid using old, run-down, or defective protective gear. If cracks, tears, or fraying appear, replace your veterinary radiology protective supplies.
Additional Resources:

Avoid X-Ray Over-Exposure: Expert Tips for Veterinarians

Sharpen Your Skills: Mastering X-Ray Technique to Avoid Overexposure
X-rays are workhorses in the veterinary world, helping diagnose countless conditions in our furry (and feathered, and scaled) friends. But for those perfect diagnostic images, proper exposure is crucial. Over-exposed X-rays, while easy to spot, can lead to a whole host of problems. Don't worry, though, this blog is here to help!
Why Does Exposure Matter?
A good X-ray is like a perfectly balanced recipe: all the elements need to be just right. Over-exposure, like adding too much salt, makes the image too dark and difficult to interpret. This can lead to missed diagnoses and even unnecessary repeat X-rays, exposing your patients and staff to additional radiation.
Culprits of the Over-Exposed Image
Several factors can contribute to over-exposed X-rays in your clinic:
Distance: A slight change in the distance between the X-ray source and the animal can significantly impact exposure. Ensure proper positioning and consult your exposure chart for the correct distance based on the animal's size and the area being imaged.
Technical Tweaks: Incorrect kV and mA settings can also play a role. Higher kV settings lead to more powerful X-rays that can penetrate deeper, potentially overexposing the film. Adjusting these settings based on the animal and the desired image is crucial.
Missing Grids: Grids help filter out scattered radiation, improving image quality and reducing exposure. Ensure you're using the appropriate grid and factoring it into your exposure calculations.
Tips for X-Ray Success
Here's how you can ensure your X-rays are picture-perfect:
Exposure Charts: These handy tools provide recommended kV and mA settings for various animal sizes and body areas. Consult them religiously!
Exposure Indicators: Most digital systems come equipped with these, helping you identify overexposed images. Learn how to interpret the readings and adjust settings accordingly.
Regular Maintenance: Keep your X-ray machines well-maintained for optimal performance and accurate exposure.
Remember:
Over-exposure isn't just about image quality; it's about patient and staff safety. By following these tips and staying vigilant, you can ensure your X-rays are both diagnostic and safe.
Bonus Tip: Consider exploring X-ray machines with features like automatic exposure adjustments based on animal size, like the DynaVue Duo. This can minimize errors, optimize imaging, and ultimately, enhance the care you provide to your animal patients.

A Guide to Veterinary X-Ray and CT Room Shielding

Shielding Solutions: Safeguarding Staff and Clients in Veterinary Radiology
Ensuring the safety of your staff and clients is paramount in any veterinary practice, and this extends to the crucial area of X-ray and CT imaging. These powerful tools provide invaluable diagnostic information, but they also emit ionizing radiation, which can be harmful if not properly contained.
This blog post will delve into the essential aspects of veterinary X-ray and CT room shielding, addressing common questions like:
How thick should the drywall be?
Do I need lead in the walls?
What level of protection is necessary for different areas of the room?
By understanding these key points, you can ensure your X-ray and CT room complies with safety regulations and provides optimal protection for everyone involved.
The Role of a Physicist Shielding Report
Before diving into specific materials and thicknesses, it's crucial to emphasize the importance of a physicist's report, also known as a shielding report. This document, created by a qualified medical physicist, is essential for determining the exact amount of radiation shielding required for your specific X-ray or CT equipment and facility layout.
The report considers various factors, including:
Type of X-ray or CT scanner: Different machines produce varying levels of radiation, and the shielding needs to be tailored accordingly.
Workload of the equipment: The frequency of X-ray or CT scans directly impacts the required shielding.
Room layout and occupancy: The location of the X-ray room relative to other occupied areas plays a crucial role in determining the shielding needed for walls, floors, and ceilings.
Understanding Shielding Requirements in Different Areas:
While a physicist's report provides the definitive answer, here's a general overview of the various areas within an X-ray or CT room and their typical shielding needs:
Walls:
Drywall thickness alone may not be sufficient for X-ray or CT rooms.
Lead lining is often incorporated within the walls to absorb radiation effectively.
The specific thickness of lead and total shielding equivalent (measured in millimeters of lead or lead equivalent) will be determined in the physicist's report.
Floors and Ceilings:
Shielding requirements for floors and ceilings depend on the location of the X-ray source and the presence of occupied spaces above or below the room.
The report will specify the needed thickness of concrete or other appropriate materials for these areas.
Control Booth:
The control booth, where the operator stands during X-ray or CT procedures, requires sufficient shielding to minimize radiation exposure.
This typically involves a combination of lead-lined walls, leaded glass windows, and proper door shielding.
Next Steps:
Remember, this blog post serves as a general informational guide, and the physicist's report is essential for ensuring your facility's X-ray or CT room adheres to regulations and prioritizes safety.
For a Physicist Shielding Report tailored to your specific veterinary practice, feel free to reach out to us!
We can help you create a safe and compliant environment for your staff, clients, and furry patients.

A Vet's Guide to Safe, Conscious X-Rays for cat Patients

1: Balancing Safety and Conscious Imaging
X-rays serve as invaluable tools in feline diagnostics, offering crucial insights when executed with precision. However, coaxing a cat into a state of stillness for the procedure without resorting to sedation presents a unique challenge. In this guide, we explore the delicate balance between achieving diagnostic-quality X-rays and ensuring the well-being of both feline patients and veterinary staff.
2: When Sedation Isn't an Option: Considerations and Scenarios
Before embarking on the journey of conscious cat X-rays, veterinary professionals must assess the necessity of avoiding sedation. Safety remains the top priority for patients and staff alike, as repeated attempts due to poor positioning or movement can elevate stress levels and radiation exposure.
While short-acting sedation options exist, there are scenarios where a conscious approach is preferable, such as with cats having advanced cardiac disease or previous adverse reactions to sedation.
3: Techniques for Conscious Radiographs: A Step-by-Step Approach
Ensuring a smooth and stress-free process for conscious X-rays involves meticulous preparation and execution. This section provides practical tips for veterinary professionals to enhance the welfare of feline patients and maintain a safe environment during the procedure.
4: Preparing for Success: The Importance of Readiness
To successfully execute conscious X-rays, meticulous preparation is non-negotiable. From predicting kV and mA settings to having restraint equipment readily available, the efficiency of the procedure relies on a well-thought-out plan. Implementing feline-centric protocols, including calming voices, quiet environments, and minimal handling, contributes to a low-stress atmosphere.
5: The Art of Positioning: Tools and Techniques
Positioning a cat for X-rays demands creativity and careful consideration.
This section introduces various tools, such as Perspex boxes, sandbags, troughs, and foam wedges, to aid in achieving optimal positioning without compromising patient comfort. Emphasizing that "less is more" in cat restraint, the guide outlines methods to stabilize cats with respiratory concerns while maintaining minimal restraint.
6: Taking the Shot: Executing the Radiographs
Executing conscious radiographs requires coordination and precision. This section guides veterinary professionals through the process, from staying with the cat until the machine is ready to providing reassurance during the 'beep' or 'click' of the X-ray machine.
Tips for allowing the cat to rest between shots and recognizing signs of distress ensure a humane approach throughout the procedure.
7: Pitfalls and Prudence: Navigating Challenges
While conscious radiographs offer a non-sedative alternative, potential pitfalls exist, such as poor positioning, movement blur, or sub-optimal exposure.
This section emphasizes the preference for sedation or anesthesia whenever possible to achieve radiographs safely, underlining the importance of adaptability and recognizing when chemical restraint may be necessary.
By mastering the art of stress-free cat X-rays, veterinary professionals can enhance the diagnostic process, ensuring the well-being of their feline patients and fostering a positive experience for both cats and their human companions.

Achieving Diagnostic Images in Veterinary Radiography
What do kV and mA and mAs mean in veterinary X-ray and what are the best settings for a small cat, medium dog, and large dog?
Since 1895, when X-rays were first discovered, radiography has proven an invaluable asset in both human and veterinary medicine.
Over a hundred years later, nearly every veterinary clinic has an X-ray machine and it’s hard to imagine how we could ever be without one now. But just like with professional photography, it’s one thing simply taking a picture; it’s another to create an image.
And for us, as vets and veterinary technicians, we are all too aware of how the way a radiograph is taken can affect our decision-making process.
In order to take a ‘good’, or diagnostic X-ray, we must appreciate the exposure settings of the machine. Typically, there are three factors we, as the operators, can adjust – the kV, the mA, and the exposure time (s). Nowadays, most set-ups are digital, and both the X-ray generator and the processor will have presets for certain areas of the body.
We may also only be able to adjust the kV and the mAs (a combined milliamp-seconds control). However, it’s important that we are able to understand and fine-tune all the settings as required to get the image we desire.
The kV (kilovoltage)
This affects the amount of energy given to the X-ray photons. The higher the kV, the higher their energy and therefore their penetrating power into the patient. Adjusting the kV will allow for adjustments in both the contrast and exposure of the image produced.
But as the kV increases, so does the risk of scatter which not only can be dangerous to the operator but also leads to an image with poor contrast. Because of this, as kV is increased, the mAs ought normally to be lowered.
The mA (milliamperage)
This affects the amount of current, thus electrons, passing through the X-ray head. Raising the mA will increase the temperature of the filament from which the electrons are produced and subsequently, increase the number of electrons that are released. This will increase the number of X-ray photons produced, and thus the overall exposure.
The s (seconds)
This is simply the exposure time; the amount of time during which the X-ray photons are released, and the patient is exposed to them. The actual exposure time, in seconds, is equal to the mAs divided by the mA.
The mAs (milliampere seconds)
In many machines, as both mA and time control the number of X-ray photons, they are combined into a single control, the mAs.
In order to get the image required, we need to balance these three factors
How we do so will depend on several things
the size of the animal
which area of the body is being imaged
the depth of the area of the body being imaged
For example:
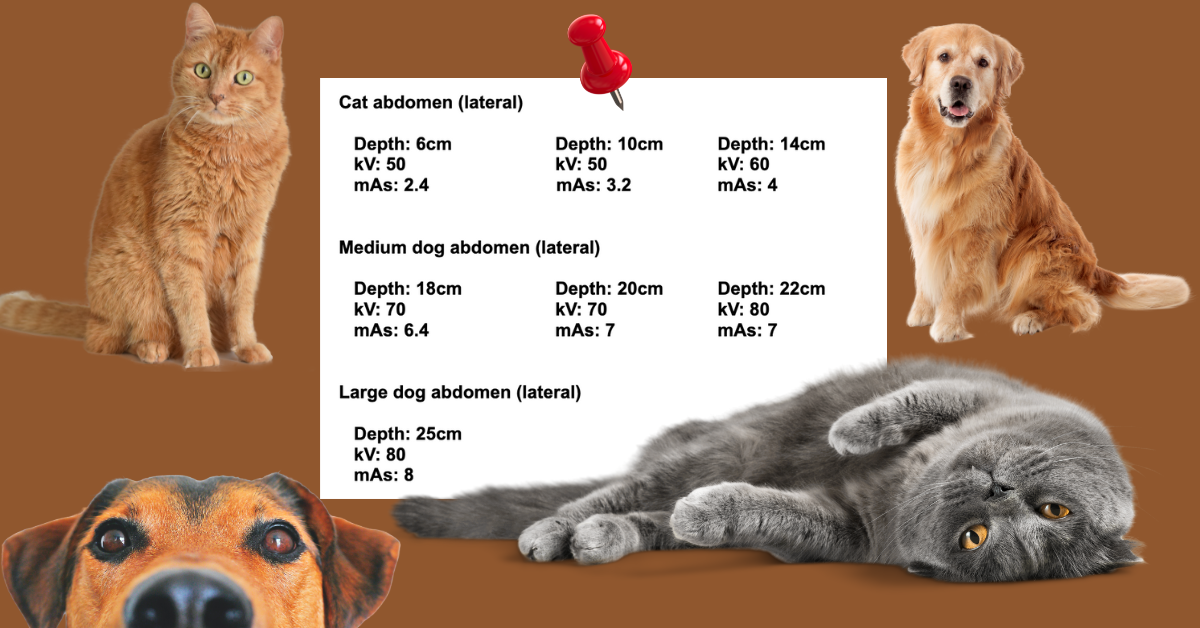
- imaging the abdomen of a large dog will require generally higher kV and mAs than imaging the abdomen of a cat, as you would need more electrons with higher energy levels in order to penetrate through to the X-ray plate.
- imaging an area of movement such as the chest will require as short an exposure time as possible to eliminate movement blur – this can be achieved by increasing the mA because of the equation exposure time = mAs ÷ mA.
Exposure charts can be very useful to give a guide as to the likely appropriate settings to use for a particular body area on a particular-sized animal. Recommended exposures will vary depending on the machine used, therefore it can be difficult to suggest exact settings that can be used across the board.
However, the following gives a good example of how factors will change depending on the size of the patient. These assume a film focal distance of 80cm.

Compared to these figures for an abdominal radiograph, thoracic radiographs will require lower mAs to reduce motion blur, so the kV may need to be slightly higher, especially if the exposure time cannot be controlled independently.
Radiographs of extremities will require a lower kV and lower mAs, as the depth of the area of interest is smaller.
If the image requires high kV settings, it can be useful to use a grid to help absorb scatter and therefore improve image quality.
As a general rule of thumb, a grid is beneficial for body parts over 10cm in depth – however, with digital systems, there is more leeway due to post-exposure filtering.
When thinking about radiation safety, both the patient and the operator, always use the lowest possible settings needed to gain the diagnostic image.
It can also be helpful to record the settings used for each exposure, either on the system or by hand, so with time, we can begin to understand our machine and what settings work well for certain images.
In many jurisdictions, this is a legal requirement and is always “best practice” for reflection and continual quality improvement.
As a rule of thumb, if you see these effects on a digital image consider these adjustments:
If you notice a dark image, particularly of soft tissue or extremities, it is generally recommended to decrease the kV.
Conversely, if you come across a light image, especially of bone, it is advisable to increase the kV.
In the case of motion blur, you should consider increasing the kV and decreasing the mAs.
If you find poor contrast on the abdomen or thorax, increasing the kV is typically recommended.
On the other hand, if you observe poor contrast on an extremity, it is generally advisable to decrease the kV.
1. Radiography in Veterinary Technology (Fourth edition) by Lisa M. Lavin. Pg. 6
2. https://www.msdvetmanual.com/clinical-pathology-and-procedures/diagnostic-imaging/radiography-of-animals
3. Lo, W. Y., Hornof, W. J., Zwingenberger, A. L., & Robertson, I. D. (2009). Multiscale image processing and antiscatter grids in digital radiography. Veterinary Radiology & Ultrasound, 50(6), 569-576.

How to Avoid Under-Exposed X-Rays in Your Animal Hospital

Mastering X-ray Imaging: Essential Techniques for Crystal Clear Animal Radiographs
As veterinarians, we’re sure that you use X-rays commonly as a part of a diagnostic process. In order to achieve an accurate diagnosis, however, these radiographs must be correctly positioned and of high quality. If X-rays are taken poorly, lesions may be both under and over-diagnosed, due to problems with interpretation.
What is an under-exposed X-ray and how do I avoid that in my animal hospital X-ray room?
Having to repeat X-rays is far from ideal, both in terms of increased radiographic exposure for our patients, but also in terms of cost, time, and frustration for the veterinary professional.
We all want our X-rays to be the perfect first time – so how do we achieve that? Exposure problems are a common X-ray fault in animal hospitals, so in this blog, we will go through under-exposure, and how to avoid it. The opposite, over-exposure, is also a common issue – read more about that here.
What is exposure?
Exposure refers to the concentration of X-ray photons in the air at a specific point. If an X-ray is under-exposed, it means there was less penetration of the beam through the target tissue.
X-ray exposure is affected by four factors:
Kilovoltage (kV) – controls the energy of the X-rays, and therefore the penetrating power
Milliampere (mA) – the current applied to the tube to generate X-rays, and therefore the number of photons produced
Exposure time
Focus-film distance (FFD - the distance from the X-ray source to the patient) – as distance increases, the intensity of the beam decreases
It is a combination of these factors which determines the overall exposure of each X-ray.
Why does an under-exposed X-ray matter?
In conventional radiography, an under-exposed X-ray will look ‘lighter’ or ‘whiter’ than a properly exposed X-ray. This whitening effect can make it very difficult to spot subtle abnormalities and lesions. Under-exposure can also lead to increased mottling or cloudiness of an image, which can obscure parts of the radiograph, or lead to artifacts.
Most veterinary staff were taught the “Rule of Toast” to describe this – underdone toast is too white.
However, in a modern digital radiograph, the computer will automatically add additional filters. It is very, very rare for an underexposed digital radiograph to appear pale or white.
This can “trick” the inexperienced radiographer into thinking that the exposure is correct when, in reality, the computer is enhancing and filtering the image.
This enhancement adds an additional layer of complexity when diagnosing from the radiograph because there may be insufficient raw data to obtain a reliable image, despite excellent-appearing radiographs.
Mildly under-exposed images are unlikely to be diagnostically catastrophic, as the signal: noise ratio of a modern DDR plate is high enough that it is likely that sufficient data has been captured. However, the more underexposed the image is, the more serious the potential for errors.
In more severely under-exposed images, the most common sign is pixelation of the image. It may appear subtly grainy, or even blurred (like an image zoomed in too far). This can significantly obscure subtle or fine pathology, especially when viewing lung fields, or fine structures like small animal phalanges or dentitions.
Under-exposure is therefore a real problem when it comes to the interpretation of X-rays in an animal hospital. Poor X-ray quality can lead to both over and under-diagnosis of disease in our patients.
Why is my X-ray under-exposed?
Having problems with under-exposed X-rays in your veterinary clinic? Here’s where you might be going wrong!
A common error when it comes to exposure is changes in the distance between the X-ray machine and the patient. Even a relatively small increase in distance can have a large effect on exposure, and therefore X-ray quality, as exposure is controlled by the inverse square law of radiation dispersal.
A small increase in the FFD requires a corresponding significant increase in the mAs to avoid an underexposed X-ray. Common causes for a variable FFD include adjustable X-ray tables in small animal hospitals, or large animal veterinarians standing too far from the patient with a portable machine.
The kV and mA settings play a large role in the exposure. Low kV levels affect X-ray penetration and therefore result in lower exposure. If an image is under-exposed, this usually means that the kV or mAs need to be increased.
However, adjusting the kV will lead to contrast changes, so in most cases, unless the contrast is too high, the mAs is the adjustment of choice to correct exposure errors.
Exposure can also be low due to various common technical errors, such as using a grid unnecessarily or underestimating the weight or body size of a patient.
Tips for avoiding an under-exposed X-ray
Achieving the right exposure is vital for X-rays of good diagnostic quality. In basic terms, if radiographs are often being under-exposed at your veterinary hospital, then increases to the kV or mAs settings will be needed.
However, for an X-ray of true diagnostic quality, it should be remembered that an image needs to be of high quality, rather than just exposed correctly.
For example, different approaches may be used when imaging the thorax as compared to the abdomen. Thoracic radiographs require a high kV: there is high natural contrast between bone, soft tissue, and gas, and using a high kV value enhances detail in the soft tissue areas of the lung fields.
Conversely, the abdomen has low natural contrast due to the vast majority of content being soft tissue, and therefore abdominal X-rays require a lower kV to maximize contrast.
The mAs setting will therefore need to be adjusted appropriately to accommodate the change in kV whilst retaining good exposure.
Exposure charts can be a really useful way to give a good starting point for determining the best settings. By including appropriate settings for multiple species, breeds, and sizes of animals, as well as different areas of anatomy, quick reference charts can be invaluable for maximizing X-ray quality and exposure.
The other two exposure factors of distance and time should be standardized as much as possible. Using correct restraint of patients should minimize motion blur. It is also important to ensure your X-ray machine is regularly maintained and serviced, to minimize the likelihood of equipment error.
Most modern DR systems have embedded Exposure Indicators, and with “exposure creep” a significant issue in digital radiography, we strongly recommend you use this under-utilized tool to ensure that your exposures are optimal. https://newvetequipment.com/dr-digital
Summing up
Under-exposed X-rays lead to interpretation errors, especially as they can be difficult to detect on a digital radiograph. Under-exposure can be caused by changes to the exposure factors: kV, mAs, distance, and time.
Standardizing exposure factors, using correct calculations for kV and mAs, and using accurate Exposure Indicators will lead to correct exposure and X-rays of true diagnostic quality in your animal hospital.
Many instances of under or overexposure can be attributed to doctors failing to measure animals or consult the technique chart.
References
Mattoon, J. (2006) ‘Digital Radiography’ Vet Comp Orthop Traumatol 19(03) pp.123-132
Kirberger, R. (2005) ‘Radiograph quality evaluation for exposure variables – a review’ Veterinary Radiology and Ultrasound 40(3) pp.220-226

Our Best Selling Veterinary X-Ray Machine - JPI DirectVet

JPI DirectVet 110V DR: The All-in-One X-Ray Solution for Veterinary Practices
An x-ray machine helps propel your veterinary practice to another level.
With it, you can offer the most accurate screening to your patients, treat many animals, and grow your business as you stand out from your competitors.
However, despite its many benefits, buying an x-ray device is easier said than done. After all, in today’s time, there are many options in the market, and not all of them are built the same in terms of quality, durability, and functionality.
To help you choose the best device for your institution, this article looks at some of the best veterinary x-ray machines available today.
What are the Types of Veterinary X-Ray Machines?
Before discussing the x-ray machines, you’ll need to understand the different types of x-ray systems.
Conventional X-Ray Machines
Conventional X-Ray Machines use a piece of film or a radiation detector for imaging. They produce physical images in a ‘negative’ format that are difficult to view and aren’t very clear by today’s standards.
Conventional X-rays used to be the industry standard for a decade but are now slowly getting obsolete due to their inconvenience and security concerns.
Here are the limitations of conventional x-ray machines:
The images need to be developed in a dark room.
You’ll need a separate film for each x-ray.
Traditional X-ray machines also take a lot of time to produce the image. In other words, your patients need to be exposed to the beams for longer, which could cause serious health issues.
Digital vs. Conventional X-Rays: Why the JPI DirectVet System Stands Out
Digital x-ray machines are the newest types of x-ray devices that produce images in digital form. They are easy to operate, render highly accurate and clear images, and don’t require darkrooms.
There are two types of digital x-ray machines:
Computed Radiography
In Computed Radiography (CR), images are first created in a photo-stimulated luminescence screen, which is then converted into digital format with the help of a reader.
Direct Radiography
In a direct radiography system, images are created directly on the computer. They are the most hassle-free devices available but are generally expensive.
Why the JPI DirectVet is the Best-Selling Digital X-Ray System for Vets
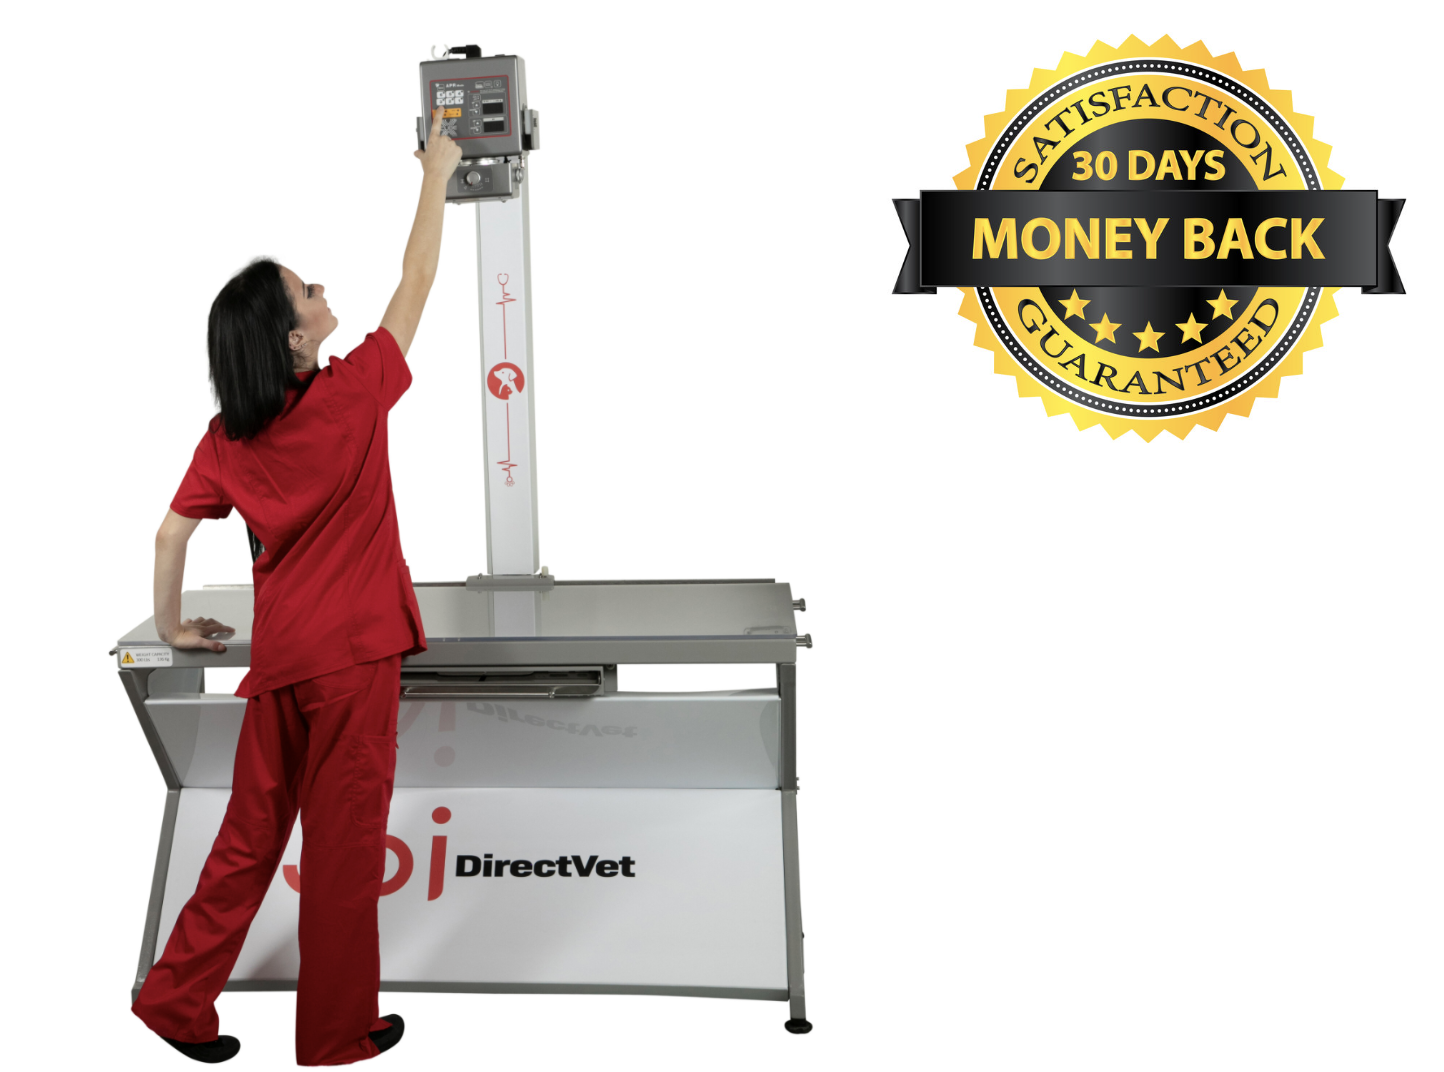
The DirectVet Is A Complete Package System. Generator, table, plates, software, computer, and a 5-year warranty.
https://newvetequipment.com/dr-with-table-generator
Guidelines for Choosing Good Digital X-Ray Machines
Here are the things we’ve considered while listing the machines below:
Ease of use when in the office or while traveling
Quality of images
High-frequency availability; these machines create high-frequency x-rays with very strong penetrative power that don't require exposure to the patient for a long time.
Reliability and the customer support of the manufacturer
Practicality
Warranty
Price
JPI DirectVet 110V DR System
5-Year Warranty
The JPI DirectVet 110V DR System is a high-frequency digital x-ray system that can offer voltage up to 120 kV. It's a complete system that doesn't require add-ons, so you can hit the ground running as soon as you buy it.
The JPI DirectVet 110V DR is a versatile machine that can screen animals of any size, with its heavy-duty table holding up to 300 lbs. It also comes integrated with full ExamVue Duo Software, with features like presets and veterinary tool-sets for different animals, dicon and jpeg image formats, email capability, and a user-friendly interface.

The 17” x 17″ ExamVue DR (with tethered plates)
5-Year Warranty
DR Digital X-Ray Includes Plates, ExamVue Software / Computer (laptop or desktop), And ExamVue PACS
This system is for you if you already have a table and generator. Delivery and installation are included.

DynaVue+ FLUOROSCOPY AND DIGITAL X-RAY
5-Year Warranty
Digital X-Ray or C-arm fluoroscopy? Why not both? DynaVue+ is a powerful device created for minimally invasive diagnostic and therapeutic procedures and has been designed for clinics that don’t have a lot of space.
The comprehensive live x-ray video mode with 30 fps rendering makes DynaVue+ stand apart from its competitors. What's more, you can even change between a digital x-ray and a live x-ray mid-exam.
The DynaVue+ comes with a 4-way floating tabletop, a computer, and an ExamVue acquisition with many useful features like custom presets, email, multi-view, image export/import, and expansion.

Veterinary X-Ray Positioning - A Helpful Guide

Buying a good veterinary x-ray machine is one thing. However, for taking high-quality images, you’ll also need to know the proper techniques regarding the patient's position and the direction of light from the device.
This article discusses some of the most important principles and protocols of veterinary x-ray positioning for small animals.
X-Ray Positioning for Small Animals
Small animals include house pets like dogs, cats, rabbits, hedgehogs, etc.
Sedation Requirements
Chemical Sedation may be required if the animal is restless or is in pain. Sedation will also help make more accurate images since it relaxes muscles and keeps the animal still.
On the other hand, physical restraint should be enough to calm patients. You’ll need two people; one to hold the head and forelimbs and another on the hind position. Extra personnel may be needed for larger or more anxious animals.
You can also use positioning aids and devices such as V troughs, cotton, tape, foam wedges, and sandbags, along with physical and chemical restraint.
Positioning for Different Organs
Now, let’s look at how you can position your patient while taking x-rays of different body parts.
Exposure Guideline
First, you’ll need to use the correct exposure to ensure patient safety and high-quality images. For this, you need to consider the thickness of the part you’re measuring and the patient’s weight. The distance between the patient and the x-ray beams also matters.
Always measure the thickness from the thickest part of the organ.
Nowadays, with most veterinary professionals using digital systems, you can easily find presets on the software. You may need to play around with the settings to get an accurate image.
Thorax Views
The most commonly used views for the thorax include the right lateral and dorsoventral views. In some cases, you can do a left lateral or ventrodorsal view.
Thorax Lateral View Guidelines
The front legs should be pulled away from the thorax's cranial part and taped if required.
The hind limbs should also be extended, but be careful not to rotate the patient.
The collimated light field should start from the shoulder and end at the top of the last rib.
Finally, make the exposure at peak inspiration (the highest pressure during the respiratory cycle).
Tip: Using a foam wedge under the sternum can help keep the sternum and the thoracic spine in the same plane.
Thorax Ventrodorsal View Guidelines
You need to place the patient in dorsal recumbency.
Align the patient's spine and sternum in the same line using a V-trough.
Tape the thoracic limbs evenly and pull them forward.
Pull and secure the pelvic limbs caudally.
The vertical line of the collimator light should be at the caudal border of the scapula. Similarly, the horizontal line should be directly over the sternum.
And finally, the exposure should also be at the peak inspiratory phase.
Thorax Dorsoventral View Guidelines
The dorsoventral view is generally only used when fluid blocks the heart and lungs or to visualize the lesions in the caudodorsal long lobes.
Depending on the patient's comfort, it should be placed in ventral recumbency without the legs taped.
Pull and abduct the thoracic limbs.
The settings for the exposure and the direction of the beams are similar to the Ventrodorsal view.
Abdominal Views
Right lateral and ventrodorsal views are preferred for a clear view of the abdomen.
Abdominal Lateral View Guidelines
For the abdominal lateral view, the patient's position should be similar to that of the thorax lateral view, i.e., the front and the hind limbs extended.
But in this case, the center should be in the middle of the last rib.
The center can be kept just behind the last rib for cats and other small animals.
Take the images during the expiratory breathing phase when there's less movement on the abdomen.
Abdominal Ventrodorsal View Guidelines
For ventrodorsal view, you can simply follow the positioning instruction for the thorax ventrodorsal.
In this case, the light beam center should start behind the last rib and cover the entire diaphragm.
Again, the images must be taken during the expiratory phase of the breathing.
Skull Views
For the skull, the lateral and the ventral views should be simple since there are few distractions. However, the real challenge lies in taking images when the mouth is open:
Ventrodorsal Maxilla (Open Mouth) Guidelines
Open the mouth of the patient in a way the hard palate is straight and parallel to the table surface.
Pull the mandible away from the head and secure it.
Either secure the endotracheal tube and tongue in the center or pull them to one side of the mandible.
The best angle for the x-ray beams is 20 degrees from perpendicular.
Frontal Sinus View Guidelines
For the frontal sinus view, lay the animal on its back in a way the hard palate is perpendicular to the table surface.
The mandible should be secured, but the nostrils should point straight up.
Note: Anesthesia is required whenever the mouth is open.
Pelvis Views
For the pelvis as well, the standard views are lateral and ventrodorsal.
Pelvis Lateral View Guidelines
Scissor the legs, placing the down leg forward and the back leg back and parallel to the table.
Center the beam on the greater trochanter and collimate the field to the pelvis, femur, and lumbosacral spine.
Pelvis Ventrodorsal View Guidelines
For the ventrodorsal view, you can choose a physical restraint with two people or put the patient in a frog leg position.
Grip the back legs at the Tauras and pull the legs forward with the femur parallel to the table.
Rotate the stiflers to make the patella point up.
The center of the light beam should be on the center of the pelvis and collimated between the top of the pelvis and right below the stifles.
Extremities
For extremities, you can use lateral, posteroanterior, or anteroposterior positions. The most important thing here is to center on the joint you want to study.
Conclusion
X-ray positioning for animals boils down to this; the patient should be comfortable, and you should center the beams in the organ you want to analyze. At the same time, the beam should be collimated appropriately so that the image is accurate in the center and the sides.

Veterinary X-Ray Software - What You'll Need to Learn

Software is generally overlooked, yet one of the most important components of an x-ray system. After all, even the most advanced hardware won’t be able to perform to its full potential without a good application program running it.
This article discusses everything you need to know about veterinary x-ray software, including what it is and the features you’ll need to look for while buying one.
What is a Veterinary X-Ray Software?
A veterinary x-ray software is a computer program that helps you to capture, manage, store, and share x-ray images. A lot of x-ray software are available on the market, and all of them vary in terms of the user interface, features, functionalities, etc.
Most x-ray hardware come with software made by their manufacturer. But you can still change the software, as long as it's compatible with the device.
Why is a Good Veterinary Software Important?
These days, x-ray systems aren’t limited to taking pictures. They also help the practitioner with the entire workflow, for example, storing and sharing the images and patient information. And veterinary software makes all of these possible.
An x-ray software has many features that make the system more convenient and effective. It makes taking and processing the images fast and easy, so you can create more accurate and detailed images in less time.
Features to Look for in a Veterinary X-Ray Software
Here are essential features that need to be present in veterinary x-ray software:
Cloud Storage
With cloud storage, you can store your patients’ information on server computers outside your medical facility. This gives two primary benefits:
The storage space in your computer is saved.
The information becomes more secure since server computers have better security protocols than your in-house computer.
Cloud computing also makes collaboration effortless. With it, you can contact other practitioners, share the x-ray images with them in real-time, and get instant feedback.
Custom Presets
You should look for software with custom presets for different animal categories like dogs, cats, etc. This way, you won’t have to change the kV, mA, and other settings every time a new patient comes in.
On the other hand, you should also be able to create your own presets for regular patients to conduct examinations without remembering the perfect values for everyone.
Image Tuning and Advanced Visualization
One of the many reasons you’d want to move to a digital x-ray system would be to get better in-depth views of the images.
In addition to the standard 2D photos, the software should support 3D imaging and views from different angles. You should also be able to add annotations, graphics, and electronic markers to the desired part of the image.
Furthermore, there should be options to manipulate the brightness, contrast, and other settings of the image to help make your x-ray tests more accurate and easier to analyze. Finally, measuring the distance between two points should be possible.
Image Control Tools
Image control tools give you more flexibility while assessing the images. Some popular image control tools include rotation, horizontal and vertical flip, rectangular or other shaped crops, zoom in/out, etc.
Do remember that the existence of image control tools is not enough. They should also be responsive and precise.
For example, you should be able to crop the image exactly in the place you want. Also, zooming shouldn’t decrease the image quality substantially.
Reports Generation and Storage
After spending so much on x-ray software, it’s unfair for you to invest in another spreadsheet or DBMS to save your patient’s information.
Many good veterinary x-ray software allows users to save their patient’s history in the format of their choice. Moreover, they allow automatic report generation after the images are taken.
As said before, cloud computing can further help to store, share, and access reports.
Other Things to Check
In addition to the above features, here are other things to consider while buying x-ray software:
Simple UI
The user interface, in simple terms, is the design through which you communicate with the software. It’s what you see on the screen when you open an application program.
The UI of the software should be simple and easy to understand. You should be able to figure out where every option is, and accessing important features shouldn’t take you many clicks.
On the other hand, the UI should also be attractive and use readable fonts. The colors on the background shouldn’t be too dull, and the icons shouldn’t look outdated or weird. All in all, the workspace shouldn’t feel strange or boring to you while working.
Integration with Your Computer System
You’ll have to see if the software you want to buy can work with the current operating system on your PC, i.e., Windows, Mac OS, or even Linux.
In addition, don’t forget to check the system requirements for the software and ensure you have enough processor, RAM, or memory to run it.
Customer Support
The software manufacturer should be willing to give its buyers free training to use the software. If that’s not possible, there should at least be an easily comprehendible software manual or tutorials on the web.
Furthermore, the software provider should be willing to address issues immediately. Ask them if 24/7 customer support is available, and ask the company’s existing clients if they deliver what they promise.
Prices
Some software providers are known to show lower prices for the product but charge extra for the features.
Some can even charge for the regular updates meant to improve the software.
Hence, you’ll have to be completely sure about how much you should pay and if the provider has hidden charges.
Key Takeaway
When choosing a veterinary software, the number of features is the most important thing. But again, you’ll need to check if you need to use the features. In addition, there should be multiple modes for viewing and manipulating the images, and the software should be easy to learn.
https://youtube.com/watch?v=Jr1iLSGHHUo&si=EnSIkaIECMiOmarE
See the video demo on you tube.

the Price of a Portable Veterinary Ultrasound Machine?

Ultrasound is a great imaging modality that can add value to a veterinary practice, allowing them to offer new services in-house. But for some practices, a mobile ultrasound may be the best choice.
This includes mobile small animal practitioners, equine and large animal vets, and even some veterinary practices that may want to move their equipment between rooms or cage sides.
If you’re looking to purchase a portable veterinary ultrasound machine, here are some things to consider…
Which Components and Features Do You Need?
Before comparing the purchase price of different manufacturers and vendors, it’s important to make sure you’re comparing apples to apples.
So, make a list of the things you must have with your ultrasound machine, as well as a list of ‘nice-to-haves’. Here are some possibilities…
Transducers. Which type of transducer(s) are included with the machine? Ultrasound probes or transducers come in different shapes and frequencies, which are used for different purposes and different species/sizes of patients. So, it’s important to make sure you’re getting the options you need, based on your practice type, the patients you see, and the services you plan to offer.
Functions and features. Does the machine offer all the operating functions that you need for your studies? And what about features like color Doppler, or the ability to make measurements and annotations on the screen? Doppler technology can be indispensable for certain types of ultrasound studies. Color Doppler provides a look at blood flow, which is crucial when evaluating the heart and helpful for identifying vascular landmarks for certain abdominal structures.
Durability. For vets who make farm calls, it’s important to purchase a unit that can handle being out in dust, humidity, and temperature fluctuations, as well as something that travels well.
Power and connectivity. Do you always have reliable power outlets available, or are there some cases when a battery-powered machine would be needed? And how will your images and videos be stored or added to your practice management software?
Support. Is there a technical support line available 24/7? And is the company stable—meaning, are support and replacement parts expected to be available in the next few years?
How Much Do Portable Veterinary Ultrasound Machines Cost?
Veterinary ultrasounds are highly variable in price, depending on the quality of the machine itself and what’s included. But the average price of a portable veterinary ultrasound is about $10,000 to $25,000.
Some units can cost significantly more, especially if they come with multiple probes and extended service plans, and warranties.
To the other extreme, there are some units that only cost between $1,000 to $5,000. Typically, these inexpensive units are handheld and compact, and they may be able to hook up to a smartphone. They typically don’t offer the capability of seeing everything in fine detail. But they may be a good option for vets who only plan to do things like ultrasound-guided cystocenteses or quick checks for free fluid in the chest or abdomen.
Financial Considerations
In addition to the purchase price, plan for long-term expenses. This could include routine service and maintenance costs, renewing a warranty, updating software, unexpected repairs, and anything else that could come up over time.
Also, investigate your financing options. Will you purchase the equipment outright using saved business funds? Or does it make more sense to do monthly payments via financing from the vendor or a bank?
Don’t forget to factor in tax savings, too.
Talking to a financial professional, especially one who is familiar with the veterinary industry, can help. This advisor or consultant can also help you determine how much to charge for the new ultrasound services your practice will offer.
Maximize the Return on Your Investment
Many veterinary patients can benefit from ultrasound studies. But in order to schedule a lot of studies and earn a profit with the new equipment, a vet must be able to perform an ultrasound study with confidence and in a timely manner.
Ultrasound is not covered in most veterinary schools to nearly the same extent as x-rays. And the use of the probe and interpretation of what’s on the screen are not always intuitive. Therefore, many vets require in-depth training and a lot of practice before becoming comfortable performing ultrasound studies.
For all these reasons, if a practice is investing in a new ultrasound machine, it also makes sense to invest in training. That way, the machine can be used with confidence and efficiency.
A vet doesn’t have to have these skills mastered at the time a machine is purchased. But at least one vet at the practice should have a commitment to learning how to use the ultrasound.

The right portable ultrasound purchase will vary from practice to practice, depending on the practice type, budget, and other factors.
But by carefully considering all these things ahead of time, it will be easier to determine which machine suits your practice’s needs and to ensure your equipment investment pays off.
Written by: Dr. Tammy Powell, DVM

Digital Radiography vs. Film X-Ray: A Veterinary Comparison

What is Veterinary Digital Radiography, and How Does It Compare to Film X-Ray Systems?
Nowadays, veterinarians have a lot of options when it comes to their x-ray system—so how does a veterinary practice choose between film and the various digital x-ray modalities that are available?
It helps to compare price, efficiency, and other factors that will affect the daily use and value of your investment. Here are some considerations…
What Is Digital Radiography Versus Film?
First, it’s helpful to define the different x-ray options that are used in veterinary medicine.
The first choice is to decide between film or digital radiography. Film is exactly what it sounds like: X-ray images are captured on physical films. To produce an image, those films are then developed using processing chemicals in a dark room.
Digital radiography, on the other hand, produces a digital image. However, there is more than one method available for obtaining this image, including CCD, CR, and DR.
CCD (charge-coupled devices) have been compared to digital cameras in the way that they work. However, they have some disadvantages, including edge distortion when collimation is wider. While this older technology is still used in some capacities, most vets would be choosing between CR or DR.
CR (computed radiography) uses phosphor plates to capture an image. That image is obtained when a plate is put through a plate reader.
DR (direct radiography) doesn’t have any type of “middleman” (film developer or plate reader). Instead, digital images are captured on a special type of x-ray sensor that directly or indirectly converts x-rays into an electrical signal. The image is produced almost instantaneously.
Costs of Digital Radiography Versus Film
As with many other technological advances, there tends to be an increase in price for newer generations of technology—at least initially, because newer technology eventually does come down in price and becomes more accessible. Compare it to smartphones and digital cameras—two type of technology that have become much more widely accessible in recent years.
X-ray technology has followed a similar pattern. Digital technology does generally cost more to purchase than a film system. And DR generally costs more than CR.
That being said, prices have come down significantly in the last decade or so, making digital technology much more affordable to many veterinary practices.
While it’s great that newer technology is becoming more affordable, that doesn’t mean the latest tech is right for every veterinary practice. For practices with a slower pace that don’t perform a lot of x-ray studies, a film or CR system may meet their needs just fine and be a smarter investment than DR.
It’s also important to consider long-term maintenance and repair costs, in addition to the purchase price of the x-ray system.
For example, is there a warranty, and what does it cover?
If a component of the machine or plate/sensor breaks down, are replacement parts available (that’s not always the case for older equipment)?
Also, for film, the cost of supplies (film purchase and disposal, processing chemicals, and developer maintenance) must also be factored in.
Efficiency of Digital Radiography Versus Film
There’s not doubt that, used to its maximum potential, DR technology is fast and efficient. That’s because, rather than waiting on a developer or plate reader, images are created in just a few seconds.
This efficiency can make x-ray studies go much faster, with fewer retakes. Also, for digital systems in general, it’s usually faster to set up the study, since there are automatic technique settings for different patient sizes and areas of the body being studies.
All of this means a faster, simpler workflow, less time for the patient to be on the x-ray table, and the potential to schedule more x-ray studies. Many practices have reported increasing their x-ray revenue after upgrading to DR. This can certainly increase the financial return on the equipment investment.
But there is one important consideration when it comes to efficiency. The machine is only efficient if team members feel confident using it. So, it’s ideal to invest in something that’s user friendly and that has tech support available.
It’s smart to invest time to train everybody on the new equipment, since many employees will be used to different systems and need a little help learning all the features and functions of the new equipment.
Quality of Digital Radiography Versus Film
While many vet professionals believe digital radiography is always better quality than film, that’s not necessarily true.
Quality depends on the system itself, as well as on the ability of team members to use the equipment proficiently to obtain high-quality, diagnostic images. Performed with skill, film studies can be perfectly diagnostic and of high quality.
That being said, digital does allow some room for error. A lot of practitioners like it for that reason. The software automates much of the image processing, and the digital image can be manually manipulated if something needs to be seen in more detail.
Which Is Best—Digital Radiography or Film?

Digital x-ray technology, particularly DR, certainly offers many advantages. And it may make sense to invest in the latest technology that a veterinary business can reasonably afford, so that replacement parts and tech support are available for as many years as possible.
However, each veterinary practice must evaluate their unique needs and see what works best for them.
Written by: Dr. Tammy Powell, DVM

How Much Do Today’s Veterinary Digital X-ray Systems Cost?

What Price Range Is to be Expected?
The average price for a DR digital x-ray system in the veterinarian industry ranges from $21,000 to $35,000.
Examples:
DR Plate and system - $21,995
A complete DR system with table, generator, and DR digital x-ray is $29,995
A wireless system for equine or mobile vets - $28,995.
Equipment purchases are one of the most important investments a veterinary practice will make, so it’s important to ensure that the price makes sense for the business.
This doesn’t necessarily mean that the cheapest equipment is always the best deal. Instead, it’s important to consider a number of factors in terms of how you can maximize your investment and meet all the goals you had in mind for your new equipment.
The Price of Veterinary X-Ray Equipment Has Decreased Dramatically
Fortunately, this is much more affordable than machines were as recently as 10 years ago. That being said, it’s still a significant financial investment.
You may find equipment outside of this range, depending on which deals the manufacturer/seller is able to offer or which features the equipment offers. But this is a pretty common range to budget for.
Once you see the initial offer price, also be sure to ask about any deals. Don’t be afraid to shop around and tell sellers what other offers you have, in order to receive their best price.
And if you are buying from a company from which you plan to use other services (for example, using lab work services and buying an x-ray machine from the same company), ask about discounts or bundled deals.
What Additional Costs Can Be Expected?
In addition to the actual purchase price, it’s important to factor in the ongoing costs of maintaining your equipment in working order.
After all, if the new digital x-ray system can’t be used, it won’t bring in any income and it would go from a smart investment to just an expense!
Some long-term or ongoing costs to consider, for both new and used equipment alike, include…
Warranties, including when any initial warranties will expire, whether they can be renewed, and how much it will cost to renew.
Ongoing maintenance and repairs. Ask about routine recommended maintenance, as well as costs of the most common types of repairs. If any of this isn’t fully covered by a warranty or service plan, set aside savings each month into a sinking fund earmarked for future repairs.
Software upgrades. Timely upgrades are crucial to keeping your image processing and storage in working order, efficient, and secure.
Ask about technical support, if there is a free 24/7 support line you can call for smaller issues.
Speaking of repairs, also check how it works if you need repairs in the future—how long your equipment would be down, and whether replacement equipment (such as another sensor or plate) is available in the meantime.
Which Financing Option Is Best for Your Practice?
Once you’ve calculated all the costs of purchasing and owning your new equipment, it’s also important to consider how you will finance the purchase. This can make or break your monthly cash flow.
If your practice is well-established and has a business savings account to fully cover the cost of the purchase, that may be a good option. But then again, a monthly payment plan may be better, since you can pay as you go (and perhaps earn a profit on your investment right away) rather than depleting the liquid funds you have on hand.
Of course, when financing on a monthly payment plan, interest rates must be factored in. Interest will increase your total cost of purchase—perhaps very significantly if it’s a high-interest rate.
But a reasonable interest rate may be worth it.
The equipment manufacturer or seller may offer monthly payment plans, so be sure to ask about this. Also, many banks offer business loans for equipment purchases, an option known as a “capital lease.”
There are even some options to rent equipment rather than purchasing if this is a good fit for your practice.
Also, remember to factor in tax savings—most commonly through Section 179 of the IRS Tax Code—which can make a huge difference on overall practice revenue.
All of this can get complicated, so it’s a good idea to seek advice from a financial professional for large purchases.
How Can a Veterinary Practice Maximize the Return on Their Equipment Investment?
Here’s the fun part—getting to use your shiny new equipment!
This is why you bought the x-ray equipment in the first place. In addition to financial gains for your practice, you wanted to provide excellent care to your patients.
Maximizing the use of your equipment starts BEFORE the purchase.
Make sure you’re investing in something that is user-friendly and efficient, as well as something that produces high-quality images on all the different sizes of patients your practice sees.
That way, you can ensure it actually gets used (and produces diagnostic quality images) to its maximum potential rather than being cumbersome to use.
Also, plan ahead for how much you will charge for x-ray studies or other services. And talk to the team about communicating the value of these services to clients.
This improves client compliance to maximize patient care and ROI on your new x-ray machine.
With all these factors in mind, remember that a big discount on the purchase price isn’t always the best deal. Of course, you should always do your research and get the best deal you can.

But also remember the other factors that will affect the use (and profitability) of your equipment in the long term.
Written by: Dr. Tammy Powell, DVM

When and How to Perform Equine Skull X-Ray
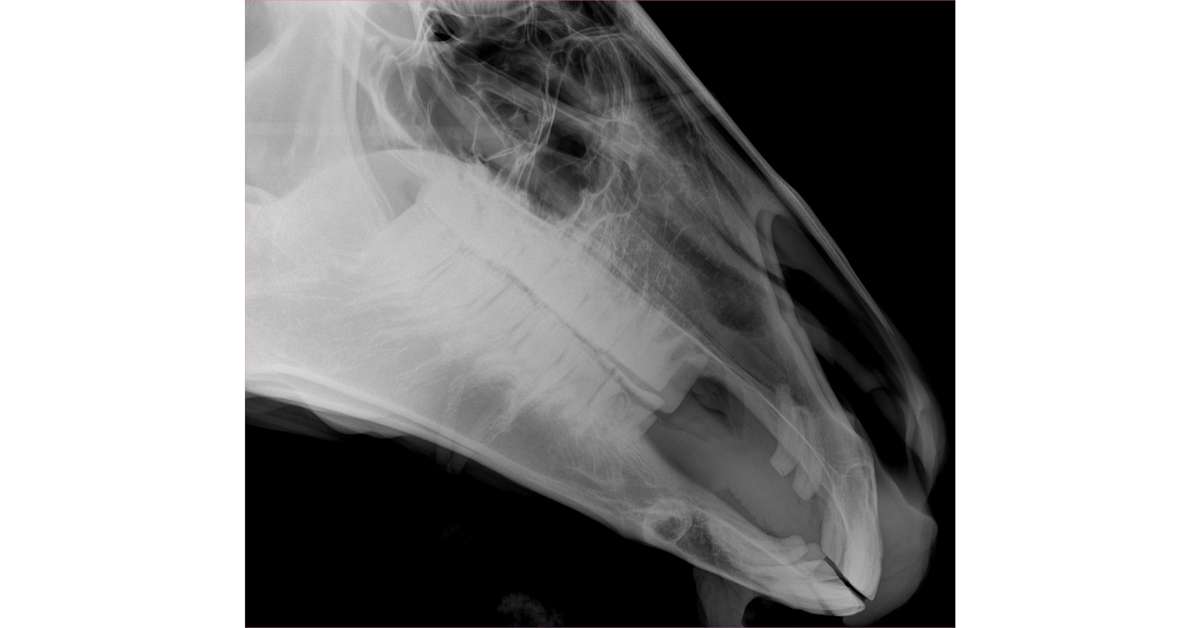
Radiographs of the head are useful when evaluating for injuries or disease processes of the skull, jaws, teeth, nasal cavity, and paranasal sinuses in horses.
Examples include, but are not limited to, dental or periodontal disease of the cheek teeth, head trauma, sinusitis, and neoplasia.
Common clinical signs for which skull radiographs may be indicated include nasal discharge or epistaxis (especially unilateral), swellings of the face, odor or draining tracts, bony changes, or difficulty eating.
When skull radiographs are indicated, here are some common guidelines to follow for procedures, views, and interpretation.
Performing Radiographs of the Head in a Horse
A systemic approach to an x-ray study can help improve efficiency and ensure nothing is missed. This should include…
All necessary equipment, including a generator with enough power for skull radiographs, a large sensor (while intraoral plates are available for dental evaluation, here we’ll discuss extraoral views), and any props that may be needed to aid with views or positioning.
Knowing which views are needed (more on this below).
Having a technique chart or reference for settings. While the numbers can vary depending on the machine/equipment, commonly kVp is set between 70-100 and mA between 3-20.
Sedation is generally recommended unless there is a medical contraindication.
If possible, remove the horse’s halter or anything else on the head that could create an artifact or cover-up details in the x-ray image.
In some cases, it may be worthwhile for radiographs to be accompanied by (or followed up with) additional diagnostic tests, such as ultrasound or endoscopy.
Which Radiographic Views of the Equine Skull Should be Taken?
These are the most common views that are typically used for an equine skull study…
Lateral: This is a good screening shot to look for abnormalities (such as fluid or opacity) in the nasal cavity and paranasal sinuses. Bony and dental structures will be superimposed, but obvious abnormalities (such as tooth root abnormalities) might also be noted here. The cassette is centered over the 4th upper cheek tooth or rostral aspect of the facial crest, and a horizontal beam is used.
Ventrodorsal (or Dorsoventral) Oblique: Oblique views are valuable for reducing superimposition. A VD or DV technique can be used.
A VD oblique aids in evaluating mandibular structures, as well as in viewing the maxillary sinuses with less superimposition. The cassette is centered at about the same location as the lateral shot, but more dorsally to create obliquity. The x-ray tube is placed ventrolateral to the mandible so that the beam is at approximately a 45-degree angle on the opposite side of the face.
A DV oblique is helpful for evaluating sinus structures and maxillary cheek teeth. This view is basically the reverse of the VD, with the cassette positioned below the jaw and the x-ray beam pointing down at approximately a 45-to-60-degree angle on the opposite side of the face.
Dorsoventral: This view provides a lot of information about the sinuses, nasal passages, and nasal septum, especially for comparing right to left. Teeth and bony structures may also be evaluated, although overlap of these structures is to be expected. For this shot, position the cassette ventral to the head, centered under the mandibles. Then position the beam perpendicular to the cassette.
Additional views may be obtained as needed, especially more focal shots and additional angles to isolate an area in question.
For more detailed guidance on views for evaluating specific areas of the skull, this article is highly recommended: 101-eve-v25-i12-fm-toc.indd (aaep.org)
Interpreting Radiographs of the Equine Skull
Fortunately, the contrast between air (the nasal passages and paranasal sinuses) and bone creates good radiographic contrast. On the other hand, the complex structures of the skull, combined with superimposition of those structures, can make radiographic interpretation challenging.
For the best results, always use markers to identify which side of the head is being evaluated in the shot and differentiate between right and left, especially in oblique views (for example, RDLV—right dorsal to left ventral oblique).
Also, obtaining bilateral views is helpful for lateral and oblique shots, since it allows for comparison between sides.
Always evaluate the entire radiograph, and be on the lookout for asymmetry.
As with any x-ray study, clinical experience and good radiography reference images can help a vet identify what is normal versus abnormal.
Consultation with a radiologist can be helpful as well.

By having a system for skull radiographs, knowing which views to take, and becoming familiar with the interpretation of these x-ray studies, a vet can determine the next step for a horse showing symptoms of a problem with the head or teeth.
Written by: Dr. Tammy Powell, DVM