

Why We Get Underexposed X-rays and How to Identify One
Why are Clear Veterinary Diagnostic Images So Important?
Proper diagnostic imagery is the bedrock of developing lifesaving treatment protocols for our patients.
Beyond diagnosis, x-rays enable Veterinary professionals to monitor the effectiveness of ongoing treatment, making adjustments based on the patient’s response (which can affect the patient’s long-term prognosis).
A poor-quality image can snowball into a delayed diagnosis, postpone treatment plans, and defer patient care.
For this reason, it’s important to identify the characteristics of a diagnostically valuable x-ray.
Various factors contribute to an image’s ability to be considered diagnostically worthy. To get started, look at one of the most common causes of retakes: underexposed X-rays.
What Makes Up a Quality Veterinary Diagnostic Image?
Before we dive into what characteristics to look for in an underexposed image, let’s first talk about qualities that make up an image with a balanced exposure rate.
An image with adequate quality will display:
Sharpness (the image is in focus, clear, and distinct)
Visual characteristics of density and contrast (adequate representation of tissue density)
Clear visualization of internal structures
No distortion or artifacts (no patient motion, technical errors, unnecessary objects, etc.)
Proper knowledge and use of a veterinary X-ray technique chart enables consistent exposure rates and image quality.
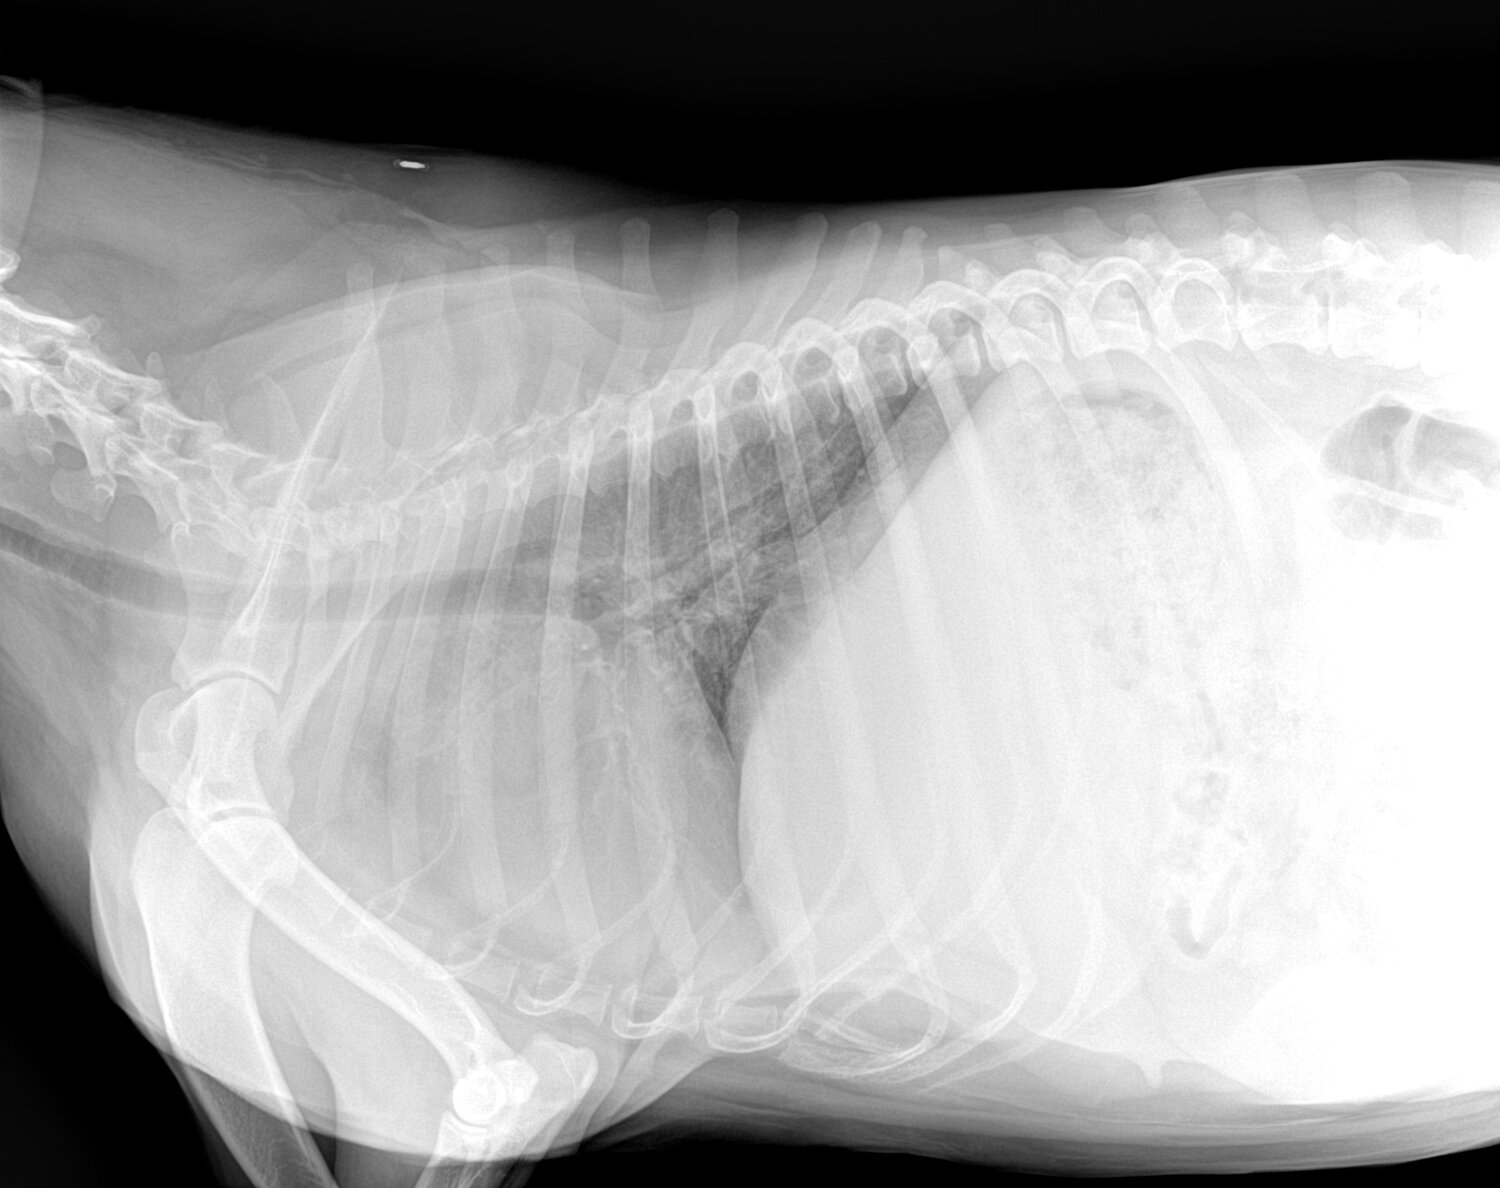
What is an Underexposed Veterinary X-Ray?
Underexposed X-rays result from X-ray settings being set too low.
When x-ray settings are too low, insufficient energy builds up in the primary beam. With too little energy meeting the X-ray detector (the tool that captures the image, also known as a cassette), the image appears radiopaque (meaning white to light gray).
A few other characteristics you’ll notice in underexposed X-rays are:
Lack of density and contrast (making the image appear “cloudy)
Poor visibility of internal structures
Blur or distortion
Scatter Radiation (reduces image contrast and clarity as a result of the x-ray changing direction –“scattering” - when it meets the patient)
The result of these characteristics will likely require a retake (increasing radiation exposure to both the patient and those capturing the image).
It’s no secret that X-ray retakes are less than ideal. Not only do they increase exposure risks, but they also decrease productivity and hospital efficiency and delay diagnostic review and treatment planning.
When an X-ray image lacks proper exposure, it is considered underexposed and less diagnostically valuable (or not at all).
How to Avoid an Underexposed Veterinary X-Ray
Here are a few easy-to-follow tips to avoid underexposed X-rays with your next patient:
1. Correctly measure the anatomical part of the patient you’ll be radiographing using a set of calipers (for best results, measure in the position they’ll be in for the image. For example, lateral recumbency)
2. Using the measurement, refer to your veterinary x-ray technique chart for correct kVp and mAs settings
3. Ensure the x-ray tube head is in the correct position (raised if the cassette is on the tabletop or lowered if it’s in the bucky tray)
4. Use the collimator on the veterinary X-ray generator to reduce unnecessary scatter radiation
Use image-enhancing algorithms and software tools offered by computed radiography to reduce artifacts, distortion, and scatter radiation for best results.
Risks of Poor Quality Veterinary Diagnostic Images
Just as a good diagnostic image can result in a successful treatment plan, a poor-quality X-ray can create barriers and delays in a confident diagnosis.
Inadequate exposure during an X-ray can lead to:
Misdiagnosis
Inconclusive diagnosis
Failure to resolve discrepancies in interpretation
Something as simple as an underexposed image can lead to potentially life-threatening consequences and compromised patient care.
The Quick Take Away
Think of X-ray exposure like a toaster—if the toaster doesn’t produce enough energy, when it’s finished, you’re left with nothing but a warm piece of white bread.
Just as we’d need to increase the time on our toaster, the machine's X-ray settings will need to be increased for a balanced diagnostic image.
Enhancing Safety in Your Veterinary Radiology Room
Dosimeter badges and a proper X-ray or CT room shield plan are the best ways to protect your veterinary team from radiation exposure.
Want to learn more? For more information on radiation safety at your practice, check out the links below:
