


What Does a Portable/Equine Veterinary X-Ray Machine Cost?

Portable x-ray equipment can be valuable to equine practitioners, mobile veterinarians, veterinary practices with limited space for equipment, or anyone else who could benefit from equipment that is compact and easy to transport.
Radiology equipment is an important investment. Here are some tips to make sure you get the best value and make a return on your portable X-ray system purchase.
How Much Do Portable Veterinary X-Ray Systems Cost?
Here, we’ll focus on digital x-ray equipment. An average price range is about $25,000-60,000. Of course, this depends on whether you are buying new or used, as well as on what’s included in the system.
For example, you’ll need a generator and a plate or sensor. Not all systems include a generator in the price, so be sure to check exactly what’s included. And if using CR rather than DR technology, a plate reader is needed.
Additionally, many systems include software and a laptop for capturing and storing images. Some software has extra perks that could come in handy, such as the ability to make measurements right on the images.
When deciding which x-ray equipment to purchase, consider how it will be used at your practice.
For example, if you have a mobile small animal practice, how much room do you have for equipment storage?
If you’re in a barn with limited electrical outlet access, would it be better to purchase a cordless unit? What about WiFi or Bluetooth access for wireless sensors or a protective cover for the equipment?
Consider getting opinions from other vets that use a portable system, to see what they recommend.
Could These Factors Help with the Purchase Price?
Some things to consider when it comes to finding the best deal include…
Ask around for different quotes once you know which system you are interested in. Ask vendors for any special deals they may offer, and see if they can beat an offer you already have.
Consider different financing options. Does it make sense to pay upfront or to do a monthly payment plan at a reasonable interest rate? And will you finance through the equipment seller, a bank, or another option?
What are the tax implications (and potential savings) on your equipment purchase? In some cases, tax savings could make up for the expense of buying new equipment.
Look at Long-term Expenses in Addition to the Purchase Price
Of course, the purchase price is important. But long-term costs are also crucial to consider since expensive maintenance could end up canceling out the initial savings on a cheaper but lower-quality equipment purchase.
So, look at the warranty for starters. When does it expire? What does it cover? Can the warranty be renewed, and how much will it cost to renew? Is there an expected charge for routine maintenance? And for older technology, are replacement parts still being manufactured?
And speaking of maintenance, how durable is the equipment? This could make a huge difference, depending on when and where you plan to use the equipment.
For example, if you do farm calls, can the generator and sensor stand up to the elements (dust, humidity, etc.)? Can it function well after being transported in the car during hot or cold weather? If equipment gets damaged easily, that could really add to long-term expenses, and that must be considered in your purchasing decision.
What about software? How often does it need to be upgraded, and are upgrades included in your costs?
Crunch the Numbers
All of the above factors will be part of your financial considerations. Additionally, it helps to plan ahead for how much income the new equipment is expected to bring in—to ensure the purchase makes financial sense for your practice.
For example, how much would the practice charge for various types of x-ray studies?
How many x-ray studies are expected per week or per month—and does this cover the monthly payment on the equipment while also bringing in a profit?
Before investing in new equipment for your practice, it’s helpful to consult a financial advisor or veterinary business consultant.
Make Sure Your Equipment Gets Used Safely and Efficiently
Radiation safety is always important. For mobile units, there may not be a dedicated x-ray suite available, so it’s necessary to ensure that everyone is present (the vet team operating the equipment, as well as any pet owners who are present during the visit) and follow all safety recommendations.
Additionally, training the vet team on the new equipment will ensure they can use the equipment quickly and effectively. This could potentially mean saving time and scheduling more procedures—which could help with the ROI on your equipment purchase.
The right portable veterinary x-ray system purchase will vary from practice to practice, depending on the circumstances under which the machine will be used (in a clinic or out in the field), how busy the practice is, finances, and other factors.

But by carefully considering all these things ahead of time, it will be easier to determine which system suits your practice’s needs and to find the best possible deal to ensure your investment pays off.
Written by: Dr. Tammy Powell, DVM

Pros and Cons of Film, CR, and DR Veterinary Systems

Different x-ray machines and modalities come at different price points. Technology accounts for much of the cost variations.
So, which technology is worth the cost, and which isn’t? If your practice is thinking about purchasing a veterinary x-ray unit, here are some considerations…
Pros of Film Veterinary X-ray Systems
Film radiographs have been a tried-and-true method for a long time. It’s what many veterinarians learned to interpret images on—and some practitioners find that by comparison, digital images are easy to “overinterpret” or find false positives for certain lesions.
Additionally, film x-ray systems and accessories often come with a cheaper purchase price. Like any technology, the price of older generations or models goes down as newer tech is developed.
Cons of Film Veterinary X-ray Systems
This tends to be the most time-consuming method of taking radiographs. Each film must be individually run through a developer. This developing process takes time in and of itself—and then that time can be compounded because a vet team must wait until a film is developed to know whether retakes are needed.
Plus, there is the added cost and maintenance of the developer, chemicals, and even the x-ray films that must be continuously purchased and eventually disposed of properly. There must be a separate dark room for developing images. And more moving parts mean more opportunities for something to break down.
A practice must also have enough room to store all their physical radiographs. There’s no backup copy if anything happens to the original, and sharing a film is much less convenient than sharing a digital file.
Pros of Veterinary CR Systems
CR (computed radiography) is a form of digital radiography, meaning it produces a digital image rather than a physical one. This makes storage and sharing of images simpler in many ways compared to film.
Images are produced after running the phosphor plate (which captures the image) through a plate reader. While this is typically faster than developing film, it still takes time. Some practices invest in more than one set of plates and readers to help improve efficiency.
Cons of Veterinary CR Systems
Although CR is typically faster than film, there is still time required to run the plate(s) through a plate reader. And for vets who are used to films, there can be a learning curve when adopting digital technology and learning to read digital images that show a high level of detail.
In terms of cost, this is often a middle option between older and newer technology (which could mean it’s more or less expensive, depending on what you’re comparing it to).
Pros of Veterinary DR Systems
DR (direct radiography) is the fastest method of taking a radiograph since there’s no developer or plate reader involved. Instead, the image is captured on a sensor and then directly produced on a screen just seconds after the shot is taken.
This saves time not only by eliminating the developing/reading step entirely but also by letting the team know right away if any retakes are needed. The newest technology is also more likely to have robust options for presets, to help the team set up a study with the right settings and exposure more quickly.
Digital veterinary software might allow the vet to zoom in or make measurements on the screen when interpreting images.
DR technology also tends to have the smallest footprint, since there’s no need for a separate developer (with its own dedicated dark room) or plate reader—just the generator, table, sensor, and hardware/software for the images. So, this can be a good option for smaller clinics with limited space.
Cons of Veterinary DR Systems
As with many types of veterinary equipment, newer technology tends to come with a higher price tag. However, just like other types of technology like digital cameras or personal computers, the purchase price starts to trend down as it becomes more widely available over the years. Digital x-rays are no exception, and prices have come down a lot since the technology first entered the market.
So, veterinarians might be able to find models within their practice’s budget, including used veterinary digital x-ray machines for sale. It’s also important to consider that a more efficient machine can help increase the number of studies per day or per week, which can help offset the purchase cost.
Which Type of Veterinary X-Ray Unit Is Right for Your Practice?
With all the pros and cons of each in mind, it really comes down to preference. And in addition to film, CR, or DR technology, also consider factors such as…
Expected x-ray usage or goals for income generated from the new machine.
Quality of images on all the different sizes of patients you see.
Financing options.
Warranty and service plans.
Availability of replacement parts over the next several years.
Software costs, updates, reliability, security, and compatibility with practice management software.
Veterinary DR systems certainly offer many advantages. And investing in the newest technology may help in terms of warranties and availability of replacement parts.

But every modality has its own pros and cons. By considering these, a veterinary practice will have a better understanding of what they’re getting for their money, which will help with choosing the right machine for their individual practice.
Written by: Dr. Tammy Powell, DVM

Choosing the Best Veterinary Digital X-Ray System

Veterinary Digital X-Ray System Features to Look For (That Have Nothing to Do with the X-Rays…)
When choosing a digital x-ray machine for veterinary use, everyone can probably agree that diagnostic, good-quality images are of the utmost importance. That’s the whole point of using radiographs in the first place—to get accurate information about what’s going on with a patient.
However, assuming a machine produces great x-ray images on the sizes of patients you see, there are other factors that can affect practice flow, efficiency, and return on investment.
If you are choosing between two or more otherwise excellent machines, here are some additional factors to consider…
Generator and Table Size
Newer technology, including high-frequency generators, allow some x-ray units to be made smaller and more compact than previous models.
Many practices have limited space. So, if the table and system are still big enough to accommodate your largest patients, it might be advantageous to purchase an x-ray system with a smaller footprint.
Setup and Installation
Outside of minimum radiation safety standards for the x-ray suite or location, there are options when it comes to installing a new machine.
One consideration is the electric supply. Some newer systems provide the convenience of simply plugging into a standard outlet. Others might have specific electrical requirements, requiring consultation with an electrician or even rewiring the x-ray suite.
There’s also the matter of setting up the machine and ensuring it’s operating smoothly. Check if your purchase includes installation costs. Inquire about any shipping or transportation timelines and concerns.
User Friendliness
A user-friendly machine can improve efficiency. This means smoother practice flow, fewer frustrations, and headaches, and potentially a higher number of x-ray studies performed per day or per week (and thus a better return on investment).
User-friendliness can mean many different things. But basically, this is anything that makes a radiographic study run more easily and intuitively.
Often, it includes an easy way to input patient and client information. It could also mean intuitive interfaces for setting up a study based on species, views to be performed, and the patient’s measurements.
Presets are popular and can make setting up and performing a study even easier. For example, some systems will automatically adjust settings for the study at hand (for example, cat thorax or large dog abdomen).
Software Compatibility and Reliability
Digital veterinary software is important, since it’s how x-ray images are viewed, stored, and shared. It’s crucial for day-to-day operation (i.e., interpreting radiographs right after they are taken) and can be considered part of the patient’s medical record. Software problems create huge headaches and inconveniences.
The basic requirements are that software operates smoothly, efficiently, and securely. Any software can have glitches from time to time. But there should be confidence that the company prioritizes fixing any issues. Technical support should be available. Protection against hackers or other privacy invasions should be of the utmost importance, too.
Additionally, any software purchased along with your new x-ray system should be compatible with your practice management software. This will improve efficiency and eliminate many frustrations. Also consider how images can be formatted, i.e., DICOM, jpeg, etc.
Support
Veterinary x-ray equipment represents a significant financial investment. Protection of this investment can take many forms, such as warranties, service plans, and 24/7 technical support.
Ask about these things prior to purchase. In addition to service and repairs being available, remember to ask about the timeline for repairs and whether loaner equipment is available in the meantime to keep you up and running.
Finally, consider whether or not replacement parts are available—and likely to continue being available for the foreseeable future. An x-ray system investment is typically a long-term one, so it’s very frustrating (and expensive) to have no options for repair if a component breaks down.
Extra Bells and Whistles
Here are a few examples of “extras” a veterinary practice might look for on their new x-ray system…
Tools like measurements (possibly including preset, guided measurements like a vertebral heart score tool) within the software.
Horizontal beam capabilities, especially for practices that see a lot of exotic species.
Combination machines, such as one that also includes a modality like a fluoroscopy.
Everything you need for the new veterinary x-ray system is included in the purchase, such as one or more sensors, hardware, software, a workstation laptop, etc.
Access to training for the veterinary team, to help with learning the new system and improving efficiency.
Always start by making sure a veterinary DR system meets its primary purpose: taking good, diagnostic-quality images.

After that, the purchase isn’t always an “apples-to-apples” comparison. Shop around and see if there’s a good system available with features that benefit your practice and make the x-ray process smoother and more efficient.
Written by: Dr. Tammy Powell, DVM

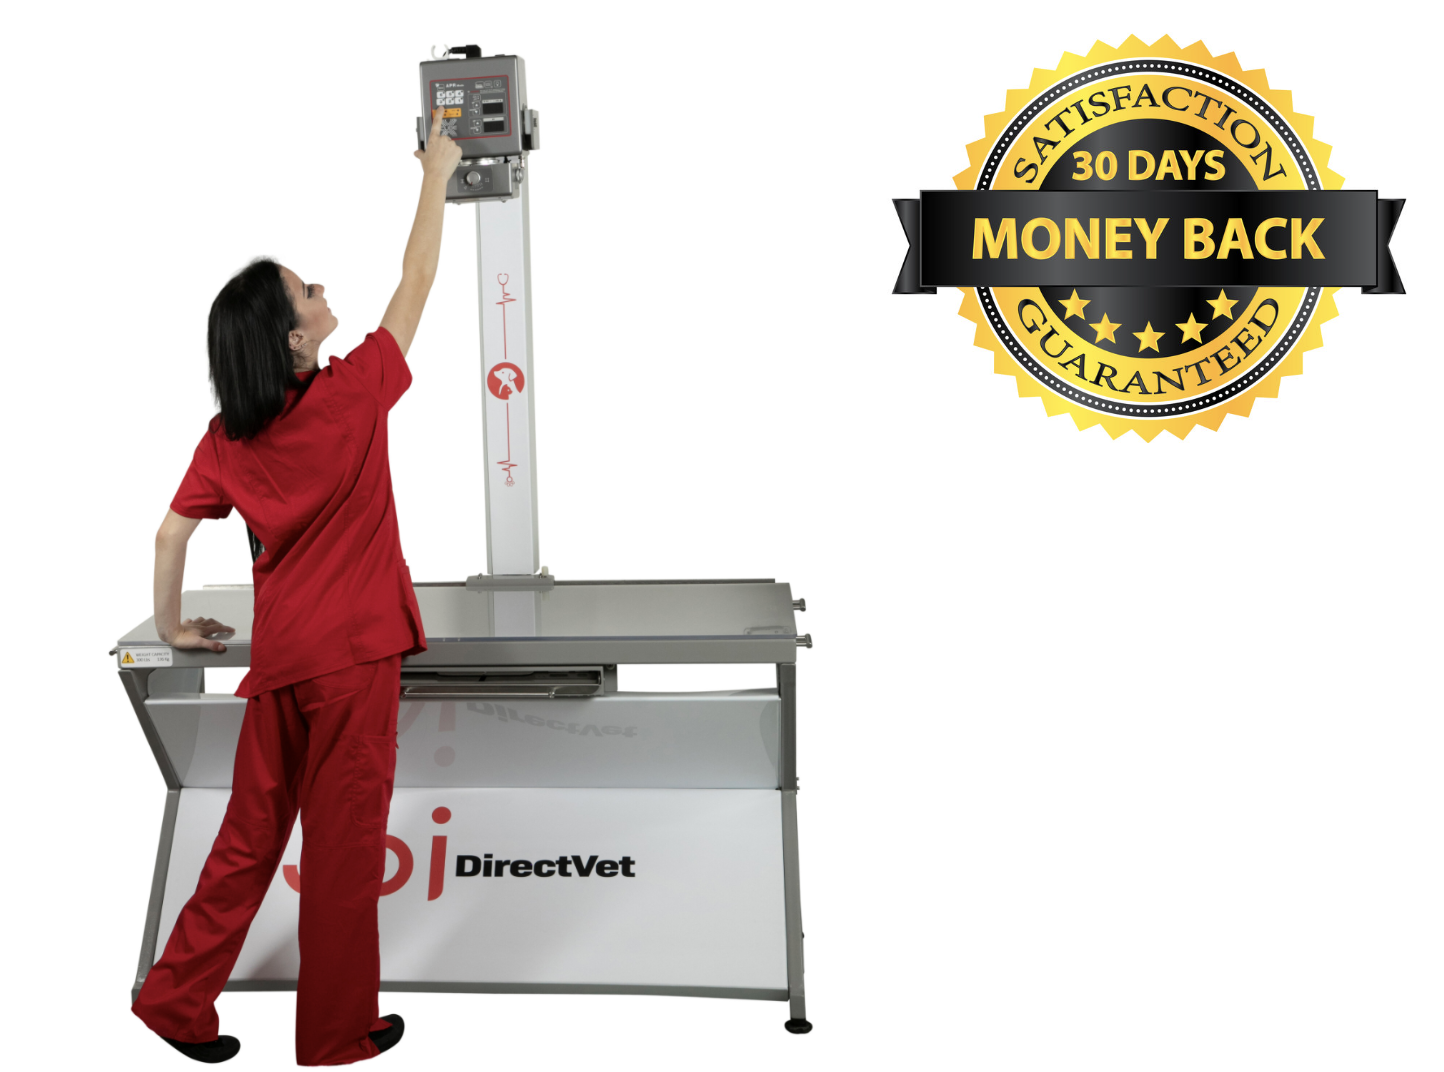
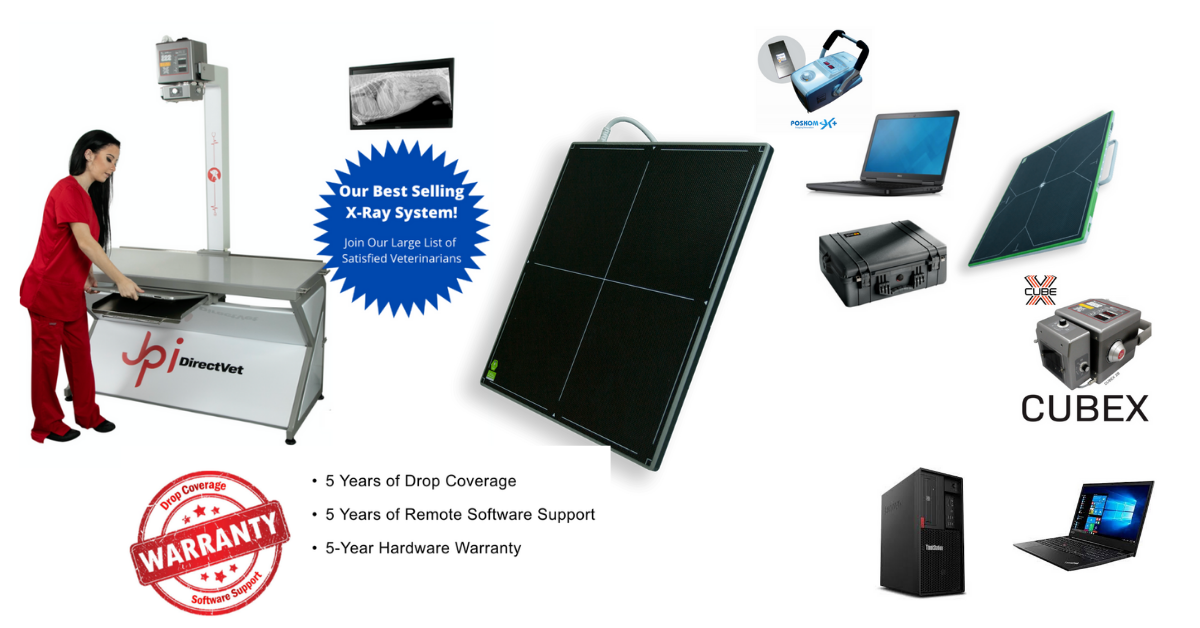
Our Best Selling Veterinary X-Ray Machine - JPI DirectVet

JPI DirectVet 110V DR: The All-in-One X-Ray Solution for Veterinary Practices
An x-ray machine helps propel your veterinary practice to another level.
With it, you can offer the most accurate screening to your patients, treat many animals, and grow your business as you stand out from your competitors.
However, despite its many benefits, buying an x-ray device is easier said than done. After all, in today’s time, there are many options in the market, and not all of them are built the same in terms of quality, durability, and functionality.
To help you choose the best device for your institution, this article looks at some of the best veterinary x-ray machines available today.
What are the Types of Veterinary X-Ray Machines?
Before discussing the x-ray machines, you’ll need to understand the different types of x-ray systems.
Conventional X-Ray Machines
Conventional X-Ray Machines use a piece of film or a radiation detector for imaging. They produce physical images in a ‘negative’ format that are difficult to view and aren’t very clear by today’s standards.
Conventional X-rays used to be the industry standard for a decade but are now slowly getting obsolete due to their inconvenience and security concerns.
Here are the limitations of conventional x-ray machines:
The images need to be developed in a dark room.
You’ll need a separate film for each x-ray.
Traditional X-ray machines also take a lot of time to produce the image. In other words, your patients need to be exposed to the beams for longer, which could cause serious health issues.
Digital vs. Conventional X-Rays: Why the JPI DirectVet System Stands Out
Digital x-ray machines are the newest types of x-ray devices that produce images in digital form. They are easy to operate, render highly accurate and clear images, and don’t require darkrooms.
There are two types of digital x-ray machines:
Computed Radiography
In Computed Radiography (CR), images are first created in a photo-stimulated luminescence screen, which is then converted into digital format with the help of a reader.
Direct Radiography
In a direct radiography system, images are created directly on the computer. They are the most hassle-free devices available but are generally expensive.
Why the JPI DirectVet is the Best-Selling Digital X-Ray System for Vets
The DirectVet Is A Complete Package System. Generator, table, plates, software, computer, and a 5-year warranty.
https://newvetequipment.com/dr-with-table-generator
Guidelines for Choosing Good Digital X-Ray Machines
Here are the things we’ve considered while listing the machines below:
Ease of use when in the office or while traveling
Quality of images
High-frequency availability; these machines create high-frequency x-rays with very strong penetrative power that don't require exposure to the patient for a long time.
Reliability and the customer support of the manufacturer
Practicality
Warranty
Price
JPI DirectVet 110V DR System
5-Year Warranty
The JPI DirectVet 110V DR System is a high-frequency digital x-ray system that can offer voltage up to 120 kV. It's a complete system that doesn't require add-ons, so you can hit the ground running as soon as you buy it.
The JPI DirectVet 110V DR is a versatile machine that can screen animals of any size, with its heavy-duty table holding up to 300 lbs. It also comes integrated with full ExamVue Duo Software, with features like presets and veterinary tool-sets for different animals, dicon and jpeg image formats, email capability, and a user-friendly interface.

The 17” x 17″ ExamVue DR (with tethered plates)
5-Year Warranty
DR Digital X-Ray Includes Plates, ExamVue Software / Computer (laptop or desktop), And ExamVue PACS
This system is for you if you already have a table and generator. Delivery and installation are included.

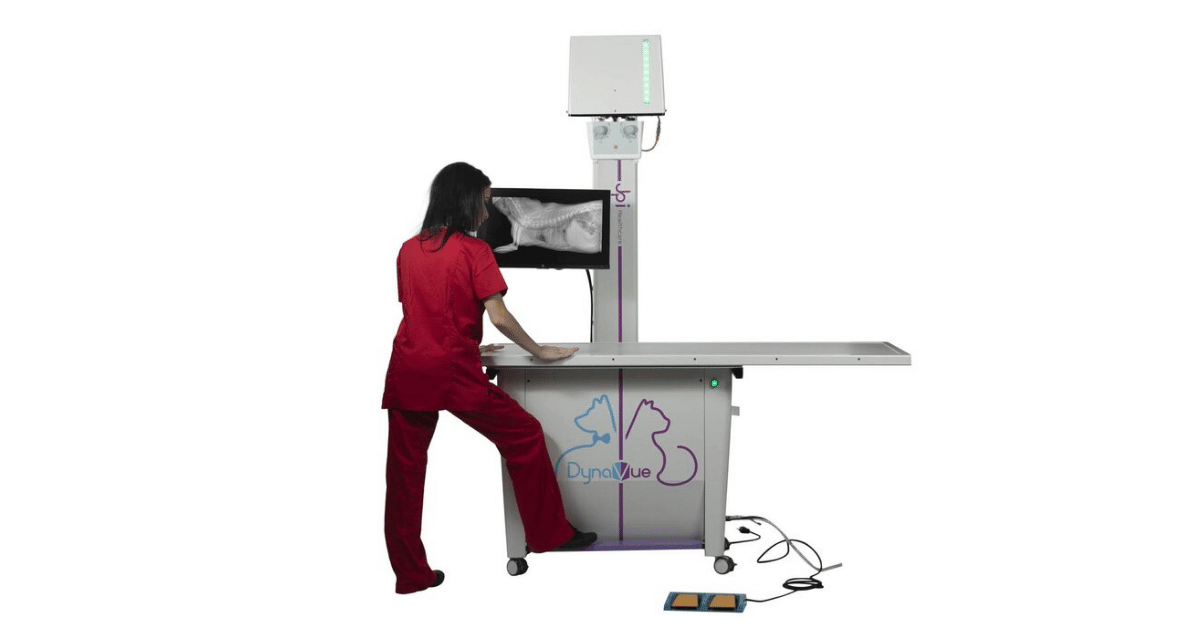
DynaVue+ FLUOROSCOPY AND DIGITAL X-RAY
5-Year Warranty
Digital X-Ray or C-arm fluoroscopy? Why not both? DynaVue+ is a powerful device created for minimally invasive diagnostic and therapeutic procedures and has been designed for clinics that don’t have a lot of space.
The comprehensive live x-ray video mode with 30 fps rendering makes DynaVue+ stand apart from its competitors. What's more, you can even change between a digital x-ray and a live x-ray mid-exam.
The DynaVue+ comes with a 4-way floating tabletop, a computer, and an ExamVue acquisition with many useful features like custom presets, email, multi-view, image export/import, and expansion.


Veterinary X-Ray Positioning - A Helpful Guide

Buying a good veterinary x-ray machine is one thing. However, for taking high-quality images, you’ll also need to know the proper techniques regarding the patient's position and the direction of light from the device.
This article discusses some of the most important principles and protocols of veterinary x-ray positioning for small animals.
X-Ray Positioning for Small Animals
Small animals include house pets like dogs, cats, rabbits, hedgehogs, etc.
Sedation Requirements
Chemical Sedation may be required if the animal is restless or is in pain. Sedation will also help make more accurate images since it relaxes muscles and keeps the animal still.
On the other hand, physical restraint should be enough to calm patients. You’ll need two people; one to hold the head and forelimbs and another on the hind position. Extra personnel may be needed for larger or more anxious animals.
You can also use positioning aids and devices such as V troughs, cotton, tape, foam wedges, and sandbags, along with physical and chemical restraint.
Positioning for Different Organs
Now, let’s look at how you can position your patient while taking x-rays of different body parts.
Exposure Guideline
First, you’ll need to use the correct exposure to ensure patient safety and high-quality images. For this, you need to consider the thickness of the part you’re measuring and the patient’s weight. The distance between the patient and the x-ray beams also matters.
Always measure the thickness from the thickest part of the organ.
Nowadays, with most veterinary professionals using digital systems, you can easily find presets on the software. You may need to play around with the settings to get an accurate image.
Thorax Views
The most commonly used views for the thorax include the right lateral and dorsoventral views. In some cases, you can do a left lateral or ventrodorsal view.
Thorax Lateral View Guidelines
The front legs should be pulled away from the thorax's cranial part and taped if required.
The hind limbs should also be extended, but be careful not to rotate the patient.
The collimated light field should start from the shoulder and end at the top of the last rib.
Finally, make the exposure at peak inspiration (the highest pressure during the respiratory cycle).
Tip: Using a foam wedge under the sternum can help keep the sternum and the thoracic spine in the same plane.
Thorax Ventrodorsal View Guidelines
You need to place the patient in dorsal recumbency.
Align the patient's spine and sternum in the same line using a V-trough.
Tape the thoracic limbs evenly and pull them forward.
Pull and secure the pelvic limbs caudally.
The vertical line of the collimator light should be at the caudal border of the scapula. Similarly, the horizontal line should be directly over the sternum.
And finally, the exposure should also be at the peak inspiratory phase.
Thorax Dorsoventral View Guidelines
The dorsoventral view is generally only used when fluid blocks the heart and lungs or to visualize the lesions in the caudodorsal long lobes.
Depending on the patient's comfort, it should be placed in ventral recumbency without the legs taped.
Pull and abduct the thoracic limbs.
The settings for the exposure and the direction of the beams are similar to the Ventrodorsal view.
Abdominal Views
Right lateral and ventrodorsal views are preferred for a clear view of the abdomen.
Abdominal Lateral View Guidelines
For the abdominal lateral view, the patient's position should be similar to that of the thorax lateral view, i.e., the front and the hind limbs extended.
But in this case, the center should be in the middle of the last rib.
The center can be kept just behind the last rib for cats and other small animals.
Take the images during the expiratory breathing phase when there's less movement on the abdomen.
Abdominal Ventrodorsal View Guidelines
For ventrodorsal view, you can simply follow the positioning instruction for the thorax ventrodorsal.
In this case, the light beam center should start behind the last rib and cover the entire diaphragm.
Again, the images must be taken during the expiratory phase of the breathing.
Skull Views
For the skull, the lateral and the ventral views should be simple since there are few distractions. However, the real challenge lies in taking images when the mouth is open:
Ventrodorsal Maxilla (Open Mouth) Guidelines
Open the mouth of the patient in a way the hard palate is straight and parallel to the table surface.
Pull the mandible away from the head and secure it.
Either secure the endotracheal tube and tongue in the center or pull them to one side of the mandible.
The best angle for the x-ray beams is 20 degrees from perpendicular.
Frontal Sinus View Guidelines
For the frontal sinus view, lay the animal on its back in a way the hard palate is perpendicular to the table surface.
The mandible should be secured, but the nostrils should point straight up.
Note: Anesthesia is required whenever the mouth is open.
Pelvis Views
For the pelvis as well, the standard views are lateral and ventrodorsal.
Pelvis Lateral View Guidelines
Scissor the legs, placing the down leg forward and the back leg back and parallel to the table.
Center the beam on the greater trochanter and collimate the field to the pelvis, femur, and lumbosacral spine.
Pelvis Ventrodorsal View Guidelines
For the ventrodorsal view, you can choose a physical restraint with two people or put the patient in a frog leg position.
Grip the back legs at the Tauras and pull the legs forward with the femur parallel to the table.
Rotate the stiflers to make the patella point up.
The center of the light beam should be on the center of the pelvis and collimated between the top of the pelvis and right below the stifles.
Extremities
For extremities, you can use lateral, posteroanterior, or anteroposterior positions. The most important thing here is to center on the joint you want to study.
Conclusion
X-ray positioning for animals boils down to this; the patient should be comfortable, and you should center the beams in the organ you want to analyze. At the same time, the beam should be collimated appropriately so that the image is accurate in the center and the sides.

Veterinary X-Ray Software - What You'll Need to Learn

Software is generally overlooked, yet one of the most important components of an x-ray system. After all, even the most advanced hardware won’t be able to perform to its full potential without a good application program running it.
This article discusses everything you need to know about veterinary x-ray software, including what it is and the features you’ll need to look for while buying one.
What is a Veterinary X-Ray Software?
A veterinary x-ray software is a computer program that helps you to capture, manage, store, and share x-ray images. A lot of x-ray software are available on the market, and all of them vary in terms of the user interface, features, functionalities, etc.
Most x-ray hardware come with software made by their manufacturer. But you can still change the software, as long as it's compatible with the device.
Why is a Good Veterinary Software Important?
These days, x-ray systems aren’t limited to taking pictures. They also help the practitioner with the entire workflow, for example, storing and sharing the images and patient information. And veterinary software makes all of these possible.
An x-ray software has many features that make the system more convenient and effective. It makes taking and processing the images fast and easy, so you can create more accurate and detailed images in less time.
Features to Look for in a Veterinary X-Ray Software
Here are essential features that need to be present in veterinary x-ray software:
Cloud Storage
With cloud storage, you can store your patients’ information on server computers outside your medical facility. This gives two primary benefits:
The storage space in your computer is saved.
The information becomes more secure since server computers have better security protocols than your in-house computer.
Cloud computing also makes collaboration effortless. With it, you can contact other practitioners, share the x-ray images with them in real-time, and get instant feedback.
Custom Presets
You should look for software with custom presets for different animal categories like dogs, cats, etc. This way, you won’t have to change the kV, mA, and other settings every time a new patient comes in.
On the other hand, you should also be able to create your own presets for regular patients to conduct examinations without remembering the perfect values for everyone.
Image Tuning and Advanced Visualization
One of the many reasons you’d want to move to a digital x-ray system would be to get better in-depth views of the images.
In addition to the standard 2D photos, the software should support 3D imaging and views from different angles. You should also be able to add annotations, graphics, and electronic markers to the desired part of the image.
Furthermore, there should be options to manipulate the brightness, contrast, and other settings of the image to help make your x-ray tests more accurate and easier to analyze. Finally, measuring the distance between two points should be possible.
Image Control Tools
Image control tools give you more flexibility while assessing the images. Some popular image control tools include rotation, horizontal and vertical flip, rectangular or other shaped crops, zoom in/out, etc.
Do remember that the existence of image control tools is not enough. They should also be responsive and precise.
For example, you should be able to crop the image exactly in the place you want. Also, zooming shouldn’t decrease the image quality substantially.
Reports Generation and Storage
After spending so much on x-ray software, it’s unfair for you to invest in another spreadsheet or DBMS to save your patient’s information.
Many good veterinary x-ray software allows users to save their patient’s history in the format of their choice. Moreover, they allow automatic report generation after the images are taken.
As said before, cloud computing can further help to store, share, and access reports.
Other Things to Check
In addition to the above features, here are other things to consider while buying x-ray software:
Simple UI
The user interface, in simple terms, is the design through which you communicate with the software. It’s what you see on the screen when you open an application program.
The UI of the software should be simple and easy to understand. You should be able to figure out where every option is, and accessing important features shouldn’t take you many clicks.
On the other hand, the UI should also be attractive and use readable fonts. The colors on the background shouldn’t be too dull, and the icons shouldn’t look outdated or weird. All in all, the workspace shouldn’t feel strange or boring to you while working.
Integration with Your Computer System
You’ll have to see if the software you want to buy can work with the current operating system on your PC, i.e., Windows, Mac OS, or even Linux.
In addition, don’t forget to check the system requirements for the software and ensure you have enough processor, RAM, or memory to run it.
Customer Support
The software manufacturer should be willing to give its buyers free training to use the software. If that’s not possible, there should at least be an easily comprehendible software manual or tutorials on the web.
Furthermore, the software provider should be willing to address issues immediately. Ask them if 24/7 customer support is available, and ask the company’s existing clients if they deliver what they promise.
Prices
Some software providers are known to show lower prices for the product but charge extra for the features.
Some can even charge for the regular updates meant to improve the software.
Hence, you’ll have to be completely sure about how much you should pay and if the provider has hidden charges.
Key Takeaway
When choosing a veterinary software, the number of features is the most important thing. But again, you’ll need to check if you need to use the features. In addition, there should be multiple modes for viewing and manipulating the images, and the software should be easy to learn.
https://youtube.com/watch?v=Jr1iLSGHHUo&si=EnSIkaIECMiOmarE
See the video demo on you tube.

the Price of a Portable Veterinary Ultrasound Machine?

Ultrasound is a great imaging modality that can add value to a veterinary practice, allowing them to offer new services in-house. But for some practices, a mobile ultrasound may be the best choice.
This includes mobile small animal practitioners, equine and large animal vets, and even some veterinary practices that may want to move their equipment between rooms or cage sides.
If you’re looking to purchase a portable veterinary ultrasound machine, here are some things to consider…
Which Components and Features Do You Need?
Before comparing the purchase price of different manufacturers and vendors, it’s important to make sure you’re comparing apples to apples.
So, make a list of the things you must have with your ultrasound machine, as well as a list of ‘nice-to-haves’. Here are some possibilities…
Transducers. Which type of transducer(s) are included with the machine? Ultrasound probes or transducers come in different shapes and frequencies, which are used for different purposes and different species/sizes of patients. So, it’s important to make sure you’re getting the options you need, based on your practice type, the patients you see, and the services you plan to offer.
Functions and features. Does the machine offer all the operating functions that you need for your studies? And what about features like color Doppler, or the ability to make measurements and annotations on the screen? Doppler technology can be indispensable for certain types of ultrasound studies. Color Doppler provides a look at blood flow, which is crucial when evaluating the heart and helpful for identifying vascular landmarks for certain abdominal structures.
Durability. For vets who make farm calls, it’s important to purchase a unit that can handle being out in dust, humidity, and temperature fluctuations, as well as something that travels well.
Power and connectivity. Do you always have reliable power outlets available, or are there some cases when a battery-powered machine would be needed? And how will your images and videos be stored or added to your practice management software?
Support. Is there a technical support line available 24/7? And is the company stable—meaning, are support and replacement parts expected to be available in the next few years?
How Much Do Portable Veterinary Ultrasound Machines Cost?
Veterinary ultrasounds are highly variable in price, depending on the quality of the machine itself and what’s included. But the average price of a portable veterinary ultrasound is about $10,000 to $25,000.
Some units can cost significantly more, especially if they come with multiple probes and extended service plans, and warranties.
To the other extreme, there are some units that only cost between $1,000 to $5,000. Typically, these inexpensive units are handheld and compact, and they may be able to hook up to a smartphone. They typically don’t offer the capability of seeing everything in fine detail. But they may be a good option for vets who only plan to do things like ultrasound-guided cystocenteses or quick checks for free fluid in the chest or abdomen.
Financial Considerations
In addition to the purchase price, plan for long-term expenses. This could include routine service and maintenance costs, renewing a warranty, updating software, unexpected repairs, and anything else that could come up over time.
Also, investigate your financing options. Will you purchase the equipment outright using saved business funds? Or does it make more sense to do monthly payments via financing from the vendor or a bank?
Don’t forget to factor in tax savings, too.
Talking to a financial professional, especially one who is familiar with the veterinary industry, can help. This advisor or consultant can also help you determine how much to charge for the new ultrasound services your practice will offer.
Maximize the Return on Your Investment
Many veterinary patients can benefit from ultrasound studies. But in order to schedule a lot of studies and earn a profit with the new equipment, a vet must be able to perform an ultrasound study with confidence and in a timely manner.
Ultrasound is not covered in most veterinary schools to nearly the same extent as x-rays. And the use of the probe and interpretation of what’s on the screen are not always intuitive. Therefore, many vets require in-depth training and a lot of practice before becoming comfortable performing ultrasound studies.
For all these reasons, if a practice is investing in a new ultrasound machine, it also makes sense to invest in training. That way, the machine can be used with confidence and efficiency.
A vet doesn’t have to have these skills mastered at the time a machine is purchased. But at least one vet at the practice should have a commitment to learning how to use the ultrasound.

The right portable ultrasound purchase will vary from practice to practice, depending on the practice type, budget, and other factors.
But by carefully considering all these things ahead of time, it will be easier to determine which machine suits your practice’s needs and to ensure your equipment investment pays off.
Written by: Dr. Tammy Powell, DVM

Digital Radiography vs. Film X-Ray: A Veterinary Comparison

What is Veterinary Digital Radiography, and How Does It Compare to Film X-Ray Systems?
Nowadays, veterinarians have a lot of options when it comes to their x-ray system—so how does a veterinary practice choose between film and the various digital x-ray modalities that are available?
It helps to compare price, efficiency, and other factors that will affect the daily use and value of your investment. Here are some considerations…
What Is Digital Radiography Versus Film?
First, it’s helpful to define the different x-ray options that are used in veterinary medicine.
The first choice is to decide between film or digital radiography. Film is exactly what it sounds like: X-ray images are captured on physical films. To produce an image, those films are then developed using processing chemicals in a dark room.
Digital radiography, on the other hand, produces a digital image. However, there is more than one method available for obtaining this image, including CCD, CR, and DR.
CCD (charge-coupled devices) have been compared to digital cameras in the way that they work. However, they have some disadvantages, including edge distortion when collimation is wider. While this older technology is still used in some capacities, most vets would be choosing between CR or DR.
CR (computed radiography) uses phosphor plates to capture an image. That image is obtained when a plate is put through a plate reader.
DR (direct radiography) doesn’t have any type of “middleman” (film developer or plate reader). Instead, digital images are captured on a special type of x-ray sensor that directly or indirectly converts x-rays into an electrical signal. The image is produced almost instantaneously.
Costs of Digital Radiography Versus Film
As with many other technological advances, there tends to be an increase in price for newer generations of technology—at least initially, because newer technology eventually does come down in price and becomes more accessible. Compare it to smartphones and digital cameras—two type of technology that have become much more widely accessible in recent years.
X-ray technology has followed a similar pattern. Digital technology does generally cost more to purchase than a film system. And DR generally costs more than CR.
That being said, prices have come down significantly in the last decade or so, making digital technology much more affordable to many veterinary practices.
While it’s great that newer technology is becoming more affordable, that doesn’t mean the latest tech is right for every veterinary practice. For practices with a slower pace that don’t perform a lot of x-ray studies, a film or CR system may meet their needs just fine and be a smarter investment than DR.
It’s also important to consider long-term maintenance and repair costs, in addition to the purchase price of the x-ray system.
For example, is there a warranty, and what does it cover?
If a component of the machine or plate/sensor breaks down, are replacement parts available (that’s not always the case for older equipment)?
Also, for film, the cost of supplies (film purchase and disposal, processing chemicals, and developer maintenance) must also be factored in.
Efficiency of Digital Radiography Versus Film
There’s not doubt that, used to its maximum potential, DR technology is fast and efficient. That’s because, rather than waiting on a developer or plate reader, images are created in just a few seconds.
This efficiency can make x-ray studies go much faster, with fewer retakes. Also, for digital systems in general, it’s usually faster to set up the study, since there are automatic technique settings for different patient sizes and areas of the body being studies.
All of this means a faster, simpler workflow, less time for the patient to be on the x-ray table, and the potential to schedule more x-ray studies. Many practices have reported increasing their x-ray revenue after upgrading to DR. This can certainly increase the financial return on the equipment investment.
But there is one important consideration when it comes to efficiency. The machine is only efficient if team members feel confident using it. So, it’s ideal to invest in something that’s user friendly and that has tech support available.
It’s smart to invest time to train everybody on the new equipment, since many employees will be used to different systems and need a little help learning all the features and functions of the new equipment.
Quality of Digital Radiography Versus Film
While many vet professionals believe digital radiography is always better quality than film, that’s not necessarily true.
Quality depends on the system itself, as well as on the ability of team members to use the equipment proficiently to obtain high-quality, diagnostic images. Performed with skill, film studies can be perfectly diagnostic and of high quality.
That being said, digital does allow some room for error. A lot of practitioners like it for that reason. The software automates much of the image processing, and the digital image can be manually manipulated if something needs to be seen in more detail.
Which Is Best—Digital Radiography or Film?

Digital x-ray technology, particularly DR, certainly offers many advantages. And it may make sense to invest in the latest technology that a veterinary business can reasonably afford, so that replacement parts and tech support are available for as many years as possible.
However, each veterinary practice must evaluate their unique needs and see what works best for them.
Written by: Dr. Tammy Powell, DVM

How Much Do Today’s Veterinary Digital X-ray Systems Cost?
What Price Range Is to be Expected?
The average price for a DR digital x-ray system in the veterinarian industry ranges from $21,000 to $35,000.
Examples:
DR Plate and system - $21,995
A complete DR system with table, generator, and DR digital x-ray is $29,995
A wireless system for equine or mobile vets - $28,995.
Equipment purchases are one of the most important investments a veterinary practice will make, so it’s important to ensure that the price makes sense for the business.
This doesn’t necessarily mean that the cheapest equipment is always the best deal. Instead, it’s important to consider a number of factors in terms of how you can maximize your investment and meet all the goals you had in mind for your new equipment.
The Price of Veterinary X-Ray Equipment Has Decreased Dramatically
Fortunately, this is much more affordable than machines were as recently as 10 years ago. That being said, it’s still a significant financial investment.
You may find equipment outside of this range, depending on which deals the manufacturer/seller is able to offer or which features the equipment offers. But this is a pretty common range to budget for.
Once you see the initial offer price, also be sure to ask about any deals. Don’t be afraid to shop around and tell sellers what other offers you have, in order to receive their best price.
And if you are buying from a company from which you plan to use other services (for example, using lab work services and buying an x-ray machine from the same company), ask about discounts or bundled deals.
What Additional Costs Can Be Expected?
In addition to the actual purchase price, it’s important to factor in the ongoing costs of maintaining your equipment in working order.
After all, if the new digital x-ray system can’t be used, it won’t bring in any income and it would go from a smart investment to just an expense!
Some long-term or ongoing costs to consider, for both new and used equipment alike, include…
Warranties, including when any initial warranties will expire, whether they can be renewed, and how much it will cost to renew.
Ongoing maintenance and repairs. Ask about routine recommended maintenance, as well as costs of the most common types of repairs. If any of this isn’t fully covered by a warranty or service plan, set aside savings each month into a sinking fund earmarked for future repairs.
Software upgrades. Timely upgrades are crucial to keeping your image processing and storage in working order, efficient, and secure.
Ask about technical support, if there is a free 24/7 support line you can call for smaller issues.
Speaking of repairs, also check how it works if you need repairs in the future—how long your equipment would be down, and whether replacement equipment (such as another sensor or plate) is available in the meantime.
Which Financing Option Is Best for Your Practice?
Once you’ve calculated all the costs of purchasing and owning your new equipment, it’s also important to consider how you will finance the purchase. This can make or break your monthly cash flow.
If your practice is well-established and has a business savings account to fully cover the cost of the purchase, that may be a good option. But then again, a monthly payment plan may be better, since you can pay as you go (and perhaps earn a profit on your investment right away) rather than depleting the liquid funds you have on hand.
Of course, when financing on a monthly payment plan, interest rates must be factored in. Interest will increase your total cost of purchase—perhaps very significantly if it’s a high-interest rate.
But a reasonable interest rate may be worth it.
The equipment manufacturer or seller may offer monthly payment plans, so be sure to ask about this. Also, many banks offer business loans for equipment purchases, an option known as a “capital lease.”
There are even some options to rent equipment rather than purchasing if this is a good fit for your practice.
Also, remember to factor in tax savings—most commonly through Section 179 of the IRS Tax Code—which can make a huge difference on overall practice revenue.
All of this can get complicated, so it’s a good idea to seek advice from a financial professional for large purchases.
How Can a Veterinary Practice Maximize the Return on Their Equipment Investment?
Here’s the fun part—getting to use your shiny new equipment!
This is why you bought the x-ray equipment in the first place. In addition to financial gains for your practice, you wanted to provide excellent care to your patients.
Maximizing the use of your equipment starts BEFORE the purchase.
Make sure you’re investing in something that is user-friendly and efficient, as well as something that produces high-quality images on all the different sizes of patients your practice sees.
That way, you can ensure it actually gets used (and produces diagnostic quality images) to its maximum potential rather than being cumbersome to use.
Also, plan ahead for how much you will charge for x-ray studies or other services. And talk to the team about communicating the value of these services to clients.
This improves client compliance to maximize patient care and ROI on your new x-ray machine.
With all these factors in mind, remember that a big discount on the purchase price isn’t always the best deal. Of course, you should always do your research and get the best deal you can.

But also remember the other factors that will affect the use (and profitability) of your equipment in the long term.
Written by: Dr. Tammy Powell, DVM

Obtaining High Quality X-Ray Images of the Equine Stifle

Radiographs of the stifle in horses are a relatively common procedure. They are used to evaluate for developmental and acquired abnormalities of various structures of the knee joint.
Here are some tips for when to obtain these radiographs, and how to obtain great shots of the equine stifle…
When Are Stifle Radiographs Indicated?
Some of the most common indications for stifle radiographs in a horse include a pre-purchase examination or investigation of any swelling of the joints, lameness localized to the stifle, difficulty bending the joint, or traumatic injuries that could affect the knee.
Some of the conditions of the stifle that radiographs may be used to evaluate include osteochondrosis, osteochondritis dissecans (OCD lesions), subchondral bone cysts, trauma, osteoarthritis, joint effusion, infection, or any other suspected abnormalities.
Ultrasound may also prove useful in evaluating the equine stifle, especially for soft tissue structures such as the joint space, meniscus, and ligaments.
Additional diagnostics—such as joint fluid analysis, arthroscopy, or CT when available—may also provide valuable information. But radiographs are usually a good diagnostic to start with, as they are fairly routine and provide a lot of information.
Planning for Equine Stifle Radiographs
Prior to doing an x-ray study of the stifle, it’s important to thoroughly understand the anatomy of the stifle.
In addition to a working knowledge of stifle anatomy, it’s important to know how this anatomy can change over time. For example, knowing which ages the physes of the joint close can greatly aid in accurate radiographic interpretation.
A vet team should also know how to obtain standard views at appropriate angles, with correct exposure techniques for each view. Due to thick musculature, cranio-caudal views may require significantly longer exposure times than latero-medial views.
Additionally, having a differential diagnosis list will help a vet determine if any additional views are needed to see specific structures of the stifle joint in more detail.
Sedation can help to reduce motion artifact, which can produce x-ray images that are of higher diagnostic quality.
Bilateral views are recommended. This provides an easy basis for comparison in that individual horse, if lesions are unilateral. Also, some lesions (such as OCD) may be bilateral, even if the horse is only showing symptoms on one side at the moment.
Which Views of the Stifle Should be Obtained?
The most commonly obtained views of the stifle include the following…
Latero-medial. In this view, the x-ray generator is positioned laterally, facing the femorotibial joint, and slightly (10-20 degrees) in a caudo-cranial direction. The beam is directed horizontally, with the detector placed medially and perpendicular to the beam.
Caudo-cranial. For this shot, the generator is placed caudally to the joint—with the beam centered at the midline—and the detector cranially and perpendicular to the beam. The generator is raised at a 10 to 20-degree, proximo-distal angle.
Caudo-lateral to Cranio-medial Oblique. For this view, also known simply as a “lateral oblique,” the beam is centered over the lateral aspect of the femorotibial joint and then angled at a 30 to 60-degree caudo-lateral to cranio-medial orientation. It is directed horizontally across the joint, or at a slight proximo-distal angle. The detector is placed on the opposing side and perpendicular to the beam.
These three views make up the majority of routine x-ray studies of the stifle. But additional views may be included if more information is needed, such as the patellar skyline or flexed lateromedial views.
For additional information on obtaining views of the stifle in a horse—including detailed pictures of the anatomy in common x-ray views—this article is highly recommended: RadiographWilson.pdf (aaep.org)

Conclusion
As with any aspect of practicing medicine, having a good reference and proper equipment, and gaining practice/experience over time, will help a veterinarian develop confidence in taking and interpreting radiographs of the equine stifle.
Written by: Dr. Tammy Powell, DVM

When and How to Perform Equine Skull X-Ray
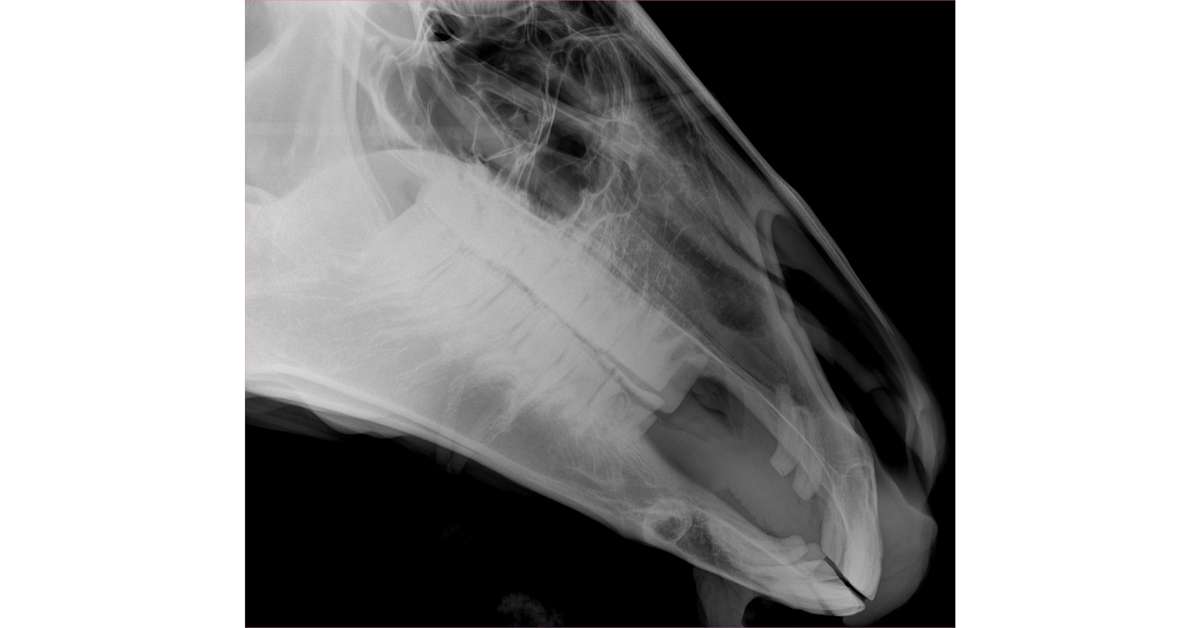
Radiographs of the head are useful when evaluating for injuries or disease processes of the skull, jaws, teeth, nasal cavity, and paranasal sinuses in horses.
Examples include, but are not limited to, dental or periodontal disease of the cheek teeth, head trauma, sinusitis, and neoplasia.
Common clinical signs for which skull radiographs may be indicated include nasal discharge or epistaxis (especially unilateral), swellings of the face, odor or draining tracts, bony changes, or difficulty eating.
When skull radiographs are indicated, here are some common guidelines to follow for procedures, views, and interpretation.
Performing Radiographs of the Head in a Horse
A systemic approach to an x-ray study can help improve efficiency and ensure nothing is missed. This should include…
All necessary equipment, including a generator with enough power for skull radiographs, a large sensor (while intraoral plates are available for dental evaluation, here we’ll discuss extraoral views), and any props that may be needed to aid with views or positioning.
Knowing which views are needed (more on this below).
Having a technique chart or reference for settings. While the numbers can vary depending on the machine/equipment, commonly kVp is set between 70-100 and mA between 3-20.
Sedation is generally recommended unless there is a medical contraindication.
If possible, remove the horse’s halter or anything else on the head that could create an artifact or cover-up details in the x-ray image.
In some cases, it may be worthwhile for radiographs to be accompanied by (or followed up with) additional diagnostic tests, such as ultrasound or endoscopy.
Which Radiographic Views of the Equine Skull Should be Taken?
These are the most common views that are typically used for an equine skull study…
Lateral: This is a good screening shot to look for abnormalities (such as fluid or opacity) in the nasal cavity and paranasal sinuses. Bony and dental structures will be superimposed, but obvious abnormalities (such as tooth root abnormalities) might also be noted here. The cassette is centered over the 4th upper cheek tooth or rostral aspect of the facial crest, and a horizontal beam is used.
Ventrodorsal (or Dorsoventral) Oblique: Oblique views are valuable for reducing superimposition. A VD or DV technique can be used.
A VD oblique aids in evaluating mandibular structures, as well as in viewing the maxillary sinuses with less superimposition. The cassette is centered at about the same location as the lateral shot, but more dorsally to create obliquity. The x-ray tube is placed ventrolateral to the mandible so that the beam is at approximately a 45-degree angle on the opposite side of the face.
A DV oblique is helpful for evaluating sinus structures and maxillary cheek teeth. This view is basically the reverse of the VD, with the cassette positioned below the jaw and the x-ray beam pointing down at approximately a 45-to-60-degree angle on the opposite side of the face.
Dorsoventral: This view provides a lot of information about the sinuses, nasal passages, and nasal septum, especially for comparing right to left. Teeth and bony structures may also be evaluated, although overlap of these structures is to be expected. For this shot, position the cassette ventral to the head, centered under the mandibles. Then position the beam perpendicular to the cassette.
Additional views may be obtained as needed, especially more focal shots and additional angles to isolate an area in question.
For more detailed guidance on views for evaluating specific areas of the skull, this article is highly recommended: 101-eve-v25-i12-fm-toc.indd (aaep.org)
Interpreting Radiographs of the Equine Skull
Fortunately, the contrast between air (the nasal passages and paranasal sinuses) and bone creates good radiographic contrast. On the other hand, the complex structures of the skull, combined with superimposition of those structures, can make radiographic interpretation challenging.
For the best results, always use markers to identify which side of the head is being evaluated in the shot and differentiate between right and left, especially in oblique views (for example, RDLV—right dorsal to left ventral oblique).
Also, obtaining bilateral views is helpful for lateral and oblique shots, since it allows for comparison between sides.
Always evaluate the entire radiograph, and be on the lookout for asymmetry.
As with any x-ray study, clinical experience and good radiography reference images can help a vet identify what is normal versus abnormal.
Consultation with a radiologist can be helpful as well.

By having a system for skull radiographs, knowing which views to take, and becoming familiar with the interpretation of these x-ray studies, a vet can determine the next step for a horse showing symptoms of a problem with the head or teeth.
Written by: Dr. Tammy Powell, DVM

Pre-Purchase Examinations and X-Rays in Horses
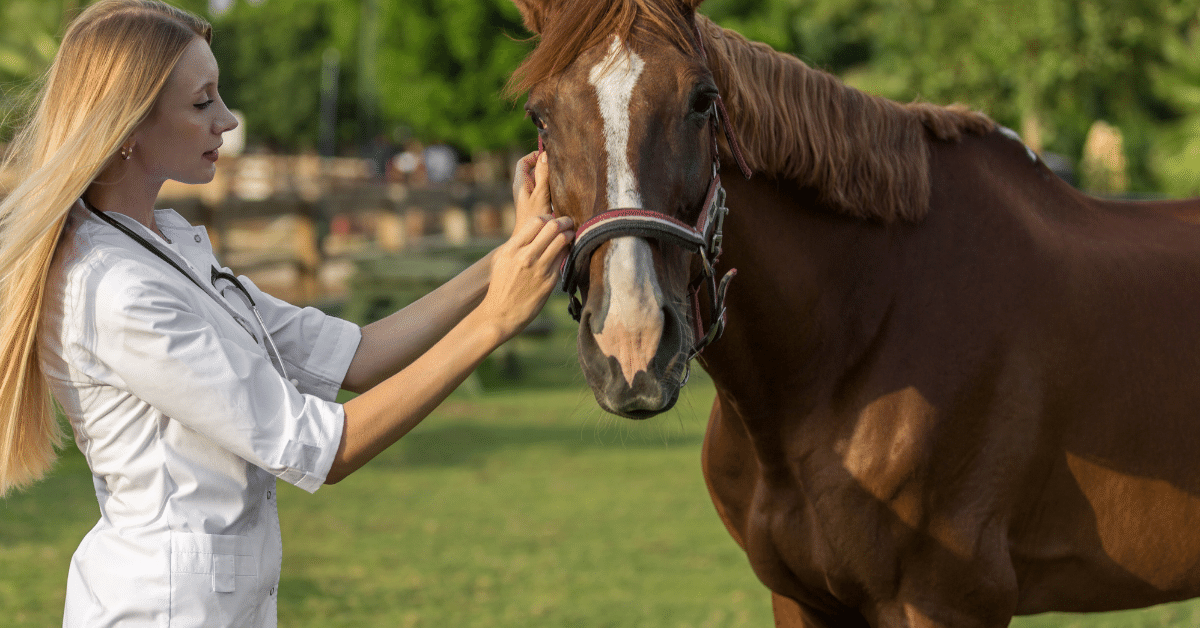
Since purchasing a horse can be a large financial investment—both the purchase price itself, as well as any medical bills that arise later due to health or lameness issues—it makes sense for horse owners to do their research prior to buying a new horse.
As such, a pre-purchase examination with a veterinarian is typically performed prior to the sale going through, which includes a physical evaluation and possibly radiographs.
What Is Included In a Pre-Purchase Examination of a Horse?
At the very least, a pre-purchase check includes the horse’s history (ownership, work, and medical history) and a full physical evaluation.
A horse’s identification should be verified. A vet may also make notes about the horse’s temperament or other non-medical factors.
The horse’s history is important when considering expectations of future performance.
For example, what is the horse being purchased for, i.e., what will their job be? And how does this level of activity compare to their current level of activity?
Then there’s a standard full physical examination, which looks for abnormalities of the skin, eyes, mouth, cardiovascular, gut, and other body systems.
This includes evaluating the horse before and after physical exertion and seeing how long it takes them to recover.
The musculoskeletal part of the exam may include more detail while evaluating for lameness. Examples of this part of the exam include (but are not limited to)...
Observing the horse’s gait at walk, trot, canter, or other tasks, both saddled and unsaddled.
Palpation of the limbs, neck, and back.
Hoof evaluation and hoof testers.
Flexion testing.
Range of motion.
In addition to the physical examination and lameness evaluation, diagnostic testing may be performed. This might include…
Bloodwork or labs for general health.
Drug testing.
Diagnostic imaging, including radiographs of the joints or ultrasound of tendons.
Any additional tests (breeding soundness, tests required for interstate travel, endoscopy for respiratory issues, etc.) as needed.
Which Radiographic Views Should Be Included In a Horse Pre-Purchase Exam?
That being said, there is some debate over which/how many views should be included.
When in doubt, it’s probably best to err on the side of caution and obtain more views rather than less, since these views may potentially be used in litigation if the buyer ends up encountering a problem with the horse.
For this reason, the images also need to be of excellent quality, and it is recommended to use standard views/angles.
Radiographs of the limbs may include views of joints and bones that are more likely to encounter issues, especially the…
Stifles (craniocaudal, lateral, +/- obliques).
Hocks (DP, lateral, +/- obliques).
Fetlocks (DP, lateral, +/- obliques)
Foot/navicular series.
Additional views could be added depending on the needs of the situation. This may include additional joints, additional angles or flexed/stressed shots, or even vertebral studies of the neck and back.
A veterinarian would be looking for any abnormalities, such as previous or current injuries, arthritis, or OCD lesions. Of course, all of these findings should be correlated with the horse’s history and clinical evaluation.
Getting a radiologist consultation on pre-purchase radiographs is never a bad idea either.
Conclusions from a Pre-Purchase Examination
The purpose of a pre-purpose examination, including the radiographs, is to uncover any abnormalities which may potentially lead to a problem later, so a buyer has more information about what to expect from that particular horse.
However, it’s important to remember that there aren’t a lot of “perfect” horses out there. Most horses will have some type of lesion or abnormality uncovered.

While some abnormalities may predict a severe issue and lead to cancellation of the sale, other potential issues are not so clearcut. A pre-purchase examination isn’t a guarantee that a horse will never have a problem. And a mild abnormality may be perfectly acceptable to the buyer for the purpose for which they are purchasing the horse.
The goal is to provide information, and to convey that information to the buyer so they can make an informed decision and get the horse that’s right for them.
Written by: Dr. Tammy Powell, DVM
Treatment for Blocked Cats: The Power of Fluoroscopy

Urinary obstructions in cats are a life-threatening issue that vets see and treat commonly.
And while most vets have a system for caring for these unfortunate felines, it is exciting to learn about new technology that may provide value during the treatment of these critical patients.
One such development is fluoroscopy technology, which is now more accessible than ever to general practitioners. Here are three ways fluoroscopy may help while unblocking a cat…
Confirming Placement of the Urinary Catheter
Depending on the type of indwelling catheter used, it may be of value to check the placement of the catheter on radiographs.
This is especially true for red rubber catheters—which can double back on themselves or even tie into a knot if too much of the catheter is placed into the urinary bladder—or for any catheter long enough to cause additional trauma if passed so far that the tip contacts and irritates the bladder wall.
While traditional x-rays may be used for this purpose, fluoroscopy offers the advantage of being able to adjust the catheter placement in real time. That way, the catheter can be quickly adjusted prior to placing sutures.
Real-Time Contrast Studies of the Bladder and Urethra
Blocked cats with severely distended urinary bladders are at risk for bladder rupture—whether from the condition itself or from manipulation (pressure or cystocentesis) while the bladder is excessively full.
A large bladder rupture is often obvious since a full bladder will suddenly become difficult or impossible to palpate. However, a small tear or leak may be more difficult to detect.
A positive contrast cystourethrogram can help to identify small ruptures, by looking for contrast outside the borders of the urinary bladder on radiographs.
While traditional radiographs can certainly be used for this purpose, fluoroscopy may prove useful because of the ability to see things moving in real time, and the ability to move the patient and quickly see the abdomen at multiple angles without taking a lot of x-ray shots.
In addition to the bladder, this can be very useful for tracking the movement of contrast through the urethra (to identify obstructing materials, strictures, etc.), versus only seeing a couple of snapshots in time on traditional x-rays.
Since contrast media can be irritating to tissue that is already compromised, a vet must weigh the pros and cons of doing a contrast study right after unblocking a cat. But this procedure could also be useful after the cat has had time to heal, to ensure the bladder is intact before the urinary catheter is removed and the patient is sent home.
Evaluating for Uroliths and “Sludge”
In cats, sludge, sand, or gritty material—which may be a combination of crystals, blood clots, mucus, etc.—can accumulate in the urinary bladder. And while less common than in dogs, uroliths are sometimes diagnosed in cats.
On radiographs, sludge may be confused with a bladder mass or even sometimes with uroliths. Fluoroscopy can help with characterizing this material inside the urinary bladder (and distinguishing it from a bladder mass) by seeing how it moves in real time, as the patient is moved.
Additionally, a vet could use fluoroscopy to track the progress of flushing this material out of the bladder (or urethra) after relieving a blockage.
Conclusion
For many years, traditional radiographs have been included as part of the workup for blocked cats, and a vet can provide excellent care to feline patients with current protocols.

However, as fluoroscopy technology continues to evolve and become more accessible to general practitioners, it’s exciting to see the ways in which this modality can make a vet’s job easier and provide more information for patient care.
Written by: Dr. Tammy Powell, DVM

Planning and Measuring for Full-Body X-Rays

Full-body radiographs are a valuable diagnostic tool for well and sick veterinary patients alike.
Wellness screening, such as with a senior wellness package, may include full thoracic and abdominal radiographs in addition to bloodwork, as a screening tool to catch disease processes early.
And the use of full-body screening is widely recognized for ill patients—for example, as part of the diagnostic workup for patients with non-specific symptoms, when doing a “met check” to look for metastasis, or when evaluating the patient after a traumatic injury.
But how many views are required, and how are patient measurements performed when screening large portions of the body? These topics will be discussed below…
How Many Views Are Required?
Most experts recommend at least five views: right and left lateral thorax, VD thorax, lateral (usually right lateral) abdomen, and VD abdomen. For both the abdomen and the thorax, a DV view may replace a VD view in some cases, such as if a patient isn’t stable enough to lie in dorsal recumbency.
In general, this is considered the MINIMUM number of views by many veterinary radiologists. With that in mind, sometimes full-body studies require more than five views.
Here are some examples of additional views that may be needed…
Some experts recommend including BOTH a VD and DV view of the thorax, for a total of four thoracic views, especially when looking for metastasis or small/localized lesions.
More and more commonly, veterinarians are increasing their standard abdominal study to three views (adding a left lateral view as the third view), at least for GI studies. A left lateral is especially valuable for evaluating the pylorus.
For large dogs whose entire thorax or abdomen can’t be captured on the plate or sensor, they would require two of each of these views--a cranial and caudal portion for each view, so that each body cavity can be fully evaluated without any portion being cut off due to the patient’s large size.
Depending on what a practitioner is looking for, additional views (spine, limbs, skull, contrast studies, etc.) may be needed. This is especially true for blunt trauma, when the patient may have multiple injuries.
Is it possible to do a full-body study with less than five views?
Sometimes, this does happen. Everyone is probably familiar with the “cat-gram” (a lateral and VD view of a cat’s entire body, for a total of two views) that is commonly used in daily practice.
A vet will need to use their best clinical judgment for the needs of each individual patient, understanding that if less than the recommended five views are taken, details could be missed.
How to Measure a Patient for Full-Body X-Rays
Once the vet has decided which views are to be included in the study, this allows the vet team to measure the patient for each of these views.
The key is to measure the patient in the SAME POSITION they’ll be in during the study. This is important because the patient’s width may change with their position, thanks to the effects of gravity and the table and any props being used.
So, for lateral views, the patient should be lying on their side, for VD views they should be lying on their back… and so on.
Once the patient is in the appropriate position, a good rule of thumb is to measure them at the widest point for the area within the field of view. This is frequently toward the diaphragm/liver for both thoracic and abdominal studies.
This ensures the beam will be powerful enough to penetrate the part of the body being studied and produce a quality image.
However, there may be times when it makes sense to measure the patient using a different strategy, such as…
When focusing on a specific organ. For example, to see the most detail on the bladder, it would be helpful to measure that region of the abdomen. For full-body studies, this may be included in addition to the general screening shots.
If the patient’s body shape is such that measurements are significantly different at the widest and narrowest parts of the body within the field of view. In this case, two shots (at two different settings) may be necessary to see all fields at the right exposure and level of detail needed for diagnostic quality.
Full-body radiographs can be a great diagnostic tool that helps patients receive the care they need.

By using best practices and strategies, a veterinarian can ensure that these studies deliver the best possible diagnostic value.
Written by: Dr. Tammy Powell, DVM

What Is an Over-Exposed X-Ray, and How to Avoid Over-Exposed

An over-exposed radiograph is one in which the X-ray beam was too powerful, resulting in an excessively dark or “burnt-out” image.
Unfortunately, this can make it difficult or impossible to interpret the radiograph, which can lead to frustrating retakes or even non-diagnostic images.
Here are some important things to know about over-exposed X-rays and how to avoid them…
Why Are Over-Exposed Radiographs a Bad Thing?
Radiographs are about balance. A veterinary professional may feel like Goldilocks—wanting to avoid too few or too many X-rays passing through the patient and onto the film or sensor/plate, and instead, find the x-ray beam strength that is “just right.”
What happens otherwise?
Too few X-rays (or a beam that’s weaker) means an under-exposed (or whited out) image. Too many X-rays (a beam that’s too powerful) result in an over-exposed image.
In general, an over-exposed image may be more useful than an under-exposed image when working with physical X-ray films, thanks to the availability of hot light, an extra bright light that may allow a veterinarian to see more details when viewing an over-exposed film.
However, even a hot light can’t save a very over-exposed image. It’s always best to go for high-quality radiographs.
High-quality X-ray images are more diagnostic because they allow for the visualization of fine details that could otherwise be missed. For example, pulmonary vessels and small nodules might not be visible in an over-exposed radiograph.
How to Avoid Over-Exposed Radiographs
Improving the quality of radiographs involves troubleshooting. By figuring out WHY there is an issue with image quality, a veterinarian can most effectively improve their radiographs.
Here are some possible causes of over-exposed X-rays…
Machine errors. Sometimes, a generator, developer, or digital plate needs to be serviced in order to correct the problem.
An equipment issue may be more likely if ALL patient radiographs are showing the same issue, such as an exposure error. Keeping up with routine x-ray equipment maintenance can help to prevent this type of problem.
Technical errors. This is less common with digital machines that have preprogrammed settings.
However, it’s still possible, especially if the wrong part of the body has been selected for the study. Or, maybe the clinic has different sensors/plates with slightly differing sensitivities to the same exposure settings.
For film machines, errors in technique are common. Technique charts can help vet professionals select the best settings and reduce time-consuming retakes.
Either way, to obtain a lighter image, lower the kVp or mAs for the shot.
Operator errors. For film and digital studies alike, errors in measuring the patient are common. For example, when performing an abdominal or thoracic study, remember to take the patient’s measurement while they are lying on their side—this number could be surprisingly different from the patient’s width while standing up.
Also, the X-ray operator should remember to collimate the field. This improves the detail and reduces scatter radiation that could otherwise darken an image.
Training and practice can help veterinary team members master these protocols and obtain high-quality images.
Also, digital radiographs can help remove some potential human error (such as manually setting the technique) by automating much of the process.
Getting the exposure right the first time will help the whole team save time, reduce stress for patients and staff by avoiding frustrating retakes, and produce images of a higher diagnostic quality for excellent patient care.

Written by: Dr. Tammy Powell, DVM