


A Guide to Veterinary X-Ray and CT Room Shielding

Shielding Solutions: Safeguarding Staff and Clients in Veterinary Radiology
Ensuring the safety of your staff and clients is paramount in any veterinary practice, and this extends to the crucial area of X-ray and CT imaging. These powerful tools provide invaluable diagnostic information, but they also emit ionizing radiation, which can be harmful if not properly contained.
This blog post will delve into the essential aspects of veterinary X-ray and CT room shielding, addressing common questions like:
How thick should the drywall be?
Do I need lead in the walls?
What level of protection is necessary for different areas of the room?
By understanding these key points, you can ensure your X-ray and CT room complies with safety regulations and provides optimal protection for everyone involved.
The Role of a Physicist Shielding Report
Before diving into specific materials and thicknesses, it's crucial to emphasize the importance of a physicist's report, also known as a shielding report. This document, created by a qualified medical physicist, is essential for determining the exact amount of radiation shielding required for your specific X-ray or CT equipment and facility layout.
The report considers various factors, including:
Type of X-ray or CT scanner: Different machines produce varying levels of radiation, and the shielding needs to be tailored accordingly.
Workload of the equipment: The frequency of X-ray or CT scans directly impacts the required shielding.
Room layout and occupancy: The location of the X-ray room relative to other occupied areas plays a crucial role in determining the shielding needed for walls, floors, and ceilings.
Understanding Shielding Requirements in Different Areas:
While a physicist's report provides the definitive answer, here's a general overview of the various areas within an X-ray or CT room and their typical shielding needs:
Walls:
Drywall thickness alone may not be sufficient for X-ray or CT rooms.
Lead lining is often incorporated within the walls to absorb radiation effectively.
The specific thickness of lead and total shielding equivalent (measured in millimeters of lead or lead equivalent) will be determined in the physicist's report.
Floors and Ceilings:
Shielding requirements for floors and ceilings depend on the location of the X-ray source and the presence of occupied spaces above or below the room.
The report will specify the needed thickness of concrete or other appropriate materials for these areas.
Control Booth:
The control booth, where the operator stands during X-ray or CT procedures, requires sufficient shielding to minimize radiation exposure.
This typically involves a combination of lead-lined walls, leaded glass windows, and proper door shielding.
Next Steps:
Remember, this blog post serves as a general informational guide, and the physicist's report is essential for ensuring your facility's X-ray or CT room adheres to regulations and prioritizes safety.
For a Physicist Shielding Report tailored to your specific veterinary practice, feel free to reach out to us!
We can help you create a safe and compliant environment for your staff, clients, and furry patients.


Fluoroscopy - the difference between II images & FPD

Understanding the Contrast Between II and FPD Images
In a recent article, we were able to show the benefits of fluoroscopy in the veterinary field. Now, we can highlight in a bit more detail, the differences between the two methods of obtaining fluoroscopy images and explain when each one may be appropriate.
Just like standard radiography where there are two methods for image capture - computed radiography (CR) or direct digital radiography (DDR) - in the field of fluoroscopy, there are also two methods - via an Image Intensifier (II) or a Flat Panel Detector (FPD).
For ease of understanding and by relating to familiar X-ray technologies, similarities can also be drawn between the standard X-ray capture options and the fluoroscopy image capture options with both the CR and II methods relying on an intermediate system between the point of image capture, and the viewing of the image, but the DDR and FPD methods connecting directly to a viewing computer.
How the image is obtained
Image intensified images:
The X-ray image intensifier is a unit that utilizes a series of photochemical reactions to achieve a viewable image.
At the front of the unit, exposed to the X-ray beam, sits an input phosphor (a solid material that emits light when exposed to radiation – the same technique as in an old-style intensifying screen in a film-based or CR X-ray setup). Immediately adjacent to this layer is a photocathode.
When the radiation beam strikes the input phosphor, causing visible light to be released, this visible light in turn strikes the photocathode. The photocathode releases electrons in direct proportion to the visible light, which is directed through the tube by electron lenses onto an output phosphor.
The output phosphor emits light the same way as the input phosphor does, so the image is obtained. This image is only around 1” in diameter, so to be diagnostic it needs to be magnified by attaching a video camera and then digitized in a computer.
Flat Panel Detector images:
In the FPD system, the X-ray image intensifier unit and video camera are replaced by a single digital assembly where the X-ray photons are converted directly to electrical charge and displayed on a monitor.
Benefits of each system
Image intensified images:
Being an older system, II fluoroscopy is a cheaper option than the more modern FPD systems, making it more accessible to the majority of veterinary clinics. There may also be a degree of familiarity in their use and maintenance is likely to be more easily obtained and more affordable than for FPD systems.
Flat panel detector images:
The images obtained in this way are much more detailed, of higher quality, and of a higher resolution than those captured by an image intensifier, therefore making them much more likely to result in an accurate diagnosis.
As well as a higher resolution image, the C-arms used in FPD units range from 12” x 12” to 17” x 17” which is a much larger field of view than those used with II units.
This means a wider area of the patient can be examined in a single capture. The whole process is also much faster than with an image intensifier, so the patient is exposed to a shorter duration of radiation.
Downsides of each system
Image intensified images:
Just as the image quality is the main benefit of the FPD system, the lack of image quality is the main downside to the II system - the images obtained tend to be of low resolution which can make diagnoses challenging.
The C-arms used also cover a much smaller field of view – typically around 9” x 9” or 12” x 12” meaning the anatomical area examined is also much smaller.
The slower processing of the image means a longer duration of exposure to radiation for the patient. As with many older technological systems, the II units are typically larger and take up more space within a practice than the more modern FPD units.
Flat panel detector images:
The main drawback to an FPD system is the cost – being a newer and much more advanced technique, the set-up costs are understandably much higher than for an image intensifier system.
This advanced equipment is also more delicate, and great care and training are needed to be able to use it safely. Some maintenance costs will also reflect this higher value.
When choosing which system is right for a hospital, all the above factors need to be taken into consideration. There will not be one-size-fits-all. In the future, just like what happened when digital radiography took over from film radiography, we may all move more towards flat panel detectors but for the moment, clinics have the two possible options.
Whichever system is chosen, having fluoroscopy within a practice will greatly enhance the services they can offer and aid in increasing the diagnostic toolkit available to the doctors.
References
1. https://newvetequipment.com/blog/veterinary-fluoroscopy
2. Gingold, E. (n.d.). Modern Fluoroscopy Imaging Systems. Image Wisely. https://www.imagewisely.org/Imaging-Modalities/Fluoroscopy/Modern-Imaging-Systems Figure 1, figure 2.
3. https://youtu.be/rex_N_H4zxU

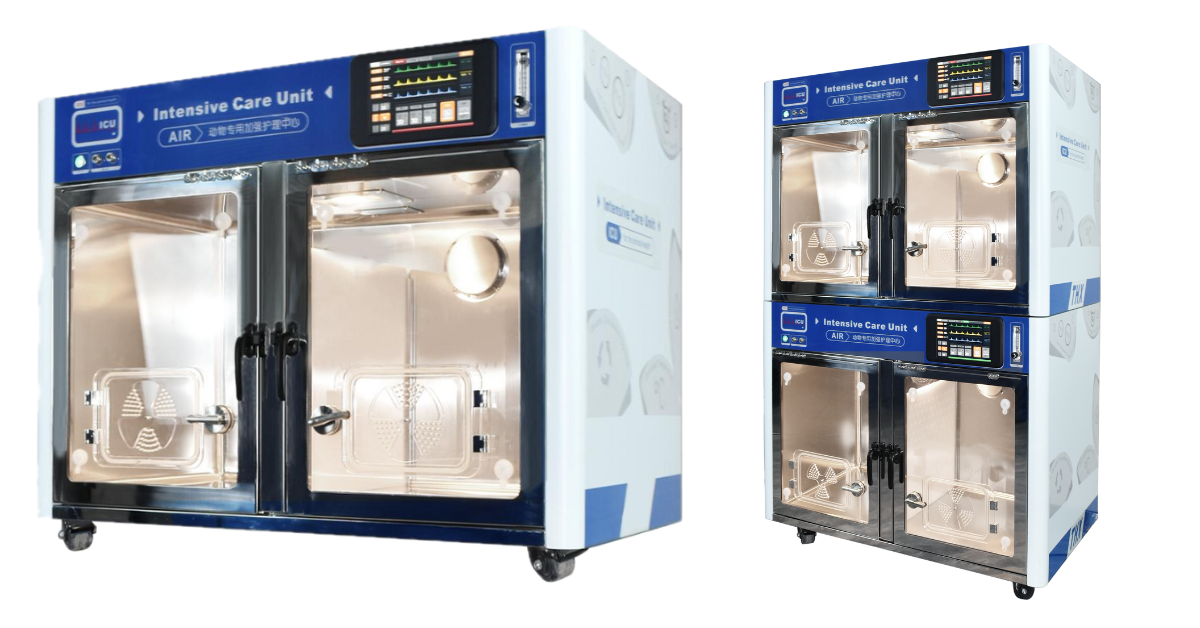
What does an ICU cage unit do for a critical pet patient?

A Safe Haven for Healing: Understanding the Benefits of Veterinary ICU Cages
Care of the critically ill patient can be challenging enough as it is; makeshift oxygen tents, fluctuating room temperatures, and awkward nebulization systems can make it seem like a real uphill struggle.
Vet surgeons and vet techs who have access to the latest innovations in intensive care equipment can focus their time and energy on patients and treatment plans, instead of wasting it battling environmental undesirables.
So, what are our requirements?
Oxygen Supply
One of the primary features of all our intensive care unit (ICU) cages is the supplementation of oxygen (O2).
Traditional flow-by methods are unreliable, in no small part due lack of patient compliance. With flow-by, not only is it difficult to quantify the amount of O2 being delivered to a patient, but it is also nearly impossible to track and measure the patient’s response to the gradual removal of said supplementation.
The user-friendly control panel on our ICU cages facilitates the delivery of precise proportions of O2 into a patient’s micro-environment.
These levels can be readily adjusted in a manner to suit the patient’s needs, who can be easily viewed and monitored via the clear-view cage doors. O2 concentrators can be utilized with our ICU cages for the highly economical creation of medical-grade O2.
Vet professionals can relax in the knowledge that certain safety functions are in place to protect patients. Not only will an alarm sound should O2 concentration fall below 20%, or carbon dioxide exceed 2000ppm, but they can rest assured that intelligent technology will automatically engage the external circulation of air in these circumstances, and therefore maintain patient safety.
Nebulization
For patients requiring nebulization, our ICU cages offer an extremely exciting feature. Environmental medical nebulization is an inbuilt function, removing the need for awkward, handheld systems that are poorly tolerated by pets, with the potential to induce stress.
What is more, the efficacy of nebulization is dramatically improved and can be achieved without disturbing the patient.
Warming
Hypothermic patients benefit from our ICU cages through the gentle, reliable, and consistent application of warm air into their environment.
Burns from heat mats and microwaveable wheat bags need to be a risk no more. Instead, it is possible to accurately monitor and adjust environmental temperature at the touch of a button, for safe and effective warming.
Quiet, calm, and spacious accommodation
Other benefits of ICU cages include the calm, and quiet environment that they create.
There are no clattering metal cage doors. Instead, soft-closing plastic doors make for a peaceful experience for critically unwell patients who may be stressed about their condition.
The impact of anxiety on compromised patients is no secret amongst vet professionals: we all know that it can interrupt and prolong treatments and therefore recovery. For this reason, our ICU cages feature silent air conditioning systems and a 3-in-1 light system.
White light is invaluable for times of patient assessment, whilst gentle, warm light is invaluable for general monitoring, and blue light is available for therapeutic purposes.
Our cages can accommodate larger patients than some since there is a removable divider. When the divider is in place, the control panel is capable of setting individual environmental conditions for each cage, resulting in tailored care for each patient.
Infection control
When a critical patient poses the additional challenges of being either infectious, or immunosuppressed, it can be tricky to know where to house them for their safety, or that of other patients.
Our ICU cages come into their own in these circumstances, with to state-of-the-art photo-hydro-ionization technology which continuously disinfects and deodorizes the cage. An internal air circulation system further bolsters the creation of a safe and sterile environment, reducing cross-contamination between patients.
ICU cages can have been described as life-supporting pieces of equipment, and it is easy to see why. As veterinary professionals, we not only aim to not harm, but we also strive for the best standard of care when it comes to our patients;
ICU housing facilitates exactly this for many critically unwell pets including neonates, infectious patients, critical care patients, those with cardiopulmonary diseases, those with post-operative complications, as well as geriatrics.

Struggle with makeshift oxygen & unreliable nebulization? Our ICU cages offer:
Precise oxygen delivery with alarms & safety features.
Built-in nebulization for improved efficacy & reduced stress.
Safe & controlled warming to avoid burns.
Quiet environment with silent AC & calming light options.
Infection control with photo-hydro-ionization & air circulation.
Ideal for neonates, infectious, critical care, & more!
https://newvetequipment.com/intensive-care-unit

Buy Veterinary Digital X-ray Equipment with Confidence

How to Buy Veterinary Digital X-ray Equipment without Experiencing Buyer's Remorse
Have you ever bought something and regretted the purchase?
I think I have at one time or another. However, it’s one thing to regret ordering a cheeseburger and fries, but quite another when I regret buying a $50,000 car or truck.
When I make a big purchase, I want to feel good about my decision. I want to make sure that I made the right choice.
I want you to feel great about buying from me! I understand it is no small thing for a Veterinarian to spend $20,000 or $30,000 on digital x-ray equipment, and I want you to feel great about buying from us.
So, here is my “purchase without buyer's remorse” plan:
The 30-day satisfaction guarantee, or your money-back offer. When you make a digital x-ray system purchase, I will give you 30 days so that you feel comfortable and confident that you made the right choice.
And if you are not satisfied, return your digital x-ray equipment for a full refund.
Yes, that is correct! A FULL refund!!
I know that after the vet digital x-ray equipment is installed in your clinic, and once you learn how to use the software, you will be very happy with the results you get.
I can offer this guarantee because I am very confident with the quality of the digital x-ray equipment we sell, and I want you to be completely satisfied.
Here is the fine print:
Equipment must be returned in original packaging.
Equipment cannot be returned if damaged by the user during your 30 days.
The buyer pays the cost of shipping/packing/insurance of all returned equipment.
You must give us a reasonable chance to correct any dissatisfaction.
The main reason I am offering this “30-day satisfaction guarantee or your money back” is to give you peace of mind.
I understand I’m not as big as Idexx, Cuattro, or Sound-Eklin. Perhaps that makes you think twice about trying us out.
But I am confident that our equipment is as good, if not better, and now we have a “30-day satisfaction guarantee or your money back” - which the big boys do not offer!

The bottom line is simple:
I am offering quality digital x-ray equipment for the veterinary industry at an amazing price, with a great warranty, and now a 30-day guarantee.
I want to do the right thing, treat you with respect, and help you be successful in your veterinary practice.
Call or text me - Brad Haven, Jr. - 530-355-5886
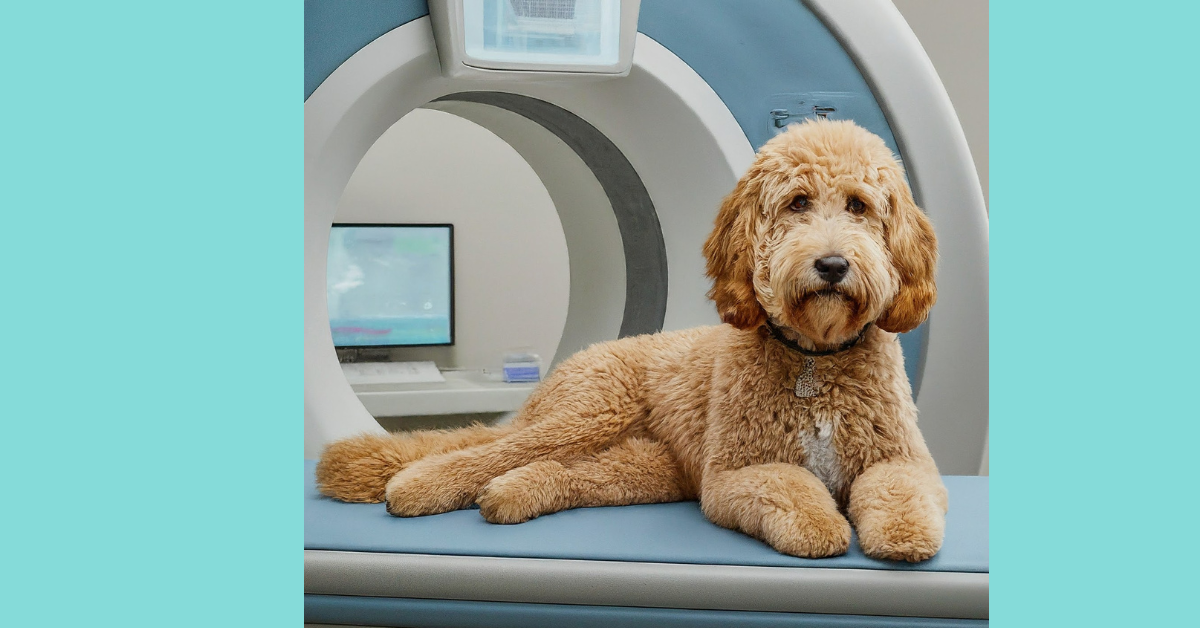
Cone Beam CT and Orthopedic Surgery for Veterinary Hospitals

Cone beam computed tomography (CBCT) has revolutionized diagnostic imaging in the veterinary orthopedic field.
It has enabled delicate structures to be imaged in intricate detail, ensuring no pathologies are missed, diseases can be detected early, and surgery can be planned with the greatest precision.
In veterinary clinics, CBCT is now being used to scan cats and dogs, providing 3D images superior to other imaging modalities.
The benefits of using CBCT for Veterinary
Orthopedic surgeons rely on various imaging techniques for all aspects of their work including diagnostics, surgical planning, intra-surgical imaging, and monitoring post-surgical healing.
The unique properties CBCT has to offer make it the ideal imaging modality for orthopedic work as it greatly reduces a patient’s radiation exposure compared to conventional CT, while still producing high-quality images.
Compared to conventional CT, which uses a continuous beam of radiation, CBCT uses a conical-shaped beam and flat plate receiver, which both rotate 180 to 360° around the patient, while only taking intermittent images at specific intervals. Algorithms are used to convert these 2D images into a reconstructed 3D view that provides orthopedic surgeons with high-resolution images.
The benefits of CBCT:
High-resolution 3D images are produced – The intricate level of detail each scan provides is ideal for assessing the architecture of bones and complex joints.
Patients are only exposed to a low dose of radiation – The use of a focused field of view and intermittent radiation exposure during one scan enables each patient’s radiation dose to be significantly reduced compared to conventional CT.
No issues with superimposition – The 3D images eliminate superimposition, enabling structures to be viewed using CBCT that would otherwise be unable to be assessed with digital radiography.
Scans can be performed rapidly – A full scan takes less than a minute to complete, so it is ideal for both veterinary work and for use during orthopedic surgeries.
The equipment is cost-effective – Compared to the cost of setting up a conventional CT scanner, CBCT is cheaper, enabling veterinary clinics access to CT when conventional CT scanners are out of budget.
CBCT in Orthopedic Veterinary Clinics
CBCT was first used in dentistry where it superseded digital radiographs by providing more accurate information on lesion location while being cost-effective and performing scans rapidly.
More recently, orthopedic surgeons have started using the benefits of CBCT, especially for imaging areas that were previously difficult to assess using digital radiography due to the location of superimposed bones or complex joints.
Why CBCT is superior to digital radiography
Digital radiography is the first-line imaging choice for diagnosing orthopedic conditions in our pets.
However, digital radiography has the disadvantage of only being able to provide limited anatomical detail, restricting its use for diagnosing orthopedic conditions and surgical planning.
Veterinary clinics with access to CBCT can rely on this technique to provide superior detailed scans for all stages of orthopedic work. When used for diagnosing orthopedic conditions, it can assess fractures that would have otherwise been missed and can detect signs of degenerative conditions and bone tumors earlier.
The use of imaging for orthopedic surgery
Orthopedic surgeons are greatly reliant on access to reliable imaging modalities for pre-surgical planning and intra-surgical use.
CBCT is the ideal choice for surgical planning as each scan provides detailed information on lesion location and enables surgical accuracy to be improved while limiting the need for revision surgeries.
Benefits of CBCT for orthopedic surgery:
Ideal for pre-surgical planning – The high-resolution 3D images provide surgeons with maximum information on the location of the lesion, enabling improved surgical accuracy during intricate surgeries while also decreasing anesthetic and surgical time.
Rapid scan times of less than one minute – Each scan may take between 5 to 40 seconds, helping to reduce the surgical and anesthetic time for the patients who require intra-operative scans.
Mobile equipment – Having access to portable CBCT equipment enables scans to be performed during surgery with limited disruption to the patient or the aseptic field.
Lower radiation doses – Compared to conventional CT, CBCT exposes patients to significantly lower radiation doses while not compromising image quality. This enables repeated scans to be performed when necessary.
Ideal for monitoring healing post-surgery – CBCT allows healing to be more accurately assessed, especially when monitoring fracture repair and callus formation. In comparison, digital radiographs can over- or underestimate healing, making it difficult to assess post-operative recovery.
CBCT is currently gaining rapid popularity in veterinary hospitals due to its ability to produce accurate 3D images in a rapid, cost-effective way that is unique to other imaging modalities.
ts ability to overcome superimposition and its suitability for surgical planning and intra-surgical use make it essential for all veterinary orthopedic work.
References
Posadzy M, Desimpel J, Vanhoenacker F. Cone Beam CT of the musculoskeletal system: clinical applications. Insights into imaging. 2018 Feb;9(1):35-45.
Ricci M, Boldini M, Bonfante E, Sambugaro E, Vecchini E, Schenal G, Magnan B, Montemezzi S. Cone-beam computed tomography compared to X-ray in the diagnosis of extremities bone fractures: a study of 198 cases. European Journal of Radiology open. 2019 Jan 1;6:119-21.
Meneses F, Maiolini A, Forterre F, Oevermann A, Schweizer-Gorgas D. Feasibility of a Frameless Brain Biopsy System for Companion Animals Using Cone-Beam CT-Based Automated Registration. Frontiers in veterinary science. 2022 Feb 9;8:779845.
Lee J, Stayman JW, Otake Y, Schafer S, Zbijewski W, Khanna AJ, Prince JL, Siewerdsen JH. Volume-of-change cone-beam CT for image-guided surgery. Physics in Medicine & Biology. 2012 Jul 17;57(15):4969.
Venkatesh E, Elluru SV. Cone beam computed tomography: basics and applications in dentistry. Journal of Istanbul University Faculty of Dentistry. 2017 Dec 2;51(3 Suppl 1):102-21.
Fotouhi J, Fuerst B, Unberath M, Reichenstein S, Lee SC, Johnson AA, Osgood GM, Armand M, Navab N. Automatic intraoperative stitching of nonoverlapping cone‐beam CT acquisitions. Medical physics. 2018 Jun;45(6):2463-75.

Enhance Your Pet's Recovery with a Veterinary Smart ICU
When Does Your Patient Need the Extra Support of a Veterinary Smart ICU?
As a veterinary professional, your priority is always the well-being of your animal patients. For some, surgery, even when necessary, can be a risky and stressful experience.
That's where veterinary Smart ICUs come in, offering an advanced level of care and monitoring to maximize their chances of a smooth recovery.
But when exactly should you consider utilizing this specialized unit? Here are some key scenarios:
1. Postoperative Care:
Following surgery, even routine procedures, some animals require close monitoring and specialized care. The Smart ICU provides a controlled environment with constant observation, allowing you to:
Identify and address potential complications early: From pain management to bleeding risks, the ICU's advanced equipment and dedicated staff can intervene swiftly, minimizing setbacks.
Deliver consistent, precise medication: IV drips, pain relievers and other critical medications can be administered accurately and continuously in the ICU, ensuring optimal effectiveness.
Promote a comfortable recovery: Temperature control, oxygen therapy, and specialized bedding can create a soothing environment for healing.
2. Critical Care and Emergency Situations:
Animals experiencing severe illnesses, trauma, or life-threatening conditions need immediate and expert intervention. The Smart ICU is equipped to handle:
Cardiopulmonary issues: Advanced monitoring of heart rate, respiration, and oxygen levels allows for swift action in critical situations.
Infectious diseases: Isolation rooms within the ICU prevent the spread of contagious illnesses while providing specialized care.
Severe injuries: From accident victims to animals requiring complex surgical procedures, the ICU offers the necessary equipment and expertise for critical care.
3. Special Needs Patients:
Young pups and kittens, geriatric individuals, and animals with pre-existing conditions require extra attention after surgery. The Smart ICU is ideal for:
Newborn care: Providing warmth, oxygen, and specialized feeding support is crucial for fragile neonates.
Elderly care: Monitoring vital signs, managing pain, and ensuring comfort tailored to their unique needs.
Patients with chronic conditions: Offering a haven with specialized equipment and protocols to address their specific requirements.
Making the Informed Decision:
Deciding whether a Smart ICU is right for your patient requires careful consideration of the individual case.
Factors like the complexity of the surgery, the animal's pre-existing health, and potential recovery challenges should be weighed.
Remember, a Smart ICU is an invaluable tool in your arsenal, offering an extra layer of support and potentially improving recovery outcomes for your patients.
Don't hesitate to consider its benefits when faced with complex cases or animals needing specialized care.

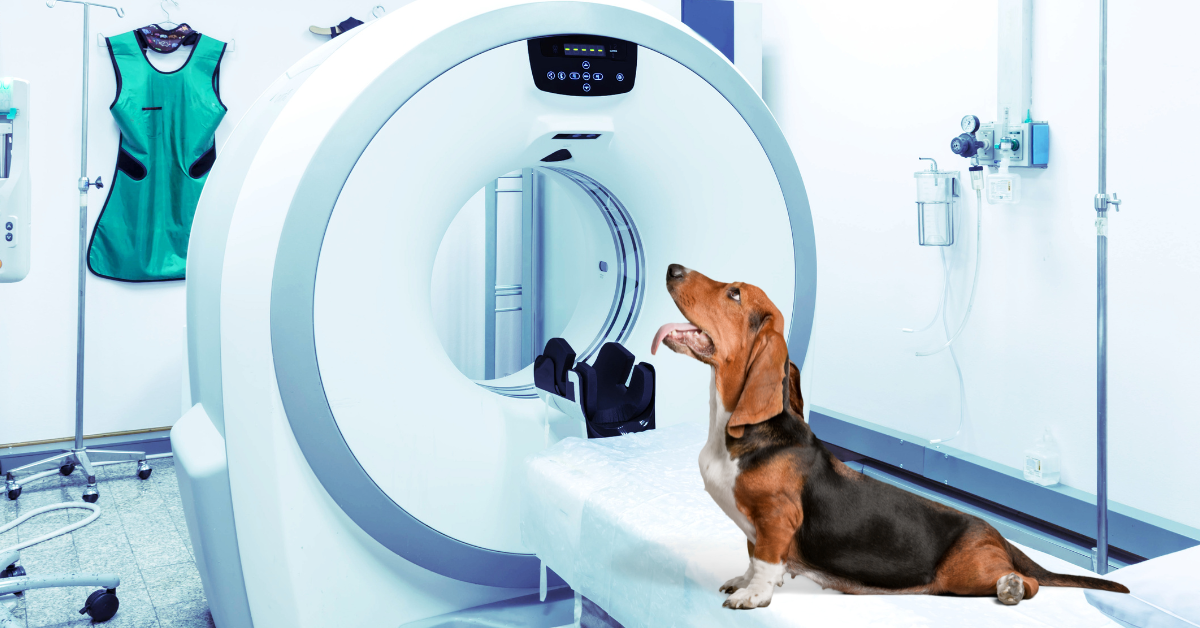
Cone Beam CT: A Powerful Tool for Veterinary Surgeons

What is Cone beam CT (CBCT)
Cone beam CT (CBCT) is a type of 3D imaging that uses X-rays, similar to regular CT scans. But instead of a fan-shaped beam, CBCT uses a cone-shaped beam, making it smaller, faster, and lower in radiation.
Why use Cone beam CT (CBCT)
Veterinary surgeons are finding CBCT especially useful for:
Maxillofacial disease: CBCT excels at imaging the complex structures of the jaws, teeth, and sinuses. This helps diagnose and treat dental problems, trauma, and tumors more accurately. Studies show it provides more detailed information than traditional X-rays.
Small and exotic animals: CBCT's compact size and lower radiation make it ideal for examining the heads and teeth of small pets and even exotic species like rabbits.
Joint disease: CBCT can reveal subtle changes in joints, helping diagnose fractures, dislocations, and arthritis, especially in areas with overlapping bones.
When not to use it?
CBCT isn't perfect for everything. Its uncollimated beam means it's not ideal for:
Soft tissue, thorax, or abdomen: These areas require more focused imaging, best achieved with regular CT scans.
Large animals: Scattered radiation makes images less clear in larger animals like big dogs.
The future of CBCT?
As vets see the benefits, CBCT is likely to become more common in veterinary clinics. Its ability to provide detailed 3D images can lead to better diagnoses, treatment plans, and ultimately, improved patient care for a wider range of animals.
Key points:
CBCT uses a cone-shaped beam for faster, lower radiation 3D imaging.
It excels at imaging the jaws, teeth, and joints in small animals.
Not ideal for soft tissue, thorax, or abdomen, or large animals.
Holds promise for improved diagnosis and treatment in veterinary medicine.

3 Key Reasons Veterinary Surgeons Should Use Cone Beam CT
Three reasons why a veterinary surgeon would want to use a cone beam CT
Cone beam computed tomography (CBCT) has been available in human dentistry for years, but it is now also entering veterinary medicine.
Some specialist vets who work with maxillofacial and dentistry cases have already started to use this technology. I
t provides detailed 3D images which can be helpful for oncology or trauma cases, as well as those suffering from dental disease. Here we are going to explore this imaging modality in more detail, including some scenarios in which you might choose to use it.
What is cone beam CT?
CBCT uses radiation, in the same way that normal computed tomography (CT) does. However, the shape of the x-ray beam is different. In CBCT the beam is in the shape of a cone, whereas normal CT has a fan-shaped beam.
The cone-shaped beam covers the area of interest, and the X-ray source only needs to pass once around the animal, being picked up by a sensor on the opposite side of the patient to create an image.
This means the average dose of radiation a patient receives is more similar to that of one thoracic radiograph than a conventional helical CT.
Due to the low amounts of radiation it emits, its lower purchase cost and the machine’s compact design, CBCT is becoming easier to access than normal CT. Its design makes it particularly ideal for imaging the maxillofacial area, which is a complicated area of anatomy to visualize.
Three reasons why a veterinary surgeon would want to use cone beam CT
Maxillofacial disease
As previously discussed, CBCT is commonly used for maxillofacial disease.
This imaging modality works well in small anatomical areas with high tissue density. This fits the bill for the maxillofacial area, which has several complicated structures including the teeth, upper and lower jaws, the temporomandibular joint, and the sinuses filled with turbinates. All of these structures can overlap and confuse diagnostic imaging, particularly in brachycephalic breeds.
CBCT can create a highly detailed, superimposition-free image that shows the area of interest in 3D. This gives a clear advantage over traditional, 2D dental x-rays.
A recent study into dental pathology in cats found that ‘CBCT provided more clinically relevant detailed information as compared to dental radiography’.
This was also the case in a 2018 paper on CBCT vs dental radiography in small to medium-sized brachycephalic dogs. These studies indicate that practitioners could be missing clinically relevant pathology when using dental X-rays alone.
As well as endodontic disease, other examples where CBCT may be superior to X-rays include –
Evaluating maxillofacial trauma
Assessment of temporomandibular joint disease, dislocation, luxation, or fracture
Viewing bone integrity associated with cystic lesions
Assessing the severity of oronasal communications and cleft palates
Evaluating the extent of oral tumors in hard tissue of the maxilla and mandible
Small and exotic animals
CBCTs can be used in examinations of the head and dentition of small and exotic species, as well as canine and feline patients.
A 2017 paper holds ‘CBCT to be superior to conventional CT for evaluation of normal dentition in rabbits’. Subtle changes in the periodontal ligament space can be detected more easily in rabbits, which can be an indication of emerging disease.
This could otherwise go unnoticed and be missed in conventional CT scans.
Whole body exams of many small, exotic animals may be possible with this technology too, further widening its appeal and usage.
Joint disease
CBCT can be used in extremities like the limbs to evaluate joint disease.
There are indications for its use in the musculoskeletal system including evaluation of fractures and dislocations in small bones and joints, and it can be used in conjunction with other imaging techniques to assess cartilage. It is easier to evaluate degenerative joint disease (like osteoarthritis) with CBCT than conventional radiography, particularly in areas where there is superposition of other bony structures.
This paper on CBCT in people with joint disease further demonstrates this point.
In veterinary medicine, a 2021 study in standing horses demonstrated that CBCT provided diagnostic imaging in a timely fashion. No doubt this modality will start to become more commonly used for joint disorders in a variety of species as veterinary practitioners start to utilize it further.
When would you not want to use cone beam CT?
The X-rays from the CBCT are not collimated.
They make a divergent, uncollimated cone meaning more scattered radiation is produced. This means there is a reduction in soft tissue contrast, and the resolution in areas like the thorax and abdomen is poorer, especially in large dogs.
Larger body parts cause greater scatter. Using CBCT in these areas will mean contrast is lower than if it is used in smaller areas, like the jaw or a limb.
This is different from normal CT scanners which have a collimated beam that runs as straight as possible, with little scattered radiation.
So normal CT should be chosen for soft tissue, thorax, and abdomen examinations (especially in larger cats and dogs) and CBCT would not be advised.
Equally, good radiation shielding – especially when a horizontal beam is likely – is necessary for imaging facilities utilizing this technique.
Summary
Cone beam CT shows great promise across multiple areas of veterinary medicine, but in particular for maxillofacial disease.
It provides highly detailed 3D images of areas that are traditionally hard to assess with conventional dental radiography. This helps veterinary surgeons to plan their treatment accordingly, which can only lead to better patient care and outcomes.
CBCT will probably be seen more and more frequently in hospitals, as its potential gains recognition by general practitioners.

Harness the Power of Thermal Imaging in Veterinary Practice
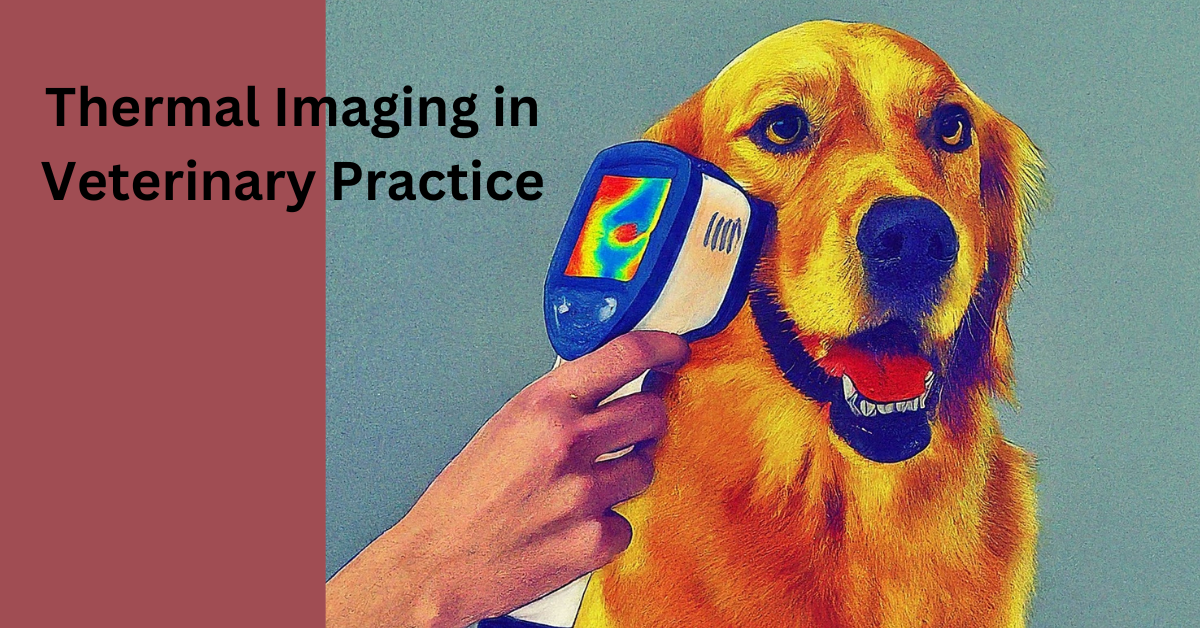
Thermal imaging is a versatile diagnostic tool that has a valuable role in diagnosing lesions early, before clinical signs are shown, as well as monitoring the response to treatment. All areas of veterinary practice, including livestock, equine, and small animals, can benefit from having access to thermal imaging equipment.
What is thermal imaging?
All organisms emit infrared radiation, which thermal imaging cameras detect and convert into a visual image or thermograph1,2,3. Infrared radiation is part of the electromagnetic spectrum that is not visible to humans, but infrared cameras can measure this energy and record each measurement as a specific color, producing a thermograph that can be used to diagnose lesions.
Each infrared measurement represents the skin temperature in a specific location, which changes depending on the underlying capillary blood flow.
Skin temperature may increase in an area in response to pain or inflammation, or it may decrease due to restricted blood flow.
The treating veterinarian can then use thermographs to identify asymmetrical areas or hotspots that represent altered blood flow and the presence of a lesion.
How can thermal imaging benefit veterinary practice?
Thermal imaging offers veterinary clinics and hospitals a versatile diagnostic tool that is unique to other diagnostic modalities.
It is a safe, non-invasive test that does not require any animal contact and minimal handling, so is especially useful for monitoring large numbers of animals, while also eliminating the need for chemical sedation for nervous or aggressive animals.
Current uses of thermal imaging in veterinary clinics
Determining the location of a lesion – A thermograph can rapidly and accurately identify the location of a lesion.
This information can then be used to decide on further diagnostic tests, saving valuable time and preventing unnecessary tests from being performed.
Monitoring response to treatment – Thermographs can be repeated regularly to monitor how well a lesion is healing and its response to treatment.
This can be useful for preventing re-injury and ensuring treatment is producing a satisfactory result6.
Preventing injuries in athletes – Thermal imaging can detect lesions before any clinical signs or lameness occurs. This can help avoid serious injuries by enabling treatment to be started early before the injury develops further.
Detecting health problems early – Thermal imaging can be used as part of a general health check or elderly pet examination to detect any lesions early before clinical signs are shown.
Painful conditions such as osteoarthritis are commonly diagnosed on thermographs, enabling treatment to be started at an earlier stage of the disease.
Detecting individuals in a flock or herd that is at risk of becoming unwell – In large groups of animals, thermal imaging can quickly detect any individuals with an increased skin temperature, allowing affected animals to be isolated from the herd and promptly checked before illness develops.
Uses for thermal imaging in equine veterinary clinics
In equine practice, thermography is a useful diagnostic tool for diagnosing lameness such as acute laminitis, navicular disease, synovitis, fractures, back problems, and tendonitis.
It is widely used alongside lameness examinations and other diagnostic tests to help efficiently diagnose difficult-to-locate lesions.
How thermal imaging can be used in farm practices
Thermal imaging has a wide range of uses in farm practice as it can quickly identify unwell individuals within a large group.
Foot lesions in cattle can be detected using thermographs by identifying increases in hoof temperature, while early mastitis cases can be diagnosed by monitoring udder temperature.
Research also supports the use of thermal imaging for identifying infectious diseases such as Bluetongue, bovine respiratory disease, bovine viral diarrhea virus, and even exotic conditions such as foot and mouth disease.
In the future, thermal imaging may have a vital role in diagnosing infectious diseases.
Uses for thermal imaging in small animal veterinary hospitals
Thermal imaging can be used to identify lesions involved in spinal disease, joint disease, osteoarthritis, and cruciate disease in pets.
It has an important role in locating lesions and therefore guiding the use of MRI, and it can identify painful lesions early so treatment can be started promptly.
Thermal imaging can be used to assess wound healing, by detecting ischemia and non-viable tissue as a result of decreased capillary blood flow. It can also be used to monitor the success of skin grafts.
Research also supports using thermographs to locate malignant tumors in dogs and cats, by identifying an increase in regional skin temperature.
In the future thermal imaging may have a vital role in diagnosing benign and malignant tumours.
Thermal imaging already has a wide range of veterinary uses, making it a safe investment that will significantly benefit patient health and welfare.
Research also promises new and exciting upcoming uses for thermal imaging, guaranteeing that every veterinary practice will benefit from this exciting diagnostic tool.
References
Mota-Rojas D, Martínez-Burnes J, Casas-Alvarado A, Gómez-Prado J, Hernández-Ávalos I, Domínguez-Oliva A, Lezama-García K, Jacome-Romero J, Rodríguez-González D, Pereira AM. Clinical usefulness of infrared thermography to detect sick animals: Frequent and current cases. CABI Reviews. 2022;17(40).
Racewicz P, Sobek J, Majewski M, Różańska-Zawieja J. The use of thermal imaging measurements in dairy cow herds. Animal Science and Genetics. 2018;14(1):55-69.
Sung J, Loughin C, Marino D, Leyva F, Dewey C, Umbaugh S, Lesser M. Medical infrared thermal imaging of canine appendicular bone neoplasia. BMC veterinary research. 2019(1):1-7.
Rekant SI, Lyons MA, Pacheco JM, Arzt J, Rodriguez LL. Veterinary applications of infrared thermography. American journal of veterinary research. 2016;77(1):98-107.
Casas-Alvarado A, Martínez-Burnes J, Mora-Medina P, Hernández-Avalos I, Domínguez-Oliva A, Lezama-García K, Gómez-Prado J, Mota-Rojas D. Thermal and circulatory changes in diverse body regions in dogs and cats evaluated by infrared thermography. Animals. 2022 Mar 20;12(6):789.
da Silva TC, de Albuquerque Mariz TM, Escodro PB. Use of thermography in clinical and sports evaluations of equine animals: a review. Research, Society and Development. 2022;11(8).

Positioning for Veterinary Dental Radiography

Many disease processes may go undiagnosed without radiography, which provides a useful diagnostic and monitoring tool. Radiography also allows us to plan our extractions or other treatments more carefully.
We have produced a comprehensive guide to dental positioning but here is a handy overview of what you should be aiming to achieve, especially if you’re using a handheld generator.
Required views for Veterinary X-rays
A full mouth series consists of rostral maxillary and mandibular views, right and left maxillary views, and right and left mandibular views.
The rostral maxillary and mandibular views should include the canine teeth.
Maxillary canine teeth are best imaged in separate oblique views to prevent superimposition of the first and second premolars upon the canine tooth roots.
In addition, of course, you may wish to take additional views for specific suspected or confirmed dental abnormalities.
A portable handheld X-ray generator is a great asset to aid you in getting the full set of views, as it gives full flexibility in positioning the tube head.
However, care must be taken to avoid inadvertent radiation exposure, and all local rules for radiography must of course be followed.
Positioning the dog or cat
When placing the sensor in the patient’s mouth, care needs to be taken so that it is not damaged, particularly with more flimsy films or sensors.
This may mean using positioning aids like small rubber-coated dental wedges, modeling clay placed in a plastic bag, or disposable gauze sponges/paper towel sheets.
A towel under the patient’s neck will also help to keep them straight during radiography. The tongue can lie between the sensor/film and the teeth in cats and small dogs, the soft tissue opacity will not interfere with image production.
When taking radiographs, you will need to bear in mind the position of the skull, the placement of the sensor/film, and the position of the tube head.
Broadly speaking, the two most common positioning techniques are the parallel technique and bisecting angles.
The parallel technique is used for the caudal mandibular premolars and molars. The bisecting angle technique is used for all the maxillary teeth and the rostral mandibular teeth.
Parallel technique
Place the patient in lateral recumbency with the relevant side facing upwards. The film/sensor will be placed intraorally on the lingual surface of the teeth. Use a film/sensor positioning aid as necessary to keep the film/sensor in place and as parallel as possible to the tooth of interest.
The film/sensor must cover the entire area of interest, from crown to root. The tube head or x-ray machine is set at a 90-degree angle (perpendicular to the film) to take the image.
Bisecting angle technique
The parallel technique has limited use, and so bisecting angles must be used to get the full set of views. The theory behind this is that the correct angle stops image distortion.
If the x-ray beam is too parallel to the sensor/film, it will make the image elongated (like a low setting sun casting long shadows).
If the image produced is abnormally short, then the beam has been made too perpendicular to the sensor/film (like a high sun at noon making short shadows).
The right angle between the two of these will create an image that is a true representation of the patient’s dental anatomy.
When obtaining views of the maxillary teeth the patient is placed in sternal recumbency and when the mandibular teeth are imaged the patient is usually in dorsal recumbency.
The sensor/film needs to be intraoral, placed in the area of interest with the patient biting on it.
You will then need to imagine a line running parallel to the sensor film and another that is parallel to the tooth (crown to root). Where these lines intersect, they will form an angle, which you will then need to divide in half. Aim the primary beam perpendicular to this imaginary line, keeping it centered over the tooth of interest.
This should produce a true image of the tooth at the correct height and width.
Tips for imaging specific teeth
Rostral mandibular incisors and canine teeth.
Place the patient in dorsal recumbency and make sure that the palate is parallel to the table. Put the sensor/film between the teeth and tongue using a positioning aid.
Position the tube head 90 degrees, perpendicular to the sensor. In small and medium dogs, it is possible to get the canines in the same image as the incisors. For large dogs, it might be necessary to move the sensor caudally to capture all the roots.
Rostral mandibular premolars
The patient is placed in dorsal recumbency with the skull parallel to the table. The sensor/film will be parallel to the table in the bite between the maxillary and mandibular premolars.
The tube head is aimed perpendicular to the bisecting angle line and centered over the premolars of interest.
Caudal right or left mandibular teeth
The cat or dog is in lateral recumbency with the side of interest facing upwards, ensuring the skull is parallel to the table.
The sensor/film should be intraoral on the lingual side of the tooth of interest. The sensor/film can be orientated in portrait or landscape. Aim the tube head perpendicular to the tooth of interest and sensor or film.
Rostral maxillary incisors and canine teeth
The patient needs to be in sternal recumbency with the skull parallel to the table. The film/sensor is placed between the maxillary and mandibular incisors with the help of a positioning aid to hold it in place.
The bisecting angle line is determined with the tube head perpendicular to it centering over the incisors. A 20–30-degree angle is often used which helps prevent superimposition of the maxillary first and second premolars.
Oblique views of the maxillary canine teeth
With the patient in sternal recumbency, position the skull with padding to ensure it is parallel to the floor. The film/sensor is placed intraorally and caudally towards the opposite arcade. This helps to get the root apex in the shot. You may need a positioning aid to keep it in place.
The tube head is aimed perpendicular to the bisecting angle from a rostrolateral approach (centered over the canine tooth). The tube head should be at a 45-degree angle to the sensor/film, ensuring the sensor/film is large enough to capture the crown and the root.
Right or left maxillary premolars
The patient should be in sternal recumbency with the sensor film placed beneath the maxillary teeth (so that the patient is biting the sensor/film). Positioning devices might be needed to make sure the sensor/film is kept parallel to the table.
The bisecting angle should be determined with the tube head aimed perpendicular to it. In dogs, the tube head is at a 30-45-degree angle, but cats require a steeper angle of 20-30 degrees due to their zygomatic arch.
Teeth with three roots may require a second view to assess their mesial roots, which can be achieved by moving the tube head rostrally while keeping the bisecting angle the same.
Summary
Hopefully, this guide gives you a few pointers when getting started with dental radiography.
One final parting tip that may be of help is if the image is distorted, check the beam angle. If the image is normal but not all areas of interest are visible, check the plate position.

The Future of Veterinary Imaging: Fluoroscopy Advances
What is Fluoroscopy?
Fluoroscopy is an advanced imaging modality that is widely used in human medicine, although its potential in veterinary medicine is only just starting to be realised1. Like conventional radiography, fluoroscopy uses X-rays to produce an image, but in this technique, the image is produced as a video in real-time.
This moving image allows for a much greater range of diagnostic tests to be carried out and can also be used for a range of therapeutic interventions. This field is usually referred to as Interventional Radiography.
Fluoroscopic images are produced by an X-ray generator that produces either a continuous, strobed, or near-continuous, beam of X-rays.
The X-rays are captured by either an image intensifier or, in more modern digital systems, a flat panel detector. Image intensifiers need to be coupled via an optical distributor to a recording or viewing device such as a video camera or screen.
Flat panel detectors are similar to those used in conventional digital radiography (DDR systems) and are connected directly to a computer.
The two main types of fluoroscopy units used in veterinary clinics are portable C-arm units and R&F (radiography and fluoroscopy) rooms.
R&F units are made up of a stationary radiography table with an integrated fluoroscope. The x-ray generator has two separate tube heads, one is used for radiography and one for fluoroscopy.
Portable C-arms are more common in veterinary applications, being used for major surgeries in veterinary hospitals. Unlike an R&F room, a portable c-arm cannot take diagnostic X-rays, only fluoroscopy.
How is fluoroscopy performed?
Depending on the procedure being performed, the patient may be either anesthetized, sedated, or conscious.
In the case of conscious studies, animals are usually restrained within a box where they can easily sit up or lie down, as unlike conventional radiography there is no requirement for them to be perfectly still.
In practice, a change of position is often used to obtain different views and more detailed information. Contrast agents are commonly used to show function e.g. swallowing, or to highlight a particular anatomical area.
In interventional procedures, the patient would routinely be under general anesthetic, and a C-arm fluoroscope is used by the surgeon to visualize part or all of the procedure.
What are the advantages of fluoroscopy?
The big difference between fluoroscopy and traditional radiography is that fluoroscopic images are dynamic moving images, so can be used to assess the function as well as the structure of the body part being imaged.
This opens up a whole array of possibilities. Images produced by fluoroscopy tend to be less detailed than regular radiographs and, to counter this, contrast media are often used to delineate the required structures.
What conditions can fluoroscopy be used to help diagnose?
Many conditions are best diagnosed via fluoroscopy, where a static radiograph does not allow us to see function and ultrasound techniques don’t allow a large enough field of view or suffer interference from air or bone.
Studies that are commonly carried out may include;
Swallowing studies: Swallowing studies require the patient to ingest a volume of contrast material, such as barium, and the progress of this can be tracked through the throat and down to the stomach. This technique is considered the gold standard for investigation of the dysphagic patients.
Esophageal function: Fluoroscopy is useful in the diagnosis of functional and structural esophageal diseases such as megaesophagus and hiatal hernias.
Tracheal and bronchial collapse: A collapsing trachea may be visible on plain radiographs but is a dynamic condition and can easily be missed. Fluoroscopy is more effective at assessing the presence and degree of airway collapse.
Functional diaphragm disorders due to injury or disease of the phrenic nerve.
Localization of thoracic masses: Movement of the mass during normal respiration helps to differentiate peripheral pulmonary and thoracic wall masses.
Blood vessels can be assessed through angiography. Fluoroscopy allows radio-opaque dyes to be injected accurately into specific vessels, aiding the diagnosis of vascular ring anomalies and allowing procedures, such as mesenteric portography which is used to diagnose portosystemic shunts as well as assess the effectiveness of vessel attenuation at surgery.
Real-time evaluation of orthopedic implant placement intra-operatively.
Urinary dysfunction and intervention. Using contrast agents, fluoroscopy allows for easy diagnosis of urinary issues and the effectiveness of catheterizations or other interventions.
What conditions can be treated with the aid of fluoroscopy?
Treatment of conditions with the aid of fluoroscopy is termed Interventional Radiology and in the human field, this is the standard of care for many diseases.
The advantages of using IR as opposed to more traditional therapies include shorter anesthetics, lower perioperative morbidity and mortality, and reduced hospitalization times.
In some cases, conditions that were considered untreatable by other methods can be treated, for example, chemoembolization of unresectable tumors.
Veterinary medicine has some way to go before these techniques are adopted as widely as they are in human medicine.
There are certainly some difficulties and disadvantages in the use of Interventional Radiographic techniques, which include the degree of technical expertise required, specialist equipment needed, and the risk of undesirable radiation exposures to both patients and personnel.
These issues can be reduced greatly with the right training and equipment for the job.
IR techniques that are currently offered to veterinary patients include;
Treatment of cardiac and vascular diseases
Placement of devices within specific blood vessels for transarterial or transvenous embolization of vessels e.g. PDA occlusion, PSS shunt occlusion, or treatment of intractable hemorrhage
Vascular foreign body retrieval e.g. catheter fragments
Cardiac interventional procedures such as balloon valvuloplasty for congenital valve stenosis
Cardiac pacemaker implantation for treatment of arrhythmias
Pulmonary disease
Intraluminal tracheal stenting for treatment of tracheal collapse
Retrieval of tracheobronchial foreign bodies where surgery or endoscopic retrieval are not feasible
Cyanoacrylate embolization for treatment of recurrent chylothorax
Aspiration and biopsy of the thoracic wall and pulmonary masses
Management of neoplasms
Intra-arterial chemotherapy
Arterial embolization and chemoembolization to reduce tumor growth
Palliative stenting of neoplastic obstructions
Urinary disease
Urethral and ureteral stenting to overcome obstructions due to stones, strictures, and malignancies
Urethral catheter placement in cats with urethral rupture
What does the future hold for fluoroscopy
Veterinary fluoroscopy is a developing field of diagnostics.
It seems likely these techniques will become more widely available at both referral and first-opinion veterinary clinics. As expertise in this field progresses, more and more patients can benefit from this technology.
References
1. Weisse, C. W., Berent, A. C., Todd, K. L., & Solomon, J. A. (2008). Potential applications of interventional radiology in veterinary medicine. Journal of the American Veterinary Medical Association, 233(10), 1564-1574.
2. Gingold, E. (n.d.). Modern Fluoroscopy Imaging Systems. Image Wisely. https://www.imagewisely.org/Imaging-Modalities/Fluoroscopy/Modern-Imaging-Systems. Accessed 24/01/2024
3. Shaw, L., & Tudor, D. (2021). Fluoroscopy: Don’t Miss the Show. The Veterinary Nurse, 51–57.
4. Shalom NE, Gong GX, Auster M. Fluoroscopy: An essential diagnostic modality in the age of high-resolution cross-sectional imaging. World J Radiol. 2020 Oct 28;12(10):213-230.
5. Pollard, R. E., Marks, S. L., Cheney, D. M., & Bonadio, C. M. (2017). Diagnostic outcome of contrast videofluoroscopic swallowing studies in 216 dysphagic dogs. Veterinary Radiology & Ultrasound, 58(4), 373-380.
6. Fuentes, V. L., Johnson, L., & Dennis, S. (2010). BSAVA Manual of Canine and Feline Cardiorespiratory Medicine. BSAVA.
7. Pollard, R. E. (2012). Imaging evaluation of dogs and cats with dysphagia. International Scholarly Research Notices, 2012.
8. Bevan, J. M., & Taylor, R. A. (2004). Arthroscopic release of the medial femoropatellar ligament for canine medial patellar luxation. Journal of the American Animal Hospital Association, 40(4), 321-330.
9. Weisse, C. (2015). Veterinary interventional oncology: from concept to clinic. The Veterinary Journal, 205(2), 198-203.
10. Kim, M. Y., Kim, J. H., Kim, K. C., & Yoon, H. Y. (2022). The effectiveness of intraoperative mesenteric portography for preventing misdiagnosis of congenital absence of the portal vein in dog with extrahepatic portosystemic shunt: a case report. Acta Veterinaria Brno, 91(3), 267-272.
11. Meurs, K. M., Lehmkuhl, L. B., & Bonagura, J. D. (2005). Survival times in dogs with severe subvalvular aortic stenosis treated with balloon valvuloplasty or atenolol. Journal of the American Veterinary Medical Association, 227(3), 420-424.
12. Wess, G., Thomas, W. P., Berger, D. M., & Kittleson, M. D. (2006). Applications, complications, and outcomes of transvenous pacemaker implantation in 105 dogs (1997–2002). Journal of veterinary internal medicine, 20(4), 877-884.

Picking the Perfect Small Animal Ultrasound Probe
Small Animal Veterinary Ultrasound Probes: What To Look For
Ultrasound imaging has become an indispensable tool in modern veterinary medicine. Offering real-time, non-invasive visualization of internal organs and tissues, it aids in diagnosing a wide range of conditions, from abdominal pathologies to cardiac malformations. However, for optimal image quality and diagnostic accuracy, the right veterinary ultrasound probe is crucial. This blog delves into the key considerations when choosing probes for your small animal practice.
Understanding Probe Types:
Veterinary ultrasound probes come in various shapes and sizes, each tailored to specific anatomical regions and applications. Here are the most common ones:
Micro-convex Probes: The workhorses of small animal abdominal ultrasonography, offer a good balance between image resolution and penetration depth. Their small footprint allows access to tight spaces like intercostal gaps, making them ideal for visualizing organs like the liver, kidneys, and bladder.
Linear Probes: With a flat footprint and high-frequency range, linear probes excel at providing high-resolution images of superficial structures like muscles, tendons, and joints. They are also valuable for cardiac examinations and evaluating delicate structures like the eyes.
Phased-array Probes: Offering electronic beam steering, phased-array probes enable detailed visualization of deeper structures like the heart and blood vessels without requiring probe manipulation. Additionally, some models enable 3D reconstruction, enhancing diagnostic capabilities.
Endocavity Probes: For internal examinations of the female reproductive tract or urinary bladder, specialized endocavity probes are available. These miniature probes feature sterile sheaths for safe insertion and provide clear visuals of organs within body cavities.
Frequency Matters:
Frequency refers to the number of sound waves emitted by the probe per second, directly impacting image resolution and penetration depth. Higher frequencies (5-12 MHz) generate sharper images but struggle to penetrate deeper tissues. Conversely, lower frequencies (2-5 MHz) offer deeper penetration but with less detail. The ideal frequency range depends on the target organ and patient size. Consult your ultrasound manufacturer's recommendations for specific applications.
Image Quality and Advanced Features:
Beyond probe type and frequency, several features influence image quality and diagnostic utility:
Field of View: Indicates the area covered by the ultrasound beam, impacting the number of organ sections captured in a single image. Wider fields of view are helpful for general surveys, while narrower fields provide a more focused examination of specific structures.
Tissue Harmonic Imaging (THI): Reduces image noise generated by tissue interfaces, resulting in sharper and clearer visualization of organ borders and internal structures.
Doppler Modes: Enables evaluation of blood flow within vessels, aiding in diagnoses related to cardiovascular and circulatory disorders.
Ergonomics and Handling: Probe weight, grip design, and cable length can significantly impact user comfort and scanning efficiency. Choose probes that feel comfortable in your hand and minimize fatigue during prolonged examinations.
Considerations for Your Practice:
When selecting probes for your practice, consider the following factors:
Patient Population: The typical size and species of animals you see will influence the appropriate probe sizes and frequencies.
Common Examination Types: Regularly performed procedures like abdominal scans, echocardiography, or musculoskeletal assessments will guide your probe selection.
Budget: Probe prices vary widely, depending on technology, features, and brand. Determine your budget constraints and prioritize must-have features versus optional ones.
Compatibility: Ensure the chosen probes are compatible with your existing ultrasound machine.
Conclusion:
Selecting the right veterinary ultrasound probes is vital for accurate diagnoses and effective patient care. By understanding probe types, frequencies, and advanced features, you can tailor your equipment to your practice's specific needs and optimize your diagnostic capabilities. Investing in high-quality probes not only enhances your clinical acumen but also improves workflow efficiency and patient comfort.
Remember, consulting with your ultrasound equipment provider and colleagues can offer valuable insights during the selection process.
By making informed choices, you can equip your practice with the best tools to provide exceptional veterinary care for all your furry (and feathered) patients.

House Calls-Understanding the Rise of Mobile Veterinary Care

The Future of Pet Healthcare: Mobile Veterinary Services Explored
In the bustling world we live in, time is a precious commodity.
Pet owners, like everyone else, are constantly juggling work, family, and social obligations, often leaving little time for lengthy trips to the veterinarian's office. This is where mobile veterinary care steps in, offering a convenient and stress-free solution for both pets and their owners.
The Convenience Factor: A Win-Win for Pets and Owners
Imagine the relief of having a veterinarian come to your doorstep, eliminating the need to pack up your anxious pet, brave traffic jams, and wait in crowded waiting rooms.
Mobile vet visits offer a personalized and comfortable experience for pets, reducing stress and allowing them to be examined in their familiar surroundings.
For pet owners, mobile vet services provide the flexibility to schedule appointments at their convenience, often during evenings or weekends. This can be especially beneficial for those with busy schedules or multiple pets, as they can avoid juggling multiple appointments and transportation arrangements.
Benefits for Veterinarians: A Rewarding Career Path
Mobile veterinary care offers a unique and rewarding career path for veterinarians.
By bringing their expertise directly to pet owners, mobile vets enjoy a more personal connection with their clients, fostering stronger relationships and building a loyal clientele.
The mobile setting also provides veterinarians with a more flexible schedule, allowing them to set their own hours and work-life balance. This flexibility is particularly appealing to veterinarians seeking a more autonomous and entrepreneurial approach to their practice.
Essential Equipment for Mobile Veterinary Success
To operate a successful mobile veterinary practice, essential equipment is required to ensure a comprehensive and effective examination and treatment of pets. This includes:
A well-equipped mobile van or trailer that serves as a portable clinic, with ample space for examination, treatment, and storage of medical supplies.
Essential veterinary tools and equipment, including a stethoscope, thermometer, otoscope, ophthalmoscope, and surgical instruments.
Diagnostic tools, such as a portable ultrasound machine and laboratory equipment for blood and urine analysis.
Pharmaceutical supplies, including medications, vaccines, and emergency drugs.
The Allure of Used Veterinary Equipment: A Smart Investment
For veterinarians embarking on a mobile veterinary venture, purchasing used equipment can be a cost-effective and sustainable solution. Reputable online marketplaces like https://www.usedvetequipment.com/ offer a wide selection of pre-owned veterinary equipment, carefully inspected and refurbished to meet industry standards.
By opting for used equipment, veterinarians can significantly reduce their initial investment costs, allowing them to allocate more resources toward other aspects of their business, such as marketing and client acquisition.
Marketing Your Mobile Veterinary Practice: Spreading the Pawsitive Word
To attract clients and establish a successful mobile veterinary practice, effective marketing strategies are crucial. Here are some key considerations:
Build a strong online presence: Create a user-friendly website that clearly outlines your services, availability, and contact information. Utilize social media platforms to engage with potential clients, share informative content, and promote special offers.
Target your marketing efforts: Identify your ideal client base and tailor your marketing messages accordingly. Consider factors such as location, pet ownership demographics, and common pet health concerns in your area
Network with other pet professionals: Collaborate with local pet stores, groomers, and animal shelters to cross-promote services and expand your reach.
Offer incentives and loyalty programs: Provide discounts for first-time clients, package deals for multiple services, and referral bonuses to encourage repeat business.
Embrace the Future of Veterinary Care
The mobile veterinary industry is rapidly expanding, driven by the increasing demand for convenience and personalized pet care.
By offering a unique and valuable service, mobile veterinarians are well-positioned to thrive in this growing market. With careful planning, strategic marketing, and a commitment to providing exceptional care, mobile veterinary practices can achieve success and make a positive impact on the lives of pets and their owners.

Exploring the Benefits of Mobile Services

Beyond the Clinic: A Holistic Approach to Pet Wellness with Mobile Vets
In the dynamic realm of veterinary medicine, a transformative trend has emerged, revolutionizing the way pet owners and veterinarians experience care. Mobile veterinary services have become the go-to solution for those seeking the perfect blend of convenience, personalized attention, and a stress-free environment for pets.
If you're a veterinarian contemplating diving into the world of mobile vet services, this comprehensive guide will equip you with tips on starting a new service, effective marketing, the importance of a compelling website, and how purchasing used equipment can be a savvy financial move.
The Convenience for Customers and Their Beloved Pets
For Pet Owners:
Stress-Free Environment: Bid farewell to the challenges of transporting pets to traditional clinics. Mobile vet services bring veterinary care directly to the doorstep, eliminating the stress associated with car rides and unfamiliar surroundings.
In-Home Comfort: Imagine your pet being examined and treated in the cozy comfort of their own home. Mobile vet services prioritize in-home care, reducing stress-induced behavioral issues and fostering a more relaxed experience for both pets and owners.
Flexible Scheduling: Tailor-made for busy lifestyles, mobile vet services offer flexibility in appointment scheduling. Whether it's a routine check-up or a more urgent matter, customers can enjoy appointments that align with their schedules.
For Veterinarians:
Personalized Connections: Building relationships with clients and their pets is a cornerstone of mobile vet services. Enjoy the opportunity to provide personalized attention, forge stronger connections, and have a more profound impact on the well-being of your furry patients.
Escape the Clinic Setting: Break free from the constraints of a traditional clinic. Mobile vet services allow you to create a unique work environment, where you can focus on individualized care without the physical boundaries of a brick-and-mortar establishment.
Autonomy and Control: With a mobile vet service, you're not just a practitioner; you're an entrepreneur. Take control of your practice, set your schedule, and enjoy a greater sense of autonomy in steering the direction of your veterinary career.
Tips for Starting Your Mobile Veterinary Service
Develop a Professional Website: Your online presence is crucial for attracting clients. Create a website that clearly outlines your services, service areas, and contact information. Ensure that the design is user-friendly, and consider incorporating features like appointment scheduling and informative content.
Utilize Social Media for Engagement: Harness the power of social media to connect with potential clients. Share informative content about pet care, engage with your audience, and showcase the behind-the-scenes of your mobile vet service. Encourage satisfied clients to share their experiences on your platforms.
Establish Local Partnerships: Collaborate with local pet stores, groomers, and animal shelters to cross-promote your services. Attend community events and pet fairs to showcase your expertise and connect with potential clients. Word of mouth within the community is a powerful marketing tool.
Offer Competitive Pricing and Packages: Consider introductory packages or discounts to attract new clients. Tailor your pricing to cater to the specific needs of your target audience. Highlight the value of your services, emphasizing the convenience and personalized care you bring to their doorstep.
Emphasize Convenience in Marketing: In your marketing materials, underscore the convenience your mobile vet service provides. Highlight the stress-free environment for pets and the time-saving benefits for pet owners. Showcase testimonials that speak to the positive impact of your services on the lives of both pets and their owners.
Equipment Essentials for Your Mobile Veterinary Clinic
Investing in the right equipment is crucial for delivering comprehensive care on the go. Here's a checklist:
Portable Examination Table: Facilitate thorough examinations with a portable table that ensures comfort for pets.
Basic Diagnostic Tools: Stethoscope, otoscope, and ophthalmoscope are indispensable for routine check-ups and assessments.
Essential Medications and Supplies: Be equipped with medications and supplies to address common pet ailments promptly.
Waste Disposal System: Maintain cleanliness and hygiene with a portable waste disposal system.
Portable Laboratory Equipment: For in-house diagnostics, invest in portable equipment for blood and urine tests.
Reliable Transportation: A well-maintained and spacious vehicle is essential for transporting equipment and ensuring you reach your clients promptly.
Considering Used Equipment to Save Costs: Exploring platforms like usedvetequipment.com can be a smart financial move for a new mobile vet service. Purchasing quality used equipment allows you to save costs without compromising on the essential tools needed for your practice. Ensure you thoroughly inspect and verify the condition of the equipment before making a purchase.
Conclusion: Paving the Way to Success in Mobile Veterinary Services
Embarking on the journey of mobile veterinary services opens doors to a fulfilling and dynamic career.
By incorporating these tips for starting your service, emphasizing the convenience for customers and their pets, and strategically investing in equipment, you're poised to create a thriving business that brings veterinary care right to the doorstep of those who need it the most.

Explore Endoscopy in Veterinary Medicine

In recent years, endoscopy has become increasingly prevalent in veterinary medicine, offering a minimally invasive approach to diagnosing and treating a wide range of conditions. Just like other advanced imaging modalities, such as veterinary CT systems and fluoroscopy, endoscopy is becoming more commonplace for use by general practitioners.
This article aims to provide an overview of endoscopy in veterinary medicine, exploring its various applications, benefits, and considerations for implementation in veterinary practices.
What is Endoscopy?
An endoscope is a specialized instrument that allows veterinarians to visualize and examine internal organs and structures without the need for surgery.
This versatile tool consists of a thin, flexible tube equipped with a light source and a camera. The endoscope is inserted into the body through a natural orifice, such as the mouth, esophagus, or anus, to provide a real-time view of the internal environment.
Common Uses of Endoscopy in Veterinary Medicine
Endoscopy offers a range of valuable applications in veterinary medicine, including:
Non-invasive assessment of anatomy: Endoscopy allows veterinarians to examine the internal surfaces of organs and structures without making incisions. This provides a detailed view of the anatomy, enabling the detection of abnormalities, such as inflammation, masses, and foreign objects.
Obtaining biopsy samples: Biopsy samples are crucial for the definitive diagnosis of many conditions, including inflammatory and neoplastic diseases. Endoscopes can be equipped with biopsy forceps, allowing veterinarians to collect tissue samples from the areas of interest without the need for surgical intervention.
Removal of foreign objects: Foreign bodies can pose a significant risk to animal health. Endoscopy facilitates the visualization, localization, and removal of foreign objects from various parts of the body, including the gastrointestinal tract, respiratory tract, and urinary tract.
Minor surgical procedures: Endoscopy can be used to perform a variety of minor surgical procedures, such as balloon dilation of strictures, hemostasis, and nasopharyngeal polyp removal.
Exotic animal care: Endoscopy plays a valuable role in the care of exotic species, such as birds and reptiles. It can be used for gender determination, diagnostic evaluation, and minor surgical procedures.
Benefits of Endoscopy
Endoscopy offers several distinct advantages over traditional diagnostic methods, including:
Minimally invasive: Endoscopic procedures are minimally invasive, causing minimal discomfort and tissue damage compared to open surgery. This reduces recovery time and allows animals to return to their normal activities more quickly.
Real-time visualization: Endoscopy provides real-time visualization of internal structures, enabling veterinarians to identify abnormalities promptly and accurately.
Versatility: Endoscopy can be used to examine a wide range of body systems, including the gastrointestinal, respiratory, urinary, and reproductive systems.
Considerations for Implementing Endoscopy in Veterinary Practices
While endoscopy offers numerous benefits, its implementation in veterinary practices requires careful consideration of several factors:
Training and experience: Veterinarians should undergo appropriate training and gain hands-on experience in endoscopic procedures before performing them independently.
Equipment selection: The choice of endoscopic equipment depends on the specific needs of the practice and the types of patients it serves.
Cost-benefit analysis: Endoscopic equipment can be a significant investment, so practices should carefully assess the cost-benefit ratio before making a purchase.
Referral options: It is important to have a referral network in place for cases that require specialized endoscopic expertise.
Conclusion
Endoscopy has become an invaluable tool in veterinary medicine, offering a minimally invasive and versatile approach to diagnosing and treating a wide range of conditions.
By expanding their diagnostic capabilities with endoscopy, veterinary practices can enhance patient care and provide comprehensive, high-quality services.
Additional Resources:
* American Veterinary Medical Association: [https://www.avma.org/](https://www.avma.org/)
* World Small Animal Veterinary Association: [https://www.wsava.org/](https://www.wsava.org/)
* European Society of Veterinary Endoscopy: [https://www.esve.org/](https://www.esve.org/)

Mastering Detection & Treatment of Urinary Bladder Stones

Unraveling the Diagnostic Challenge: Spotting Hidden Bladder Stones
Introduction:
Embarking on the quest to identify and address urinary bladder stones in our furry companions requires a nuanced approach. This comprehensive guide is designed to navigate the intricacies of detection and treatment, shedding light on the sometimes elusive nature of these mineral-rich intruders.
Recognizing the Telltale Signs: Is It Bladder Stones?"
Is your pet showing signs of distress like blood in their urine, increased urination, or accidents at home? These could be subtle indicators of urinary bladder stones. Explore this section to decipher the signals that may prompt a visit to your veterinary clinic.
The Power of Radiographs: Shedding Light on Uroliths
Radiographs serve as the cornerstone in this diagnostic journey. Learn about capturing essential views of the abdomen and unraveling the mystery of radiopaque stones. Delve into the nuances of stone size and distribution, from sand-like grains to larger formations.
Contrast Studies: Enhancing Visibility for the Elusive Stones
When radiographs fall short, a double-contrast study becomes essential. Discover the benefits of combining positive and negative contrast agents for optimal bladder stone visualization.
Understand the role of anesthesia or sedation in administering contrast agents through a urinary catheter, ensuring patient safety and comfort.
Ultrasound Magic: Illuminating Radiolucent Stones
Explore the wonders of ultrasound in uncovering radiolucent stones that elude traditional radiographs. Dive into the fluid-filled bladder's role in providing contrast for ultrasound waves, enabling the detection of stones and other bladder abnormalities. Delve into ultrasound's capabilities in assessing the upper urinary tract, identifying issues beyond bladder stones.
Tailoring Treatment: From Diet Changes to Cystotomies
Based on diagnostic findings, discover treatment options, from recommending dietary changes for dissolvable stones to performing cystotomies for stone removal. Understand the importance of follow-up imaging to track progress and determine the effectiveness of dissolution.
Post-Op Imaging: Ensuring Success in Stone Removal
Uncover the critical role of imaging on the day of surgery, utilizing pre-op radiographs to confirm stone presence and post-op views to document successful removal. Navigate the choice between standard radiographs and ultrasound for follow-ups, ensuring the long-term health monitoring of the urinary system.
Conclusion:
Armed with a combination of imaging modalities, veterinary professionals can empower clients to proactively address, monitor, and prevent urinary bladder stones in their cherished pets.
Stay ahead in the journey of pet healthcare with crystal-clear insights into the world of diagnosing and treating these pesky intruders.
Your commitment to comprehensive care ensures a happier and healthier life for our four-legged friends.

A Vet's Guide to Safe, Conscious X-Rays for cat Patients

1: Balancing Safety and Conscious Imaging
X-rays serve as invaluable tools in feline diagnostics, offering crucial insights when executed with precision. However, coaxing a cat into a state of stillness for the procedure without resorting to sedation presents a unique challenge. In this guide, we explore the delicate balance between achieving diagnostic-quality X-rays and ensuring the well-being of both feline patients and veterinary staff.
2: When Sedation Isn't an Option: Considerations and Scenarios
Before embarking on the journey of conscious cat X-rays, veterinary professionals must assess the necessity of avoiding sedation. Safety remains the top priority for patients and staff alike, as repeated attempts due to poor positioning or movement can elevate stress levels and radiation exposure.
While short-acting sedation options exist, there are scenarios where a conscious approach is preferable, such as with cats having advanced cardiac disease or previous adverse reactions to sedation.
3: Techniques for Conscious Radiographs: A Step-by-Step Approach
Ensuring a smooth and stress-free process for conscious X-rays involves meticulous preparation and execution. This section provides practical tips for veterinary professionals to enhance the welfare of feline patients and maintain a safe environment during the procedure.
4: Preparing for Success: The Importance of Readiness
To successfully execute conscious X-rays, meticulous preparation is non-negotiable. From predicting kV and mA settings to having restraint equipment readily available, the efficiency of the procedure relies on a well-thought-out plan. Implementing feline-centric protocols, including calming voices, quiet environments, and minimal handling, contributes to a low-stress atmosphere.
5: The Art of Positioning: Tools and Techniques
Positioning a cat for X-rays demands creativity and careful consideration.
This section introduces various tools, such as Perspex boxes, sandbags, troughs, and foam wedges, to aid in achieving optimal positioning without compromising patient comfort. Emphasizing that "less is more" in cat restraint, the guide outlines methods to stabilize cats with respiratory concerns while maintaining minimal restraint.
6: Taking the Shot: Executing the Radiographs
Executing conscious radiographs requires coordination and precision. This section guides veterinary professionals through the process, from staying with the cat until the machine is ready to providing reassurance during the 'beep' or 'click' of the X-ray machine.
Tips for allowing the cat to rest between shots and recognizing signs of distress ensure a humane approach throughout the procedure.
7: Pitfalls and Prudence: Navigating Challenges
While conscious radiographs offer a non-sedative alternative, potential pitfalls exist, such as poor positioning, movement blur, or sub-optimal exposure.
This section emphasizes the preference for sedation or anesthesia whenever possible to achieve radiographs safely, underlining the importance of adaptability and recognizing when chemical restraint may be necessary.
By mastering the art of stress-free cat X-rays, veterinary professionals can enhance the diagnostic process, ensuring the well-being of their feline patients and fostering a positive experience for both cats and their human companions.
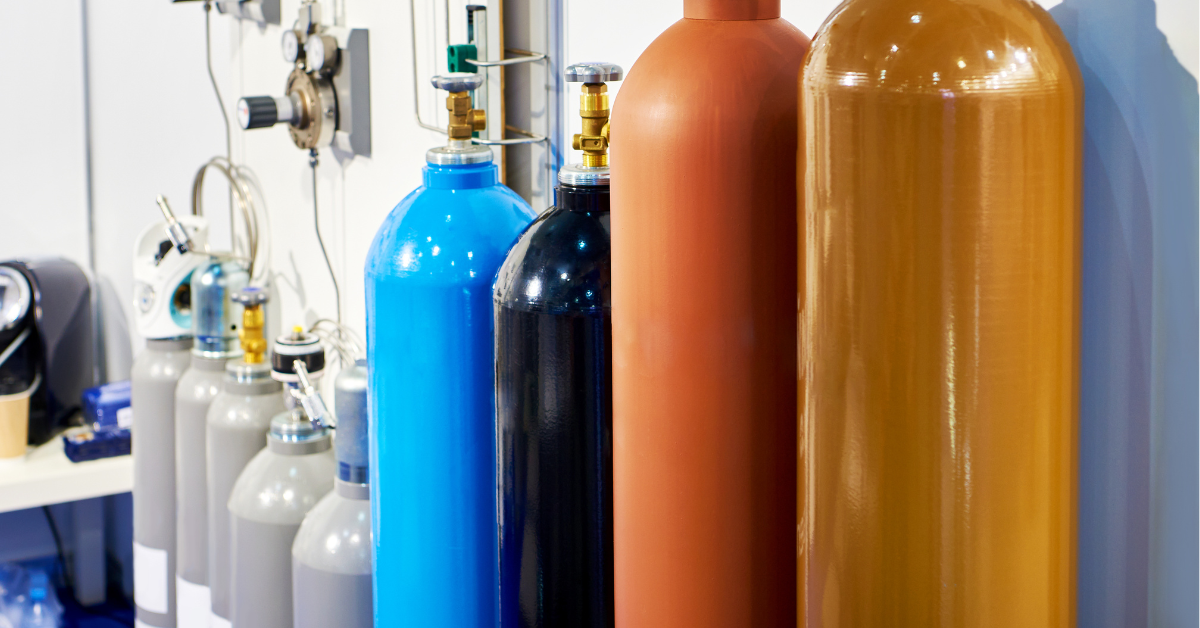
Choosing the Best Oxygen Source for Your Veterinary Practice

What Oxygen Source Does Your Veterinary Hospital Utilize: Concentrator-Generated, Cylinder-Stored, or Piped Oxygen?
Have you ever thought about what works best in your veterinary hospital?
Have you become accustomed to switching small oxygen cylinders on the regular, hoofing them about the practice, trying not to think too hard about what may result from one dropped on the ground?
Well, there are alternatives out there. So, if you’re rethinking how your practice should deliver oxygen to patients, read on; we’ve collated the pros and cons of each system so that you can make an educated judgment call for you and your colleagues.
Oxygen Cylinders for Veterinary Hospitals
One of the most traditional methods of oxygen storage and delivery within the veterinary hospital or clinic is through the use of oxygen cylinders, particularly the smaller ones designed to attach to individual anesthetic machines.
The patient caseload determines the lifespan of these cylinders, ranging from one to a few days before necessitating replacement.
However, the replacement process not only adds to the workload of the veterinary team but also poses potential dangers associated with handling and moving compressed gas.
It is crucial to equip staff with purpose-designed trolleys for safely transporting these cylinders. In the event of a drop and subsequent damage, a compressed gas leak could literally blow a hole in the operating theatre wall.
Effective administration is essential for managing small oxygen cylinders, ensuring that spares are consistently available. Ideally, anesthetic machines should feature two docks, allowing for a seamless transition from one cylinder to the next when needed.
Human error is a potential concern in this system, requiring accurate labeling of cylinders as "full," "in use," or "empty." Prompt replacement of empty cylinders is vital to maintaining a state of preparedness. Additionally, robust ordering processes must be in place to prevent running out of this critical veterinary consumable.
Considerations also extend to the cost of cylinder rental, contributing to the overall expenses of operating a veterinary practice, subsequently reflected in client bills.
Despite these challenges, there are positive aspects to using oxygen cylinders in veterinary care.
Purpose-built, portable anesthetic tables with small cylinders enable uninterrupted anesthesia for patients in transit.
Moreover, in the event of a power outage, anesthetic machines continue to function, with many modern devices equipped to be powered by compressed gas through mini-Schrader sockets during emergencies.
Piped oxygen for veterinary hospitals
Piped gas is sleek in appearance, giving a professional and ‘thought-out’ look to a clinic.
Gas outlets (sockets, usually Shrader-type) are placed at convenient spots around the practice (for example at prep room and theatre anesthetic stations, and near oxygen kennels inwards).
Hoses are secured into these outlets, extending into the room to attach to anesthetic machines.
The wall outlets are fed from an oxygen distribution line that extends outside and connects to an oxygen source, most commonly bulk supply oxygen cylinders.
These large oxygen cylinders are generally situated externally to the practice, making for convenient replenishment of supplies since gas delivery companies can be given a key or combination to a safety gas storage ‘cage’.
Oxygen concentrators can also be purchased as an alternative to bulk gas cylinders, the associated money-saving of which could well offset the cost of having a piped system installed.
Veterinary piped oxygen tends to utilize flexible hosing for the transportation of the gas throughout the building.
These hoses are not only easy to fit retrospectively (and can therefore be fitted to existing veterinary practice fabric, not just new builds), but also allow amendments and changes to be made over time.
Veterinary practices tend not to be static entities; they grow and develop to meet the ever-changing and developing needs of pet owners, so having the ability to easily add to and amend facilities is extremely useful.
It is overall a flexible system that can be tweaked as necessary to suit the individual practice.
The list of benefits of piped gas is short but important. Many practices find piped gas to be the best option simply for the level of convenience and safety for staff; it reduces or even eradicates the number of cylinder changes compared to traditional small gas cylinders.
Even where large cylinders are used, changing empty cylinders is quick and simple since they do not need to be moved.
The downside is, of course, that the cylinder still needs to be replaced periodically. In some very cold climates, there may be a risk of the connections freezing in mid-winter – but this can easily be mitigated with good design.
Oxygen concentrators play a vital role in the operations of a veterinary hospital or clinic.
They serve as ingenious devices that harness air as a natural resource to generate medical-grade oxygen.
Functioning by extracting air from the surroundings, these concentrators meticulously filter out elements like nitrogen, producing purified oxygen readily available for patients around the clock.
Available in various sizes, they cater to diverse needs, ranging from individual anesthetic stations to comprehensive applications that serve an entire veterinary practice through a piped gas delivery system.
This method of oxygen generation proves highly convenient, requiring minimal intervention once the equipment is activated.
Veterinary practices stand to benefit in two significant ways: firstly, for environmentally conscious practices, the use of concentrators helps diminish their ecological footprint by reducing the need for oxygen delivery vans on the road.
Secondly, there's a substantial cost-saving advantage, potentially cutting gas bills by up to 90%. It is advisable, however, to maintain a spare oxygen cylinder as a precaution in case of equipment failure.
In summary, the cost-effectiveness of utilizing an oxygen concentrator in conjunction with a piped gas system makes it a valuable investment for veterinary hospitals, regardless of their size.
This holds particularly true for mid to large-sized practices, where the financial advantages are substantial.
Moreover, the convenience offered by these systems contributes to enhanced staff morale.
Even in smaller veterinary practices where the installation of a piped gas system might not be financially justifiable, the adoption of one or more compact concentrators can prove advantageous not only in terms of finances but also in promoting staff well-being and environmental considerations.

Unleashing Convenience: The Rise of In-Home Veterinary Care

Convenience Meets Care: The Evolution of Mobile Veterinary Services
For many pet owners, scheduling veterinary appointments can be a logistical nightmare.
Getting your furry friend the care they need can feel like an insurmountable hurdle between busy work schedules, transportation challenges, and anxious pets. Thankfully, the landscape of veterinary medicine is evolving, and mobile veterinary services are emerging as a convenient and compassionate solution.
From House Calls to High-Tech Vans:
The concept of mobile veterinary care isn't entirely new. Traditionally, veterinarians made house calls, providing essential services in the comfort of a pet's familiar environment. However, with advancements in technology and veterinary equipment, mobile vet services have transformed into fully equipped clinics on wheels.
These specialized vans are outfitted with the latest diagnostic tools, allowing veterinarians to perform a wide range of examinations, vaccinations, and even minor procedures directly at your doorstep. This eliminates the stress of traveling to a clinic, especially for pets who experience anxiety in unfamiliar environments.
Benefits for Pets and Owners:
The advantages of mobile veterinary services extend far beyond convenience:
Reduced stress for pets: Familiar surroundings can significantly decrease anxiety and fear associated with vet visits, leading to a more positive experience for both the pet and the owner.
Increased accessibility: Mobile services cater to individuals with limited mobility, busy schedules, or multiple pets, making veterinary care more accessible than ever before.
Personalized attention: Mobile vets often have more dedicated time with each pet, allowing for a more thorough examination and personalized care plan.
Improved compliance: By removing logistical barriers, mobile services can encourage regular check-ups and preventive care, ultimately benefiting your pet's long-term health.
The Future of Mobile Veterinary Care:
The future of mobile veterinary services is brimming with potential. As technology continues to evolve, we can expect to see:
Expansion of services: Mobile vets may offer more specialized services like dentistry, pain management, and even advanced diagnostics.
Telemedicine integration: Combining mobile visits with remote consultations can further enhance accessibility and provide ongoing support between appointments.
Focus on preventative care: Mobile services can be crucial in promoting preventative healthcare initiatives, leading to healthier and happier pets.
Short Reason for a Mobile Vet to Have a Website: Reach More Pets, 24/7
A website for your mobile vet service allows you to reach potential clients anytime, anywhere.
This is crucial as many pet owners research vets online before making an appointment.
Your website can showcase your services, qualifications, and the convenience of mobile care, attracting clients who might not otherwise consider your services.
Choosing to be a Mobile Veterinarian
Mobile veterinary services are revolutionizing the way we care for our pets.
By offering convenience, personalized attention, and reduced stress, they are making essential veterinary care more accessible and ensuring a healthier, happier life for our furry companions.

Stainless Steel Cages for pets in Veterinary Clinics

Promoting Animal Well-Being: The Role of Stainless Steel Cages in Veterinary Clinics
Stainless steel cages are found in most veterinary clinics across the world, often being used for both canine and feline patients and some exotic species.
The perception of cages of any kind to members of the public can be poor, but using the right stainless steel cages can have a positive impact on animal welfare and be a great advantage to a clinic.
They are excellent for biosecurity as can be easily disinfected using appropriate techniques without worrying about damage to the surfaces.
Various layouts of cages exist, which allow a certain flexibility in the clinic to fit with a practice trying to balance patient safety, hygiene, and patient welfare.
Patient welfare is at the forefront of the veterinary industry and equipment that makes this easier is always worthwhile. Members of the public assume a level of patient welfare when leaving their pets in the clinic, so it’s vital to ensure this occurs.
Safety for staff members
Stainless steel cages are much safer for staff members as they allow the behavior of a patient to be observed from a distance, without the staff having to get close and risk injuries from bites or scratches.
The initial components of pain scoring can be performed by observing the patient from outside the cage and watching their reactions.
This also means that the patient themselves is less aware of being observed and their “personal space” remains intact, so they tend to remain calmer (in an already strange situation for them away from family and familiar scents and surroundings).
The easy closure of the cages prevents damage to fingers or paws from becoming trapped within the cage.
Safety for patients
As the cages are smoothly finished, there is no risk of a rough edge or surface that the patient can catch themselves and cause injury on.
They are unable to get through the gaps between the metal cage bars, so cannot hurt themselves falling. They cannot affect the closing mechanisms, regardless of whether they lean or put pressure on them, so they are safe and secure inside the cage.
Welfare of patients
Due to the design of the cages, there is excellent airflow and ventilation which prevents airborne particles from staying for too long on surfaces. It also allows for the patients to have good airflow and prevent overheating by being too enclosed.
As the patients can see out of the cages, they feel less enclosed and often are calmer as they can observe what is going on around them.
An unfamiliar environment can be frightening for patients, but a bright area where staff can observe the patients and talk to them to help calm can be helpful to make them feel less scared.
Because they cannot injure themselves or others, as mentioned above, they will be safer overall and if they are vocalizing in distress staff members can hear them and come to help them.
The cages are designed to be large enough that the patients can turn around and exhibit normal behavior which is good, but without being too big that they can cause damage by knocking themselves on the sides.
Cleanliness
Stainless steel as a material by nature is durable and easy to clean. The cages can be wiped over, or areas submerged in cleaning products, to allow for a thorough disinfection and can even be left with disinfectant in contact for longer periods of time to prevent any diseases remaining.
This all helps prevent cross-contamination, as when the next patient is placed in the kennel it is not only visibly clean but is disinfected, allowing for the reassurance that diseases will not be passed on.
Conclusion
Stainless steel cages have many benefits to both the patients and staff in the clinic.
As well as the above, they are durable and hard-wearing so last for a long time due to their high quality.
They can be customized to allow them to stack on top of others or for various sizes and configurations which makes for a highly useful system for many years.