


Upgrade to Digital X-Ray with Your Existing Table/Generator

Saying Goodbye to Chemicals and Dark Rooms: The Digital X-Ray Advantage
Advantages of upgrading to digital X-ray:
Faster viewing of X-rays compared to film x-ray.
Elimination of the need for a dark room, saving 20-30 minutes of processing time.
Improved environmental conditions and staff health:
No more purchasing and handling of chemicals.
Elimination of film, storage, toxic chemical fumes, and odors.
Convenient sharing of X-rays:
Sending x-rays to a radiologist via email or PACS.
Easy sharing of X-rays with customers through email.
Enhanced customer service and interaction:
Digital technology allows for easier and more efficient viewing of each X-ray.
More time can be spent with customers, providing better service.
We had one location that had a table/generator which was over 15 years old, and we were able to upgrade to digital, still using his old table and generator.
Money saved!
The Doctor upgraded to a DR system, and we saved him money by using his old table and generator.
We can do the same for you and it doesn't matter if you want a CR or DR digital x-ray system.
TESTIMONY
Here is what the Doctor had to say in an unsolicited email a few days after the installation...
“Image quality is superb! Far better than Sound x-ray we use to have at Bakersfield hospital. We took abdominal X-rays on a 70-pound dog and the x-rays came out great. Thank you! Let me know if anybody wants to visit and see the images...I will be more than happy to show them the images” — Dr. Singh - Family Pet Hospital - Vacaville, CA
Use your current table and generator and go digital - for a CR or a DR system.

Upgrade to Digital X-Ray & Keep Current Table & Generator

DR Digital X-Ray - Easy to Upgrade - Use Your Current Table and Generator
Each veterinary practice relies on various tools and equipment to carry out its services. One of the most important pieces of equipment in treating animals is an X-ray machine.
These machines make it possible to examine the internal structures of an animal to make diagnoses as to the ailments the animals are suffering from.
Broken bones, impacted gastrointestinal tracts, inflammation, and myriad other conditions will all be exposed without the need for invasive surgery with the aid of good x-ray equipment.
In this piece, we'll be taking a look at one of the best x-ray setups designed for use in veterinary practices. This is the DR Digital X-Ray assembly with Plates, Software/Computer, and ExamVue PACS (Server Based) offered by New Vet Equipment.
We'll be taking a step-by-step look at the various components in this assembly, highlighting their positive attributes and how they can positively impact your professional operations. Let's get right into it.
Flat Panel Detector (CareRay Cesium Plate)
Digital Radiography (DR) utilizes x-ray sensitive plates to capture data while the patient examination is going on directly. This data is immediately transferred to a computerized system without needing an intermediate cassette, as happens during Computer Radiography (CR) procedures.
For this reason, DR systems are considered a great choice for those hoping to upgrade from film x-ray techniques.
Flat Panel Detectors (FPDs) are the essential components of these systems and typically use combinations of amorphous silicon detectors fitted with gadolinium or cesium scintillators.
These are responsible for converting x-rays hitting them into light, which is subsequently translated into digital data by thin-film transistors. This data is represented on the acquisition screen for viewing by the vet.
Various advantages come with using Digital Radiography instead of other methods, including:
Superior images that exhibit higher resolutions and overall quality, making diagnoses easier and more accurate for veterinary medicine practitioners.
The ability to enhance images through software tools and algorithms. This capability is not possible when using film x-rays.
Radiation dosages are significantly reduced because the amount of radiation produced by the x-ray generator does not need to be as high as it is when using other radiography methods.
Processing chemicals and film will be a thing of the past, making the entire radiography procedure much simpler.
It's possible to retrofit your equipment to accommodate Digital Radiography equipment without the need to overhaul your entire x-ray setup.
Processing times will be significantly reduced (by up to 5% in some instances).
Thanks to increased efficiency and a more streamlined workflow, higher patient throughput can be achieved.
Digital Radiography systems can be utilized across multiple modalities and systems.
Host Workstation (Desktop/Laptop)
Clients are given the option of choosing between a laptop-based or desktop acquisition computer. These are both sufficiently powerful computers for the tasks they will be called upon to handle, so the choice will largely depend on your particular preferences or space considerations.
The desktop version utilizes an Intel Core i5-6500 with 16GB Ram, 1600Mhz processing speed, and two 1TB hard drives. On the other hand, the laptop version is a ThinkPad E580 running on an Intel Core i7, with 8GB RAM and 500GB hard disk space. It features a 15.6" display. Both these options run on the Windows 10 operating system and come with a 3-year manufacturer's warranty.
Compatible with Portable X-Ray Generator
Portable medical x-ray units are not much different from fixed digital x-ray units in their method of operation except for their size. Even so, they also have certain unique benefits for practitioners of veterinary medicine, including:
Portability: Some veterinary practices can be very busy at times, and a portable x-ray unit makes it possible to conduct an x-ray. This convenience causes less stress to the ailing animal and makes things easier for the x-ray technician as well.
Safer Operation: The use of traditional medical imaging equipment was a source of concern for those exposed to potentially harmful radiation. Portable units come with protective shields mounted on the front of the devices to help prevent patients and operators from exposure to scattered radiation.
Increased Speeds: These units eliminate long waits and processing times, leading to quicker diagnosis, treatment, and also recoveries.
ExamVue PAC Software
The ExamVue PAC software is an imaging management solution that will work seamlessly with your hardware while integrating easily with your office workflow. It is designed to facilitate the viewing, storage, sharing, and management of DR images. It offers a variety of benefits and features, including:
Advanced specialty tools, including Vertebral Heart Score (VHS) and Norberg Angle that make it possible to make quick diagnoses on your x-ray images
Interactive sharing features that allow for the sharing of diagnostic images with clients and colleagues through their Windows tablets or work desks
Integration capacity for up to ten Windows stations within a single office setup
A large variety of annotation tools make it a useful tool for those wishing to share and collaborate with others in the course of their work.
5-Year Warranty
This DR Digital x-ray setup comes with a 5-year warranty to see owners enjoy their use without the worry of system or mechanical failure. These warranties include 5-year drop coverage, five years of remote software support, and five years of hardware support as well.
Shipping and Installation
Depending on your location, you might be eligible for free shipping and installation services. With a quick call or email, you can find out whether or not you qualify for this service.
Final Thoughts
All veterinary professionals know that the success of their efforts relies not only on their personal skill, experience, and training but on the equipment they use. Even the best practitioner of veterinary medicine will perform at less than their best if they are using substandard, inaccurate equipment. To acquire the best digital x-ray assembly for your veterinary practice, visit New Vet Equipment today and place your own order.
Written by: Rachel Best

When and How to Perform Equine Skull X-Ray
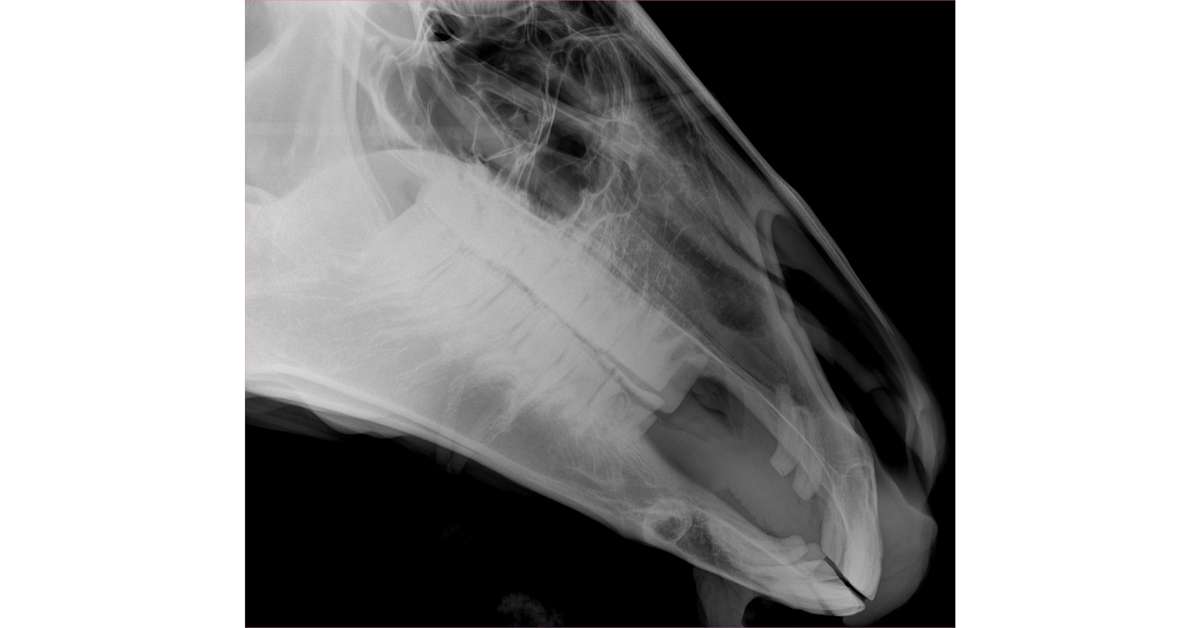
Radiographs of the head are useful when evaluating for injuries or disease processes of the skull, jaws, teeth, nasal cavity, and paranasal sinuses in horses.
Examples include, but are not limited to, dental or periodontal disease of the cheek teeth, head trauma, sinusitis, and neoplasia.
Common clinical signs for which skull radiographs may be indicated include nasal discharge or epistaxis (especially unilateral), swellings of the face, odor or draining tracts, bony changes, or difficulty eating.
When skull radiographs are indicated, here are some common guidelines to follow for procedures, views, and interpretation.
Performing Radiographs of the Head in a Horse
A systemic approach to an x-ray study can help improve efficiency and ensure nothing is missed. This should include…
All necessary equipment, including a generator with enough power for skull radiographs, a large sensor (while intraoral plates are available for dental evaluation, here we’ll discuss extraoral views), and any props that may be needed to aid with views or positioning.
Knowing which views are needed (more on this below).
Having a technique chart or reference for settings. While the numbers can vary depending on the machine/equipment, commonly kVp is set between 70-100 and mA between 3-20.
Sedation is generally recommended unless there is a medical contraindication.
If possible, remove the horse’s halter or anything else on the head that could create an artifact or cover-up details in the x-ray image.
In some cases, it may be worthwhile for radiographs to be accompanied by (or followed up with) additional diagnostic tests, such as ultrasound or endoscopy.
Which Radiographic Views of the Equine Skull Should be Taken?
These are the most common views that are typically used for an equine skull study…
Lateral: This is a good screening shot to look for abnormalities (such as fluid or opacity) in the nasal cavity and paranasal sinuses. Bony and dental structures will be superimposed, but obvious abnormalities (such as tooth root abnormalities) might also be noted here. The cassette is centered over the 4th upper cheek tooth or rostral aspect of the facial crest, and a horizontal beam is used.
Ventrodorsal (or Dorsoventral) Oblique: Oblique views are valuable for reducing superimposition. A VD or DV technique can be used.
A VD oblique aids in evaluating mandibular structures, as well as in viewing the maxillary sinuses with less superimposition. The cassette is centered at about the same location as the lateral shot, but more dorsally to create obliquity. The x-ray tube is placed ventrolateral to the mandible so that the beam is at approximately a 45-degree angle on the opposite side of the face.
A DV oblique is helpful for evaluating sinus structures and maxillary cheek teeth. This view is basically the reverse of the VD, with the cassette positioned below the jaw and the x-ray beam pointing down at approximately a 45-to-60-degree angle on the opposite side of the face.
Dorsoventral: This view provides a lot of information about the sinuses, nasal passages, and nasal septum, especially for comparing right to left. Teeth and bony structures may also be evaluated, although overlap of these structures is to be expected. For this shot, position the cassette ventral to the head, centered under the mandibles. Then position the beam perpendicular to the cassette.
Additional views may be obtained as needed, especially more focal shots and additional angles to isolate an area in question.
For more detailed guidance on views for evaluating specific areas of the skull, this article is highly recommended: 101-eve-v25-i12-fm-toc.indd (aaep.org)
Interpreting Radiographs of the Equine Skull
Fortunately, the contrast between air (the nasal passages and paranasal sinuses) and bone creates good radiographic contrast. On the other hand, the complex structures of the skull, combined with superimposition of those structures, can make radiographic interpretation challenging.
For the best results, always use markers to identify which side of the head is being evaluated in the shot and differentiate between right and left, especially in oblique views (for example, RDLV—right dorsal to left ventral oblique).
Also, obtaining bilateral views is helpful for lateral and oblique shots, since it allows for comparison between sides.
Always evaluate the entire radiograph, and be on the lookout for asymmetry.
As with any x-ray study, clinical experience and good radiography reference images can help a vet identify what is normal versus abnormal.
Consultation with a radiologist can be helpful as well.

By having a system for skull radiographs, knowing which views to take, and becoming familiar with the interpretation of these x-ray studies, a vet can determine the next step for a horse showing symptoms of a problem with the head or teeth.
Written by: Dr. Tammy Powell, DVM

Reliable Suburban Surgical Operating Table

Suburban Surgical 58 inch V-Style Operating Table With Heated Top and Hydraulic Base
For precise animal positioning, the Suburban Surgical V-style operating table does the job excellently.
With a heated top and hydraulic base, there is a wide range of positions that this operating table can do. A high-quality stainless steel top offers durability and reliability even for several years of use.
The elite hydraulic hand operating table allows you to perform even the most complicated procedures comfortably. Combined with a stainless steel enhanced tilt mechanism, perform your procedures at your desired positions.
The Suburban V-style operating table gives you effective and efficient control of the patient. Achieve the perfect angle while operating on your patients.
Your patient requirements and surgery style are unique and special to your veterinary practice. A good operating table must have excellent features in order to meet the needs of your practice.
The Suburban Surgical 58 inch V-Style Operating Table With Heated Top and Hydraulic Base is specially made for practitioners to meet the demands and requirements they need for their practice.
58 inch V-style stainless steel operating tabletop
The Suburban V-style operating table has one of the strongest operating tables top in the market. If you're looking for a reliable, secure, and durable operating table for your veterinary clinic, this is the best choice.
Stainless steel construction provides strength and convenience as it repels most foreign substances and body fluids. It permits easy cleaning and prevents cross-contamination. For you and your patient's safety, welded smooth radius bends for the corners are designed to avoid accidental injury.
The table is made with a one-piece die-formed 18-gauge that is designed to last. The top is made with an elegant satin finish.
A large 58-inch top ensures the patient is comfortable no matter how large the patient is. It has a top panel adjusting knob that you can turn counterclockwise to loosen and raise it to a 90-degree angle.
Therm-o-Matic II Heat Control provides Heated and Unheated modes
The Suburban V-style operating table allows you to operate on animals that require certain temperatures while being operated. The heating feature maintains the body temperature of the patient even during long hours of use. The heating mode is conveniently placed on the side of the table, giving you easy access when desired. Control the temperature via an easy-to-use mounted side panel.
The Therm-o-Matic II Heat Control shows the temperature using an LCD panel on the side of the table. Once the desired temperature is reached, an indicator light turns on.
The heat control requires 120V AC power. Just select the temperature you want the tabletop to reach, and sensors will automatically regulate the desired temperature. The heating mode can also be turned off when a patient does not require certain temperatures to be operated.
Top-quality stainless steel construction
The Suburban V-style operating table is manufactured and engineered to last. The operating table is made with the latest laser manufacturing and computer numerical control process. Every piece of the table is made with precision and accuracy.
Only high-quality parts are used in the table to give reliability even in the toughest procedures. Engineered and built to last, you can depend on the Suburban V-style operating table for a long time.
Solid stainless steel base with enhanced tilt mechanism and hydraulic hand operation
The stainless steel base is made with high-quality steel that guarantees steady and stable performance even in the toughest procedures. Perform your operations at your desired position with the enhanced tilt mechanism. You can adjust the table to your desired height with the help of the hydraulic mechanism feature.
A pump-action foot pedal is conveniently placed at the side of the base for you to smoothly raise or lower the operating table. The operating table can rise from 35.750" H to 47.500" H. The tilt mechanism is also made with strong stainless steel for enhanced durability and strength.
An adjustable floor leveler feature is also available in this excellent operating table. The floor levelers are located on all four corners to ensure stability during intensive operations.
A positive locking handle is also included so that the top is steady when the desired angle is made. The flat stainless steel base can also b used as a footrest for enhanced comfort, especially in long procedures.
The elite base allows the table to be rotated in full 360 degrees. The mounting brackets are made with high-quality steel for long-lasting strength and durability. The tabletop can be locked in any position from horizontal to near vertical.
Sanitary features
The rigid stainless steel top has a unique raised center to direct and channel fluid to the collection holes at one end. This feature allows a sterile environment for your patient. Avoid having messy procedures with the Suburban V-style operating table.
Access-A-Rail operating table system
The innovative Access-A-Rail feature on this table provides precise positioning for demanding procedures. This feature allows excellent positioning flexibility that is not seen in other operating tables. It has an adjustable height stainless steel with cleats to attach the Access-A-Rail and two Cam Cleat Tie-down for accurate positioning of patients. Keep animals safely positioned and secured during your surgical procedures.
Restraint capability
There are times when patients need greater than necessary control and handling. The Suburban V-style operating table provides a convenient over-the-table restrainer assembly.
The stainless steel supports can attach to the Access-A-Rails and hold a steel rail that spans the width of the operating table. It gives you a reliable upper restraint capability when needed.
This operating table is designed to give you comfort and ease of use even in unique patient situations. The table can have upper rail adjustments to provide excellent flexibility.
Stainless steel rail extensions
Stainless steel extensions allow you to add tie-downs and other accessories for convenience. Your materials and equipment can be placed slightly away from the surgical area for better visibility and ease of access. Make your surgical procedure efficient and fast with this excellent feature.
Warranty
A 3-year warranty on parts is included for the Suburban V-style operating table. Labor is not included in the warranty.
Written by: Leo Heno

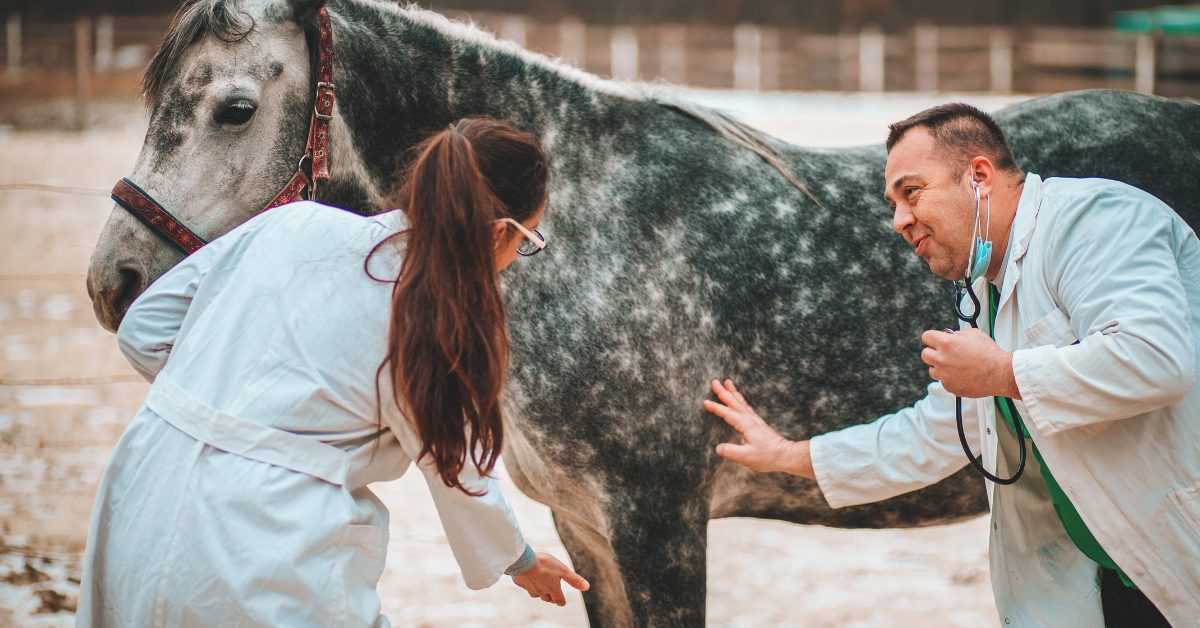
Pre-Purchase Examinations and X-Rays in Horses
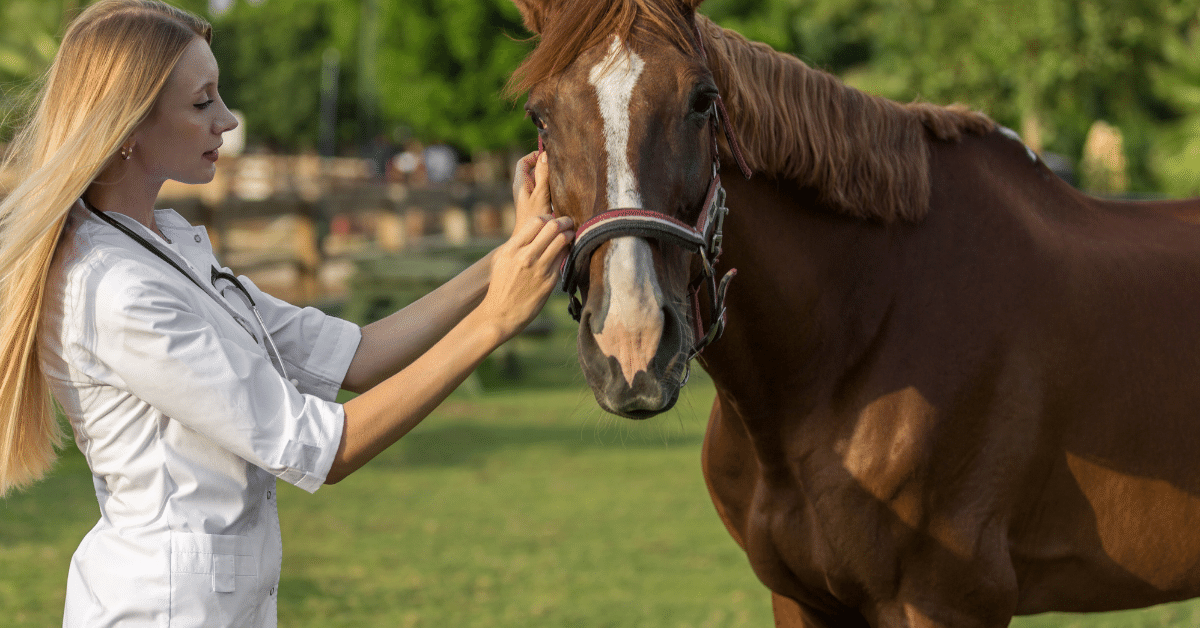
Since purchasing a horse can be a large financial investment—both the purchase price itself, as well as any medical bills that arise later due to health or lameness issues—it makes sense for horse owners to do their research prior to buying a new horse.
As such, a pre-purchase examination with a veterinarian is typically performed prior to the sale going through, which includes a physical evaluation and possibly radiographs.
What Is Included In a Pre-Purchase Examination of a Horse?
At the very least, a pre-purchase check includes the horse’s history (ownership, work, and medical history) and a full physical evaluation.
A horse’s identification should be verified. A vet may also make notes about the horse’s temperament or other non-medical factors.
The horse’s history is important when considering expectations of future performance.
For example, what is the horse being purchased for, i.e., what will their job be? And how does this level of activity compare to their current level of activity?
Then there’s a standard full physical examination, which looks for abnormalities of the skin, eyes, mouth, cardiovascular, gut, and other body systems.
This includes evaluating the horse before and after physical exertion and seeing how long it takes them to recover.
The musculoskeletal part of the exam may include more detail while evaluating for lameness. Examples of this part of the exam include (but are not limited to)...
Observing the horse’s gait at walk, trot, canter, or other tasks, both saddled and unsaddled.
Palpation of the limbs, neck, and back.
Hoof evaluation and hoof testers.
Flexion testing.
Range of motion.
In addition to the physical examination and lameness evaluation, diagnostic testing may be performed. This might include…
Bloodwork or labs for general health.
Drug testing.
Diagnostic imaging, including radiographs of the joints or ultrasound of tendons.
Any additional tests (breeding soundness, tests required for interstate travel, endoscopy for respiratory issues, etc.) as needed.
Which Radiographic Views Should Be Included In a Horse Pre-Purchase Exam?
That being said, there is some debate over which/how many views should be included.
When in doubt, it’s probably best to err on the side of caution and obtain more views rather than less, since these views may potentially be used in litigation if the buyer ends up encountering a problem with the horse.
For this reason, the images also need to be of excellent quality, and it is recommended to use standard views/angles.
Radiographs of the limbs may include views of joints and bones that are more likely to encounter issues, especially the…
Stifles (craniocaudal, lateral, +/- obliques).
Hocks (DP, lateral, +/- obliques).
Fetlocks (DP, lateral, +/- obliques)
Foot/navicular series.
Additional views could be added depending on the needs of the situation. This may include additional joints, additional angles or flexed/stressed shots, or even vertebral studies of the neck and back.
A veterinarian would be looking for any abnormalities, such as previous or current injuries, arthritis, or OCD lesions. Of course, all of these findings should be correlated with the horse’s history and clinical evaluation.
Getting a radiologist consultation on pre-purchase radiographs is never a bad idea either.
Conclusions from a Pre-Purchase Examination
The purpose of a pre-purpose examination, including the radiographs, is to uncover any abnormalities which may potentially lead to a problem later, so a buyer has more information about what to expect from that particular horse.
However, it’s important to remember that there aren’t a lot of “perfect” horses out there. Most horses will have some type of lesion or abnormality uncovered.

While some abnormalities may predict a severe issue and lead to cancellation of the sale, other potential issues are not so clearcut. A pre-purchase examination isn’t a guarantee that a horse will never have a problem. And a mild abnormality may be perfectly acceptable to the buyer for the purpose for which they are purchasing the horse.
The goal is to provide information, and to convey that information to the buyer so they can make an informed decision and get the horse that’s right for them.
Written by: Dr. Tammy Powell, DVM

The Case for Veterinary Nurse Practitioners
We covered what a veterinary nurse practitioner’s role may include, as well as some of the most commonly heard pros and cons of adding this new role to the profession.
This week, we’re covering some additional pros and cons for discussion, as well as practical considerations for when and how this change may occur in vet med.
Read on to learn more…
Veterinary Technician Utilization and Career Growth
It’s no secret that veterinary technicians are often underutilized and that their pay is often not up to the standards of their professional education and the crucial role that they play at a veterinary practice.
Many technicians note there is a “ceiling” for them in clinical practice—in terms of reaching new levels of professional satisfaction and an income that truly reflects their knowledge and hard work.
As such, many vet techs leave the clinical side of the work they love in order to pursue management, teaching, or even an entirely new start in human medicine or another field.
Many argue that a veterinary nurse practitioner option would help more techs stay in the field and be appropriately compensated while continuing to grow professionally.
On the other hand, many have pointed out that it may make more sense to fully utilize vet techs (and pay them a higher compensation) prior to creating a new role.
In other words, if we don’t fix the current problems vet techs are facing, would those issues just be perpetuated in a new role?
Less of a Role for Veterinary Technicians
Those who don’t support the veterinary nurse practitioner movement point out that once this new role is created, there may be less of a need for traditional vet techs.
These wonderful staff members may begin to feel underutilized, underappreciated, and underpaid next to their new nurse practitioner coworkers—since nurse practitioners would still be able to perform all the tasks a vet tech could.
Veterinarians Fully Utilizing Their Education versus Daily Routine Appointments
While a nurse practitioner role may help vet techs see their full professional potential, some argue it will carry the same benefit for veterinarians.
If a vet’s time is freed up from repetitive daily wellness and minor issues appointments, they may be freer to pursue their own professional interests, such as dentistry, surgery, acupuncture, complicated internal medicine cases, or anything else they enjoy.
Of course, many vets do enjoy daily interactions with clients for more routine appointments, so this may depend on personal preference.
And some worry that the loss of those daily, routine interactions could hurt their relationships with clients in the long-term—that they would only see clients when their pet is seriously ill, without a prior relationship.
Preventing Burnout Within the Profession
Many veterinarians and veterinary professionals have suffered from burnout and mental health concerns related to their careers.
Some state that a veterinary nurse practitioner role can help the profession as a whole in this regard—by taking some of the extraordinary workloads off of veterinarians and delivering better workflow to the whole practice.
Also, allowing skilled veterinary professionals to receive fair compensation and derive more professional satisfaction could help with job satisfaction for the whole team, not just vets.
Consumer Expectations and Preferences
It’s been pointed out that veterinary medicine, in general, is slow to update to new technology and consumer preferences.
Some argue that veterinary nurse practitioners may be expected by pet owners in the near future, since that’s what people are used to for their own health care.
While many veterinarians and practice owners expect clients to stick to the practice’s way of doing things, history in many other industries has shown us that customers eventually do turn elsewhere when businesses fail to adapt to the times.
Distribution of Veterinary Services
Whether there is a national surplus or shortage of veterinarians, some parts of the country have faced a vet shortage in either climate—especially rural areas.
For this reason, some rural practitioners have voiced their support of the veterinary nurse practitioner, as it may be a way to distribute some of their caseloads even when they can’t find a DVM to hire.
Others argue that while nurse practitioners would be more affordable than a DVM, they would still be too expensive for some rural practices—and that these practices would be hurt in the long run because there would be fewer traditional vet techs overall for them to hire.
Liability
One serious concern to answer is who is legally responsible if a medical error occurs while a patient is under the care of a veterinary nurse practitioner?
If the veterinarian is liable, as is the case when an error occurs by a vet tech, this may make veterinarians reluctant to delegate.
When and How Could the Role of Veterinary Nurse Practitioner Be Created?
While there is much discussion about this topic right now, it could take quite a while for any serious changes to be made toward the creation of this new role.
Some of the roadblocks include the need for major changes to education and credentialing.
Currently, many vet techs have an associate degree—which is much shorter than the length of time required to become a veterinarian. Supporters of the nurse practitioner role envision the degree being the equivalent of a master’s degree, so the education would be much more extensive.
Additional considerations include accreditation of any educational programs, as well as standardization for credentialing, continuing education, etc.
Also, there’s the matter of what the state laws allow vet techs to do at a veterinary practice. These laws would have to be changed, and that could take years and be very expensive.
What’s Next?
It’s been suggested that more data is needed to know if the nurse practitioner is really sustainable for the long-term (and not just a short-term need during the pandemic), and that it may take many years for this new role to be created.
On the other hand, at least one university is in the process of creating a master’s degree targeted to veterinary technicians.
There is certainly some appeal to the collaborative environment envisioned by supporters, with a healthier workload distribution to all employees while allowing the practice to provide high-quality care to more pets and bring in more revenue.
But while there may be benefits, it’s certainly necessary to continue discussing any potential downsides so that there is a realistic idea of how this new potential role could affect the profession as a whole.
Additional great sources of information include a recent podcast from Dr. Andy Roark

and an article from VIN News Service (https://news.vin.com/default.aspx?pid=210&Id=10484775 ).
Written by: Dr. Tammy Powell, DVM

Does the Profession Need a Veterinary Nurse Practitioner?

A hotly debated topic in veterinary medicine right now is whether there is a need for a midlevel practitioner—a position comparable to a nurse practitioner or physician’s assistant on the human side of medicine.
So, what are the arguments for and against this potential new veterinary career track? And what would be required for the role of veterinary nurse practitioner to be created?
This is what will discuss today, in the first part of a two-part series on midlevel practitioners in veterinary medicine…
What Is a Veterinary Nurse Practitioner?
A midlevel practitioner is someone whose scope of practice would be beyond that of a veterinary technician or nurse, but less than that of a veterinarian.
This idea has been floating around for at least a decade, if not longer. But the recent veterinarian and vet staff shortage during the pandemic may have spurred to the forefront of many vet professionals’ minds.
Right now, veterinary technicians are able to perform many of the tasks necessary for patient care. The exception is any part of the scope of practice that is limited to vets—diagnosing, prognosing, prescribing, and performing surgeries.
Creating a veterinary nurse practitioner would mean allowing these vet professionals to take on some of these roles that are currently restricted to veterinarians.
Examples may include taking on wellness visits, diagnosing and prescribing treatment for minor ailments (ear infections, etc.), refilling chronic medications after checking bloodwork or performing minor surgeries such as uncomplicated dental extractions.
Of course, many tasks—including most surgeries and management of more in-depth medical cases—would continue to be reserved for licensed DVMs…
The goal of this new role would be to take some of the routine daily tasks off the veterinarian’s hands, to free up the veterinarian and allow the practice to provide care to more patients.
What Are the Arguments For and Against Creating Veterinary Nurse Practitioners?
There are strong cases being made both for and against this new position within veterinary medicine. Here are some of the key points of the debate…
Access to Care
Right now—as demand for veterinary care increased during the pandemic, while a shortage in vets and vet team members has left many practices struggling to keep up with that demand—many pet owners report challenges in receiving care for their pets.
Clients are having difficulty scheduling appointments, often having to wait weeks to months for a wellness visit. And some practices have limited how many new clients they can see.
Proponents of the veterinary nurse practitioner envision the role freeing up time for the vet, so that the practice can see more patients and clients.
On the other hand, some state that a decision that could permanently affect the future of the profession shouldn’t be made because of circumstances that could be short-term.
In other words, is the increased demand for pet care during the pandemic going to stick around? Is it enough to fuel and support the new role of the veterinary nurse practitioners in the long term?
Availability of Jobs for Veterinarians
Right now, there is a veterinarian shortage. But not so many years ago, many complained of a surplus, which made veterinarians’ jobs harder to find with less competitive salaries.
Detractors of the veterinary nurse practitioner movement worry that in another few years, we could again be facing a surplus of vets. After all, ups and downs are natural in any industry.
Should that occur at any point in the future, there is a serious concern that veterinarians could be out of work because practices (especially corporate practices) may prefer to hire lower-salary nurse practitioners rather than DVMs.
Since nurse practitioners in human medicine have the right to open their own practice, there is also a potential concern of competition for veterinarians who are practice owners.
Cost of Care
Even before staffing shortages occurred, the cost of care has been another hotly debated topic in veterinary medicine for many years. This is another important facet of access to care since many pet owners are unable to afford quality veterinary care.
Some state that by providing a midlevel practitioner, a veterinary practice can expand its reach to more clients by offering affordable services (since a veterinary nurse practitioner would be paid less than a veterinarian), especially for wellness and minor ailments.
Supporters argue it would be the best of both worlds. In addition to the ability to offer affordable services, the new system would also increase the practice’s bottom line and provide fair compensation to all employees (since having a nurse practitioner would allow a practice to see a lot more patients per day and thus bring in more revenue).
Also, the availability of nurse practitioners may decrease the need to hire relief vets for too many shifts, decreasing the practice’s overall operating costs. Of course, for relief vets, this would be a disadvantage.
Stay Tuned for More…
To cover this topic more in-depth, we’ll address more pros, cons, and considerations in next week’s article.
In the meantime, hopefully, this has provided some food for thought.

Whether the profession moves forward with creating a nurse practitioner role or not, the issue has opened discussions on many important topics currently facing the field of veterinary medicine. And those discussions are important to always improve, adapt, and to find solutions to keep the profession healthy and sustainable.
Written by: Dr. Tammy Powell, DVM

Veterinary Digital DR X-Ray JPI Directvet System

Veterinary Digital DR X-Ray System Package Deal
Regardless of healthcare professionals' skills and experience, the quality of medical care patients receive will only be as good as the equipment used. This applies not only to human beings and their doctors but to animals and veterinary healthcare practitioners. NewVetEquipment is the proud supplier of high-quality veterinary equipment and is pleased to offer the DirectVet Plus full Veterinary Digital X-Ray System.
Here's a closer look at what this system has to offer
DirectVet Plus X-Ray Table
Veterinarians have to handle pets and animals of all sizes, which means that the x-ray table they use needs to withstand the weight of larger animals. This 32x54-inch system can support more than 300 pounds of weight at a time, and the generator arm is designed to move back and forth over the subject. This makes the system capable of handling the x-ray needs of animals as large as ponies with relative ease.
CubeX 28 X-Ray Generator
CubeX is well-known and respected for its high-frequency, portable generators for veterinary and medical use. These x-ray generators are lightweight and compact. Veterinarians will be pleased with the CubeX 28 due to its user-friendly digital displays, simple design, and soft-touch controls. It comes with two-stage, dynamic auto-line compensation, dual integrated laser pointer, and an easy-to-use inverted control panel that makes it compatible for use with a table.
CareRay Cesium Flat Panel Detector
CareRay Digital Medical Systems is an industry leader in developing, researching, and manufacturing x-ray flat-panel detectors. This system comes with the 17x17-inch cesium flat panel detector that is packed with exceptional performance features, including:
High-definition filming: The high levels of detail these panels can produce make it possible for veterinarians and radiologists to diagnose tuberculosis, inflammation, tumors, and more. Experts will observe and make judgments regarding the biliary tract, abdomen, and urinary tract. These panels also facilitate skeletal viewing, muscular system observations, foreign body identification, and trauma diagnoses.
Image and Video Playback functionality: It comes with a playback function that allows you to save and review videos that highlight the motility and morphology of the organs in the gastrointestinal tract.
Visual contrast functionality: Barium-based imaging is often necessary for the x-raying and observation of the esophagus, angiographies, enemas, sinus fistulas, and other circumstances where observations need to be made compared to surrounding tissues.
Large-format perspective functionality: Veterinarians will be able to get a clear view of the pulsation of the heart and respiratory movement of the subject's lungs. This is made possible by the wide format of the flat panel's 17x17-inch layout. These clear and comprehensive radiographic images make the need for multiple imaging and repositioning unnecessary.
Easy integration: These flat panel x-ray detectors are easy to configure and integrate with whatever system you're using. This broad system compatibility will make the operator's or technician's life much easier.
All CareRay Digital flat panels are fully FDA, CFDA, CE, and ISO13485 certified and are widely used in the veterinary, medical, security, and industrial fields in various capacities. They are highly durable pieces of equipment made out of aluminum alloy and carbon fiber housing.
ExamVue PAC Software
The proper software has to be put in place to support the function of this system in an office setting. ExamVue has developed its simple, fast, and user-friendly software, with a very convenient diagnostic function. ExamVue PAC is server-based, and it comes with a series of advanced specialty tools, including line profiles, freehand, rectangle, polygon, and histogram. Image annotation is also made possible via user text, length, cobb angle, angle, and R/L mark.
Smaller practices and more extensive operations are accommodated by the system, with the capability of supporting up to 10 separate viewers. It has unique features and capabilities, including image stitching, importation, comparisons, processing, storage, and communication. It will work well with any DICOM DIR or Q/R compatible devices.
Host Computer Workstation
Buyers have the option of choosing a laptop or desktop computer as the host workstation. Whichever the case, this piece of equipment will have the computing power and processing muscle to handle high volume and high-complexity operations. The desktop host is an i5-6500 processor with 16 GB RAM and 2 Terabytes of storage with a 3-year warranty. The acquisition laptop option is a ThinkPad E580 running on an Intel Core i7 processor with 8GB RAM and 500GB of storage. These specifications, however, might be subject to change.
5-Year Warranty and Easy Payment Plans
Acquiring the equipment to run a veterinary and radiology service properly is a significant investment. It can be a hurdle for many trying to establish new offices or expand their current operations. To help clients acquire the equipment they need, they may choose between one-time payments or make reasonable monthly payments.
All the equipment that comes with this system is covered under a 5-year warranty, with 5-year drop coverage and software support included. The DirectVet Plus System offers peace of mind to all who choose to make it a part of their operation.
Take note that you may qualify for a deduction on capital equipment purchases under section 179 of the current Internal Revenue Service (IRS) tax codes. Your potential deduction might allow you to treat the full cost of new equipment and software as a deductible expense whether you purchase cash, capital lease, loan, or an Equipment Finance Agreement (EFA). Further information may be found on the IRS section 179 portal.
Final Thoughts
The DirectVet Plus Digital X-Ray System is an effective solution for veterinarians looking for a convenient, powerful, and user-friendly way to handle their x-ray needs. It is a system that doesn't need any additional power supplies, construction, or preparations. It is a self-contained veterinary digital x-ray equipment system that will be ready for use as soon as it's delivered, making it an excellent choice for veterinarians in the process of establishing their practice. Visit NewVetEquipment.com to place your order or have any questions or concerns you might have addressed.
Written by: Rachel Best
Treatment for Blocked Cats: The Power of Fluoroscopy

Urinary obstructions in cats are a life-threatening issue that vets see and treat commonly.
And while most vets have a system for caring for these unfortunate felines, it is exciting to learn about new technology that may provide value during the treatment of these critical patients.
One such development is fluoroscopy technology, which is now more accessible than ever to general practitioners. Here are three ways fluoroscopy may help while unblocking a cat…
Confirming Placement of the Urinary Catheter
Depending on the type of indwelling catheter used, it may be of value to check the placement of the catheter on radiographs.
This is especially true for red rubber catheters—which can double back on themselves or even tie into a knot if too much of the catheter is placed into the urinary bladder—or for any catheter long enough to cause additional trauma if passed so far that the tip contacts and irritates the bladder wall.
While traditional x-rays may be used for this purpose, fluoroscopy offers the advantage of being able to adjust the catheter placement in real time. That way, the catheter can be quickly adjusted prior to placing sutures.
Real-Time Contrast Studies of the Bladder and Urethra
Blocked cats with severely distended urinary bladders are at risk for bladder rupture—whether from the condition itself or from manipulation (pressure or cystocentesis) while the bladder is excessively full.
A large bladder rupture is often obvious since a full bladder will suddenly become difficult or impossible to palpate. However, a small tear or leak may be more difficult to detect.
A positive contrast cystourethrogram can help to identify small ruptures, by looking for contrast outside the borders of the urinary bladder on radiographs.
While traditional radiographs can certainly be used for this purpose, fluoroscopy may prove useful because of the ability to see things moving in real time, and the ability to move the patient and quickly see the abdomen at multiple angles without taking a lot of x-ray shots.
In addition to the bladder, this can be very useful for tracking the movement of contrast through the urethra (to identify obstructing materials, strictures, etc.), versus only seeing a couple of snapshots in time on traditional x-rays.
Since contrast media can be irritating to tissue that is already compromised, a vet must weigh the pros and cons of doing a contrast study right after unblocking a cat. But this procedure could also be useful after the cat has had time to heal, to ensure the bladder is intact before the urinary catheter is removed and the patient is sent home.
Evaluating for Uroliths and “Sludge”
In cats, sludge, sand, or gritty material—which may be a combination of crystals, blood clots, mucus, etc.—can accumulate in the urinary bladder. And while less common than in dogs, uroliths are sometimes diagnosed in cats.
On radiographs, sludge may be confused with a bladder mass or even sometimes with uroliths. Fluoroscopy can help with characterizing this material inside the urinary bladder (and distinguishing it from a bladder mass) by seeing how it moves in real time, as the patient is moved.
Additionally, a vet could use fluoroscopy to track the progress of flushing this material out of the bladder (or urethra) after relieving a blockage.
Conclusion
For many years, traditional radiographs have been included as part of the workup for blocked cats, and a vet can provide excellent care to feline patients with current protocols.

However, as fluoroscopy technology continues to evolve and become more accessible to general practitioners, it’s exciting to see the ways in which this modality can make a vet’s job easier and provide more information for patient care.
Written by: Dr. Tammy Powell, DVM

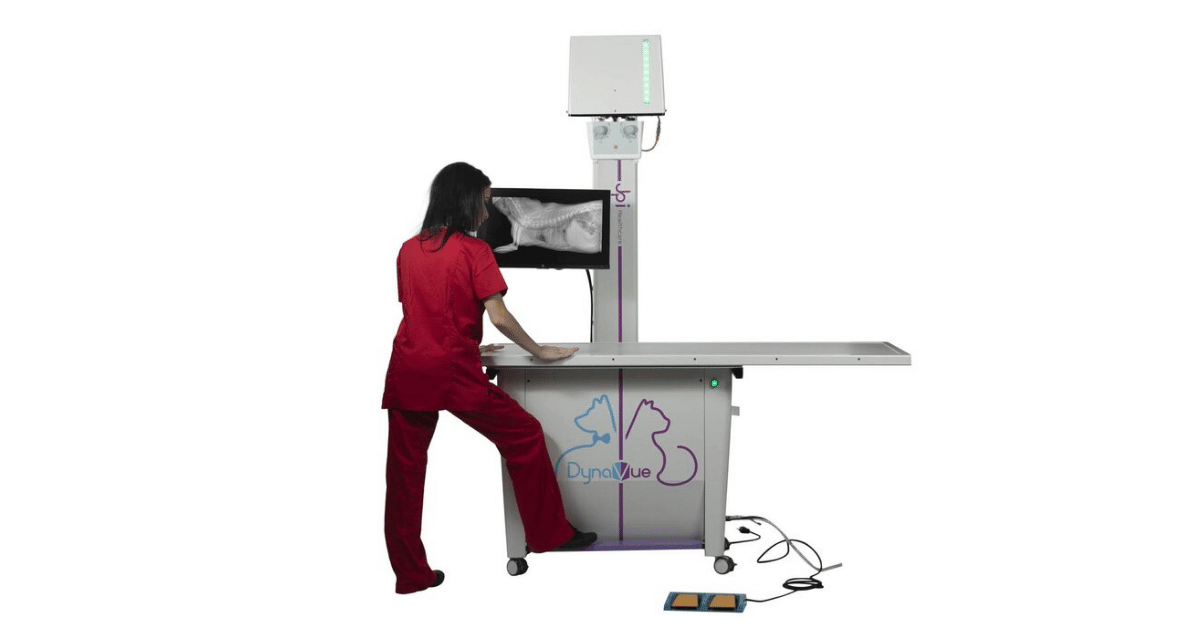
Planning and Measuring for Full-Body X-Rays

Full-body radiographs are a valuable diagnostic tool for well and sick veterinary patients alike.
Wellness screening, such as with a senior wellness package, may include full thoracic and abdominal radiographs in addition to bloodwork, as a screening tool to catch disease processes early.
And the use of full-body screening is widely recognized for ill patients—for example, as part of the diagnostic workup for patients with non-specific symptoms, when doing a “met check” to look for metastasis, or when evaluating the patient after a traumatic injury.
But how many views are required, and how are patient measurements performed when screening large portions of the body? These topics will be discussed below…
How Many Views Are Required?
Most experts recommend at least five views: right and left lateral thorax, VD thorax, lateral (usually right lateral) abdomen, and VD abdomen. For both the abdomen and the thorax, a DV view may replace a VD view in some cases, such as if a patient isn’t stable enough to lie in dorsal recumbency.
In general, this is considered the MINIMUM number of views by many veterinary radiologists. With that in mind, sometimes full-body studies require more than five views.
Here are some examples of additional views that may be needed…
Some experts recommend including BOTH a VD and DV view of the thorax, for a total of four thoracic views, especially when looking for metastasis or small/localized lesions.
More and more commonly, veterinarians are increasing their standard abdominal study to three views (adding a left lateral view as the third view), at least for GI studies. A left lateral is especially valuable for evaluating the pylorus.
For large dogs whose entire thorax or abdomen can’t be captured on the plate or sensor, they would require two of each of these views--a cranial and caudal portion for each view, so that each body cavity can be fully evaluated without any portion being cut off due to the patient’s large size.
Depending on what a practitioner is looking for, additional views (spine, limbs, skull, contrast studies, etc.) may be needed. This is especially true for blunt trauma, when the patient may have multiple injuries.
Is it possible to do a full-body study with less than five views?
Sometimes, this does happen. Everyone is probably familiar with the “cat-gram” (a lateral and VD view of a cat’s entire body, for a total of two views) that is commonly used in daily practice.
A vet will need to use their best clinical judgment for the needs of each individual patient, understanding that if less than the recommended five views are taken, details could be missed.
How to Measure a Patient for Full-Body X-Rays
Once the vet has decided which views are to be included in the study, this allows the vet team to measure the patient for each of these views.
The key is to measure the patient in the SAME POSITION they’ll be in during the study. This is important because the patient’s width may change with their position, thanks to the effects of gravity and the table and any props being used.
So, for lateral views, the patient should be lying on their side, for VD views they should be lying on their back… and so on.
Once the patient is in the appropriate position, a good rule of thumb is to measure them at the widest point for the area within the field of view. This is frequently toward the diaphragm/liver for both thoracic and abdominal studies.
This ensures the beam will be powerful enough to penetrate the part of the body being studied and produce a quality image.
However, there may be times when it makes sense to measure the patient using a different strategy, such as…
When focusing on a specific organ. For example, to see the most detail on the bladder, it would be helpful to measure that region of the abdomen. For full-body studies, this may be included in addition to the general screening shots.
If the patient’s body shape is such that measurements are significantly different at the widest and narrowest parts of the body within the field of view. In this case, two shots (at two different settings) may be necessary to see all fields at the right exposure and level of detail needed for diagnostic quality.
Full-body radiographs can be a great diagnostic tool that helps patients receive the care they need.

By using best practices and strategies, a veterinarian can ensure that these studies deliver the best possible diagnostic value.
Written by: Dr. Tammy Powell, DVM

What Is an Over-Exposed X-Ray, and How to Avoid Over-Exposed

An over-exposed radiograph is one in which the X-ray beam was too powerful, resulting in an excessively dark or “burnt-out” image.
Unfortunately, this can make it difficult or impossible to interpret the radiograph, which can lead to frustrating retakes or even non-diagnostic images.
Here are some important things to know about over-exposed X-rays and how to avoid them…
Why Are Over-Exposed Radiographs a Bad Thing?
Radiographs are about balance. A veterinary professional may feel like Goldilocks—wanting to avoid too few or too many X-rays passing through the patient and onto the film or sensor/plate, and instead, find the x-ray beam strength that is “just right.”
What happens otherwise?
Too few X-rays (or a beam that’s weaker) means an under-exposed (or whited out) image. Too many X-rays (a beam that’s too powerful) result in an over-exposed image.
In general, an over-exposed image may be more useful than an under-exposed image when working with physical X-ray films, thanks to the availability of hot light, an extra bright light that may allow a veterinarian to see more details when viewing an over-exposed film.
However, even a hot light can’t save a very over-exposed image. It’s always best to go for high-quality radiographs.
High-quality X-ray images are more diagnostic because they allow for the visualization of fine details that could otherwise be missed. For example, pulmonary vessels and small nodules might not be visible in an over-exposed radiograph.
How to Avoid Over-Exposed Radiographs
Improving the quality of radiographs involves troubleshooting. By figuring out WHY there is an issue with image quality, a veterinarian can most effectively improve their radiographs.
Here are some possible causes of over-exposed X-rays…
Machine errors. Sometimes, a generator, developer, or digital plate needs to be serviced in order to correct the problem.
An equipment issue may be more likely if ALL patient radiographs are showing the same issue, such as an exposure error. Keeping up with routine x-ray equipment maintenance can help to prevent this type of problem.
Technical errors. This is less common with digital machines that have preprogrammed settings.
However, it’s still possible, especially if the wrong part of the body has been selected for the study. Or, maybe the clinic has different sensors/plates with slightly differing sensitivities to the same exposure settings.
For film machines, errors in technique are common. Technique charts can help vet professionals select the best settings and reduce time-consuming retakes.
Either way, to obtain a lighter image, lower the kVp or mAs for the shot.
Operator errors. For film and digital studies alike, errors in measuring the patient are common. For example, when performing an abdominal or thoracic study, remember to take the patient’s measurement while they are lying on their side—this number could be surprisingly different from the patient’s width while standing up.
Also, the X-ray operator should remember to collimate the field. This improves the detail and reduces scatter radiation that could otherwise darken an image.
Training and practice can help veterinary team members master these protocols and obtain high-quality images.
Also, digital radiographs can help remove some potential human error (such as manually setting the technique) by automating much of the process.
Getting the exposure right the first time will help the whole team save time, reduce stress for patients and staff by avoiding frustrating retakes, and produce images of a higher diagnostic quality for excellent patient care.

Written by: Dr. Tammy Powell, DVM

Equine & Mobile Veterinary DR X-Ray with Wireless Panels
The Benefits Of A Mobile Veterinary X-Ray Service
When you work as a mobile vet, you are often faced with many challenging situations. Having instant access to X-ray technology helps a great deal when you are working in the field.
It does not matter if you are working with small or large animals, all vets find a mobile veterinary X-ray facility a useful tool.
For many mobile vets, veterinary digital X-ray technology has been out of reach both from a portability and cost point of view.
Thanks to advances in mobile X-ray technology, there is now a new player on the market. ExamVue offers mobile vets an opportunity to invest in mobile equine X-ray technology suitable for both field and clinic work.
What Is Included In The Package?
This easy to transport X-ray solution certainly has a lot to offer. The Wireless Portable DR system features a whole host of functions. It is suitable for both equine and other veterinary work.
The kit comes complete with a hardshell case specially made for the laptop and plate.
List of components:
Wireless laptop-based capture station
High-quality Cesium flat panel plate
A choice of plates - 14 x 17 or 10 x 12
Dedicated ExamVue Software
No cable is required between the plate and the laptop
The unique ExamVue PACS makes it easy to evaluate a case quickly. As a client, you will also benefit from a 5-year warranty along with 5-year dedicated phone support. Set up guidance and training as well as shipping and installation are included as part of the package.
Who Is This X-Ray Set up Suitable For?
This X-ray setup is suitable for both large and small animals. When you work with large barn animals, using X-ray technology as a diagnostic tool is often difficult. It often means transporting the animal to another location. Now you no longer need to do so.
The system does not need an electricity source. In other words, it works completely independently from the main supply of electricity. The focus is very much on self-sufficiency.
One of the main benefits of the system is that you don't have any cables to worry about when performing an X-ray. That makes entanglement and other hassle factors normally associated with portable X-ray equipment a thing of the past.
You can review your X-rays on site making an immediate clinical decision possible.
What Are The Benefits Of Csl Direct Technology?
As you will know, resolution plays an important part when making a diagnosis. This system offers excellent resolution thanks to its isotropic lateral scattering. You will also benefit from low photon coupling loss which means better quantum efficiency and detector quantum efficiency.
The Wireless Flat Panel
The wireless flat panel offers you the latest in mobile veterinary X-ray tech including minimal exposure time. High sensitivity and resolution are important for reliable diagnosis and image quality.
Thanks to the excellent image quality, patients will receive a lower dose of radiation without the need for several X-rays.
The plates are structured in such a way that they are protected from degradation due to moisture. Good durability thanks to the Csi:TI screen. Your choice of panel is delivered in a flat panel case for easy storage and handling.
Software Performance
The ExamVue DR software is both easy to learn and use. It is one of the few equine X-ray software programs that feature processing, storage, acquisition capture, and the viewing of digital images.
To date, ExamVue has been used in a range of X-ray disciplines including orthopaedic and podiatry. The interface makes the software easy to learn for both experienced and novice vets.
Other software functions include printing, CD - DVD burn, image stitching, and procedure mapping. You also have a facility that allows you to create worklists.
Above all, ExamVue offers excellent value both in terms of functionality and cost-effectiveness.
Other Software Features That Will Impress You
Looking at the software in more detail, you will find that it also offers many other features.
This is a guide to other features you will find useful:
Console Acquisition Software
Patient registration facility using a manual function of Dicom worklist.
Complete processing parameters from small to large.
Edge enhancement function, histogram and contrast.
You can review images by horizontal and vertical flips.
The software lets you rotate images both clockwise and counter clockwise.
Complete zoom and pan along with a magnifying and crop facility.
The software has a field for annotations and measurements for free text and arrow markers.
Backed up by Cobb's and Norberg Angle Measurement.
Image preview facility
The emergency mode allows an examination without patient data input.
Facility for sending Dicom print to a Dicom printer
Dicom storage along with hard disk capacity notification function.
Exportable image facility which includes PNG, JPG, BMP, and Dicom to other forms of media. No viewer is required.
Database function that allows side by side images and a list of other functions including repeat, delete, and reject.
Gridline removal function and stitching software
Comes complete with AED mode ( Automatic Exposure Detection) which does not require connection to the X-ray generator.
Laptop Details
The laptop that comes as part of the package is a Dell Wireless 1506. It benefits from a 15.6" HD screen with wide-view anti-glare capability. The operating system is Windows 10 and it features 8 GB of RAM.
The package is backed up by Intel Integrated HD graphics 4400 featuring a 500 GB hard drive. The ExamVue Software is preloaded on delivery of the laptop to you.
That is good to know when you are thinking about investing in a mobile veterinary X-ray facility. For more information, you can contact the company and further familiarize yourself with their range of other veterinary product lines.
https://newvetequipment.com/dr-wireless-system
Written by: Annie Wall

Diagnosing Dental Disease in Small Mammals: A Vet's Guide
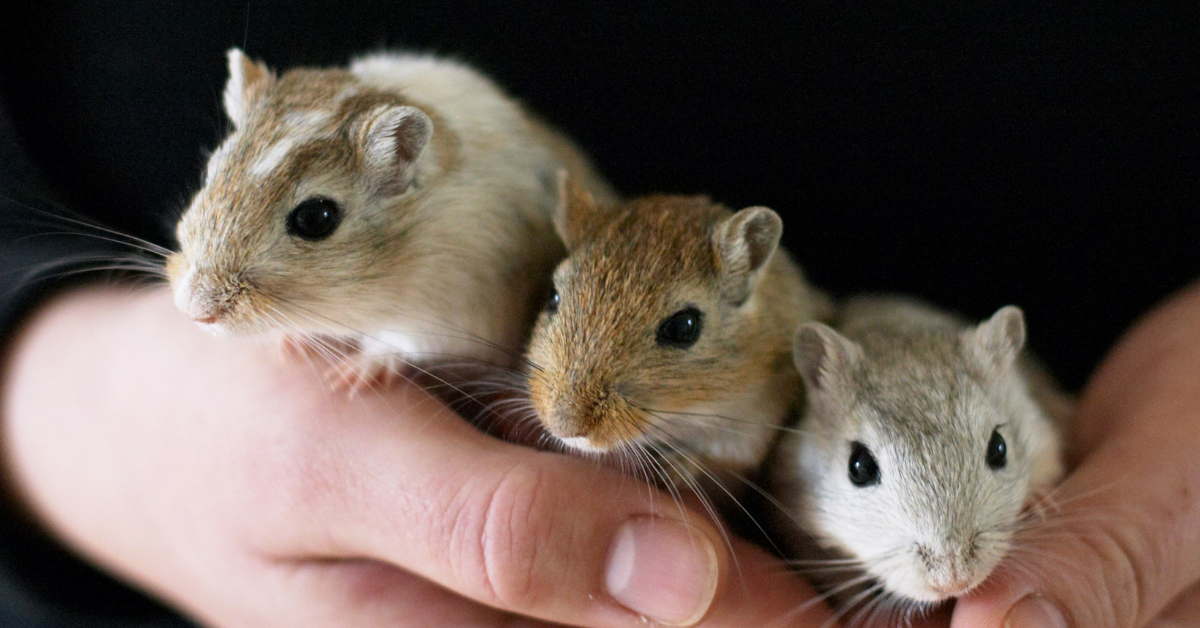
Since dental health can be a serious issue that affects a pet’s ability to eat, it’s important to address dental disease when it arises—even in the smallest of patients, like small mammals or pocket pets. While these tiny mouths can be challenging to work with, it is possible to evaluate and treat dental issues in these species.
In recent articles, we’ve discussed dental care in rabbits and guinea pigs. Today, we’ll focus on small rodents such as hamsters, gerbils, mice, and rats.
Which Dental Issues Do Small Mammals Develop?
These species (gerbils, hamsters, mice, and rats) can develop incisor malocclusions, since their incisors are open-rooted and grow continuously.
Unlike rabbits and guinea pigs, these small rodents have closed-rooted molars that do not grow continuously. Fortunately, that means that dental issues of the cheek teeth, while possible, are much less common.
On the other hand, since their molars have fully developed roots and don’t continuously erupt, small rodents may develop periodontal disease secondary to plaque. They may also develop dental caries if fed a diet heavy in sugar, including excessive use of certain commercial rodent treats.
Other oral issues include trauma to the teeth or jaws, food impaction, abscesses and infections, or diseases such as neoplasia. In hamsters, cheek pouch eversions or impactions are especially common.
Normal Dentition in Small Mammals
Mice, rats, gerbils, and hamsters have the dental formula 2(I 1/1, C 0/0, P 0/0, M 3/3), for a total of 16 teeth, with a space called the diastema between the incisors and molars.
The mandibular incisors are about three times as long as the maxillary incisors. The enamel may be white to yellow or orange, depending on the species.
As mentioned above, their incisors grow continuously, while their molars do not.
This dentition is consistent with the lifestyle of these small exotic pets. Their diet primarily includes seeds, roots, tubers, and grains—so unlike rabbits and guinea pigs, they don’t ingest a lot of fiber to the point where they require continuously erupting cheek teeth.
Their incisors wear down due to gnawing and burrowing behaviors. Chewing aids—such as wooden blocks or cardboard that is free of print or dyes—can help promote this natural behavior and keep the incisors in good shape.
Diagnosing Dental Disease in Small Mammals
Symptoms may be subtle at first, and it is common for pet owners to miss disease until it becomes more advanced. Symptoms may include anorexia, any change in behavior (such as hiding or hunching if they are in pain), drooling, and swellings or changes to face symmetry.
Hamsters with cheek pouch impactions may present with swollen cheeks. Or the cheek pouches may be seen protruding from the mouth in the case of eversions.
It’s possible for a veterinarian to do an initial, cursory oral exam on an awake pet using an otoscopic cone, and to evaluate the incisors on an awake pet. This method may uncover obvious abnormalities. But it is likely to miss subtle changes and does not allow for a thorough oral exam.
Anesthesia or sedation are best, both for a full oral examination and for dental radiographs.
Additional tools for small rodents, such as mouth gags and cheek retractors, are needed to get the best view of the teeth and oral cavity. Magnification can also be very valuable.
A dental x-ray study is best performed using a dental x-ray unit, with the sensor placed extra-orally due to the small size of these patients. Mammography film can also be used, as it shows fine details.
Treating Dental Disease in Small Mammals
For incisor malocclusions, the goal is to restore the teeth to their normal length and function. An appropriate type of dental drill is recommended. Avoid nail trimmers, rongeurs, and other cutting tools as these carry a risk of fracturing the teeth during trimming.
Molars should NEVER be trimmed since they have true roots and don’t erupt continuously. However, these cheek teeth may require removal of tartar and treatment of periodontal disease or even extraction of severely diseased or abnormal teeth.
For hamsters with cheek pouch eversions, viable tissue should be put back into normal position and sutured to the cheek. With impactions, the pouch must be emptied out and rinsed with saline.
Antibiotics and pain medications should be prescribed as needed, depending on the pathology.
Any vet treating dental disease in small rodents must have the appropriate sizes and types of dental tools. It’s also possible to use a needle (18 to 25-gauge, depending on the size of the patient) as an elevator during extractions.
Appropriate training is also very important, to ensure these small patients receive the specialized care their need.
Due to their fast metabolism, nutritional support is usually needed until the animal is recovered and eating on its own.
Owner Education is Important
Many clients buy these small pets for their children and don’t necessarily interact with the pets on a daily basis or have a deep understanding of their husbandry needs.

Promoting regular checkups of these patients can help to catch issues early, as well as educate owners on husbandry and on how to tell if their pet is ill.
All of this can serve to better the health of these small rodents and help to catch dental disease or other health issues early, when treatment may be simpler and carry a better prognosis.
Written by: Dr. Tammy Powell, DVM

Essential Guide to Guinea Pig Dental Care

Guinea pigs have teeth that grow continuously, and their dental needs are very different from the dental needs of a dog or cat.
However, dental health is still a vital part of a guinea pig’s wellbeing. Here are some important things to know…
Which Dental Problems Do Guinea Pigs Develop?
Congenital malocclusions are possible in guinea pigs, although much less common than in rabbits since guinea pigs have not been bred with dwarf or shortened snout variations.
Acquired dental disease accounts for the majority of dental issues in guinea pigs—with dietary factors being a primary cause, due to uneven or inadequate wearing down of the teeth.
A common problem is an inadequate fiber in the diet, which is normally provided via hay. A vitamin C deficiency can also lead to dental issues since it affects the integrity of the connective tissues that hold the teeth in place—leading to loose and misaligned teeth and subsequent tooth overgrowth.
Any other local or systemic issues (trauma to the jaws or teeth, systemic disease, neoplasia, etc.) that affect a guinea pig’s eating habits could also lead to dental problems.
The uneven or inadequate wearing of the teeth can cause malocclusions, elongated crowns, and sharp edges that can injure or ulcerate the buccal mucosa and cause pain. Overgrowth on the lingual aspect may entrap or irritate the tongue. All of this can make it difficult or impossible for a guinea pig to eat.
Abscesses or infections may also occur, although this is much less common than in rabbits.
Normal Guinea Pig Dentition
In order to recognize what is abnormal in this species, it’s important to know what’s normal for them.
Guinea pigs have open-rooted teeth that continuously grow, and they wear down their teeth by chewing on fibrous foods.
Their dentition is the same in all four quadrants: one incisor, followed by one premolar and three molars. Guinea pigs do not have canine teeth, but instead have a space called the diastema between the incisors and the premolars.
The premolars and molars are anatomically identical and collectively known as the cheek teeth.
Since the mandible is wider than the maxilla, the cheek teeth curve (the mandibular teeth inward and the maxillary teeth outward) to occlude with one another on a sloped plane.
Signs of Dental Disease in a Guinea Pig
Since guinea pigs are prey species, they try to hide signs of a problem for as long as possible. But a pet owner may pick up on changes in eating habits, which develop even in the early stages of malocclusions.
Anorexia is a common symptom of dental problems.
Other symptoms may include weight loss, changes in fecal output (quantity and appearance), dropping food, changes to grooming habits (and subsequent skin issues), salivation, and GI stasis. Facial swellings are possible but less common.
Diagnosing Dental Disease in Guinea Pigs
General anesthesia is best for a thorough dental evaluation.
Cheek teeth abnormalities are very common, more so than incisor malocclusions. So, if an incisor malocclusion is present, it’s a good indicator that a closer look at the cheek teeth is necessary.
A visual examination with a good light source and an otoscopic cone or speculum may reveal a dental issue. However, small or subtle lesions can be missed this way.
Use of an endoscope is very helpful for diagnosing dental problems in guinea pigs, with the added bonus of clear images to show clients so they truly understand the issue.
Radiographs are also important for diagnosing dental issues. And if available, CT is an excellent tool for obtaining diagnostic information.
Treating Dental Disease in Guinea Pigs
Supportive therapy is usually needed, since dental problems impact a guinea pig’s ability to eat, and pets may present in poor condition with weight loss and anorexia. Supportive care commonly includes fluid support, dietary support with a critical care formula, and pain relief.
All of this can help stabilize the patient for anesthesia, prevent complications such as GI stasis, and promote a better recovery and return to normal eating habits.
The main goal of dental treatment is to restore the normal length and shape of the teeth as much as possible and to promote normal occlusion in the process.
A high-speed dental drill is generally used while cutting tools are not recommended because they can cause fractures in the teeth. If needed, extractions of diseased teeth or surgical removal of abscesses can be performed, along with appropriate antibiotic therapy.
Prognosis varies, based on the severity of the disease. Severely overgrown teeth may require multiple treatments are done 1-2 months apart, or even chronic palliative treatments.
To perform safe and effective dental procedures for guinea pigs, it’s important for a veterinarian to gain training and experience, and to have the right tools. Referral to a specialist is a good option, too.
Prevention Is the Best Medicine
Since most dental problems in guinea pigs are related to diet, client education can go a long way toward preventing dental issues in guinea pigs.
Providing instruction on a guinea pig’s dietary requirements is a great step at a new pet visit. Additionally, owners should know to look for anorexia or changes in their pet’s eating habits and to report concerns to their vet right away.
Quick recognition of a problem could help to catch the issue early, resulting in more timely and effective treatment

Written by: Dr. Tammy Powell, DVM

Essential Rabbit Dental Health Tips for Better Teeth

Although rabbits don’t undergo regular dental cleanings the way dogs and cats do, dental health is still an extremely important part of a rabbit’s wellbeing. When dental problems occur, a rabbit might be unable to eat or drink.
For a veterinarian to provide rabbit dental care, it helps to know which dental problems this species is prone to, how to treat them, and how to prevent dental issues with home care and client education.
Which Dental Issues Do Rabbits Develop?
A rabbit’s teeth grow continuously throughout its whole life. As such, tartar isn’t really a problem the way it is in dogs and cats.
An appropriate diet—with the right nutrition and plenty of roughage—plays a crucial role in wearing down the teeth naturally, so that they don’t overgrow.
In fact, many rabbit dental issues are due to husbandry concerns. An inappropriate diet is most common.
Other acquired dental conditions include broken teeth, jaw fractures and other trauma, oral foreign bodies, metabolic bone disease (which can also be nutrition-related, or due to a vitamin D deficiency in indoor rabbits), and any systemic disease that affects a rabbit’s ability to eat and therefore keep their teeth in good shape.
Overgrowth of the teeth can lead to sharp edges, as well as malocclusions that make it difficult or impossible to eat. Infections and abscesses (in which the purulent material turns very thick) can also occur.
While acquired dental problems are very common, congenital issues may also play a role. This may include malformations of the jaws or of the teeth themselves.
Normal Rabbit Dentition
To properly diagnose and treat rabbits, it’s important for a veterinarian to know what is normal for this species.
Rabbits have four maxillary incisors (two large teeth, plus a pair of smaller “peg teeth” directly behind them) and two mandibular incisors. They do not have canine teeth—instead, there is a space called the diastema.
Following the diastema, the cheek teeth are made up of three premolars and three molars on each side of the maxilla, and two premolars and three molars on each side of the mandible.
Since malocclusions are common, it’s also important to know the normal occlusions in a rabbit.
The mandibular incisors occlude just between the two sets of upper incisors.
The mandible is narrower than the maxilla, so the upper cheek teeth are not normally in contact with the lower cheek teeth. Effective chewing of hay and other fibrous foods comes from a grinding motion of the cheek teeth.
Diagnosing Dental Disease in Rabbits
A change in eating patterns is often the first sign of a problem.
Other symptoms may include fecal changes (quantity and appearance), bruxism, drooling, decreased grooming, weight loss or a general decline in condition, and other symptoms localized on the face (swellings, nasal discharge, epiphora, exophthalmos).
A full dental examination is best performed under sedation or general anesthesia. A metal speculum or otoscope cone with good lighting will aid in the visualization of the cheek teeth. An oral endoscopy is an excellent option, if available.
A veterinarian should look for misshapen teeth, sharp edges, malocclusions, and anything else that can interfere with a rabbit’s ability to chew. Also, look for swellings or other abnormalities of the mouth or jaw.
In addition to the physical examination and dental evaluation, skull radiographs can provide crucial information about the extent of the disease and prognosis, which can contribute to making a treatment plan.
Blood work can help rule out other conditions and ensure the rabbit is healthy enough for a dental procedure under anesthesia.
Treating Dental Disease in Rabbits
The teeth must be returned as closely as possible to their original length, alignment, and ability to function.
This means overgrown teeth must be shortened to their normal length, and normal occlusion must be restored. This could be done in one procedure, or via multiple procedures over time for patients with more extensive abnormalities.
Diseased or severely overgrown or malformed teeth may need to be extracted, although extractions of cheek teeth are ideally kept to a minimum.
Additional ailments, such as abscesses, must also be treated—which in rabbits often means surgical resection and antibiotics.
Familiarity and practice are required to perform these procedures, as a rabbit’s mouth is very different from a dog or a cat.
It’s a good idea for general practitioner veterinarians to gain training in rabbit dental care before attempting complex procedures. It’s also crucial to have the right tools for a rabbit’s teeth.
Referral to a specialist is also an option, either after the diagnosis is reached, or at the rabbit’s initial onset to the clinic. But general practitioners with the right training and appropriate tools at their practice may be able to treat some rabbit dental conditions themselves.
Either way, earlier treatment is best, both for the dental prognosis and for the rabbit’s overall health, since their condition can decline quickly if they have difficulty eating. Nutritional support may be needed until the patient is able to eat on their own.
Owner Education Is Necessary to Prevent Recurrence
Remember to talk to the owner about husbandry—including a proper diet with the right balance of nutrients and fibrous materials for tooth health.
Dental treatment is only a short-term solution. Addressing the underlying cause (which is often husbandry-related) is the only way to prevent the issue from happening again.

Written by: Dr. Tammy Powell, DVM

Essential Oral and Beak Care for Birds: A Guide for Vets

Even though birds don’t need the same type of oral or dental care that dogs and cats do, their oral and beak health is still an important part of their wellbeing.
Many avian patients are not only beautiful, they are also very intelligent, with big personalities. As such, many veterinarians enjoy seeing birds at their practice. However, to appropriately evaluate and treat these patients, extensive knowledge is required of the many differences between birds and mammals.
While it won’t be possible in just one article to cover every issue a bird could have with its mouth or beak, below we’ll cover some of the most common conditions to look for in pet birds, mostly focusing on Psittacines (parrots).
Normal Anatomy and Signs of a Problem
The beak is also known as the bill or rostrum. It consists of the upper (maxillary rostrum) and lower (mandibular rostrum) jaws, each of which is covered at its rostral end by a hard keratin structure known as the rhampotheca or “horny bill.”
Normally, the upper and lower portions of the beak should align well with one another. But various beak or systemic health problems can lead to overgrowth, malocclusions, or other problems. Additionally, health issues can present within a bird’s mouth.
An owner may alert their veterinarian to a problem by mentioning symptoms they’ve noticed at home, such as halitosis, yawning, frequent beak rubbing, or changes in eating behavior.
During the physical examination, keep a lookout for any asymmetry of the head and beak. Look inside the mouth for lesions, too, such as masses, plaques, odor, foreign bodies, or wounds.
When examining a bird, a low-stress approach is best—for the ease of the veterinary visit, for avoiding spurious lab results due to stress, and for the wellbeing of the bird. Avoid using excessive pressure or restraint. For some birds, sedation may be ideal.
Common Health Conditions of the Beak and Mouth in Birds
Some of the most common conditions a veterinarian will see include…
Beak overgrowth, uneven wear, or malocclusions. Routine beak trimmings can help prevent these problems. Commonly, a Dremel is used for this purpose. It can take practice and experience to gain proficiency. The Dremel should not be held in contact with the beak for too long, due to the risk of excessive heat.
More complicated issues, such as a malocclusion, may need additional treatments or referral to a specialist.
Once the beak shape is corrected, enrichment at home, which encourages normal use of the beak, can help prevent the problem from occurring again and possibly eliminate the need for further beak trimmings.
Beak and oral trauma. Common traumatic injuries include bite wounds/punctures (from other birds or other animals), fractures (which may be just to the tip of the keratin part of the beak, or may involve underlying bone), avulsions, and oral trauma or punctures from hard objects or toys.
Oral and beak diseases. Birds may suffer from bacterial, fungal, viral, and parasitic infections. One example is the viral Psittacine Beak and Feather Disease. Also, neoplasia may occur.
Systemic diseases can also affect the beak or oral cavity. One condition which may affect the mouth and GI tract is an internal papillomatous disease (IPD). Psittacines with this condition may present with cauliflower-like growths in their oral cavity or cloaca, while also having masses present internally.
An overgrown beak may be an indication of malnutrition or systemic disease (such as liver disease).
And Candidiasis (thrush) may be an indication of an underlying disease or immunosuppression.
Diagnosing and Treating Beak and Oral Health Conditions in Birds
In addition to symptoms reported by the owner and physical exam findings, diagnostic tests are often indicated. This could include radiographs to evaluate the extent of an injury, bloodwork to look for systemic disease, infectious disease testing, histopathology of masses or growths, or other testing as needed.
Treatment depends on the diagnosis. In some cases, a simple beak trim with a recommendation for home enrichment may be all that’s required. With certain diseases and injuries, the treatment may be much more complicated.
Depending on a veterinarian’s knowledge and comfort level with birds, they may consider referral to a specialist. Knowing the common oral and beak conditions in birds, what to look for, and what is normal versus abnormal anatomy, can help a practitioner know when a referral is warranted.

For any veterinarians wishing to care for more birds at their practice, continuing education, hands-on labs, practice/experience, and good informational resources can all help with developing the knowledge and skills needed to evaluate and treat these beautiful and unique patients.
Written by: Dr. Tammy Powell, DVM

Veterinary Dental Cleaning Techniques in Dogs

Dogs come in many shapes and sizes, but all of them can be affected by dental and periodontal disease.
Here are some important things to consider for dental cleanings in dogs…
What’s the Normal Dentition for a Dog?
While it’s important to recognize what’s abnormal, it’s just as important to know what’s NORMAL when it comes to a dog’s teeth.
For example, many clients ask questions like ‘how many teeth does a dog have?’. A quick and confident answer can help instill confidence in the veterinarian’s knowledge.
Also, during a dental procedure, knowing the expected number of teeth will help a vet know if any teeth are missing—an abnormal finding that warrants further exploration and dental radiographs.
It also helps to know how many roots each tooth has, as well as the approximate length and direction of each root. That way, a vet can plan for the most efficient way to extract a tooth, and it will be less likely that any root tips are left behind.
What Are the Most Common Dental Issues in Dogs—and in Specific Breeds?
Periodontal disease is, of course, very common, affecting more than two-thirds of dogs by three years of age.
But while any breed can be affected, certain breeds are more prone to developing tartar and periodontal disease quickly. Often, this happens to small or brachycephalic breeds due to tooth crowding.
Big dogs, on the other hand, maybe more likely to suffer traumatic tooth fractures.
While it’s important to keep a lookout for anything that could be part of a disease process, knowing the common issues in each size and breed of dog could help a vet know where to look for issues and pick up on subtle or early changes.
When Should Dental Radiographs be Taken?
Dental radiographs are considered the standard of care for dental procedures. Some estimates state that dental x-rays can reveal about 40% more pathology than can a visual oral examination alone.
This leads to better patient care. Also, the x-ray images can help clients visualize their dog’s dental health status and therefore better understand the importance of the treatments a veterinarian recommends.
So, when and how should dental radiographs be performed?
Many experts recommend taking a full set of dental radiographs immediately after anesthesia induction. Usually, this task is performed by a skilled vet tech or nurse, along with anesthesia monitoring.
Performing radiographs prior to the cleaning gives the vet a chance to review the radiographs. These findings, along with a visual assessment of the patient’s mouth (including charting), gives a lot of information to support a call to the owner, if needed for additional treatments.
Some veterinarians prefer to do radiographs after the dental cleaning is performed, so they can first remove large chunks of calculus that could interfere with radiographic interpretation. There’s nothing wrong with this, and every practice should do what works best for them.
The most important thing is probably to have a consistent protocol, to improve efficiency.
It’s worthwhile to invest in training for this important skill. Consider sending team members to a conference or course, or asking the company that sold the dental x-ray equipment if they offer training.
Since dogs differ greatly in size, it helps to have more than one size of film/plate/sensor available. In order to be diagnostic, x-ray images must show 2-3 mm of bone from the apex of the root. The crown of the tooth doesn’t necessarily need to be included.
For routine cleanings, one set of radiographs may be all that is needed. But for patients who are receiving extractions or more advanced procedures, it’s beneficial to perform post-op dental x-rays. This confirms that everything was done properly and safely, in case any new concerns arise later.
Tips for Cleaning a Dog’s Teeth During a Dental Procedure
After radiographs and charting are finished, the typical dental procedure consists of scaling and polishing.
Here are a few tips for the dental cleaning:
Scaling of the enamel, above the gumline, can be done with an ultrasonic/and or hand scaler.
It’s recommended not to spend more than 10-15 seconds on a tooth with the ultrasonic scaler, to avoid overheating and damaging the tooth.
Subgingival cleaning may be performed by hand, or via a special “subgingival tip” on the ultrasonic scaler that is designed to be used on a lower setting and is less prone to overheating the tooth. For simple dentals without significant gum recession, this may be all that is needed.
If using ultrasonic scalers, many experts recommend following up with hand scaling for more detailed work or hard to reach places, to ensure no tartar is left behind.
For periodontal pockets ranging from 3-5 mm with no other pathology (mobility, etc.), closed root planing and subgingival curettage may help to reestablish the health of the pocket and soft tissue attachments to the tooth.
For pockets deeper than 5 mm where the tooth is being treated (rather than extracted), open root planing is recommended. Referral to a specialist may be best.
It’s important to stock tools in different sizes to accommodate different breeds of dogs. Having the right tools can make a veterinary team member’s life much easier and allow them to more easily reach and clean crevices or tight spots.
Due to the prevalence of periodontal disease, there’s no doubt that dental health is important for a dog’s wellbeing.

Client expectations are evolving. Many devoted pet owners research dental procedures online and expect a high level of care for their dog’s oral health needs.
By investing in dentistry—and then communicating the value of each step to their clients—a veterinary practice can bring in income while providing excellent care to their canine patients.
Written by: Dr. Tammy Powell, DVM

Stainless Steel Wall-Mounted Folding Exam Table
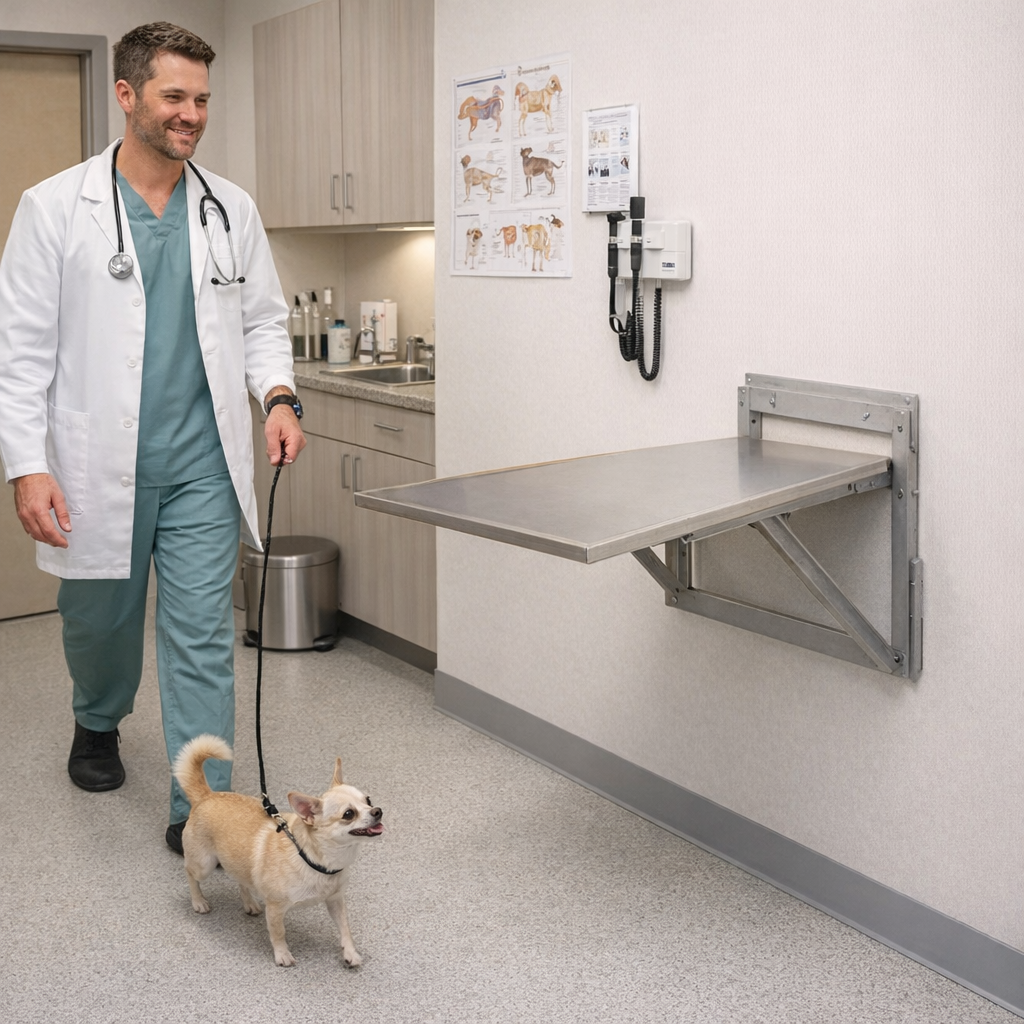
Why Wall-Mounted Folding Exam Tables Make Sense for Modern Veterinary Clinics
In today’s veterinary clinics, space, efficiency, and hygiene all matter more than ever. Many practices are looking for ways to improve patient care without expanding square footage or overcrowding exam rooms.
One practical solution more clinics are choosing is a stainless steel wall-mounted folding exam table.
Here’s why this type of exam table is becoming a brilliant stainless steel wall-mounted folding exam table, for veterinary hospitals and small practices alike.
Designed for Clinics Where Space Is Limited
Not every veterinary clinic has large exam rooms or extra treatment space. In smaller practices, every square foot needs to work hard.
A wall-mounted folding exam table:
Folds nearly flat against the wall when not in use
Extends less than 5 inches from the wall when closed
Frees up room for movement, carts, and staff flow
When an exam or patient transfer is needed, the table folds down quickly—then disappears again when the task is complete.
Built for Practical, Everyday Use
This exam table style is designed for real clinical workflows, not occasional use.
Key functional benefits include:
Sturdy stainless steel construction
Supports up to 120 pounds, providing stable support for routine exams and recumbent patients.Versatile applications
Can be used for examinations, patient transfers, or temporary patient support.Integrated backsplash
Helps prevent fluids from getting trapped between the table and the wall—reducing cleanup concerns.
Stainless Steel Supports Better Hygiene
In veterinary medicine, infection control is critical—for both patients and staff.
Stainless steel exam tables offer clear advantages:
Easy to clean and disinfect
Rust-resistant and moisture-resistant
Non-porous surface that doesn’t harbor bacteria
Maintains a clean, professional appearance over time
These qualities make stainless steel a reliable choice for exam and treatment areas where cleanliness matters most.
Ideal for Small Clinics and Fast-Paced Environments
Wall-mounted folding exam tables are handy in:
Small veterinary clinics
Practices with limited exam rooms
Facilities where patients need immediate access
Clinics looking to add functionality without remodeling
Because the table stores vertically when not in use, it allows teams to adapt rooms quickly as needs change throughout the day.
Simple Delivery and Assembly
Another benefit is ease of ownership.
Free delivery
Ships ready for quick assembly
No special tools required
Lightweight enough to handle easily during setup
Please note:
Installation is not included. A licensed contractor should complete proper wall mounting, and the table should be tested for correct installation before use.
A Smart, Long-Term Equipment Choice
For veterinary practices that value efficiency, hygiene, and thoughtful use of space, a stainless steel wall-mounted folding exam table offers long-term value without unnecessary complexity.
It’s a simple upgrade that supports better workflow, cleaner environments, and more flexible exam spaces—without taking over the room.
Have questions or want to learn more?
Call 877-545-1202 to talk with a veterinary equipment specialist about whether a wall-mounted folding exam table is right for your clinic.

Upgrade Your Practice: Burton Veterinary LED Exam Light

The Burton Veterinary LED Exam Light is the ultimate tool for any professional looking to improve the quality of their practice. The fixture provides an excellent 90 000 lux at 30" from the bulb, making it one of the brightest LED lights on the market today. It uses a 3-chip LED array with a CRI of 95, producing a broad spectrum for veterinary examinations.
Designed for Pet Comfort
The Burton Veterinary LED Exam Light is the next generation of high-density, energy-efficient, cost-effective illumination for veterinary clinics.
The light's unique design provides a warm, natural color and a soothing effect for pet patients. The high-definition lens diffuses the light to produce a shadowless examination field and eliminates the need for mirrors or reflectors.
Heat Free
This product improves patient care by providing brighter, more intense illumination with less heat to minimize thermal tissue damage.
By delivering highly focused light for a longer duration than traditional incandescent lamps, our torches provide a greater field of vision for surgeons and dental professionals. The heat-free light guarantees 75% energy savings over the current halogen option.
Lighting Efficiency
The new LED is the brightest, most energy-efficient light in its class. Producing 90,000 lux at 24″ (61 cm).
The LED light uses 20% of the energy used by conventional fluorescent lights while being 25% brighter and lasting longer.
The LED light delivers a uniform, shadow-free field of light. The fixture produces a more balanced field of light with less contrast at the cost of some brightness. A separate cold filter reduces room ambient and provides optimal color temperature for viewing under magnification.
3700 k Color Temperature
With the 3700k color temperature and the ability to light up to 3 inches, you'll be able to get the job done better than you ever have before! Animals are a lot more comfortable with this light, allowing you to examine them in a more efficient, easier way.
This light will last you a very long time, reducing the amount of money you spend on veterinary equipment and increasing the comfort of the animals living in your care.
CRI (Color Rendering Index) of 95
The Burton LED Exam Light improves upon the old-fashioned bulb-type exam lights with a CRI (Color Rendering Index) of 95, which makes the colors of the animals' skin appear more accurately.
This is especially helpful when examining animals with light-colored fur like kittens! The LED light doesn't feel hot like a bulb light to be less scary for the animal.
High Rg>87 that can accurately capture different skin tones
The Burton Veterinary LED Exam Light was designed to excel in veterinary care. Not only does it provide dermatologists and veterinarians a dependable and easy-to-use light source, but it also provides a warm and uniform illumination for a spot or indirect examination. With the Burton Veterinary LED Exam Light, skin tones are captured as they are, with full detail and accurate representation.
It is designed to rotate 360 degrees and can be positioned up to 37.5 inches away from the patient (body part) on which it's being used! This product has an average life span of 20,000 hours.
This particular model is dimmable, but it comes equipped with an efficient switch that allows you to change the strength of the intensity. It is easy to clean and features antimicrobial paint that keeps it sterile.
Takeaway: Burton Veterinary LED Exam Light is proven to increase diagnostic accuracy. Get yours today!
Written by: Rachel Best

Essential Tips for Feline Dental Health: Best Practices

As a veterinarian, you already know how important dental health is to your patients—and you also know that dental health concerns can vary by species.
Today, we’ll be covering some tips for dental care in cats, both before and after the dental procedure.
Knowing Your Way Around a Cat’s Mouth
Quick—how many teeth should an adult cat have?
Clients often ask questions like this. A timely, confident answer will help inspire confidence when they leave their pet with you for oral care.
Plus, knowing the normal dental formula for each species serves an important purpose DURING a dental procedure.
For example, it helps a veterinarian or vet tech easily determine whether or not there are any missing teeth—a discovery that could prompt further exploration and potentially diagnose a problem that needs to be addressed.
Similarly, when performing extractions, it’s important to know how many roots the tooth has, to ensure no root tips get left behind. Knowing the approximate length and direction of each root will also help a vet extract the tooth more efficiently.
Know the Most Common Issues to Look For
Of course, dental tartar and periodontal disease are common concerns in both dogs and cats. But each species also carries their own unique dental problems that occur commonly.
For example, FORLs/resorptive lesions are fairly common in cats, but not so much in dogs. Felines are also more prone to certain inflammatory conditions such as stomatitis.
While it’s important to keep a look out for anything that could be part of a disease process, knowing the common issues in each species could help a vet pick up on subtle or early changes.
Also, be aware of normal structures that could be confused for a mass or lesion—such as the lingual molar salivary gland in cats.
Dental Radiographs: Why, When, and How
The WHY is simple: Dental x-rays are important because they allow a veterinarian to see the whole picture of a pet’s dental health—which frequently includes problems brewing below the gumline.
But, WHEN and HOW should dental x-rays be performed?
Many experts recommend taking a full set of dental radiographs immediately after anesthesia induction. Usually, this task is performed by a skilled vet tech or nurse, along with anesthesia monitoring.
It’s worthwhile to invest in training for this important skill. Consider sending team members to a conference or course, or asking the company that sold the dental x-ray equipment if they offer training. And setting up a standard technique (performing the views in the same order each time) can improve efficiency.
Performing radiographs prior to the cleaning gives the vet a chance to review the radiographs. These findings, along with a visual assessment of the patient’s mouth (including charting), gives a lot of information to support a call to the owner, if needed for additional treatments.
For routine cleanings, this may be all that is needed. But for patients who are receiving extractions or more advanced procedures, it’s beneficial to perform post-op dental x-rays. This confirms that everything was done properly and safely, in case any new concerns arise later.
Tips for Cleaning a Cat’s Teeth During a Dental Procedure
After charting is done, the typical dental procedure consists of scaling and polishing.
Scaling of the enamel can be done with an ultrasonic/and or hand scaler, while curettes (sometimes in combination with a specialized, “periodontal tip” on the ultrasonic scaler) are used to clean below the gumline.
Polishing is performed using a low-speed handpiece, usually with disposable prophy angles and fine-grit prophy paste.
Dental extractions may be done at the point during the procedure that works best for that patient’s needs and the veterinarian’s preference. For example, it may make sense to pull very loose teeth prior to cleaning (no point in spending time cleaning a tooth that is about to fall out), while more complicated extractions might be performed further into the procedure.
Here are a few tips for dental cleaning:
Make sure to stock the right size tools (scalers, etc.) in the practice, which means a range of sizes if you see everything from cats to large dogs. Smaller tools for cats allow for getting into crevices and cleaning more efficiently.
Use time limits to avoid overheating of the teeth, i.e. no more than 10 seconds at a time on any tooth with the ultrasonic scaler, or 5 seconds with the polisher.
In cats, due to the small size and shape of their skull, the eye sits very close to the maxillary teeth. Therefore, be careful while probing or cleaning deep periodontal pockets in that area (not to mention during nerve blocks or extractions) to avoid traumatic injuries to the eye.
Due to the prevalence of periodontal disease, and the abundance of oral and dental diseases that can occur in cats, there’s no doubt that dental health is important for their overall health and comfort.
Client expectations are evolving. Many devoted pet owners research dental procedures online and expect a high level of care for their cat’s oral health needs.

By investing in dentistry—and then communicating the value of each step to their clients—a veterinary practice can bring in income while providing excellent care to their feline patients.
Written by: Dr. Tammy Powell, DVM