


Cloud versus Server Based PIMS: Which Is Better?
Choosing the Right PIMS: Cloud-Based vs. Server-Based Systems
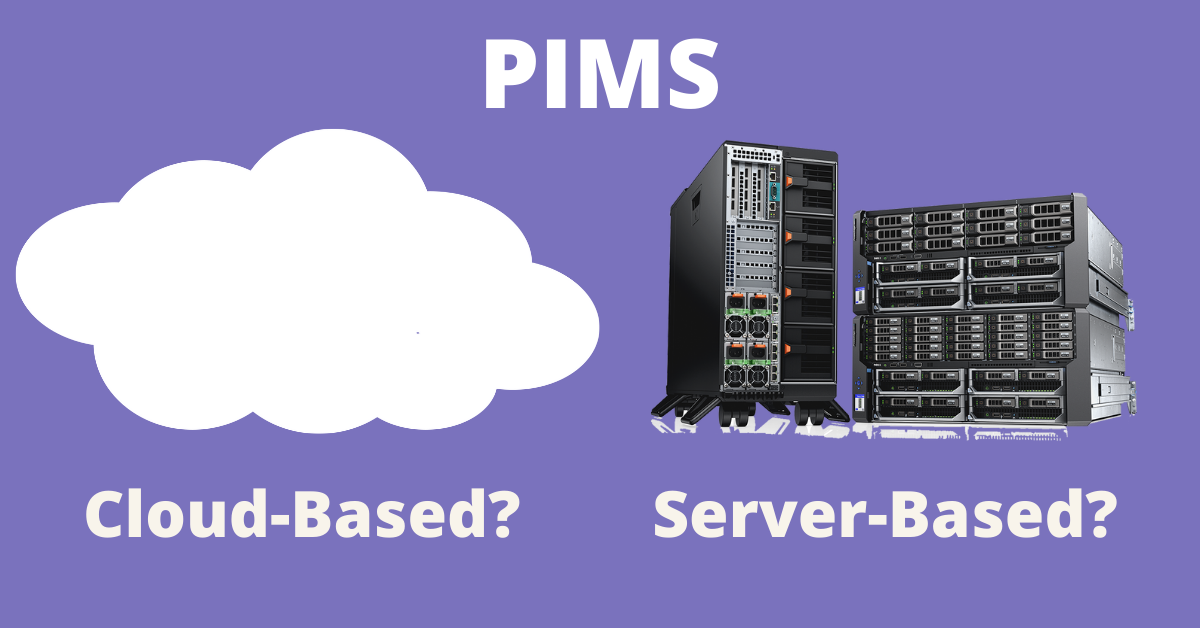
Should veterinary practices choose server-based or cloud-based practice information management systems (PIMS)?
Having the right PIMS for your practice is important. Your practice management software plays a role in just about any task your team does throughout the day. It can also improve your practice’s performance by providing financial reports, helping to prevent missed charges, etc.
Here are some considerations for deciding between cloud-based and server-based PIMS…
Server-Based PIMS: Pros and Cons
A simplified way to think of server-based PIMS is as an “in-house” data storage and management system, whereas the cloud involves more remote storage and management. Server-based is considered older technology compared to cloud-based, but many vets prefer it, especially if they have years of experience with it.
The software is installed on the veterinary practice’s hardware (computers). The computers in the clinic must communicate with a central server to ensure up-to-date data is accessible at all workstations. This type of system requires frequent data backup to ensure no data is lost. Data is stored locally on the server.
One advantage of server-based PIMS is that software may work without a good internet connection.
Some veterinarians also feel that a server is more secure than the cloud. However, security concerns may carry less weight in recent years, as cloud-based software becomes more advanced and more common. Plus, even server-based software can face security threats like viruses and ransomware.
A big disadvantage of server-based PIMS is the cost of setting up, as well as long-term management costs. Server-based PIMS has very specific hardware requirements, which may need to be purchased from the PIMS company to be eligible for their technical support. Also, server-based software can require expensive updates, a visit from an IT professional if anything goes wrong, and the expense of replacing computers every 3-5 years.
One additional, important consideration is that although server-based software has the advantage of operating without an internet connection, it is still possible for the server itself to crash—which can create major headaches and lost business.
Cloud-Based PIMS: Pros and Cons
A PIMS being cloud-based means that the software and data are stored remotely, on servers outside of the practice, and accessed via the internet. This is similar to many services we use in our daily lives, such as Gmail and other email programs, Dropbox, etc.—not to mention common apps that integrate with PIMS. Cloud-based PIMS are gaining in popularity due to advantages such as simplicity of setup and use, as well as advances in technology that seem to be trending toward cloud storage.
One big advantage of cloud based PIMS is that they don’t typically require an expensive hardware setup, since they can work on just about any device with internet or even cellular service.
This flexibility also means more choices in terms of hardware. For example, if you are a fan of Macs, you can keep your preferred operating system, rather than switching to PCs as some server based PIMS require.
Since the software servers are remote rather than physically located at the vet clinic, responsibility for server maintenance and performance falls on the PIMS company rather than on the veterinary team.
This can make it much less likely for a veterinary practice to suffer from server crashes. Also, updates are often automatic and less likely to slow down operations.
A frequently cited disadvantage of cloud based PIMS is inability to access the system if the internet is down. However, many PIMS providers and veterinary teams are finding workarounds for this issue. One easy solution is using cellular service as a backup, since the PIMS can still work with 4G (or possibly 3G or 5G).
Also, some (not all) cloud based PIMS allow veterinary teams to use the system even with no internet or cellular service, then sync everything once service becomes available again.
This can make cloud based PIMS a good option for mobile practitioners.
Remote Access and Work-Life Balance: The Pros and Cons of Cloud and Server-Based PIMS
Some veterinarians like how cloud based PIMS allow them to finish up notes, access new lab results, etc. from home. This is possible on server-based PIMS, too, using programs such as GoToMyPC.
However, adding remote desktop access can mean yet another cost incurred for a server based PIMS. In either case, accessing everything at home might not be ideal for work-life balance.
But perhaps this feature is useful for vets who do on-call shifts.
Not all veterinarians and practice managers are comfortable having their data stored offsite. This concern may come down to the specific PIMS company.
Ask questions about their security, how the data is backed up, and how you can access the data if you ever switch companies or if the company goes out of business. Some practice owners also back up their data locally on external hard drives, for extra assurance.
Important Considerations for Any PIMS
Not all PIMS are created equal. That’s true whether the software is server or cloud-based. In addition to the considerations above, think about the following when choosing a PIMS…
All basic functions like medical records, appointments, invoicing/payments, and inventory, as well as any desired integrations for automation, marketing, client apps, telemedicine, etc.
Upfront and ongoing costs, including maintenance and service.
Training for team members on the new software.
Availability of technical support.
Policies for security and data loss prevention.
Minimum hardware or internet requirements.
Compatibility with other devices such as printers.
Compatibility with practice management apps, labs, diagnostic image storage and sharing, vendors, etc.
Ability to grow with your practice.
Customization options.
Reputation and stability of the company.
Ask colleagues their opinion and seek a demo from the PIMS provider before purchasing.

While this may sound like a lot to research, choosing the right PIMS for your practice can make daily workflow easier for everyone, save time, and help your veterinary practice thrive.
Written by: Dr. Tammy Powell, DVM

EzyVet Veterinary Practice Management Software
EzyVet is a type of practice information management software (PIMS) for veterinary practices.
A good quality PIMS can play a part in nearly every aspect of practicing medicine and running a business. But how does a veterinarian or practice manager know which PIMS is right for their workflow, practice culture, and long-term growth and goals?
There’s no single system that is right for every practice. Instead, every veterinary business should research their options and see which PIMS might be a good fit.
Our last two articles took a look at some key features of AVImark and Cornerstone. Today, we’ll be covering another popular PIMS option: ezyVet.
Company Info and the Technical Stuff about the EzyVet Practice Software
EzyVet (Cloud Veterinary Software | ezyVet ) was originally created in New Zealand in 2006. Since then, it’s grown to serve over 2,000 animal hospitals on six continents, with offices in Dallas, London, and Auckland. In 2021, the company was acquired by IDEXX.
The software is entirely cloud-based. It can run on any internet-connected device with a browser, including computers, tablets, and phones of various providers and operating systems.
The ezyVet website includes information on suggested hardware and internet requirements to allow the software to run at its best.
They also mention that the system still works offline, then syncs back to the system once the network is available again. This was listed as a perk for mobile vets who may travel out of network range. But it stands to reason that this feature could also prove useful for occasional internet outages in brick-and-mortar practices. They do suggest having internet with a cell phone provider available as a backup option.
Server backups aren’t required since the software is cloud-based. Updates are automatic, and the company promotes innovation so that new updates can help to meet veterinarian and client demands.
New customers receive comprehensive onboarding services for a smooth transition. Support is available 24/7, via email, phone, or ticket. And ezyVet advertises that they have bank-level security.
Main Features and Functions of EzyVet Software
The key features advertised by ezyVet include…
All the functions that would be expected from a complete PIMS, including scheduling, price estimates, payment processing, client reminders, electronic medical records, inventory, and reports.
One characteristic of ezyVet software that pops up often on their website, as well as in reviews from veterinarians, is the availability of robust customization options. Of course, with any PIMS, it can require some time upfront to set up templates, workflow preferences, picklist and shorthand settings for entering data from a patient’s history and physical exam, screen/clinical record display preferences, etc. But customization can help to improve workflow and efficiency once preferences are set and running. Customization also included picking from settings designed for general practice, specialists, mobile vets, equine vets, etc.
A customer portal that offers clients the ability to access their pet’s data, use online booking to schedule appointments, pay invoices, and order certain products for their pets.
Automated invoice capture so that charges are entered as the products/services are added to the medical record. This helps save time by only entering charges once, and also helps prevent missed charges.
Lots of integration partners and compatibility, including major diagnostic laboratories, diagnostic image viewing, and sharing applications, major vendors, and more.
Telemedicine is offered via integration with Zoom or Televet.
Client communication options can be customized and automated to save time, and sent directly from the software so they are automatically added to the medical record.
Other time-saving features such as e-signature capabilities, a self-check-in kiosk option for clients, and automatic inventory reordering.
Conclusion
Subjectively speaking, ezyVet’s website was very clear and easy to navigate. A lot of information—including hardware requirements and transparent pricing information—was available and easy to find on the website, which was not always the case for some of the other large PIMS providers.
EzyVet also has a YouTube channel, including a playlist of short tutorials
All of this simple and easily available information, along with many positive reviews and the company’s goal of promoting work-life balance through time-saving automation, leave a favorable initial impression of ezyVet.
That being said, there are no “perfect” PIMS out there that are right for every practice. It’s important to research prices, features, and other factors prior to making a decision.
A “test drive” of several systems can also be the deciding factor since it involves testing out the PIMS and seeing if it feels intuitive and simple to use. EzyVet does suggest that veterinarians book a demo to see if the software is a good fit for them.
Editor's Note: Looking for x-ray or ultrasound equipment that integrates with your practice management software? Our x-ray and ultrasound equipment integrates with any software with DICOM, to save you time and make your workflow easier.

Written by: Dr. Tammy Powell, DVM

Cornerstone Veterinary Practice Management Software

Practice information management software (PIMS) is a crucial part of business for veterinary practices to maximize their operations and profit, reduce lost revenue, and make the workday flow a bit easier.
But depending on the PIMS a practice chooses, it can either work for them and make their life simpler, or it can feel like a battle with the software each day.
There’s no single “perfect” PIMS that’s right for everyone. Team members may have different preferences, and veterinary practices come in all shapes and sizes and have different needs.
To help with the research process when purchasing a PIMS, in our last article we discussed some of the key features of AVImark software. Today, we’ll be taking a look at Cornerstone software from IDEXX.
The Basics and Getting Started with Cornerstone Software
Cornerstone Software (Cornerstone Software | Feature-Rich Veterinary Software - IDEXX US ) is available from IDEXX.
Cornerstone is a preferred provider recommended by AAHA, and the software reportedly helps vets collectively manage the treatment of 26 million patients per year.
A cloud option is available. There’s no seat or usage limitation for larger practices.
One attractive security feature is automatic daily data backup, along with Cornerstone specialists to verify that data is backed up successfully and without data corruption. The provider also offers security alerts, help for fixing security concerns, and a 2-hour recovery for business-critical data if recovery is ever needed.
IDEXX offers data conversion into Cornerstone, noting that they’ve managed more data conversions than any other vet software provider.
Customized training is available for team members, including onboarding and a training plan for the practice through in-person and remote sessions.
Main Features and Functions of Cornerstone Veterinary Software
The key features advertised by IDEXX include…
All the functions that would be expected from a robust PIMS, including scheduling, price estimates, payment processing, client reminders, electronic medical records, inventory, and reports.
User-friendly, easy navigation. This includes contemporary fonts and icons, enhanced search, and a hover feature for access to scheduling details.
IDEXX claims to have the industry’s most integrated software, for working with a variety of popular apps and other programs. Obviously, integration with IDEXX labs is smooth, including in-house machines. Other highlighted applications include…
Pet Health Network Pro (Pet Health Network Pro Integrated Features - IDEXX US ), also from IDEXX, helps veterinary practices with appointment requests, automated email and text reminders for appointments, medical reminders, thank you and pet birthday messages, targeted marketing campaigns, 1-on-1 texting with clients that is saved to the patient’s record, newsletters, and reputation management. The service also features Petly pages and a mobile client app with branding customized to the veterinary practice.
rVetLink, a cloud-based referral management solution.
VetConnect Plus, an online diagnostic resource to support clinical decision-making.
IDEXX Web PACS for image storing and sharing.
PetDetector, for printing temporary pet ID collars during hospital stays.
Portable checkout devices for exam rooms or curbside.
A whiteboard to for assigning and keeping track of tasks, and for updating patient status and tasks.
Conclusion about Cornerstone Software
It seems that Cornerstone is designed to be an all-encompassing solution to help veterinary practices manage their daily workflow more efficiently, improve performance, and grow the business.
In reviews, opinions of Cornerstone range from “love it” to “hate it.” Proponents of the software note that it works best if team members invest the time to train on and customize the software from the beginning.
Training helps team members actually use all the functions that are available, for the best return on investment. And customization helps personalize the software to the needs of an individual practice, so it becomes more intuitive and a tool to improve workflow and efficiency.
To determine if Cornerstone is a good fit for your practice, a free demo is available from IDEXX. Be sure to ask a lot of questions and explore all the software’s features while “test-driving” it.

Also, talk to other practitioners to get their opinions. If another practice in your area uses the software, ask them about making a quick visit to see the software in action and ask them what they like and don’t like about it. Doing your research can help ensure the software you choose meets the needs of your clinic and practice style.
Editor's Note: Looking for x-ray or ultrasound equipment that integrates with your practice management software? Our x-ray and ultrasound equipment integrates with any software with DICOM, to save you time and make your workflow easier.
Written by: Dr. Tammy Powell, DVM

AVImark Veterinary Practice Management Software

A good practice management software (PMS)—also known as practice information management software (PIMS)—plays a role in nearly everything a veterinary practice does, from daily procedures to inventory and improving financial performance.
In modern practices, paper-based records systems are becoming less and less common. Electronic systems can save time not only for entering and processing information but also by automating tasks like client reminders.
Additionally, many pet owners expect to have access to their pet’s information in a timely manner, including when records (not just medical notes and lab results, but also diagnostic images and videos) need to be shared with another veterinary practice or a specialist.
There are many PIMS options available. Over the next three articles, we’ll take a look at features and considerations for three of the most popular systems—beginning with AVImark.
Technical and Setup Considerations
Avimark is owned by Covetrus. It uses a Windows operating system, and both server and cloud-based options are available. According to Covetrus, AVImark is used by more than 11,000 veterinary hospitals worldwide, making it a popular choice.
Data backup services are available, as are specialized hardware with warranty plans. There is also an add-on conversion service to help transfer current records and treatment/inventory lists to the new software when switching to AVImark.
One nice option is training that is provided via a self-paced online course, virtual training, or on-site training. A customized workflow analysis and consultation are also available to help a veterinary practice with their specific needs and goals.
Downsides commonly mentioned in reviews were that the system can be slow at times, especially with multiple users. Glitches can happen, although to be fair this was an issue noted with many PIMS providers. And tech support received some unfavorable reviews.
Main Features and Functions of AVImark
The key features advertised by Covetrus (AVImark veterinary practice management software | Covetrus ) include…
All the basic and necessary functions a veterinary practice would expect from a complete PIMS, such as scheduling, reminders, price estimates, inventory, reports, invoicing/payment processing, and electronic medical records.
Ease of use and team members being able to learn the system quickly. Many reviews mention that the system is intuitive and that it can quickly be picked up by new hires.
Robust search functions, which were mentioned positively in AVImark reviews. This includes the ability to search for a patient/client using the client name, pet name, phone number, or other parameters, as well as the ability to search for patients with certain factors such as those who haven’t been seen in a while, or those who need preventive medication refills, are above a certain age, etc.
Integration with a variety of other programs. This includes other Covetrus systems, such as Covetrus Prescription Management. AVImark also integrates with a variety of in-house and outside laboratory programs, diagnostic imaging software, etc.
Automation, including texts, emails, voice messaging, postcards, prompts for forward booking of appointments, etc. to help increase compliance and revenue. AVImark also advertises marketing and client communication tools, reputation management features (surveys and online reviews), and mobile apps.
Cloud-based Intelligent Inventory to help reduce inventory waste and costs.
Note templates to help streamline notetaking for medical history and for clients.
Customized list building. This can be used within the hospital to assign tasks to team members, or to save time by adding standard discharge or post-op instructions to the medical history.
A whiteboard function for tracking all updates, activities, tasks, and notes in real time. This is automatically added to the medical record and invoice, to reduce the likelihood of missed charges or miscommunications.
Telemedicine solutions (with the latest AVImark update).
Conclusion
AVImark is one of many options veterinary practice owners have when it comes to PIMS. Although it has changed ownership, it has been around for many years and is something of a “tried and true” system used by a lot of veterinary hospitals.
That being said, there is no one-size-fits-all when it comes to practice management software. Each practice must decide what’s best for their business’s size, daily operation requirements and workflow, budget, long-term goals including growth, IT infrastructure and internet dependability, and other individual factors.
Be sure to do your research prior to making a purchase. Check reviews, ask colleagues their opinions and ask vendors for a demo that can be used in your practice for several days so you and your staff can really get a feel for it and see if the software is a good fit.

By doing your due diligence, you can find the best PIMS to help with meeting daily practice needs and supporting long-term goals.
Editor's Note: Looking for x-ray or ultrasound equipment that integrates with your practice management software? Our x-ray and ultrasound equipment integrates with any software with DICOM, to save you time and make your workflow easier.
Written by: Dr. Tammy Powell, DVM

What to Know About the Mindray Vetus E7 Ultrasound

Purchasing a new veterinary ultrasound machine is an exciting, yet complex, decision. A veterinarian may feel overwhelmed by choices. There are many systems available at all different price points, with different features—many of which are hard to compare side by side for vets who are new to performing ultrasounds.
In this article, we’ll look at some of the features of the Mindray Vetus E7 Ultrasound, a veterinary-specific model, to see if it might be a fit for your practice.
What Is the Mindray Vetus E7 Ultrasound?
The Vetus E7 is a laptop-type portable ultrasound unit made specifically for veterinary practitioners. It’s designed for use on both small and large animals, for abdominal studies, cardiology, musculoskeletal and small parts studies, and even some reproductive applications.
This 2022 model features a lot of new and advanced technology. Some of the key features that might appeal to a veterinarian are discussed below.
Features of the Vetus E7
While every practice has unique needs, these features may be beneficial to veterinarians in many clinical settings…
Small size and portability. The Vetus E7 is a laptop design, so it can be transported as needed. There is a 15.6-inch, high-resolution color LED monitor. The unit is 1.7 inches thick and weighs 3.0 kg (6.6 lbs) without the battery and 3.5 kg (7.7 lbs) with the battery. Battery life is about 1.5 hours on the laptop alone, or up to 8 hours with the included U-bank battery.
Durability and ease of cleaning. The unit is basically “sealed” in, making it more difficult for liquids and stray hairs to get inside the unit or under the buttons. This includes an anti-liquid touchpad that replaces the standard rollerball, and seamless keys/buttons. Materials are said to be durable and chemical resistant. It stands to reason that the seamless design might also be helpful for protecting the unit from dust and humidity when out in the field.
ZONE Sonography Technology+ (ZST+). This is the first laptop-based system to use the technology, which is supposed to provide excellent image clarity and quality. A simplified way to describe this technology would be to say that it uses software to process acoustic data in large “zones” at a fast speed. This large amount of acoustic data creates a detailed image and can help reduce tissue motion artifacts. Dynamic pixel focusing means good special resolution and the ability to focus at various depths without the user needing to manually adjust the focal point.
Dedicated veterinary presets and user-friendly workflow. Presets are available according to species (canine, feline, equine, bovine, ovine, and customizable), and further subdivided by body size (including dog ranges of <5 kg, 5-15 kg, and >15 kg). The iWorks feature offers smart scanning protocols that standardize the workflow and allow automatic addition of annotations, marks, and measurements. The company claims this can reduce exam time by 50% and reduce keystrokes by 80%, for faster and more efficient studies.
iScanhelper, a built-in learning tool that provides tips on how to scan, as well as anatomical illustrations, patient positioning and probe placement pictures, and ultrasound images for comparison with real-time scanning.
Additionally, the Vetus E7 system includes many standard features such as Doppler and compatibility with image storage software.
Conclusion
Is the Vetus E7 right for your veterinary practice? It depends on exactly what you’re looking for, what your practice plans to budget, and what you plan to use the machine for, i.e., what’s the return on investment based on the expected number and types of studies that would be performed at your practice.
Also, it’s important to ask your supplier questions to ensure you know exactly what you are purchasing. Check how many probes are included (and which types), whether there’s a warranty and what it covers, and anything else you might want to know. See if it’s possible to get a demo, too.
All that being said, the Mindray Vetus E7 does offer some exciting features for veterinarians. In addition to the practical considerations that make it easier to keep the machine clean, many vets would appreciate the features that may make it easier to learn and use this ultrasound unit, such as intuitive workflows and processing capabilities for high-quality images at multiple depths.

It’s common knowledge that ultrasound can require a lot of training and practice before a vet feels confident in the modality. So, anything that makes the process a little easier or more intuitive, and helps with obtaining high-quality images, can certainly be a plus.
Written by: Dr. Tammy Powell, DVM

Dosimeters and Their Use in a Veterinary Practice

Dosimeters are an important part of radiation safety in a veterinary practice. Although dosimeters themselves don’t provide protection against radiation, they help monitor the effectiveness of radiation safety protocols so that team members stay within the set limits for occupational radiation exposure. Here are some things to consider when using dosimeters in a veterinary practice…
Who Needs to Wear a Dosimetry Badge in a Veterinary Practice?
The short, simple answer is that EVERYONE who restrains pets for radiographs at any time, or who will be in the x-ray suite or near the machine, during an x-ray exposure requires a badge.
A longer and more official answer can be found by checking state and federal guidelines for specific regulations.
Often, state guidelines are stricter than federal. For example, federal rules require monitoring for any employees who may receive over 25% of their specified dose limit per any quarter. But many states specify 10% rather than 25%.
Some states list very specific requirements like wearing a monitoring device for any employee that will be restraining an animal during radiographs, regardless of what their expected exposure dose over time will be. Also, AAHA has requirements regarding dosimeters for practice that wish to become AAHA accredited.
When rules differ, default to the strictest requirement to be safe. And remember to check the most up-to-date guidelines, in case of any changes.
Some practices prefer to have dosimeters for ALL employees, even those who won’t be involved with x-rays, for liability purposes.
Can Dosimetry Badges Be Shared?
Each person needs to have their own badge, including relief vets, temporary employees, volunteers, etc.
That’s because the whole point of dosimetry badges is to monitor the exposure of each person over a period of time. Sharing badges, or reassigning a badge to a different person, would make it impossible to tell who received which portions of the documented radiation exposure.
How Much Do Dosimeters Cost?
As with much of veterinary technology, costs vary. Average prices range from $50-100 per dosimeter per year, depending on the type of dosimeter.
Look for the best price available from a supplier you trust—one that is reliable and meets any guidelines for your state.
Check how often monitoring is included, and when the dosimeters will need to be replaced/repurchased.
How to Choose a Veterinary Dosimeter?
There are different types of dosimeters available, each of which has their own advantages and disadvantages. Look at exactly what you’re receiving, rather than just the purchase price alone.
Factors other than price include…
Sensitivity, includes the ability to distinguish between different energies and types of radiation, the minimum measurable dose that can be accurately measured, and whether the angle of exposure affects the results.
Durability, including fading or fogging, or loss of ability to receive information over time, especially after exposure to light, heat, or moisture/humidity.
How the information is received or processed from the dosimeter, including whether the information is obtained in real-time or must be sent out for processing and whether the dosimeter can be re-read or only processed once.
Where and When Should Dosimeters Be Worn?
For veterinary employees who take radiographs (or who help restrain patients for radiographs or are in the suite for any reason during an x-ray exposure), the badge should be worn throughout the entire length of an x-ray study.
A dosimeter should be worn near the neck, on the outside of any lead PPE. Usually, this means clipped to the top of a lead apron.
For most employees, one badge is enough. But in some cases, more than one monitoring device is recommended.
One example is pregnant employees. If pregnant employees will be performing radiographs—which is allowed in some states but not others—a fetal dosimeter may be required, which is worn under the lead apron(s).
Some experts recommend adding a ring dosimeter for fluoroscopy.
State monitoring forms may list specific location requirements for dosimeters, or they may ask veterinary practitioners to report where on the body dosimeters are being worn and whether they are under or over the lead apron.
Where Should Dosimeters Be Stored?
Dosimetry badges should be stored outside of the x-ray suite when not in use. There should be one specific place for storage, to ensure dosimeters don’t get lost or accidentally damaged.
Some types of dosimeters are sensitive to heat, including sunlight. You can ask your badge company for specifics, but otherwise, it’s best to avoid wearing badges outside the building, especially in sunlight.
Damage could also occur if a badge is accidentally thrown into the wash, etc. Storing badges in a predetermined spot will help avoid damage and unnecessary expenses to replace damaged badges.
Control badges may also be provided along with the badges for employees. Ask the manufacturer or vendor about where to store control badges.
Where Can I Learn More About Veterinary Dosimetry Requirements?
For more specific information, check with your state veterinary board. Also, check state and federal radiation regulations. When the rules are different between state and federal, default to the strictest requirements.
This includes federal and/or state OSHA requirements. Calling your state OSHA can be very helpful.
Idexx’s Lower the Dose page (IDEXX Veterinary Radiation Safety Center - IDEXX US) has a search bar where a veterinarian or practice manager can look up their state’s radiation guidelines.
VIN (Veterinary Information Network) consultants can answer questions for VIN members. To help with the many regulatory requirements of running a veterinary practice, there is also a VIN OSHA Compliance and Practice Safety Course available.

Going through all the laws and rules can be a pain. But with the legal and ethical requirements of radiation safety, there’s no reason dosimeters shouldn’t be provided and used for the safety of veterinary personnel.
Written by: Dr. Tammy Powell, DVM
See our badges here: https://newvetequipment.com/veterinary-dosimeter-badge

Dosimeters Protecting Veterinarians from Radiation Exposure

Radiation safety is crucial in veterinary medicine, and dosimeters play a role in protecting team members.
All veterinary personnel who are involved with taking radiographs should be familiar with how occupational radiation exposure can affect health, as well as with how to maximize their safety and reduce the amount of radiation to which they’re exposed.
Here’s how dosimeters fit into the radiation safety picture…
What Do Dosimeters Do?
A dosimeter, or dosimetry badge/ring, is a small device that measures radiation exposure from a source of radiation outside the body over a specified period of time. Here, we’ll focus on radiographic studies. But dosimeters are also important for practices that have additional sources of ionizing radiation (CT, nuclear medicine, etc.).
The purpose of a dosimetry badge is to ensure that radiation safety protocols are effective so that a person does not receive a dangerously high level of radiation exposure.
Radiation exposure should ALWAYS be as low as possible. However, there are recognized set limits of radiation doses that are considered acceptable for a person, below which adverse health effects are unlikely.
This safe exposure limit varies depending on a person’s occupation (whether they are a member of the “general public” or someone who has occupational exposure to x-rays or other sources of radiation), as well as a person’s age (limits are stricter for anyone under 18), and circumstances such as pregnancy.
Dosimeters help to measure and document that radiation exposure stays below these established safety limits, both over the short term and over a lifetime.
Do Dosimeters Provide Any Radiation Shielding or Protection?
No, dosimeters are not protective against radiation in and of themselves. But they contribute to radiation safety by monitoring employee radiation exposures, which helps verify that safety protocols are effective.
Or, if radiation exposure is high, dosimeters can uncover this problem and prompt a veterinary practice to evaluate their equipment or make appropriate changes to their radiation safety protocols.
Are Dosimeters Required?
Although rules and specifics vary from state to state, generally speaking, YES—dosimeters are an absolute legal requirement in veterinary practices that use x-rays or other sources of ionizing radiation. This is because of potential health and safety risks for employees.
There are also legal requirements regarding sharing of this information with employees (such as providing each employee that uses a dosimeter with their yearly exposure report) and how many years the veterinary practice has to keep this information on file.
In addition to legal requirements, dosimeters are a good idea for liability reasons. In case a current or former employee ever attributes a health problem to job-related radiation exposure, it’s best to have dosimetry records available to show that radiation exposure was at a level considered safe.
For this reason, some veterinary hospitals obtain dosimeters for all employees, even those that spend minimal (or zero) time performing radiographs. Although using dosimeters only for team members involved in taking x-ray studies is probably more common.
How Often Are Dosimeters Monitored?
Monthly and quarterly are common frequencies for processing or reading dosimeters. But the specific timeline for how often dosimeters need to be checked varies between states.
So, prior to ordering yearly badges, double-check if your state is one that requires checking dosimeters quarterly or monthly. And consider what would work best for your hospital. More frequent monitoring could allow for prompt changes to safety protocols when needed.
What Happens If Radiation Exposure Is High?
If the exposure measured on a dosimeter is higher than expected, measures should be taken to reduce radiation exposure to that employee(s).
This could mean re-evaluating safety protocols, including the principles of shielding, distancing, and minimizing exposure time.
For example, maybe lead aprons or gloves have cracks in the shielding and need to be replaced. Or, maybe team members need to be educated and monitored to ensure they are wearing the right gear every time.
Distancing from the machine (the radiation source) could be achieved through hands-free restraint. And minimizing exposure time could be achieved through improving technique so there are fewer retakes, or by rotating staff who take x-rays so the same person isn’t exposed all the time.

With everything we know about radiation safety, it’s important to implement dosimeters in veterinary practice—both to meet legal requirements, and to help ensure safety protocols are effective. In the next article, we’ll discuss more details about how dosimeters are used in a veterinary practice. Stay tuned!
Written by: Dr. Tammy Powell, DVM
See our badges here: https://newvetequipment.com/veterinary-dosimeter-badge

How Much Does Veterinary Fluoroscopy Equipment Cost
For many years, when it came to diagnostic imaging modalities in general practice, many veterinarians were limited to film or digital radiographs. Some general practitioners may have had ultrasound available, but for more advanced imaging modalities, patients were referred to specialty hospitals.
Nowadays, general practitioners may have noticed that imaging technology is becoming more widely available. Even looking at digital radiography, machine prices have come down significantly in the last 10 years.
And it’s not unusual for a practice to offer an additional imaging modality such as fluoroscopy or cone-beam CT, along with interventional radiology procedures, in addition to radiography and ultrasound.
Today, we’ll discuss the availability of fluoroscopy, cost considerations, and other factors to consider when investing in a veterinary fluoroscopy unit.
How to Choose a Fluoroscopy System
When shopping for a fluoroscopy unit, veterinarians will find that there are some veterinary-specific machines available, while others were designed for human medicine. Either option could potentially be useful depending on the specific needs of the practice.
It’s important to consider the specific features of the equipment you are purchasing, as there are big differences between some of the machines. It’s not always an “apples to apples” comparison when price shopping.
Some of the factors to consider include…
Which type of fluoroscopy unit is best? A C-arm is what comes to mind for most vets, as that was the primary system available for many years. And C-arms still have their place, especially when used in the surgery suite. But the downsides are that they can be expensive and very bulky. A table unit is another option. Small, mobile units are also available, especially for large animal practitioners, although they may not carry all the capabilities of larger units.
X-ray output/generator. Fluoroscopy generators can be continuous (constant x-ray output during a study) or pulsed (short bursts of x-rays, similar to the frames of a movie reel). As you can probably imagine, pulsed generators tend to have a lower overall output, which is important for radiation safety. However, exposures can still add up over time, so it’s important to practice radiation safety no matter which unit is being used.
What will your practice use fluoroscopy for? If there is a specific need such as fluoroscopy guidance during major surgeries, that may determine the type of unit your practice purchases.
Where in the practice will the unit be used? Consider whether the power supply in the room needs to be redone or if the room itself needs modifications to meet radiation safety guidelines. Also, does the unit physically fit into the room in which it’s intended to be used? A combination unit, such as one that combines fluoroscopy with digital x-ray or CT functions, could help with space savings in the hospital.
Ease of use and technical support. Efficiency in the hospital is important, even more so during busy times. Machines that are difficult or confusing to use could create challenges with effectively schedule fluoroscopy studies. This could lead to less frequent use of the machine, and therefore less of a return on investment.
Cost considerations. Of course, look at the actual purchase cost. But also consider factors such as financing/payment plan options for cash flow, warranty and maintenance (a warranty or service plan might not be an option when purchasing used equipment), and calculating the return on your financial investment. A practice consultant or financial expert can help with these financial projections and decisions.
How Much Do Veterinary Fluoroscopy Machines Cost?
Once a veterinary practice has evaluated their needs, it’s time to start comparing machines that would be a great fit for the practice. So, how much can a veterinarian expect to pay for a fluoroscopy unit?
The price is incredibly variable depending on the type of unit a vet practice is looking for.
Used or refurbished mini C-arm units are available through resellers starting at around $15,000. On the other hand, some new fluoroscopy units can cost well over $100,000.
There are used and new options sold between these price ranges, too.
How Can a Veterinary Practice Maximize the Return on Their Equipment Investment?
No matter which type of equipment a veterinary practice purchases, it’s important to make sure the equipment actually gets used!
Some of the factors above will help ensure the best ROI. For example, ease of use/efficiency and keeping the machine in good working order are both important.
Staff training, appropriate pricing strategies for fluoroscopy studies, and client education on the value of the service can also contribute to ROI.

Keeping all these factors in mind will help promote regular use of the machine—which carries benefits to patient care and practice profitability alike.
Written by: Dr. Tammy Powell, DVM

Optimize Care with Veterinary Fluoroscopy Technology

In addition to capturing a single moment in time on radiographs, it’s possible to record live, real-time X-ray studies. This is known as fluoroscopy.
So, what is fluoroscopy used for in vet med? And how can vets choose which fluoroscopy machine is right for their practice? Read on to learn more about veterinary fluoroscopy…
How Does Fluoroscopy Work?
Fluoroscopy uses x-rays to create video studies rather than still images. These videos can be viewed in real-time, and depending on the system and software, clips can also be saved as part of the medical record and shared for consultations.
Generators for fluoroscopy can be classified as continuous or pulsed. Continuous generators produce x-ray output for the entire length of the study. Pulsed generators, on the other hand, produce X-rays in short bursts—similar to a frame in a video.
Since fluoroscopy generates images and videos using X-rays, radiation safety protocols must be followed, just as they would while taking traditional radiographs.
This means wearing appropriate PPE and badges (including a ring badge for fluoroscopy), increasing distance away from the machine as much as possible during exposures, using the lowest possible exposures/x-ray output, and keeping hands out of the primary beam during exposures.
Common Uses of Fluoroscopy in Vet Med
While not a replacement for standard radiographs, fluoroscopy can provide additional value. The real-time imaging capabilities of fluoroscopy can capture movement in addition to just still images.
For that reason, fluoroscopy can offer a dynamic, functional view into many parts of the body—especially for conditions that are difficult to capture in the split-second exposure of a regular X-ray study.
Common examples include swallowing studies and diagnosing tracheal collapse. Both of these things are notoriously difficult to catch on regular x-ray images since perfect timing is needed to produce a diagnostic image—an X-ray image that captures just the right moment in time when the abnormality is visible.
Fluoroscopy has additional diagnostic and interventional uses in vet med, too. One example is urinary studies. Moving the patient around in real-time can help to break up bladder sludge to differentiate it from uroliths or abnormalities/thickening of the bladder itself. Real-time fluoroscopy also has value when performing contrast studies of the bladder (to evaluate for bladder ruptures, radiolucent uroliths, etc.) or procedures such as a retrohydropropulsion of urethral stones.
Skull and jaw X-ray studies can be time-consuming and technically challenging. The same is true for diagnosing joint laxity or small fractures within a complex joint. These may require multiple x-ray views—including stress views. Vets may find that fluoroscopy studies add value by showing the anatomy in real-time, from various angles, and with dynamic movement. This could make for a much quicker and easier alternative to taping the patient perfectly into position for each separate shot.
A few more examples of diagnostic uses for fluoroscopy include evaluating for nasopharyngeal polyps and dynamic hernias, as well as real-time movement during GI transit studies.
As for interventional procedures, fluoroscopy may assist during certain orthopedic surgeries or aid in guided aspirates or placement of feeding tubes. The degree of invasiveness of the procedure may determine which type of fluoroscopy unit is required (more on this below).
Fluoroscopy Machines Available to Veterinarians
For a long time, the primary option was C-arm technology, which is expensive and bulky.
Sometimes, a C-arm is the preferred option. For example, when used in the surgery suite (such as with major orthopedic surgeries performed with the aid of fluoroscopy guidance), a C-arm is typically the only option for working around the surgery table.
However, newer and less expensive options are coming to the market. For example, there is a 2-in-1 digital x-ray and fluoroscopy combination unit available from JPI. This is convenient because it takes up less space and there’s no need to buy two separate machines.
The limitations of the x-ray/fluoroscopy combo would be the lack of a horizontal beam and the inability to use fluoroscopy intraoperatively in major surgeries since it is attached to the x-ray table. However, less invasive procedures could be performed on the x-ray table with fluoroscopy guidance.
Each practice would need to decide which option is best for them. However, it is good to see new technology becoming available that could increase the accessibility of fluoroscopy to general practitioners.

Right now, demand for veterinary services is high. So, fluoroscopy could be one additional, unique service for vets to offer to their patients and clients.
Written by: Dr. Tammy Powell, DVM
Watch the swallow with Fluoroscopy!

Can Veterinary Technicians Perform Ultrasounds?

With the growing demand for veterinary services—and many vet hospitals being fully booked—many vets are delegating tasks to skilled veterinary technicians when possible. But is an ultrasound something that can be delegated to vet techs?
Here, we’ll cover what separates the duties of a veterinarian and a veterinary technician, and how that applies to performing ultrasounds on companion animals.
Which Duties Can a Vet Tech Legally Perform?
Credentialing, as well as the laws and rules governing what veterinary technicians can or cannot do, vary widely from state to state. So, it’s important to check your state’s rules and regulations for specifics.
However, as a general overview, trained technicians are allowed to perform many of the same duties that veterinarians perform. But they must operate under the supervision of a licensed veterinarian.
There are a few things that vet techs aren’t legally able to do, though. This includes making a diagnosis, prescribing treatments and diagnostic tests, performing surgery, and giving a prognosis.
How Do a Vet Tech’s Training and Legal Restrictions Apply to Performing an Ultrasound?
With the above rules in mind, think about what’s involved in an ultrasound study.
The person performing the study must be familiar with the ultrasound machine and how to use the controls to operate it. They must know how to find the organs/anatomic structures of interest and take the correct views (images and videos) of those structures, along with any relevant measurements.
So far, all of these tasks are something a vet tech could learn how to do.
Although it can take time to learn and practice ultrasound technique, vet techs are smart and educated, and capable of doing many of the challenging tasks a veterinary hospital requires on a daily basis.
So, given the right training and opportunities to hone their skills, it stands to reason that many vet techs could be taught to perform ultrasound studies.
What About Interpreting the Images?
The tricky part comes in when it’s time to interpret the images or videos that were captured during an ultrasound study.
Even though a highly trained and experienced vet tech will probably understand the significance of what they are seeing on an ultrasound study, there are legal limitations to what a vet tech can do with that information.
Interpreting the images would involve making a diagnosis (or at least a diagnostic rule out list) and possibly giving a prognosis. Plus, based on that information, prescribing treatments or additional diagnostic tests (such as performing an FNA or obtaining a biopsy) could be the next step.
Those things would fall into the realm of services limited to a licensed veterinarian.
So, a vet tech could perform the ultrasound study and capture images. But it would be up to a veterinarian to interpret the study.
In many ways, this is very similar to how x-ray studies are already performed in veterinary medicine. It’s also similar to the way ultrasound techs operate in human medicine.
So, it’s not a stretch to imagine a similar system could work for ultrasound studies in vet med.
Potential Pitfalls to Consider
With ultrasound studies, there is value in someone being able to interpret the studies in real-time.
For example, if a mass is noted in the liver, a veterinarian might recommend an FNA of the mass. However, a vet tech wouldn’t necessarily be able to prescribe this next step.
Also, certain findings may require veterinary knowledge to put into context and alter the course of the scan. One example is finding a splenic mass, which might prompt a veterinarian to also look and see if a right atrial mass is present.
One solution is to have veterinarians present (or at least be accessible for questions) during the study. That way, additional views, and procedures could be performed as needed.
However, even veterinarians who are new to ultrasound themselves may run into shortcomings with image interpretation. So, there may be limitations no matter who is performing the study, until a person gains years of practice.
A good place to start is to have whoever is performing the study—whether it’s a vet or a vet tech—use a standardized list of views to obtain. Then those views can be sent to a specialist for interpretation, which will help everyone learn.
Training and hands-on practice are also crucial. Skills will need to improve over time.
Does It Make Sense for Veterinary Technicians to Perform Ultrasounds?
With veterinary practices being so busy since the pandemic, it makes sense to utilize staff (veterinarians, techs, CSRs, and the rest of the team) to their full potential.
This is one reason why the discussion of a mid-level practitioner (veterinary nurse practitioner) role has become more prominent.
Giving additional roles and responsibilities to educated, trained vet techs could carry a lot of benefits. One would be to take some of the time-consuming duties off the doctors.
This could improve the overall efficiency and profitability of the practice by freeing up more time for the vets and allowing them to see more patients or perform more medical procedures.
Additionally, new roles and skills for vet techs could provide much-needed pay increases, job satisfaction, and career advancement opportunities.
While performing ultrasound studies isn’t a full solution to these industry-wide concerns, it’s one example of a skill set that could contribute to the expanding role of technicians in the profession.

Each vet practice must decide what will work best in their individual practice and adhere to the laws of their state. But there are many reasons to believe that vet techs learning to perform ultrasounds could be beneficial to the whole practice.
Written by: Dr. Tammy Powell, DVM

the Price of a Portable Veterinary Ultrasound Machine?

Ultrasound is a great imaging modality that can add value to a veterinary practice, allowing them to offer new services in-house. But for some practices, a mobile ultrasound may be the best choice.
This includes mobile small animal practitioners, equine and large animal vets, and even some veterinary practices that may want to move their equipment between rooms or cage sides.
If you’re looking to purchase a portable veterinary ultrasound machine, here are some things to consider…
Which Components and Features Do You Need?
Before comparing the purchase price of different manufacturers and vendors, it’s important to make sure you’re comparing apples to apples.
So, make a list of the things you must have with your ultrasound machine, as well as a list of ‘nice-to-haves’. Here are some possibilities…
Transducers. Which type of transducer(s) are included with the machine? Ultrasound probes or transducers come in different shapes and frequencies, which are used for different purposes and different species/sizes of patients. So, it’s important to make sure you’re getting the options you need, based on your practice type, the patients you see, and the services you plan to offer.
Functions and features. Does the machine offer all the operating functions that you need for your studies? And what about features like color Doppler, or the ability to make measurements and annotations on the screen? Doppler technology can be indispensable for certain types of ultrasound studies. Color Doppler provides a look at blood flow, which is crucial when evaluating the heart and helpful for identifying vascular landmarks for certain abdominal structures.
Durability. For vets who make farm calls, it’s important to purchase a unit that can handle being out in dust, humidity, and temperature fluctuations, as well as something that travels well.
Power and connectivity. Do you always have reliable power outlets available, or are there some cases when a battery-powered machine would be needed? And how will your images and videos be stored or added to your practice management software?
Support. Is there a technical support line available 24/7? And is the company stable—meaning, are support and replacement parts expected to be available in the next few years?
How Much Do Portable Veterinary Ultrasound Machines Cost?
Veterinary ultrasounds are highly variable in price, depending on the quality of the machine itself and what’s included. But the average price of a portable veterinary ultrasound is about $10,000 to $25,000.
Some units can cost significantly more, especially if they come with multiple probes and extended service plans, and warranties.
To the other extreme, there are some units that only cost between $1,000 to $5,000. Typically, these inexpensive units are handheld and compact, and they may be able to hook up to a smartphone. They typically don’t offer the capability of seeing everything in fine detail. But they may be a good option for vets who only plan to do things like ultrasound-guided cystocenteses or quick checks for free fluid in the chest or abdomen.
Financial Considerations
In addition to the purchase price, plan for long-term expenses. This could include routine service and maintenance costs, renewing a warranty, updating software, unexpected repairs, and anything else that could come up over time.
Also, investigate your financing options. Will you purchase the equipment outright using saved business funds? Or does it make more sense to do monthly payments via financing from the vendor or a bank?
Don’t forget to factor in tax savings, too.
Talking to a financial professional, especially one who is familiar with the veterinary industry, can help. This advisor or consultant can also help you determine how much to charge for the new ultrasound services your practice will offer.
Maximize the Return on Your Investment
Many veterinary patients can benefit from ultrasound studies. But in order to schedule a lot of studies and earn a profit with the new equipment, a vet must be able to perform an ultrasound study with confidence and in a timely manner.
Ultrasound is not covered in most veterinary schools to nearly the same extent as x-rays. And the use of the probe and interpretation of what’s on the screen are not always intuitive. Therefore, many vets require in-depth training and a lot of practice before becoming comfortable performing ultrasound studies.
For all these reasons, if a practice is investing in a new ultrasound machine, it also makes sense to invest in training. That way, the machine can be used with confidence and efficiency.
A vet doesn’t have to have these skills mastered at the time a machine is purchased. But at least one vet at the practice should have a commitment to learning how to use the ultrasound.

The right portable ultrasound purchase will vary from practice to practice, depending on the practice type, budget, and other factors.
But by carefully considering all these things ahead of time, it will be easier to determine which machine suits your practice’s needs and to ensure your equipment investment pays off.
Written by: Dr. Tammy Powell, DVM

Digital Radiography vs. Film X-Ray: A Veterinary Comparison

What is Veterinary Digital Radiography, and How Does It Compare to Film X-Ray Systems?
Nowadays, veterinarians have a lot of options when it comes to their x-ray system—so how does a veterinary practice choose between film and the various digital x-ray modalities that are available?
It helps to compare price, efficiency, and other factors that will affect the daily use and value of your investment. Here are some considerations…
What Is Digital Radiography Versus Film?
First, it’s helpful to define the different x-ray options that are used in veterinary medicine.
The first choice is to decide between film or digital radiography. Film is exactly what it sounds like: X-ray images are captured on physical films. To produce an image, those films are then developed using processing chemicals in a dark room.
Digital radiography, on the other hand, produces a digital image. However, there is more than one method available for obtaining this image, including CCD, CR, and DR.
CCD (charge-coupled devices) have been compared to digital cameras in the way that they work. However, they have some disadvantages, including edge distortion when collimation is wider. While this older technology is still used in some capacities, most vets would be choosing between CR or DR.
CR (computed radiography) uses phosphor plates to capture an image. That image is obtained when a plate is put through a plate reader.
DR (direct radiography) doesn’t have any type of “middleman” (film developer or plate reader). Instead, digital images are captured on a special type of x-ray sensor that directly or indirectly converts x-rays into an electrical signal. The image is produced almost instantaneously.
Costs of Digital Radiography Versus Film
As with many other technological advances, there tends to be an increase in price for newer generations of technology—at least initially, because newer technology eventually does come down in price and becomes more accessible. Compare it to smartphones and digital cameras—two type of technology that have become much more widely accessible in recent years.
X-ray technology has followed a similar pattern. Digital technology does generally cost more to purchase than a film system. And DR generally costs more than CR.
That being said, prices have come down significantly in the last decade or so, making digital technology much more affordable to many veterinary practices.
While it’s great that newer technology is becoming more affordable, that doesn’t mean the latest tech is right for every veterinary practice. For practices with a slower pace that don’t perform a lot of x-ray studies, a film or CR system may meet their needs just fine and be a smarter investment than DR.
It’s also important to consider long-term maintenance and repair costs, in addition to the purchase price of the x-ray system.
For example, is there a warranty, and what does it cover?
If a component of the machine or plate/sensor breaks down, are replacement parts available (that’s not always the case for older equipment)?
Also, for film, the cost of supplies (film purchase and disposal, processing chemicals, and developer maintenance) must also be factored in.
Efficiency of Digital Radiography Versus Film
There’s not doubt that, used to its maximum potential, DR technology is fast and efficient. That’s because, rather than waiting on a developer or plate reader, images are created in just a few seconds.
This efficiency can make x-ray studies go much faster, with fewer retakes. Also, for digital systems in general, it’s usually faster to set up the study, since there are automatic technique settings for different patient sizes and areas of the body being studies.
All of this means a faster, simpler workflow, less time for the patient to be on the x-ray table, and the potential to schedule more x-ray studies. Many practices have reported increasing their x-ray revenue after upgrading to DR. This can certainly increase the financial return on the equipment investment.
But there is one important consideration when it comes to efficiency. The machine is only efficient if team members feel confident using it. So, it’s ideal to invest in something that’s user friendly and that has tech support available.
It’s smart to invest time to train everybody on the new equipment, since many employees will be used to different systems and need a little help learning all the features and functions of the new equipment.
Quality of Digital Radiography Versus Film
While many vet professionals believe digital radiography is always better quality than film, that’s not necessarily true.
Quality depends on the system itself, as well as on the ability of team members to use the equipment proficiently to obtain high-quality, diagnostic images. Performed with skill, film studies can be perfectly diagnostic and of high quality.
That being said, digital does allow some room for error. A lot of practitioners like it for that reason. The software automates much of the image processing, and the digital image can be manually manipulated if something needs to be seen in more detail.
Which Is Best—Digital Radiography or Film?

Digital x-ray technology, particularly DR, certainly offers many advantages. And it may make sense to invest in the latest technology that a veterinary business can reasonably afford, so that replacement parts and tech support are available for as many years as possible.
However, each veterinary practice must evaluate their unique needs and see what works best for them.
Written by: Dr. Tammy Powell, DVM

How Much for a Veterinary Digital Dental X-Ray Systems Cost?
An average price range for a new digital dental radiography system would be $8,000-$15,000, depending on which components and features the system includes.
Dental radiographs are now considered a standard part of a comprehensive dental procedure.
Good quality dental x-rays can help a vet discover and treat more pathology, thereby boosting both patient care and revenue.
Although a dental x-ray system is an important equipment investment, a veterinary practice should plan for its purchase appropriately.
This includes knowing how much to budget long-term, exploring financing options, and maximizing the ROI on the new equipment.
It’s important to see exactly what you’re getting for the purchase price. For example, is the generator handheld, or is there a stand, arm, or wall mount included?
For CR plates or digital sensors, how many are included, and in which size(s)?
Also, what type of software are you receiving?
Don’t be afraid to shop around or negotiate with sellers, to receive the best possible price.
However, also keep in mind that the cheapest price isn’t always the best. Quality is key when investing in an important piece of equipment.
Check with colleagues to see which systems they prefer, or ask the seller for references of other vets in your area who have purchased the equipment so you can get some honest feedback.
See if neighboring clinics would mind you stopping by to see the equipment in person and look at the images they’re getting.
What Are the Maintenance Costs of Veterinary Digital Dental X-Ray Equipment?
In addition to the actual purchase price, it’s important to factor in the long-term costs of maintaining your equipment in working order.
Ongoing costs, for both new and used equipment alike, may include…
Warranties. Ask when any initial warranties expire, whether they can be renewed, and how much it will cost to renew. Also, find out exactly what the warranty covers. Ask about drop damage, bite damage (since the sensor will be placed directly in a patient’s mouth!), and any other common incidents that may occur in a veterinary hospital. Not all warranties cover these things.
Ongoing maintenance and repairs. Ask about routine recommended maintenance, as well as costs of the most common types of repairs. If any of this isn’t fully covered by a warranty or service plan, plan ahead for these costs so they don’t catch you by surprise. Also, add these expenses into your total purchase cost. Sometimes, more expensive long-term maintenance can cancel out the cost savings of a lower initial purchase price.
Software upgrades. Timely upgrades are crucial to keeping your equipment working smoothly—for image processing, storage, and sharing. Also, ask about security against hacking or cyber-attacks, since radiographs are part of confidential medical records.
Ask about technical support, and if there is a free 24/7 support line you can call for smaller issues.
Ask about loaner equipment that can be used if any component of your system needs to be repaired. With this option available, you’re less likely to lose revenue if your equipment becomes damaged or needs a repair.
Look Into Equipment Financing Options
Once you’ve calculated all the costs of purchasing and maintaining your new dental x-ray system, it’s also important to consider how you will finance the purchase. This can make or break your monthly cash flow.
The first decision is whether to purchase or rent the equipment. Many vets recommend purchasing if that is an option for your practice. However, each veterinary practice must choose what works best for their finances and practice flow.
Business savings may be a good option to purchase the equipment outright. But sometimes, monthly payment plans are easier on cash flow, since revenue from using the x-ray system could be enough to cover the monthly payment and earn a profit right away.
Of course, this is assuming that the interest rate on the payment plan is reasonable.
For monthly payment plans, check with the equipment seller, or ask about a capital lease (a type of loan for equipment purchases) from banks.
Remember to factor in tax savings (Section 179 of the IRS Tax Code) and seek guidance from a financial professional.
How Can a Veterinary Practice Maximize the Return on Their Equipment Investment?
Of course, you’re probably excited to start using your new dental x-ray equipment. However, maximizing the use of your equipment starts BEFORE the purchase.
If the equipment is confusing or cumbersome to use, it will take more time per study, which means fewer dental procedures can be scheduled. Also, there will be a subconscious reluctance to schedule if the equipment is a pain to use.
So, make sure to invest in a system that is user-friendly and efficient and produces high-quality, diagnostic images.
Also, invest in training for your team, since dental radiographs (especially those bisecting angle shots) can be confusing for anyone new to taking these x-ray studies. That also means training for vets on how to interpret dental images.
While a learning curve should always be expected, good training means less frustration and a shorter time until everyone feels comfortable getting great, diagnostic images—and for vets to feel confident diagnosing pathology on the images.
Finally, plan ahead for how much you will charge for dental x-ray studies, and how this can be worked into the total cost of a dental procedure.

All of these efforts can maximize the ROI on your new digital dental x-ray machine, while ensuring the highest level of patient care—a plan that’s beneficial to everyone.
Written by: Dr. Tammy Powell, DVM

How Much Do Today’s Veterinary Digital X-ray Systems Cost?
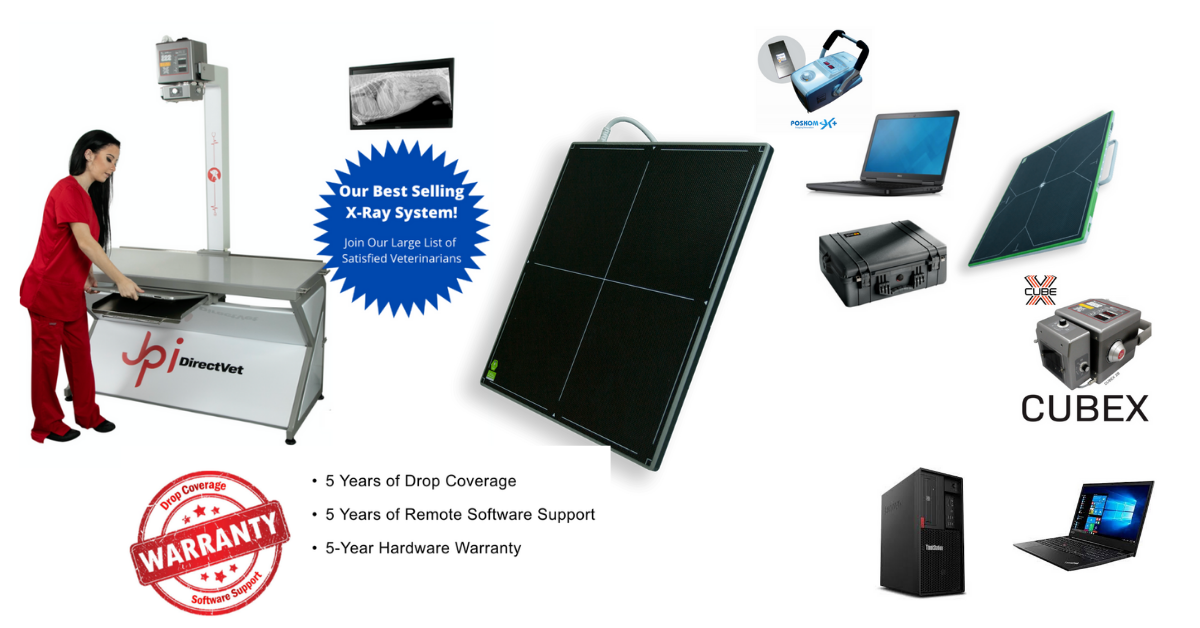
What Price Range Is to be Expected?
The average price for a DR digital x-ray system in the veterinarian industry ranges from $21,000 to $35,000.
Examples:
DR Plate and system - $21,995
A complete DR system with table, generator, and DR digital x-ray is $29,995
A wireless system for equine or mobile vets - $28,995.
Equipment purchases are one of the most important investments a veterinary practice will make, so it’s important to ensure that the price makes sense for the business.
This doesn’t necessarily mean that the cheapest equipment is always the best deal. Instead, it’s important to consider a number of factors in terms of how you can maximize your investment and meet all the goals you had in mind for your new equipment.
The Price of Veterinary X-Ray Equipment Has Decreased Dramatically
Fortunately, this is much more affordable than machines were as recently as 10 years ago. That being said, it’s still a significant financial investment.
You may find equipment outside of this range, depending on which deals the manufacturer/seller is able to offer or which features the equipment offers. But this is a pretty common range to budget for.
Once you see the initial offer price, also be sure to ask about any deals. Don’t be afraid to shop around and tell sellers what other offers you have, in order to receive their best price.
And if you are buying from a company from which you plan to use other services (for example, using lab work services and buying an x-ray machine from the same company), ask about discounts or bundled deals.
What Additional Costs Can Be Expected?
In addition to the actual purchase price, it’s important to factor in the ongoing costs of maintaining your equipment in working order.
After all, if the new digital x-ray system can’t be used, it won’t bring in any income and it would go from a smart investment to just an expense!
Some long-term or ongoing costs to consider, for both new and used equipment alike, include…
Warranties, including when any initial warranties will expire, whether they can be renewed, and how much it will cost to renew.
Ongoing maintenance and repairs. Ask about routine recommended maintenance, as well as costs of the most common types of repairs. If any of this isn’t fully covered by a warranty or service plan, set aside savings each month into a sinking fund earmarked for future repairs.
Software upgrades. Timely upgrades are crucial to keeping your image processing and storage in working order, efficient, and secure.
Ask about technical support, if there is a free 24/7 support line you can call for smaller issues.
Speaking of repairs, also check how it works if you need repairs in the future—how long your equipment would be down, and whether replacement equipment (such as another sensor or plate) is available in the meantime.
Which Financing Option Is Best for Your Practice?
Once you’ve calculated all the costs of purchasing and owning your new equipment, it’s also important to consider how you will finance the purchase. This can make or break your monthly cash flow.
If your practice is well-established and has a business savings account to fully cover the cost of the purchase, that may be a good option. But then again, a monthly payment plan may be better, since you can pay as you go (and perhaps earn a profit on your investment right away) rather than depleting the liquid funds you have on hand.
Of course, when financing on a monthly payment plan, interest rates must be factored in. Interest will increase your total cost of purchase—perhaps very significantly if it’s a high-interest rate.
But a reasonable interest rate may be worth it.
The equipment manufacturer or seller may offer monthly payment plans, so be sure to ask about this. Also, many banks offer business loans for equipment purchases, an option known as a “capital lease.”
There are even some options to rent equipment rather than purchasing if this is a good fit for your practice.
Also, remember to factor in tax savings—most commonly through Section 179 of the IRS Tax Code—which can make a huge difference on overall practice revenue.
All of this can get complicated, so it’s a good idea to seek advice from a financial professional for large purchases.
How Can a Veterinary Practice Maximize the Return on Their Equipment Investment?
Here’s the fun part—getting to use your shiny new equipment!
This is why you bought the x-ray equipment in the first place. In addition to financial gains for your practice, you wanted to provide excellent care to your patients.
Maximizing the use of your equipment starts BEFORE the purchase.
Make sure you’re investing in something that is user-friendly and efficient, as well as something that produces high-quality images on all the different sizes of patients your practice sees.
That way, you can ensure it actually gets used (and produces diagnostic quality images) to its maximum potential rather than being cumbersome to use.
Also, plan ahead for how much you will charge for x-ray studies or other services. And talk to the team about communicating the value of these services to clients.
This improves client compliance to maximize patient care and ROI on your new x-ray machine.
With all these factors in mind, remember that a big discount on the purchase price isn’t always the best deal. Of course, you should always do your research and get the best deal you can.

But also remember the other factors that will affect the use (and profitability) of your equipment in the long term.
Written by: Dr. Tammy Powell, DVM

Taking, Measuring, & Interpreting Rads of the Equine Foot

Subtle changes within a horse’s foot can be indicative of pathology that affects the horse’s performance and quality of life, so it’s important to know how to take and interpret radiographs of the equine foot.
While extensive study and experience are needed to accurately evaluate foot radiographs, this article will cover some of the main principles behind taking and interpreting x-rays of the equine foot.
When Are Radiographs of a Horse’s Foot Indicated?
Common indications include lameness localized to the foot, suspected laminitis, navicular disease, trauma, infection, conformation or balance problems, or any other issues of the foot.
Additionally, radiographs can serve a preventive and management function, to help prevent some issues before they arise. This can be done during a pre-purchase examination, as part of a consultation with a farrier, etc.
Setting Up for and Obtaining Diagnostic Quality Radiographs
Since some of the abnormalities that indicate/lead to pathology can be subtle, it’s important to set up an x-ray study very precisely. Otherwise, interpretation can be inaccurate.
For example, a horse that is not distributing its weight equally between its right and left sides may slightly hold up one of its feet. This can result in a false diagnosis of an abnormal angle of part of the hoof when measurements are made.
Here are some tips that can help a veterinarian obtain the best possible radiographs of a horse’s feet…
Be very familiar with the anatomical structures, and have a good reference image for comparison.
Radiograph all of the feet (or at least take bilateral views), even if not all are showing symptoms of a problem. This may help uncover pathology that is radiographically evident but not yet clinically evident. At the very least, if no abnormalities are detected in the other feet, the views of the unaffected feet can serve as a great reference for comparison to normal within that individual horse.
Ensure that equipment is good quality and well-maintained/undamaged.
Have a systematic approach each time, to ensure nothing is forgotten. Know which views need to be obtained and which technique should be used for each.
Do the study on level ground, so that the horse can stand in a normal position. Make sure the horse bears weight equally between the right and left foot and keeps its neck and head straight so that the foot being radiographed is at a standard, weight-bearing angle that can be effectively compared to reference images and measurements. Wooden blocks are typically used to align the beam to about the level of the bottom of the coffin bone.
Common Radiographic Views of the Equine Foot
Orthogonal lateromedial and dorsopalmar/plantar horizontal views are the most commonly obtained radiographic views of the foot, and a good starting point.
Depending on which pathology is suspected, additional views may include various oblique or angled shots.
Tips for success include cleaning the foot to remove any foreign material that could obstruct visualization of normal anatomy or create an artifact.
After cleaning, it is recommended to pack the sulci with a pliable material such as Play-Doh, to eliminate gas artifacts.
Many experts also recommend placing radiopaque markers (such as Barium paste) at certain positions on the hoof, to serve as a point of reference for measurements.
Describing the technique and positioning for all of these views is beyond the scope of this article, but more detailed instructions on setting up and taking views are described in reference texts.
Measurements of Radiographs of the Equine Foot
In addition to what can be seen with the eye qualitatively, there are standard measurements of various parts of the equine foot that can greatly aid in radiographic interpretation. Some of those measurements are covered here.
For example, asymmetry or deviation of the distal interphalangeal joint space on the DP view is considered abnormal in terms of the medial-lateral balance of the foot.

Also, dorsal hoof wall thickness measurements can help identify laminitis. Rotation of the distal phalanx (P3 or coffin bone) may be noted if the lines are drawn along the hoof wall and dorsal cortex of P3 are no longer parallel to one another.

Or, laminitis may be noted as “sinking” of P3, when the lines along the hoof wall and the dorsal cortex of P3 are still parallel to one another but are displaced lower than they should be (noted as an increased distance between the coronary band and the proximal edge of the extensor process of P3).

These measurements can be made by hand, but some digital systems and software allow for measurements made right on the images on-screen, with automatic calculations.
Either way, a good reference text should be used to be sure measurements are made comprehensively and accurately, and to compare the measurements to standard reference ranges.

Having a good understanding of the anatomy of a horse’s foot, a systematic process for obtaining diagnostic quality radiographs, and practice with measurements and interpretation of the radiographs will help a vet make the most of their x-ray studies of the equine foot.
Written by: Dr. Tammy Powell, DVM

Obtaining High Quality X-Ray Images of the Equine Stifle

Radiographs of the stifle in horses are a relatively common procedure. They are used to evaluate for developmental and acquired abnormalities of various structures of the knee joint.
Here are some tips for when to obtain these radiographs, and how to obtain great shots of the equine stifle…
When Are Stifle Radiographs Indicated?
Some of the most common indications for stifle radiographs in a horse include a pre-purchase examination or investigation of any swelling of the joints, lameness localized to the stifle, difficulty bending the joint, or traumatic injuries that could affect the knee.
Some of the conditions of the stifle that radiographs may be used to evaluate include osteochondrosis, osteochondritis dissecans (OCD lesions), subchondral bone cysts, trauma, osteoarthritis, joint effusion, infection, or any other suspected abnormalities.
Ultrasound may also prove useful in evaluating the equine stifle, especially for soft tissue structures such as the joint space, meniscus, and ligaments.
Additional diagnostics—such as joint fluid analysis, arthroscopy, or CT when available—may also provide valuable information. But radiographs are usually a good diagnostic to start with, as they are fairly routine and provide a lot of information.
Planning for Equine Stifle Radiographs
Prior to doing an x-ray study of the stifle, it’s important to thoroughly understand the anatomy of the stifle.
In addition to a working knowledge of stifle anatomy, it’s important to know how this anatomy can change over time. For example, knowing which ages the physes of the joint close can greatly aid in accurate radiographic interpretation.
A vet team should also know how to obtain standard views at appropriate angles, with correct exposure techniques for each view. Due to thick musculature, cranio-caudal views may require significantly longer exposure times than latero-medial views.
Additionally, having a differential diagnosis list will help a vet determine if any additional views are needed to see specific structures of the stifle joint in more detail.
Sedation can help to reduce motion artifact, which can produce x-ray images that are of higher diagnostic quality.
Bilateral views are recommended. This provides an easy basis for comparison in that individual horse, if lesions are unilateral. Also, some lesions (such as OCD) may be bilateral, even if the horse is only showing symptoms on one side at the moment.
Which Views of the Stifle Should be Obtained?
The most commonly obtained views of the stifle include the following…
Latero-medial. In this view, the x-ray generator is positioned laterally, facing the femorotibial joint, and slightly (10-20 degrees) in a caudo-cranial direction. The beam is directed horizontally, with the detector placed medially and perpendicular to the beam.
Caudo-cranial. For this shot, the generator is placed caudally to the joint—with the beam centered at the midline—and the detector cranially and perpendicular to the beam. The generator is raised at a 10 to 20-degree, proximo-distal angle.
Caudo-lateral to Cranio-medial Oblique. For this view, also known simply as a “lateral oblique,” the beam is centered over the lateral aspect of the femorotibial joint and then angled at a 30 to 60-degree caudo-lateral to cranio-medial orientation. It is directed horizontally across the joint, or at a slight proximo-distal angle. The detector is placed on the opposing side and perpendicular to the beam.
These three views make up the majority of routine x-ray studies of the stifle. But additional views may be included if more information is needed, such as the patellar skyline or flexed lateromedial views.
For additional information on obtaining views of the stifle in a horse—including detailed pictures of the anatomy in common x-ray views—this article is highly recommended: RadiographWilson.pdf (aaep.org)

Conclusion
As with any aspect of practicing medicine, having a good reference and proper equipment, and gaining practice/experience over time, will help a veterinarian develop confidence in taking and interpreting radiographs of the equine stifle.
Written by: Dr. Tammy Powell, DVM

Upgrade Your Surgery Room with Burton Veterinary LED Light

The Burton Veterinary LED Surgery Light is designed for surgical procedures in small and large animals. This is an ideal alternative to incandescent or halogen surgery lights and has a long life span of over 50 times the average lifespan of these lights.
What is the best use for the Burton LED surgery light?
The Burton Veterinary LED Surgery Light is ideal for veterinary specialists in small animal practices and equine veterinarians who prefer to perform surgery under local anesthesia. The Burton Veterinary LED Equine and small animal practitioners also use surgery Lights for examinations and procedures. LED surgery lights are a cost-effective alternative to conventional halogen, Xenon, or fluorescent surgical lighting systems.
Why choose Burton Veterinary
Burton Veterinary manufactures an extensive line of premium quality surgical instrumentation, flexible endoscopes, accessories, and specialty devices explicitly designed with the needs of the high-performance professional in mind. The products are developed, focusing on innovation, quality, and performance. Every product is made by hand to ensure that customers receive medical devices that are safe, effective, and durable.
The Burton light has the following features.
Safe operating temperature - The light can endure temperatures up to 70ºC (158ºF) without affecting its performance. It also has a wide range of power settings that can be adjusted according to your needs and a thermal sensor to protect it from overheating.
LED lifetime
With each light using only 1/10th the power required by other lights, the Burton LED light can last up to 50 times longer than different types of lights do. Also, due to its high CRI rating of 95, this LED provides clear, bright illumination without being too harsh on your eyes.
With the Burton Veterinary LED Surgery Light, you have the operating power you need for your next surgical procedure.
Surgically precise and brighter than ever before, it delivers 70,000 lux at 1 m and a broad 4300 K color temperature. It's easy to adjust the light output to suit your needs with a 3-step dimmer (100%, 75%, 50%).
Adjustable angling head
The flexible head allows you to adjust the direction of the light as needed so that you can work on different angles with no problems.
With a larger adjustable light pattern and limitless arm rotation, this light is ideal to provide participants in surgical procedures with a clear view of their work area.
Featuring multiple LED technology, this surgery light minimizes shadowing and provides uniform illumination. Its sleek modern design is smooth and easy to clean, plus it comes backed by a 5-year limited warranty.
The light's cutting mode has a wide beam angle that illuminates the entire operating area. The viewing mode has a narrow beam angle to focus on small areas. The light is equipped with three lenses that can be quickly interchanged. Full-spectrum light is also available if the surgeon needs to perform surgery during daylight hours.
The Burton Veterinary LED Surgery Light is the most powerful, durable, and flexible surgical light available. This premier surgical light was designed to meet the demanding needs of today's veterinary practitioners.
Written by: Rachel Best

Fluoroscopy / DR Digital X-Ray Veterinary All In One System
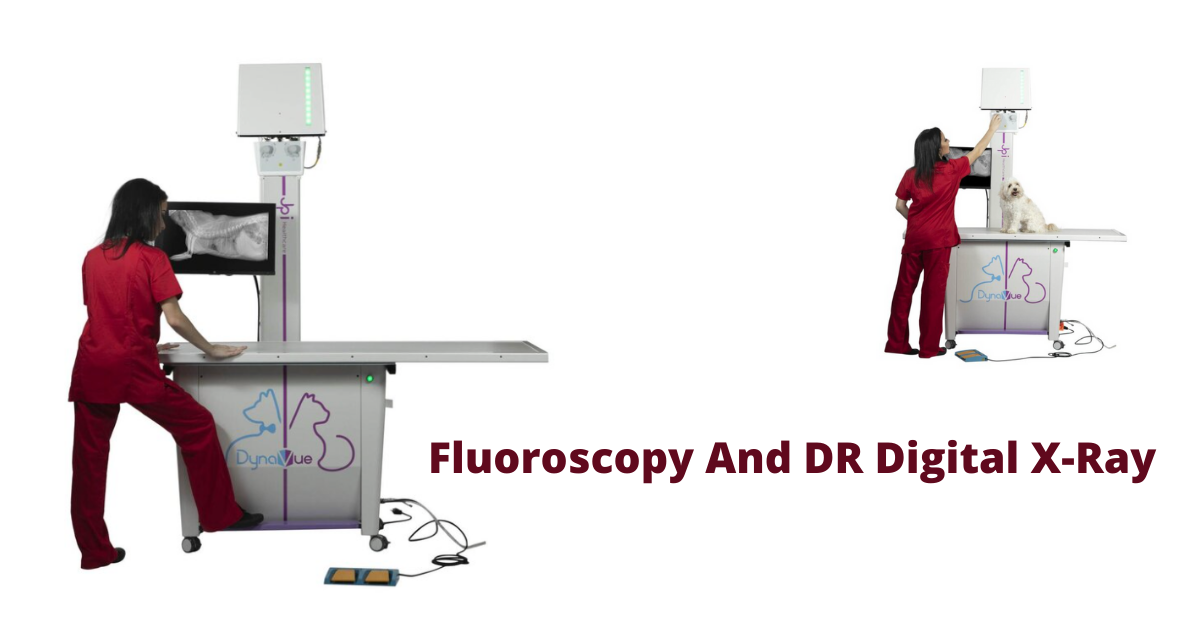
Fluoroscopy And DR Digital XRay, veterinary, All In One System
DynaVue is a very popular digital image and radiographic workflow platform used in digital radiography. It offers a complete fluoroscopy and X-Ray system, which comprises an x-ray generator, x-ray imaging table, software platform, and a large capacity Exam Pacs server for storing all the images.
DynaVue Overview
The DynaVue fluoroscopic and digital X-Ray system is based on the principles of noninvasive imaging, which utilizes ionizing radiation for medical diagnosis.
With the help of advanced processing algorithms, the system delivers high-quality images at a very low dose. The system can provide real-time cross-sectional images at a resolution of 400 microns and a speed of 30 frames per second.
The fluoroscopic imaging system is mainly used in minimally invasive surgeries and procedures such as interventional radiology, computed tomography angiography, musculoskeletal procedures, endoscopy, vascular procedures, and intraluminal stenting in veterinary medicine.
DynaVue will prove to be an advantage to veterinary practitioners as it reduces patient exposure to radiation while delivering high-quality images that can be used for various diagnostic purposes. The company offers a wide range of services for customers planning to buy DynaVue, including consultation with specialists and technical support from trained and experienced professionals.
Efficiency Requirements of a Fluoroscopy System
A sound fluoroscopy system will be able to take x-rays from multiple angles. This helps ensure doctors get the best possible images of their patients' internal problems.
The ideal system will take x-rays from three different positions: horizontal, vertical, and angled. In many cases, this is colloquially referred to as 3D imaging because of its appearance on the screen.
A good fluoroscopy system should have several modes built-in that can be used for different types of procedures. For example, an image set that can be used for knee replacement surgery is not appropriate for heart monitoring; therefore, having several different settings is crucial.
DynaVue is the Future Of Portable Fluoroscopy System
DynaVue all in one fluoroscopy and digital X-Ray system meets the exacting demands of modern veterinary and is built to provide precise, high-quality images that can be easily captured and shared with other clinicians.
The system is reliable enough to withstand the high levels of stress during a typical day in a busy veterinary facility. Yet, it is simple enough to be operated by anyone with minimal training.
The system has many features that will help enhance your practice's capability and save money in the long run. These include:
Advanced focusing - This allows for better image control.
Multiple radiography modes - Provides different functionality from one device.
Real-time image processing (8 FPS for fluoroscopy) - Supports remote monitoring.
Minimally invasive fluoroscopy - Helps lower radiation risks for the X-Ray test subjects.
DynaVue combines high-quality X-ray images with superb image quality and a wide range of therapeutic applications to perform real-time minimally invasive procedures under digital control.
It provides superior diagnostic performance to help veterinarians find early-stage diagnostics of diseases and reduce costs associated with long-term treatment.
Efficiency Requirements of a DR Digital XRay System
There are many types of digital radiography systems, and you can find them in various places. Consider the following when choosing your digital radiography system:
Technology
X-ray systems that use computer technology are almost always going to be the most advantageous. These systems will give you the greatest flexibility, such as adjusting the screen brightness or contrast levels or freezing and zooming into your images.
Installation
Your DR digital x-ray system should be easy to install and be able to be set up by 1 or 2 people. It is best if you can connect it to your computers with an Ethernet connection, but at the very least, they should have a direct USB port connection available.
Basic
Advanced x-ray machines offer all kinds of features that can be confusing and sometimes not even used by dentists. It is best to find an x-ray system with all of the basic features such as Auto Exposure, Automatic Battery Charger, Auto Focus, Automatic Film Advance, Automatic Film
Identification and Automatic Film Orientation.
Resolution
You want a minimum screen resolution of 1024x768 pixels to allow you to get sharp images on your screen. You will also need a good amount of contrast on your screen to view your images clearly.
DynaVue provides superior image quality by combining two technologies: True Waveform™ and a photodiode sensor array (PSA).
The PSA provides high-quality images with low noise levels, even at higher frame rates. The True Waveform™ feature enables superior imaging performance during cardiac gating procedures by synchronizing the image acquisition to the patient's heart rate.
For large facilities, the DynaVue system is easily scalable to meet your requirements by adding modules and accessories.
DynaVue excels in small diameter access applications because of its unique True Waveform™ technology, which provides superior imaging performance for soft tissue applications such as small blood vessels, nerve bundles, and lymph nodes.
DynaVue Features Guarantee High Efficiency
DynaVue is a 2-in-1 system that works for soft tissue and fluoro imaging. It is a state-of-the-art imaging solution that enables healthcare professionals to simultaneously see fluoro and soft tissue anatomical structures.
Flexible movement with 4-way floating table: DynaVue DR and Fluoroscopy system is one of the few systems that provides a 4-way floating table. This enables the physician greater freedom of movement, which creates a better visualization of the anatomy.
23" touchscreen display: The large display and high-quality resolution make it easy to conduct your examinations. This device ensures high-quality imaging and an intuitive user experience.
10 kW monoblock type; 15 kW inverter-based system: DynaVue DR and Fluoroscopy systems are developed for advanced diagnostic applications. Up the image quality, up the efficiency, and up the flexibility. Up the power with the Fluoroscopy system and enjoy a full range of possibilities with a single system.
Pulsed fluoroscopy offers reduced dose: The DynaVue DR system uses a backscatter method that reduces patient radiation exposure by up to 50 percent. This system also offers greater visibility throughout the exam. What's most important is that the system can still produce excellent diagnostic images comparable to existing diagnostic imaging procedures.
DynaVue uses ExamVue, a straightforward, easy-to-use, and highly customizable digital radiography software.
ExamVue is the most advanced DICOM 3.0 compliant software for X-ray imaging and reporting. More than 1,000 hospitals worldwide trust it for their daily clinical activities.
The intuitive interface offers seamless frame rate control, imaging and annotation, post imaging processing, and connection to DICOM 3 to allow your team to focus on their work instead of dealing with technology.
Takeaway: The brand new DynaVue is the perfect solution for busy animal hospitals looking to optimize their diagnostic capital while minimizing radiation exposure with a minimal investment in terms of space and equipment.
Written by: Rachel Best
Sources
https://www.ncbi.nlm.nih.gov/pmc/articles/PMC7653184/
https://www.researchgate.net/topic/Minimally-Invasive-Surgery~Diagnostic-Imaging/publications
https://www.dicomstandard.org/
https://www.jpihealthcare.com/examvue-pacs/
https://www.medicalexpo.com/prod/jpi-healthcare-solutions/product-100612-915091.html

When and How to Perform Equine Neck X-Rays

Radiographs of the cervical spine in horses can be challenging, but developing a system and becoming familiar with interpretation of these views can be very useful.
Here are some common guidelines to follow for cervical x-ray studies in horses…
When Are X-Rays of the Neck Indicated in Horses?
X-ray studies of the cervical spine are used to evaluate for a number of different conditions, such as cervical vertebral malformations, congenital malformations, trauma such as fractures, subluxations, osteoarthritis, or neoplasia.
Some of the symptoms that might lead a veterinarian to suspect an issue with a horse’s cervical spine include pain on palpation, stiffness or a reduced range of motion in the neck, neurological signs (ataxia, proprioceptive deficits), swellings or asymmetry of the neck, or even lameness or decreased competitive performance.
Advanced imaging, such as CT and nuclear scintigraphy, is becoming more common. A myelogram is sometimes indicated as well, for more information.
However, plain radiographs are usually the first line for diagnostic imaging. Plain radiographs can provide a lot of information, can be used to guide the next step of treatment or diagnostics, and may be performed with sedation, whereas other imaging modalities require general anesthesia.
An ultrasound study may also accompany neck radiographs, especially for evaluating the joints and soft tissues such as ligaments.
Performing Radiographs of the Cervical Spine in a Horse
Here are a few things that will help with smooth and efficient x-ray studies of the neck…
Make sure the generator is powerful enough for cervical radiographs, especially for the caudal cervical spine, which is a very thick region to shoot through due to surrounding musculature.
Know which views are needed (more on this below).
Carry all appropriate PPE, including cassette holders, lead aprons, gloves, etc.
Use appropriate technique for this region. This is typically a kVp of 70-90, while mAs can vary greatly between the cranial to caudal portions of the neck due to thickness.
The horse is typically sedated unless contraindicated and standing for the x-rays.
Markers should be used to clearly differentiate the different regions of the neck, so a vet knows which vertebrae they are looking at. Some vets find it’s easier to use tape on the cassette to mark the views.
Which Radiographic Views of the Equine Neck Should be Taken?
Lateral views are typically the first ones taken. The standard lateral-to-lateral view (which can be taken from either the right or the left side) can provide a good screening of the entire area.
The region is usually broken down into three overlapping shots: cranial, middle, and caudal. One disadvantage of a lateral-to-lateral view is that bilateral structures are superimposed.
Oblique views can help with the problem of superimposition and allow the vet to take a closer look at the side where a lesion is located. To provide a basis for comparison, both a right and a left oblique are taken for each region of the cervical spine (cranial, middle, and caudal).
Obliques are usually performed at an angle of 45-50 degrees from lateral—for example, dorsal-right-lateral to ventral-left-lateral oblique. A ventral to dorsal oblique technique has also been described. Either way, the direction of the shot should be clearly noted and compared to a reference of the same direction and angle, for accurate interpretation.
Additional views may be obtained if needed, especially if more focal shots are indicated to isolate an area in question.
VD views are typically not performed due to impracticality, because of the thickness of a horse’s neck, although it may be possible in smaller breeds or foals.
Interpreting Radiographs of the Equine Neck
Practice, good reference images for comparison, and familiarity with the anatomy of the region can all help with the interpretation of x-ray images.
A consultation with a radiologist can also be helpful.
Evaluate each radiograph in its entirety. Asymmetry, variations of normal anatomy, changes associated with degenerative joint disease, lytic lesions, stair-stepping between vertebrae, compression of the vertebral canal, or any other abnormalities should be noted.
Measurements of the vertebral canal can also be made and compared with standards, which can help with diagnosing more subtle compressive lesions.

By having a system for neck radiographs, knowing which views to take, and becoming familiar with the interpretation of these x-ray studies, a vet can determine the next step for a horse showing symptoms of a problem localized to the cervical spine.
Written by: Dr. Tammy Powell, DVM

Upgrade to Digital X-Ray with Your Existing Table/Generator

Saying Goodbye to Chemicals and Dark Rooms: The Digital X-Ray Advantage
Advantages of upgrading to digital X-ray:
Faster viewing of X-rays compared to film x-ray.
Elimination of the need for a dark room, saving 20-30 minutes of processing time.
Improved environmental conditions and staff health:
No more purchasing and handling of chemicals.
Elimination of film, storage, toxic chemical fumes, and odors.
Convenient sharing of X-rays:
Sending x-rays to a radiologist via email or PACS.
Easy sharing of X-rays with customers through email.
Enhanced customer service and interaction:
Digital technology allows for easier and more efficient viewing of each X-ray.
More time can be spent with customers, providing better service.
We had one location that had a table/generator which was over 15 years old, and we were able to upgrade to digital, still using his old table and generator.
Money saved!
The Doctor upgraded to a DR system, and we saved him money by using his old table and generator.
We can do the same for you and it doesn't matter if you want a CR or DR digital x-ray system.
TESTIMONY
Here is what the Doctor had to say in an unsolicited email a few days after the installation...
“Image quality is superb! Far better than Sound x-ray we use to have at Bakersfield hospital. We took abdominal X-rays on a 70-pound dog and the x-rays came out great. Thank you! Let me know if anybody wants to visit and see the images...I will be more than happy to show them the images” — Dr. Singh - Family Pet Hospital - Vacaville, CA
Use your current table and generator and go digital - for a CR or a DR system.