


Stress Management and Resources for Veterinary Professionals

Table of Contents
To be the best caregivers to dogs, cats, and other patients—it’s important for the caregiver (i.e. veterinary professional) to be cared for, too!
Many veterinarians have dreamed of a career working with animals since they were young children. And veterinary professionals may feel joy or fulfillment from their careers.
However, a busy veterinary job can put a number of different stressors on veterinarians and their team members. Over time, these stressors can decrease job satisfaction, and even lead to feelings of isolation, depression, or suicidal thoughts.
For all these reasons, wellness and work-life balance are very important for veterinarians and veterinary team members. Even though bad days happen, having the right tools to handle stress and challenges can really help.
Check our last article for tips on finding activities that bring you joy (and finding time to do them) and setting boundaries. And, try these tips and resources…
Stress Management for Work and Beyond
There are many strategies and schools of thought on how to best deal with stress in work and life. So, this list is by no means comprehensive and does not represent every technique or philosophy available.
We mention this because it’s important to find what works best for you personally, rather than trying to force a strategy or philosophy that doesn’t resonate with you.
However, this list does incorporate some “tried and true” methods that can work for many different people and that are fairly simple to begin with.
So, these tips may be a great place to “dive in” if you’re looking for something new…
Find healthy ways to process challenging emotions or stress, rather than pushing them down. A few examples include journaling, talking to a trusted friend or therapist, exercising to upbeat music, or even simple breathing techniques.
Explore a spiritual practice that works for you. Many people find that turning to a higher power can help put day-to-day worries into a new and less significant perspective.
Try meditation. While once considered “woo-woo,” the prevalence of meditation—including scientific studies that indicate its mental and physical benefits—is hard to deny. That being said, meditation can take many different forms. It can mean sitting in silence, listening to guided relaxation, or even a walking meditation—to name a few. Try a few methods to see what you enjoy most. Practice by starting with just a few minutes at a time, then work your way up slowly.
Keep a running list of positive work experiences and memories. As humans, we have a natural tendency to remember negative experiences more than we remember positive ones. Looking at a list of things that make you smile could help put things into perspective if you’re having a bad day.
Delegate at home—not just at work! Veterinary professionals are smart and capable. And they’re used to multitasking. As such, it’s easy to take that drive to “go-go-go” home after the workday ends. However, it’s important to find time to rest and recharge. That’s where time-saving delegation can help.
If it’s reasonable for your budget, consider things like hiring someone to clean your home or pick up/look after your kids after school, using a meal delivery service rather than cooking from scratch, sending out your laundry, etc. Or, talk to a partner or roommate about dividing chores.
Resources and a Support System are Beneficial
While learning to process stress and emotions is important, there’s no reason anyone needs to feel alone in the process. Feelings of isolation are common in the veterinary profession, perhaps because friends with different careers can’t relate to what a veterinary job is really like, or because of the long working hours. Whatever the reason, there are many resources and caring people available to help, including but not limited to…
The National Suicide Prevention Lifeline: 1-800-273-TALK (8255), or text 741 741 to speak to a trained crisis counselor.
Vets4Vets, a caring, confidential, and free of charge group for vets that meets online for supportive discussions: https://vinfoundation.org/resources/vets4vets/
Not One More Vet, a caring and helpful organization for veterinary professionals that offers resources, connection, and support: https://www.nomv.org/
Online therapy available to everyone regardless of insurance:
Talkspace: https://www.talkspace.com/
BetterHelp: https://www.betterhelp.com/
Also, look for apps (many of which are free) for meditation, and check out books, life coaches, financial advisers, and any other resources that resonate with your current needs and goals.
Staying at Your Best Physically Can Help with Stress Management
Physical health and wellbeing can help us stay at our strongest and most capable when it comes to dealing with life’s challenges.
After all, think about how you feel dealing with a difficult client when you’re well rested versus sleep-deprived. And consider how a long workday may feel worse if our legs and back are sore afterward, too.
For all these reasons, it’s good to do as much as we can to stay physically ready for work. Some strategies include…
Sleeping enough each night.
Regular exercise or physical activity.
Stretching with exercise or after a work shift.
Eating nutritious meals to “fuel” us through the day.
It’s not typically necessary to be a perfectionist about these things. We don’t need to be elite athletes or give up chocolate cake forever to start reaping the benefits to our energy and mental stamina. Instead, as with all new habits, it’s often best to start with small, achievable goals. Small changes to our habits can result in very real benefits.

We hope these tips and suggestions have sparked some ideas. Remember to consult a medical or another professional to receive the best advice for you as an individual. Also remember, you’re never alone. Please reach out to someone who can help (such as one of the resources listed above) at any time.
Written by: Dr. Tammy Powell, DVM

Well-being & Work-Life Balance for Veterinary Professionals

Table of Contents
Despite the wonderful aspects a career in veterinary medicine offers, there’s no denying that the field presents its own unique challenges.
This may include long work hours, demanding appointment schedules, emotional ups and downs, and difficult clients—to name a few.
All of these factors and more contribute to burnout and stress amongst veterinary professionals. These factors are part of the reason why the suicide rate is higher in veterinarians and vet techs/nurses than in the general population.
So even though veterinary medicine can be an amazing career—one where many professionals find joy and meaning by helping animals—work-life balance is very important for veterinary professionals.
Here are a few ways to start finding that balance…
For Better Work-Life Balance, Think About What Matters Most to You
There are many different aspects of life from which we can derive joy, purpose, and a sense of connection. The specifics will look different for everyone, depending on their individual needs and interests.
But some examples include:
career
friends
family
dating or marriage
spirituality
hobbies
curiosity/learning new things
staying active
time for resting
volunteering
and more.
Imbalance can easily arise when a person puts too much focus on just one of these aspects of life.
For example, if a person’s life is dominated by work, it’s easy to feel disproportionately upset when the workday is stressful or difficult.
On the other hand, if a person has nurtured several of these areas of their life, a bad workday might not hit so hard. There’s a stronger foundation of other meaningful things in life on which to stand.
So, which things matter most to you? Which parts of your life would you like to nurture more?
Trying to do too many things at once can lead to burnout and giving up. So it’s important to start making positive changes by focusing first on the things that bring you the most joy, energy, and sense of connection.
To Change Your Life, Start With Small, Achievable Goals
After choosing which areas of your life you’d like to nurture more right now, think about practical ways to start making positive changes.
Trying to do too much at once, or setting huge goals that are unrealistic, can cause procrastination, a sense of discouragement and frustration, and giving up altogether. On the other hand, small changes can add up to surprisingly big results over time.
Try these techniques…
Follow your interests and curiosity. For the time being, forget about what you “should” be doing. Of course, do necessary things, like paying bills. But for your mental wellbeing, focus on what makes you smile and gives you more energy—such as a new hobby that seems impractical but fun.
Set realistic, small goals. For example, read 10 pages per day rather than trying to finish a book on a weekend, start meditating for 5 minutes rather than 30 minutes, or walk for 15 minutes rather than doing a long hike right away if you’d like to spend more time outdoors.
Nurture connections while honoring your boundaries. No one can be all things to all people. So if a friend or family member takes up too much time with negative phone calls or unreasonable obligations, think about ways to give them time without giving too much energy if you’re already tired from work. It’s okay to sometimes say no to events or phone calls and still have a healthy relationship or friendship.
Create more time for your priorities by keeping a “time journal” to see where your time truly goes each day. Figure out where you could make changes to do more of the things you love.
Combine mundane tasks with something more meaningful or fun. For example, listen to a podcast while cleaning or driving, or meet up with a friend for socialization while exercising.
Set boundaries at work, too. Of course, this will depend on the specific workplace environment. And sometimes, a change of employment is necessary to have a healthier workplace. But often, discussions with bosses and colleagues allow new ideas to be integrated.
For example, “buffers” in the schedule (for walk-ins, emergencies, catch up, and even taking a short break) can help employees perform at their best and avoid mistakes. Pre-arranging patient care with colleagues can help avoid unnecessary phone calls on a person’s day off. And considerations for the well-being of all employees can contribute to a positive workplace with less staff turnover.
These and other strategies and be mutually beneficial for employers and employees alike.
Finding the best work-life balance can take time. And a person’s needs may evolve throughout the course of their career and life—so it’s important to reassess and make “course corrections” as our needs and interests change.
Set aside time each month to assess how things are going and where you’d like to make changes.
The time spent on personal care and work-life balance isn’t time wasted—and wellbeing is a necessity, not a luxury.
Life goes by quickly, so it’s important to think about the things that make life happy and meaningful. In addition to helping us live our best life, “filling our own cup” also allows us to be better caregivers for our patients and spark new enjoyment in our careers.
For veterinary professionals who are feeling stressed or overwhelmed, there are many people and resources who would like to help. Here are a few:

Not One More Vet: https://www.nomv.org/
Talkspace: https://www.talkspace.com/
BetterHelp: https://www.betterhelp.com/
The National Suicide Prevention Lifeline: 1-800-273-TALK (8255), or text 741 741 to speak to a trained crisis counselor.
Written by: Dr. Tammy Powell, DVM

The RAY98(P) Vet Dental X-Ray Generator from XRD Dental

Dental radiographs are considered standard of care by many veterinary dentists, to be included as part of a dental procedure in dogs and cats. That’s because, without x-rays, it’s not possible to see the “whole picture” of what’s going on below the gumline.
While this is not an exhaustive list, common scenarios where dental x-rays are valuable include pre-and post-views of dental extractions to ensure the entire root tip was removed, differentiating between different types of FORLs, and discovering dentigerous cysts or other issues when there are teeth that are missing or have not erupted as expected. In all of these scenarios, dental radiographs can help determine the best course of treatment and confirm that treatment was done successfully.
Veterinarians have many choices when it comes to purchasing a dental x-ray system, including the generator, plate/sensor/film, and software. Today, we’ll be evaluating the features of the RAY98(P) Portable Vet Dental X-Ray Generator from XRD Dental.
What Are the Key Features of the RAY98(P) Portable Vet Dental X-Ray Generator?
XRD Dental notes the following features on this model…
High-frequency technology. Speaking generally about high-frequency technology, this means that a generator produces a beam with a fast waveform and high penetration power, for consistent, high-quality images. Thanks to the narrowing of the x-ray beam spectrum and the ability to use shorter exposure times, high frequency can also mean a lower dose of radiation to patients (and potentially, staff) and less chance of motion artifact. The technology also allows for smaller, more compact machines.
Portability. Veterinarians and practice managers must decide which type of generator works best for their hospital’s needs. There are cart, wall-mounted, and portable options. Cart and wall-mounted generators offer the advantages of putting more space between the unit and the operator, no risk of running out of battery life, and no need for the unit to be handheld (and thus no arm fatigue/shake, and no risk of damaging the unit by dropping it). Portable units may be preferred in practices with limited space, or in mobile practices. Some clinics may even have more than one type of generator.
Long battery life. The company doesn’t cite the number of hours the battery is expected to last but does claim that the machine can produce hundreds of exposures with one charge. An automatic shutoff after eight minutes of inactivity helps to conserve battery life.
Compact size for ease of use. XRD dental specifies that the generator weighs just 3.75 pounds and can be operated with one hand.
Compatibility with other components. The RAY98(P) is compatible with film, PSP plates, and digital sensors.
Technical specifications are as follows for the RAY98(P) portable vet dental x-ray generator:
Settings of 70kV and 2mA, with the ability to adjust exposure time from 0.04-1.00 seconds.
A lighted display with four function keys.
0.4mm focal spot.
CANON technology for the x-ray tube.
Purchasing Considerations
Every veterinary practice has different needs based on how busy they are, how many dental procedures they perform, practice style, budget, and other factors.
Consider whether you need all components, including a generator, plate/sensor, software, or anything else to make your dental radiographs run smoothly, or if you only need to purchase or upgrade one component.
When looking into costs, consider not only the price of the equipment, but also whether warranties are available, how much service costs if there is an issue (and how quickly you could expect to be up and running again in the event of a repair), software upgrades, and any other long-term costs. Ask your sales representative to refer you to other practitioners in your area for questions about how the equipment is working for them in real life.
Taking all these factors into consideration will help determine which type of dental x-ray equipment is best for your individual practice.
Editor’s Note:
For a GREAT DEAL, check out our New Dental X-Ray Equipment Package. It includes:
Your choice of the generator (choose the RAY98(P), or a different unit if you prefer).
An intraoral sensor.
E-Z Dent software and laptop.
2-year warranty on hardware and software.

All of this is available for just $12,995, or a convenient monthly price of just $195 so you can earn a profit on your investment right away. This offers significant savings over other popular brands, with a machine that produces great images!
Written by: Dr. Tammy Powell, DVM

In-House Pancreatic Lipase Immunoreactivity (PLI) Tests.

Pancreatitis is a disease that’s common in both dogs and cats. But despite its prevalence and its potential seriousness, unfortunately, the condition is often not straightforward to diagnose.
There’s no one, single test that can definitely confirm pancreatitis. Instead, it requires looking at the whole picture of clinical symptoms, signalment, history, and different diagnostic tests.
So, where do in-house pancreatic lipase immunoreactivity (PLI) tests fit into this picture? And how useful are they? Here are some things to know…
Which Diagnostic Tests Can Be Used to Help Diagnose Pancreatitis?
Signalment, history, and the physical exam may lead a veterinarian to suspect pancreatitis. And in many cases, supportive care and treatment may be initiated based on this information alone, especially if a pet owner can’t afford diagnostics or if a patient is very ill but results of the tests can’t be obtained right away.
Assuming a client pursues diagnostic testing, the following modalities are commonly used…
Bloodwork and urinalysis. A CBC, chem panel, any other relevant blood panels, and a urine analysis can provide valuable information. But unfortunately, general bloodwork panels (even ones that include serum amylase and lipase) have limited utility for diagnosing pancreatitis.
However, these tests can be crucial for ruling out other conditions that may be causing a patient’s symptoms, evaluating overall health, and determining hydration status and electrolyte balance that must be addressed during treatment.
Radiographs. Like bloodwork/urinalysis, radiographs help rule out other conditions—especially surgical conditions like a GI foreign body obstruction. However, although some radiographic changes can be seen with severe pancreatitis, many times x-rays won’t show appreciable changes specific to the pancreas.
Ultrasound. Ultrasound is more sensitive than x-rays in terms of detecting changes (like inflammation) associated with pancreatitis. However, it’s user-dependent, and even this modality can’t detect pancreatitis 100% of the time.
PLI tests. This is one of the most valuable options for testing specifically for pancreatitis, but limitations of the tests must be recognized. See the next section for more details.
Biopsy. A pancreatic biopsy may be the most accurate way to diagnose the condition. However, this option is often not practical (and may even be harmful) for acutely ill patients.
Which PLI Tests Are Available to Veterinarians?
Serum amylase and lipase are often included on blood chemistry profiles, especially in patients who are exhibiting GI signs. However, many experts agree that these values are not good indicators of pancreatitis unless SIGNIFICANTLY elevated (3-4 times the normal range). That’s because these markers can be elevated with non-pancreatic disease and may be normal in dogs and cats with pancreatitis.
Trypsin-like immunoreactivity (TLI) is also not considered diagnostic for pancreatitis, as it can increase with azotemia, and it doesn’t remain elevated consistently and thus may be normal even in a patient with pancreatitis.
Another test, the PLI test, was designed to be specific for serum concentration of lipase of pancreatic origin. Both canine (cPLI) and feline (fPLI) versions of the test are available.
The PLI test was originally developed at Texas A&M University. Idexx later developed a similar test (SpecPL). These two tests are performed at the respective laboratories, so samples must be sent out.
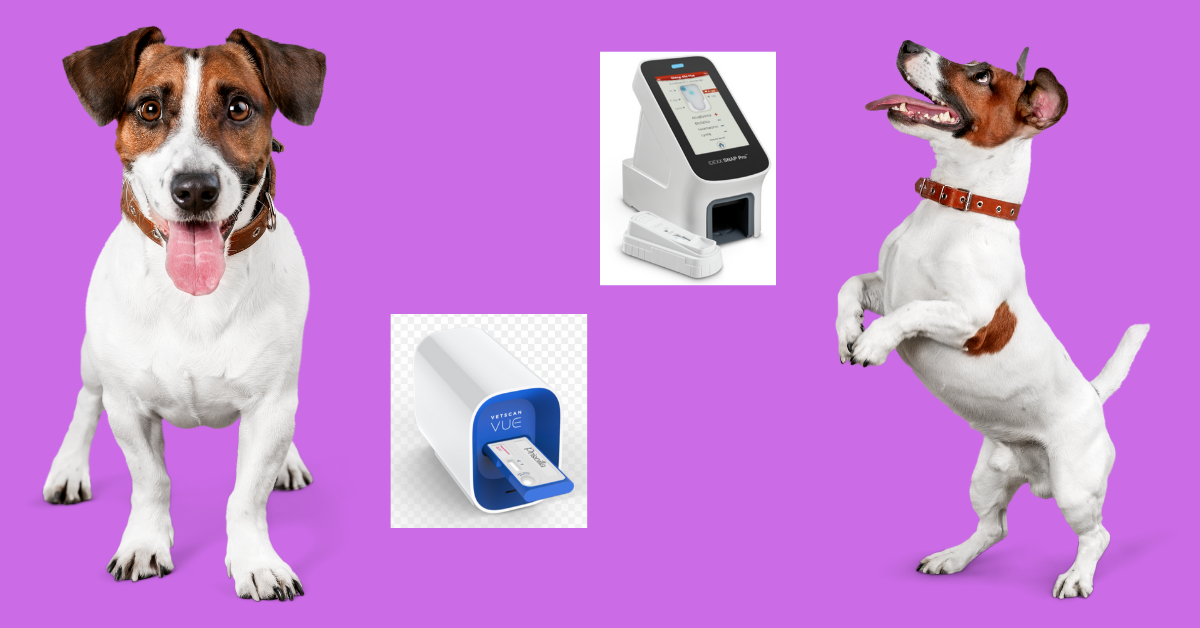
Idexx also developed a point of care version of the test: the SNAP cPL (canine) and SNAP fPL (feline). And Zoetis offers the VETSCAN cPL rapid test. These tests are available for in-house testing in veterinary practices.
How Well Do PLI Tests Work?
The sensitivity and specificity of any diagnostic test depend on many things, including cut-offs for an abnormal reading, which population of pets are being tested (healthy versus ill), and other factors.
In a nutshell, the cage-side (SNAP cPL and fPL) are considered a sensitive test, which means they’re less likely to have false negatives, but more likely to have false positives. In other words, they’re a good tool for screening symptomatic patients. A negative test means it’s less likely (though not impossible) that a patient has pancreatitis. A positive result helps support a diagnosis but MUST be followed up with additional testing.
The laboratory tests for PLI (the original test at Texas A&M and the SpecPL) have a higher specificity than the in-house tests. Therefore, many veterinarians use these as confirmatory tests after obtaining a positive SNAP test. Even these tests are not 100% diagnostic, and thus results must be interpreted in light of the whole clinical picture. But they are an important piece of the clinical puzzle when it comes to pancreatitis.
Caveats for Testing
Many experts don’t recommend testing for markers of pancreatitis (serum amylase and lipase, or PLI) as a screening test in healthy patients. Statistically speaking, false positives are more likely when doing widespread testing on a healthy population. Instead, testing is most accurate and valuable for symptomatic patients.
Of note, all of these tests may be most accurate for acute, severe pancreatitis. Milder forms of the disease, as well as chronic pancreatitis (especially in cats), may be less likely to show an abnormal result.
Laboratory testing offers the added benefit of a quantitative (number) value. This may be valuable not only for diagnosis, but for monitoring of the condition.
Of note, while PLI (both lab and in-house) tests are more specific to the pancreas than serum amylase and lipase, PLI can be elevated from non-pancreatic conditions.
Details and specifics of these tests may evolve over time. It’s important to check directly with the company for the most up-to-date information before making a purchase.
With all these things in mind, PLI tests can be a valuable addition for many veterinary practices. But they must be used appropriately and interpreted in conjunction with the entire clinical picture.

Disclaimer: This article is for general informational purposes only, and not intended as a guide to the medical treatment of any specific animal.
Written by: Dr. Tammy Powell, DVM

Choosing and Interpreting In-House Parvovirus Tests

Table of Contents
Parvovirus is a potentially deadly disease that, unfortunately, is also fairly common
Most veterinarians have diagnosed and treated their fair share of parvovirus. While most common by far in young puppies, the disease can also occur in adult dogs on occasion, especially those who are unvaccinated.
Due to parvovirus’ ability to cause severe illness and death (even with treatment), many veterinarians use point of care tests for the virus in their practice. This can help provide an answer and aid in forming a treatment plan right away, along with a plan to isolate the affected dog to limit spread of the highly contagious virus. Also, having a tangible result to show clients may help with challenging conversations about the seriousness of the condition and the expense of treatment.
At the same time, it’s important to understand the limitations of the test and to choose the brand that best fits the needs of an individual practice. Here are some things to consider…
Which Tests are Available for Parvo Testing in Dogs?
Tests are available for in-house. Laboratory testing is also available, including PCR testing that may be helpful especially for follow-up on a suspected false-negative result.
For point of care tests, here are two popular options for veterinary practices…
IDEXX SNAP Parvo Test
IDEXX claims to have high accuracy, with reference laboratory quality technology and 100% sensitivity and specificity as stated in the company’s supplemental materials on the test. They also claim to not cross-react (have a false positive test) following administration of modified live parvovirus vaccines. Results are ready in 8 minutes, and the test can be stored at room temperature. A SNAP Pro Analyzer is available to automatically activate and read tests, and add results to the medical record.
Zoetis WITNESS Parvo Rapid Test
Zoetis states the WITNESS test is easy to use, without the need to snap the test. Some vets report it is more affordable, too. It has a reported sensitivity of 86.3% and specificity of 96.1%. The test offers results in 10 minutes, room temperature storage, and an extended (12-month) shelf life.
Zoetis also offers the VETSCAN Parvo Rapid Test, which they report has a sensitivity of 96.0% and specificity of 98.7%. VETSCAN results take 10-15 minutes.
Considerations for In-House Parvo Testing
These tests look for parvovirus antigen (viral shedding) in canine feces. With this in mind, it’s important to consider everything that could affect a test’s accuracy.
For example, false negatives are possible—so a negative result doesn’t completely rule out a parvo infection in a symptomatic dog. This is because fecal shedding of parvovirus only occurs in a specific time window following exposure, and thus a puppy may have been outside this window when tested. Follow-up laboratory testing may be of value here, and treatment may need to be initiated in a clinically ill dog.
Anecdotal reports of false positives also occur following vaccination with a modified live parvovirus vaccine. It’s worth noting that IDEXX’s study on post-vaccinal false positives only included 64 dogs, so perhaps the occasional false positive would be seen with a much larger study population. In general, a false positive is more likely to be a “weak” positive rather than a strong one, and this most commonly occurs 4-14 days after vaccination.
For both suspected false positives and suspected false negatives, it’s important to look at the entire clinical picture. Does the puppy have any vomiting, diarrhea, lethargy, fever, that characteristic “parvo smell,” or any other clinical signs? Is their CBC or blood smear normal, or is neutropenia or any other abnormality present? How old are they, and what’s their vaccination history? It’s often also worth running a fecal test or treating empirically for worms in puppies with GI symptoms.
Testing for Feline Panleukopenia Virus in Cats Using a Parvo Test
Veterinarians have reported using point of care parvovirus tests to test for panleukopenia virus in cats, with a good degree of accuracy. It’s worth noting that this is considered off-label and not necessarily endorsed by the manufacturers. A veterinarian must use their clinical judgment to decide if this is something that might be beneficial to feline patients with possible panleukopenia virus. Similar to testing for parvovirus, false negatives can occur, and false positives can follow a recent vaccination.
Purchasing Considerations
Be sure to consider brand preference (if special deals are available when purchasing other equipment or tests from the same company), contracts, quantity sold, expiration dates, availability of technical support, and any other factors that could be relevant to using the tests in clinical practice.
Details and specifics of these tests may evolve over time. It’s important to check directly with the company for the most up-to-date information before making a purchase.

Written by: Dr. Tammy Powell, DVM
Disclaimer: This article is for general informational purposes only, and not intended as a guide to the medical treatment of any specific animal.

In-House Heartworm and Tick-Borne Disease Tests

In-House Combination (Four-way) Heartworm and Tick-Borne Disease Tests: A Comparison
For dogs in some parts of the country, tick exposure (and risk of tick-borne diseases such as Lyme, Erhlichia, and Anaplasma) is a concern. Some infections can cause serious illness or even chronic disease.
Last week, we discussed some of the most commonly used in-house heartworm tests. But it’s important to remember that there are also combination heartworm tests available, which also test for common tick-borne diseases.
Depending on the risks in your area, it may make sense to screen canine patients for tick-borne diseases whenever routine or yearly heartworm testing is performed. These tests might also be good for screening patients who are symptomatic.
Here are two of the most common combination (sometimes referred to as “four-way”) heartworm and tick-borne disease tests used in-house by veterinarians…
IDEXX SNAP 4Dx Plus Test
IDEXX claims their test provides accurate results with reference laboratory quality technology. The test requires 3 drops of sample, and results are ready in 8 minutes.
The six diseases that the SNAP 4Dx tests for are:
Heartworms.
Lyme (Borrelia burgdorferi) infection.
Ehrlichia canis and Ehrlichia ewingii.
Anaplasma phagocytophilum and Anaplasma platys.
There is also a SNAP Pro Analyzer available, a device that saves time by automatically activating a SNAP test, reading and interpreting the test at the correct time, and adding results automatically to the medical record.
Abaxis/Zoetis VetScan FLEX4 Rapid Test
The advertised benefits of the Abaxis (now a part of Zoetis) test are room temperature storage, a 1-year shelf life, and is very simple to use. The product information also states that the test can distinguish true Lyme disease exposure from Lyme vaccination.
The test requires 2 drops of sample and can be read in 8 minutes.
The FLEX4 tests for seven diseases, which are:
Heartworms.
Lyme (Borrelia burgdorferi) infection.
Ehrlichia canis, Ehrlichia chaffeensis, and Ehrlichia ewingii.
Anaplasma phagocytophilum and Anaplasma platys.
Similar to IDEXX, this company also offers an automatic reader—the VETSCAN VUE—to save time for veterinary technicians. Zoetis also advertises 24/7 technical support and confirmation testing (always available for heartworm, and on a case-by-case basis for tick-borne diseases).
A Few More Considerations
There is a lot of debate as to whether or not four-way tests should be used to screen healthy patients annually, versus just using a heartworm test by itself. The reason has a lot to do with the possibility of false positives.
Additionally, it’s important to know that the heartworm component tests for antigen, while the other infectious disease components test for antibodies.
This means a positive test for a tick-borne disease could potentially indicate a past exposure rather than current clinical disease.
Some practitioners find that this can waste time—for the veterinary team and pet owner alike—and potentially make a client worry needlessly when their pet is actually healthy.
On the other hand, some practitioners feel that a positive result (one that indicates previous exposure in a currently healthy dog) opens the door to a conversation about the importance of tick control.
The best answer to these considerations will vary from practice to practice; it may be best decision based on the risk of tick-borne diseases in your area.
For example, the test may be more useful for screening in Lyme-endemic parts of the country. To determine the risk in your area, consider checking resources such as the CAPC’s Parasite Prevalence Maps.
Also, check with other practitioners in your area and see if your state board or state veterinary organization has resources or information available.
Follow-up testing can be a very useful option, especially for any positive or negative results that don’t fit the clinical picture, and to determine the best next steps for an individual patient.
Details and specifics of these tests may evolve over time. So, it’s important to check directly with the company for the most up-to-date information before making a purchase. Also, check for any special deals (or stipulations such as minimum purchase requirements) prior to finalizing a purchase decision.

Written by: Dr. Tammy Powell, DVM
Resources:
CAPC Parasite Prevalence Maps: https://capcvet.org/maps/#/2021/all-year/heartworm-canine/dog/united-states

In-House Heartworm Tests: A Comparison Veterinary Guide
The American Heartworm Society (AHS) recommends annual testing for heartworm disease in canine patients. While heartworm testing in cats can be trickier than in dogs, the AHS also recommends testing cats before starting them on heartworm prevention, to establish a baseline for each patient.
Heartworm disease can be a risk in just about any state in the US. Even in states that see less mosquito activity or have not been well-known for heartworm risk, there is still some possibility of exposure as more and more dogs from heartworm-prevalent areas travel with their owners, potentially exposing the local mosquito populations.
Should Heartworm Testing Be Done In-House?
As with many diagnostic tests, a veterinarian has the option of performing the test in their practice or sending a blood sample to an outside lab for analysis—or a combination of both.
For example, sending blood to an outside lab might make sense for healthy patients who are having a wellness bloodwork panel performed at their routine checkup.
Many standard bloodwork panels include a heartworm test, so it may make sense—financially for the client, and to save time for the veterinary team—to do the heartworm test at the lab since the blood sample is already being sent out.
However, prices and bloodwork panel options vary depending on the company and contracts/deals obtained, so be sure to compare the prices at your own clinic.
On the other hand, sometimes it makes sense to do a heartworm test in-house. For example, maybe a patient is symptomatic, and the veterinarian and pet owner both want an answer right away.
Or, maybe the client can only do basic care—vaccines and a heartworm test before starting heartworm prevention. For that client, it may make sense to do an in-house test so they can receive the results right away and know they can safely begin their dog’s prevention.
Here are some of the in-house heartworm tests available to veterinarians…
IDEXX SNAP Heartworm RT Test
IDEXX claims their test provides reference laboratory quality technology, for accurate results even with a low heartworm burden.
Their improved test sensitivity comes from a technology called “bidirectional flow,” which gives the sample two chances to bind to antibodies during the test, and from amplification. And specificity comes from a wash step that helps remove debris from the result window.
Abaxis VetScan and Zoetis Witness Heartworm Rapid Tests
Abaxis (now a part of Zoetis) offers a very simple-to-use test. It requires just one drop of blood and two drops of buffer, with no need to physically snap the test.
The company advertises that their product has a 12-month shelf life and does NOT need to be refrigerated. It also has a spot to write the patient’s name, to ensure there’s no mix-up of results if performing many tests in a short time frame.
Because of the non-refrigerated storage and the ease of writing a patient’s name on the test, this rapid test might be a good option for mobile or high-volume practices.
The Zoetis Witness test is very similar to the VetScan, and Zoetis sells each one in different quantities. For practices that mostly send their samples out to a lab, it may make sense to order the Witness test, which is available to be ordered in smaller quantities, so the tests don’t expire before a veterinary practice uses all of them.
Heska Solo Step Heartworm Test
The Heska test is also supposed to be simple to use, requiring 3 drops of blood and no need to snap the test. One advantage that Heska advertises is free confirmatory testing at their lab for positive results on the in-house test. This test can also conveniently be stored at room temperature.
There are separate versions of the test available for canines and felines, with the feline test evaluating for heartworm antibody rather than antigen.
A Few More Considerations
In-house tests are great options for screening for canine patients. However, any positive in-house test should be followed up with additional testing. This would usually involve confirming the positive test at an outside lab, and doing microfilaria testing. It’s important to have this additional confirmation and information prior to beginning any treatment.
Testing for cats is more complicated, too
Since heartworm-positive cats are more likely than dogs to be negative on an antigen test, an antibody test is the test of choice for them. However, antibody testing must be taken into account with the clinical picture and additional testing, since it documents exposure and is therefore not necessarily indicative of a current infestation.
Details and specifics of these tests may evolve over time. It’s important to check directly with the company for the most up-to-date information before making a purchase.
And finally, consider additional factors such as whether a special deal is available on these rapid in-house tests if you are already purchasing other equipment (like a hematology or chem analyzer, for example) from the same company. It may make financial sense to stick with the same brand. Be sure to check for any stipulations (like a minimum number of tests per month) in the contract, though. Also consider if it would make sense for your practice to do a combination test—which often features testing for Lyme, Anaplasma, and Ehrlichia in addition to heartworm—based on the risk in your local area.

With all these factors in mind, the best test for each individual practice varies, depending on their unique needs. Doing research, and asking for opinions from colleagues who have used the tests, can help with making this important decision.
Written by: Dr. Tammy Powell, DVM

Choosing an In-House Veterinary Chemistry Analyzer

Serum chemistry analysis is something most veterinarians use at least daily, and often many times throughout their workday.
These tests can be used for well-patient health checks, for pre-surgical bloodwork, and to assess an ill patient.
Having accurate results and a system for obtaining them is important. So, when choosing the best method or machine for your practice’s needs, it makes sense to put research and time into that decision. Here are some things to consider…
Should You Use an In-House Chemistry Analyzer, or Send Samples to an Outside Lab?
Each veterinarian has their own preference. And many veterinary practices use a combination of both—in-house analyzers for when results are needed immediately (such as for guiding the treatment plan for an ill or injured patient), and an outside laboratory for more routine testing.
Depending on the pricing structure, an in-house machine might also allow the practice to keep a higher percentage of the profits with each test performed—although this will probably depend on volume and other factors such as contracts and maintenance. Either way, there is some freedom to create your own system for your practice flow.
What Should a Veterinarian Consider When Choosing an In-House Chemistry Analyzer?
Here are a few important considerations before making a purchase…
Brand preference. Sometimes, a veterinarian or their team members prefer a particular brand due to previous experience or their relationship with the company or sales representative. Certain companies may offer discounts on other services or tests (such as snap tests, hematology analyzers, or consults with specialists) as a perk of using their equipment, which may make financial sense for a practice.
Contracts. Sometimes, particularly when equipment is heavily discounted, there may be “strings” attached, such as a requirement to perform a certain number of tests per month (and a penalty for not doing so). It’s always important to check the contract closely when making a purchase or signing an equipment lease.
Costs. Obviously, the cost of the chem analyzer itself should be considered. But remember to also factor in the costs of supplies (rotors, etc.) and the cost of each test relative to the cost to the client.
Machine specifics. Which specific tests are available (chem panels vary in size and comprehensiveness), and for which species? Are single tests available, for when you only need to retest one specific value (and how much do supplies for these tests cost versus the larger panels)? How fast are the results? How much blood is needed to run each test—and does the blood need to be spun down first?
Ease of operation. Is the machine simple and intuitive to use? Is training provided by the company that sells the machine? And, how are results added to a patient’s medical record?
Warranty and maintenance. Ask if there is a warranty included, what it covers, how long it’s good for, and if there’s an option to renew it once it runs out. Also, ask about routine maintenance costs, if there’s a helpline available if you have questions, and how fast an issue with the machine can be repaired/resolved.
“Real-world” performance. Ask around and see if any colleagues in your area use the equipment, and see what their experience has been. Or, see if the company will let you use the equipment on a short trial period before buying.
IDEXX, Abaxis, and Heska
These three companies are popular choices for veterinary practices. Here are the stated advantages of highlighted chem analyzers from each company…
IDEXX Catalyst One Chemistry Analyzer
IDEXX’s machine offers up to 34 parameters for chemistry, electrolytes, and immunoassay profiles in a single run. They note the practitioner has flexibility in terms of test comprehensiveness, including individual tests and preloaded CLIPs (pre-programmed chem profiles, or the option to create custom testing profiles). Results are available in minutes, and they advertise high accuracy from proprietary technologies. The machine is supposed to be simple to use (“load-and-go” with whole blood, serum, or plasma), for easy workflow. The IDEXX Catalyst One also features 24/7 auto-monitoring and maintenance.
Abaxis VETSCAN VS2 Chemistry Analyzer
The Abaxis analyzer is a small, portable option. It allows a practitioner many options for analyzing chemistry, electrolyte, acid-base, and immunoassay tests, with 12 testing profiles available. The machine is advertised to be easy to use (only a few steps to use, and minimal maintenance), with the capability of connecting to practice management software. The VETSCAN VS2 operates on as little as 2 drops of whole blood, serum, or plasma, with results in 12 minutes. It features its own intelligent Quality Control (iQC) system, which contributes to accuracy.
Heska Element DC5X Chemistry Analyzer
Heska advertises that their analyzer offers ease of use, high performance/volume capabilities, and “gold standard” technology. Ease of use means a fully automated process (“load and go”), an intuitive touchscreen, and easy integration with practice management software (with bi-directional communication). High performance means up to five samples per operation, and up to 190 tests per hour, with the option to preload up to 50 pipettes at once to save time. Veterinarians can choose from a broad, pre-programmed panel or customize to run only the tests needed. Only 10mL of sample is needed per test. Heska also advertises a free warranty.
Keep in mind that there are different analyzer models available from each company that have varying specifications and that details may change over time. So always confirm the specifics before making a purchase.

There are many options available, so it’s important to do some research and see what’s the best fit for an individual practice and if any special deals can be obtained when purchasing or leasing. It’s worth the time since the machine will probably be used frequently to serve the needs of your patients and clients.
Written by: Dr. Tammy Powell, DVM

Choosing an In-House Hematology Analyzer

Complete blood cell counts and qualitative analysis of blood cells are some of the most common diagnostic tests used by veterinarians.
Just a few of the many uses for hematology include diagnosing and monitoring anemia and looking for signs of inflammation, infection, cancers such as leukemia, and many other ailments.
Since blood tests are so crucial to the diagnostic plan for many ill patients and are often included in baseline testing for well patients, choosing the right machine for your practice’s needs is an important decision.
Why Choose an In-House Hematology Analyzer?
When it comes to blood cell analysis, veterinarians have the option of doing tests in-house or sending samples out to a lab. Each method offers its own advantages, and some vets even use a combination of both.
For example, when a sample is sent to an outside lab, there is usually the advantage of a specialist doing the qualitative/differential analysis. With in-house analyzers, it’s a good idea to include blood smears for increased accuracy and to look at cell morphology.
A veterinarian or their nurses can gain this skill through practice. However, a specialist may be able to detect subtle changes to blood cells that a general practitioner might not notice since the specialist looks at blood cells all day long. And, they can often confidently differentiate between artifacts and pathology when looking at cells on a blood smear.
On the other hand, the in-house analysis offers a lot of conveniences.
Sometimes, a veterinarian needs an answer quickly in order to start treating an ill patient right away. And worried pet owners might want answers as soon as possible.
Plus, depending on the specific contract the veterinarian has entered into, an in-house machine might allow the practice to keep a higher percentage of the profits with each lab test performed.
What Should a Veterinarian Consider When Choosing an In-House Hematology Analyzer?
Here are a few important considerations before making a purchase…
Brand preference. Maybe a veterinarian or their team has had a good experience with a particular brand. Or, if the company has any additional equipment or tests (such as snap tests) the practice is also interested in, maybe it would be possible to negotiate a better deal for everything together.
Contracts. Sometimes, particularly when equipment is heavily discounted, there may be “strings” attached, such as a requirement to perform a certain number of tests per month (and a penalty for not doing so). It’s always important to check the contract closely when making a purchase.
Costs. Obviously, the cost of the analyzer itself should be considered. But remember to also factor in the costs of supplies (rotors, reagents, etc.) and the cost of each test relative to the cost to the client.
Machine specifics. How fast are the results? How much blood is needed to run each test? Which species can be tested? And how are results added to a patient’s medical record?
Ease of operation. Is the machine simple and intuitive to use? Is training provided by the company that sells the machine?
Warranty and maintenance. Ask if there is a warranty included, what it covers, how long it’s good for, and if there’s an option to renew it once it runs out. Also, find out about routine maintenance costs, if there’s a helpline available if you have questions, and how fast an issue with the machine can be repaired/resolved.
“Real world” performance. Ask around and see if any colleagues in your area use the equipment, and see what their experience has been. Or, see if the company will let you use the equipment on a short trial period before buying.
IDEXX, Abaxis, and Heska
These three companies are popular choices for veterinary practices. Here are the stated advantages of highlighted analyzers from each company…
IDEXX ProCyte Dx Hematology Analyzer
IDEXX claims to have the industry’s most comprehensive CBCs (27 whole blood parameters plus fluid analysis options, with 17 species capabilities), with reference lab-quality results. They advertise dot plots with each in-house CBC report and extra help such as differential diagnoses and access to board-certified consultants at no charge. Results take two minutes.
Noted special capabilities include detecting band neutrophils and nucleated red blood cells, and including a reticulocyte count.
Abaxis VetScan HM5 Hematology Analyzer
This Abaxis machine reports 22 parameters in less than four minutes, including histograms. The company advertises compatibility with select practice management systems, ease of use, and minimal, quick maintenance with automated cleaning reminders.
Another benefit may be the small sample size requirement of just two drops of whole blood. It has capabilities for 15 species, as well as fluid analysis options. One noted special capability is a direct eosinophil count.
Heska HemaTrue Hematology Analyzer
Heska notes this machine can deliver accurate, reproducible results in 55 seconds, using just 20uL (about one drop) of blood. Results include 17 parameters and histograms. The color touchscreen interface is noted to be simple to navigate, with several species options.
The HemaTrue has daily automatic cleaning and quality control. The company states veterinarians have options such as a free analyzer use, low test prices compared to competitors and a free warranty. One additional advantage is a built-in blood tube mixer.
Keep in mind that there are different analyzer models available from each company that have varying specifications and that details may change over time. So always confirm the specifics before making a purchase.

There’s no one right machine that’s a fit for every veterinary practice. Instead, look at your practice’s individual needs and budget to find the hematology analyzer that’s the best fit for your team and for meeting the needs of your patients and clients.
Written by: Dr. Tammy Powell, DVM

5 Tips to Improve Proficiency With Ultrasound
By becoming proficient at ultrasound studies, a veterinarian can elevate patient care at their practice while also boosting profits.
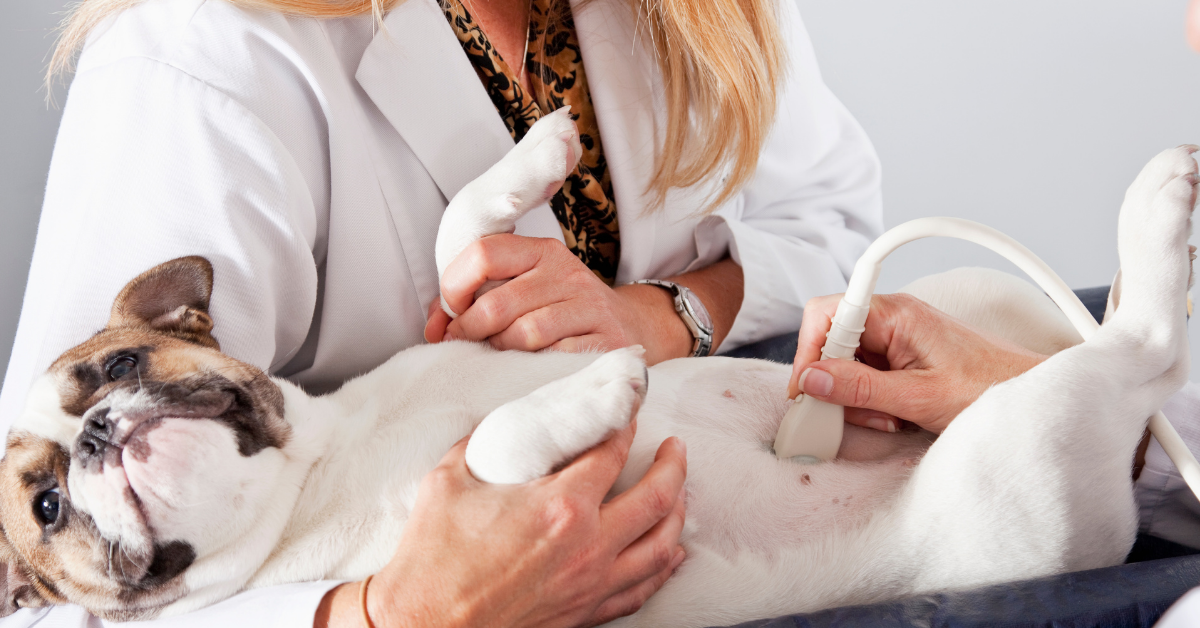
Whether you’re evaluating the abdomen, the heart, or something else, an ultrasound study can be a very valuable tool.
Here are five ways for a practitioner to improve their ultrasound skills and offer more of this valuable service to pet owners…
The Right Equipment Can Make a Vet’s Job Easier
Having good, well-functioning equipment can really make life easier for a veterinarian and their team.
This could include a variety of factors, such as…
Does all of the ultrasound equipment—probe, machine and monitor, and any programs for saving videos and information—work? Does any component (or the whole system) need to be repaired or replaced?
Is the equipment of a good quality? Maybe it’s technically working, but do the images you produce have enough detail and clarity to see what you need to see? Is any part of the process cumbersome, which can make it less likely that the ultrasound will be used to its full capacity and potential?
Would routine maintenance or an upgrade improve efficiency and make it easier to offer this service to clients and their pets?
This is all-important because even as you learn, practice, and improve your skills, inefficient or subpar equipment may make it challenging to fully implement your new training and may lead to frustration.
Standard Protocols and Techniques Can Improve Efficiency
If an ultrasound is only performed once in a while, it may feel like a hassle or lead to confusion or inefficiency when trying to schedule and perform an ultrasound study.
To improve efficiency and make it easier to offer ultrasound services at your practice, consider all stages of the process, including…
Has the veterinary team been trained and empowered in all aspects of scheduling an ultrasound study? For example, is there a specific day of the week, especially if there is only one doctor at the practice who performs ultrasounds? Has enough time been scheduled, especially if sedation is needed? Having a standard set of instructions or protocols can help the team and make things run smoother for everyone.
If the patient needs any special instructions to prepare for their ultrasound study (such as fasting from the previous evening), is there a clear process for communicating this to the client?
Does the veterinary team know all the tools you would prefer to have available during an ultrasound study? This may include everything from a v-trough, towel, and clippers, to syringes and microscope slides in case an FNA is indicated. Having a kit or list prepared ahead of time will help save time so no one has to run to the other room and grab supplies mid-study.
If a patient is sedated or under anesthesia, is there a standard format/form for monitoring?
Is there a report prepared for the client? Can video clips or still images be saved as part of the medical record? Will the client be present during the ultrasound in some cases? Make sure the whole team knows what should be done.
Take Advantage of All the Resources You Find Helpful
This may include textbooks and other references for what is normal on each ultrasound study and what is not.
Access to a second opinion can also be helpful. Consider discussing your findings with colleagues within the practice, subscribing to an online forum such as the Veterinary Information Network (VIN), or even using a specialist consultation service for an expert, second set of eyes on your ultrasound images or videos.
Practice Makes Perfect
Any new skill can be challenging at the beginning. But ultrasound proficiency will improve over time, with practice. So even if fitting more ultrasounds into a busy schedule feels time-consuming at first, it will probably get to be second nature over time.
In addition to training and courses, it may help to ultrasound healthy patients for practice, to gain a thorough understanding of all the different ways normal anatomy can look in different sizes and breeds of veterinary patients. This could be done with the pets of veterinary team members, or possibly offered to clients at a discounted price in the early stages.
Communicate Effectively With Clients
If pet owners are unsure about proceeding with ultrasound for any reason or experiencing sticker shock, the conversation can take up a lot of time for veterinarians and their team members. By planning what to say and gaining comfort with these conversations, time can be saved while providing patients with the care they need.
Efficient conversations about pet ultrasounds may include general principles for good communication (active listening, empathy, non-verbal communication, etc.), as well as explaining the excellent value that clients are receiving for the cost. For example, explain just how much information can be gathered from an abdominal ultrasound study. In addition to looking at suspected abnormalities, it’s a thorough look at many important organs. Occasionally, unexpected issues are caught early, or if the dog or cat is normal then the owner can have peace of mind.
Putting all these principles together, a veterinary team may find the whole ultrasound process becomes more efficient. This is good for team morale, as it helps to keep the day running as smoothly as possible. It can also increase a practice’s bottom line while providing excellent care for patients.

For all these reasons, it may be well worth it for a veterinary team to invest time and effort in adding ultrasound to their practice!
Written by: Dr. Tammy Powell, DVM

5 Tips to Improve Efficiency With Radiographs

Efficiency can increase a veterinary practice’s income by allowing more patients to be seen or more procedures such as radiographs to be performed.
Additionally, it may lead to an increased average charge per patient—which can improve a practice’s bottom line while delivering excellent patient care.
When it comes to radiographs, here are five ways to increase efficiency…
Start With the Best Equipment for Your Practice’s Needs
Having good, well-functioning equipment can really make life easier for a veterinarian and their team. After all, slower machines and image processors can increase the time per shot. And equipment that’s not operating at its best may lead to frustrating retakes—or even to rescheduling a procedure.
To maximize the usefulness of radiography equipment at a veterinary practice, start by taking an inventory of which equipment is there, including: generator, table, plate or cassette, film processor or digital image software, etc.
Next, evaluate each piece of equipment with the following questions:
How is the equipment functioning right now?
If not working well, can repairs or maintenance solve the issue—and what is the cost?
Is there any routine maintenance due to be performed?
Does anything need to be replaced—and is it the whole system, or just one specific component?
Would an upgrade improve efficiency? For example, upgrading from film to digital x-rays can save a lot of time that would otherwise be spent processing films.
Develop Standard Protocols and Techniques
If certain procedures are performed infrequently or don’t have a standard set of protocols to follow, this may lead to confusion, inconsistency, or errors—all of which can waste time and cause frustration.
To make things more efficient, it helps to have standard protocols for team members to follow, which have been properly explained to them. Protocols may include:
Specific instructions for patient positioning for different radiographic views, such as thorax, hip, spine, etc.
Guidelines for effective patient restraint while minimizing the staff’s exposure to radiation. For example, be sure the team knows how to properly use positioning aids such as sandbags and tape.
If patients are sedated, be sure to have a minimum standard for patient monitoring, with prepared monitoring sheets a team member can easily pick up and use for their monitoring notes.
Have a standard technique chart, or make sure the team knows how to properly set up an x-ray study using a digital program that automatically sets technique. This includes explaining how to measure a patient in the position in which they will be radiographed.
Have the Right Resources Available for Radiographic Interpretation
This may include textbooks and other references for what is normal on each radiographic view and what is not.
Access to a second opinion can also be very valuable. Try to create a collaborative environment where veterinary colleagues within the practice can help each other discuss and interpret radiographs. Consider subscribing to an online forum such as the Veterinary Information Network (VIN), where a vet can post their radiographs for a second opinion. Or, consider using a teleradiology consultation service with veterinary radiologists.
Practice Makes Perfect
Efficiency in taking and interpreting radiographs will improve over time, with practice. So even if fitting more radiographs into a busy schedule feels time-consuming at the beginning, it will get to be second nature over time.
The same is true with x-ray image interpretation—many vets become faster and more proficient with practice. Also, be sure to study the radiographs of normal patients, to gain a thorough understanding of all the different ways normal anatomy can look in different sizes and breeds of veterinary patients.
Plan for Conversations With Clients
If pet owners are unsure about proceeding with radiographs—especially when sedation is required—the conversation can take up a lot of time for veterinarians and their team members. By planning what to say and gaining comfort with these conversations, time can be saved while providing patients with the care they need. Also, clients may feel more comfortable if everything is explained in just the right way.
Efficient x-ray conversation techniques may include general principles for good communication (active listening, empathy, non-verbal communication, etc.), as well as proactively discussing the answers to commonly asked questions and concerns. For example, explain how sedation not only makes the radiographs more detailed and accurate—it also makes the procedure less scary and more comfortable for a dog or cat.

Putting all these principles together, a veterinary team may find the whole x-ray process becomes more efficient. This is good for team morale, as it helps to keep the day running as smoothly as possible. It can also increase a practice’s bottom line over time while providing excellent care for patients. For all these reasons, it’s usually well worth it for a veterinary practice to invest in radiographic efficiency!
Written by: Dr. Tammy Powell, DVM

The Ultimate Guide to Veterinary Dental Cleaning Stations

A comprehensive oral health assessment and treatment (COHAT), also known as a veterinary dental procedure, is an important consideration for any pet’s long-term health.
Keeping the mouth healthy helps protect a dog or cat’s teeth and contributes to a pet’s overall wellbeing. And, it can be a source of revenue for the veterinary practice.
Here are some of the common components of a dental cleaning station, and the roles they play during a COHAT.
The Equipment Needed for Scaling and Polishing
Even for pets who need significant extractions, the dental procedure typically also involves scaling and polishing the remaining teeth, to clean them, keep them in good health for as long as possible, and avoid further tooth loss.
So, it’s safe to say that scaling and polishing are an important part of any dental procedure.
Dental scaling and polishing are often delegated to skilled veterinary technicians and nurses. So, when it comes time to invest in a new dental cleaning station, it’s a good idea for veterinarians and practice managers to review the equipment available and see what is required to meet their practice’s needs.
These common tools on a dental cleaning unit play a role in scaling and polishing:
Ultrasonic scaler. Hand scalers are still used, too, especially for tight spots that need extra attention. And curettes are needed for subgingival cleaning. However, it’s hard to beat an ultrasonic scaler for speed and efficiency when removing large amounts of dental calculus above the gumline. Many include a built-in LED light for easy visualization of the area being cleaned.
Polisher/Low-speed handpiece. This tool is crucial for smoothing over any small defects or microabrasions in the tooth enamel caused during scaling. In other words, polishing should ALWAYS follow scaling. Recent AAHA dental guidelines recommend using disposable prophy angles and individually packaged, fine-grit prophy paste with a polisher.
Air/Water syringe. This tool is useful for flushing away bits of tartar and other debris as you’re working, for drying a tooth prior to applying a sealant, or for irrigation and inspection of any visible subgingival areas after cleaning.
Suction tool. Weak suction can be a convenient way to remove excess water and saliva during a procedure.
Equipment for Drilling and Extractions
Many extractions require drilling into alveolar bone to expose the tooth root or divide the tooth into segments. This allows for safe and efficient extractions, with less risk of leaving root tips or fragments behind.
For this reason, a high-speed drill is an essential component of any veterinary dental cleaning station. The drill should have several burs to choose from, too, since veterinarians see patients of all different sizes and since different bur shapes (rounded or tapered, for example) serve different purposes.
In addition to the drill, hand tools—such as elevators, luxators, extraction forceps, and suture kits—will be used.
Other Factors to Consider In a Dental Cleaning Station
In addition to the tools available on the dental station, here are some considerations that may affect a veterinarian or practice owner’s decision to make a purchase…
The size of the unit. Practices with small spaces may prefer a compact cleaning station, while others might not have a size restriction.
Easy storage and access to tools. No matter the size of the station, it should be easy to store and access the tools right when you need to. No veterinary team member wants to fumble while reaching for a tool or accidentally drop something because it’s difficult to put back.
Water reservoirs. No one wants to run out of water (which is used for many of the tools, including drilling and ultrasonic scaling) during the middle of a procedure, then put things on hold as the reservoir is refilled. For that reason, it may be beneficial to look for a station with a larger distilled water reservoir capacity.
Service, maintenance, and warranty. It’s important to protect any equipment investment and to make sure it’s easy to keep the machine running so a veterinary practice can avoid canceling procedures due to equipment issues.
Also, remember to invest in high-quality complementary equipment. In addition to the dental cleaning station and other dental tools, a complete dental procedure also involves dental x-rays, appropriate anesthetic protocols and equipment, personal protection equipment, and anything else needed to perform a COHAT safely and effectively.
Veterinary dentistry can be a rewarding way to provide excellent patient care and generate income for a veterinary practice—a win-win scenario. To make sure these procedures run as smoothly as possible, it’s important to choose the equipment that’s the best fit for your practice’s needs.
Additional resources:
2019 AAHA Dental Care Guidelines for Dogs and Cats: https://www.aaha.org/globalassets/02-guidelines/dental/aaha_dental_guidelines.pdf
Editor’s Note:
Currently, we offer a complete veterinary dental cleaning station at an affordable price including shipping, delivery, and a 3-year warranty.
The space-saving machine is designed for high-volume use.
It features key tools that are crucial to any veterinary dental procedure—plus, a few exciting special features like advanced cooling for the high-speed drill, a scaler with an endodontics feature, an LED light on the polisher, and more!

Learn more, and contact us with any questions, here: https://newvetequipment.com/cleaning-station
Written by: Dr. Tammy Powell, DVM

Mastering Small Mammal X-Rays: Techniques and Tips

Small mammals can be rewarding to work with, although they can also present some unique challenges.
When radiographing these pets, it’s important to understand species differences and plan accordingly.
Here are some tips and starting points for radiographing these unique pets…
Considerations for Small Mammal X-Ray Studies
While often lumped together as one group—commonly called “small mammals,” “exotic small mammals,” or even “pocket pets” for smaller species—this group of pets actually covers a range of diverse species.
This can include everything from ferrets to guinea pigs and rabbits to small rodents like hamsters and mice—and even marsupials like sugar gliders.
It’s important to understand what’s normal and what’s not for each species. For example, hindgut fermenters (rabbits, guinea pigs, and chinchillas) often have notable gas in their GI tract, whereas that amount of gas would be abnormal for a ferret.
To gain an understanding as to what’s normal for each species, it helps to not only study texts and references but also to practice looking at radiographs of healthy pets for comparison.
In addition to understanding species differences in anatomy, it’s also important to consider each patient’s needs when preparing for an x-ray study. For example, certain small mammals may face health consequences with fasting prior to x-rays. For others, a short period of fasting (especially if anesthesia is used) might be appropriate.
Due to the small size of most patients, highly detailed images are needed. Many experts recommend using mammography films for this reason, with tabletop technique. For very small patients, or for extremity views, dental x-ray machines and films may provide good results.
Positioning and Restraint of Small Mammals
Since many small mammals are prey species, they may be prone to excess stress with strong manual restraint, especially if they are already ill. For critical, dyspneic, and otherwise in poor condition patients, it’s usually best to stabilize them prior to pursuing diagnostics.
For patients who are stable, it may make sense to use manual restraint for short studies. Chemical restraint is often favored over manual restraint, though, for reducing patient stress and patient movement. Chemical restraint may include injectable sedative drugs, or inhalant anesthetic delivered via intubation. If intubation isn’t possible, inhalant delivery via mask may also be an option for some patients. Check for appropriate drug doses for each species.
The use of positioning aids and props depends on the size of the patient. Due to their small size, heavy sandbags are not typically used for these patients. Taping a patient’s limbs to the cassette may be a better strategy. And a small trough may be helpful for obtaining a VD view.
Key Radiographic Views
As with any other species, it’s important to obtain a minimum of two orthogonal views (a lateral and VD/DV) with proper patient positioning. Then, additional views such as obliques can be added if relevant.
Because most of these patients are small in size, whole-body radiographs are common. Then, additional close-up views of areas of interest (like limbs or the skull, for example) can be included, too. For patients who are large enough, it may be ideal to do separate thoracic and abdominal studies.
If needed, standard contrast agents such as barium and iodinated contrasts may be used. Keep in mind that GI transit time is variable depending on the species. In general, carnivores (like ferrets) have the fastest transit times, while hindgut fermenters have the slowest.
Skull radiographs are common in small mammals for evaluating dental issues. A complete set of skull radiographs usually includes DV/VD, lateral, right and left oblique, and “skyline” (rostrocaudal) views.
Conclusion

With the right knowledge, practice, and a few adaptations, radiographs can be used to help diagnose and treat small mammals. Owners of these unique pets often appreciate finding a veterinarian who is able to perform such procedures and deliver a high quality of care to these small patients.
Written by: Dr. Tammy Powell, DVM

Radiographing Reptiles: Helpful Key Tips and Techniques

If you work with lizards, snakes, tortoises, or other reptiles, x-rays are an important diagnostic tool for these patients.
So, how does the process of radiographing reptiles differ from dogs and cats? Here are some helpful tips for reptile x-rays…
Considerations for Reptile Radiographs
Many reptiles are small in size compared to the average dog or cat. Thus, good quality radiographs with sufficient detail are required for images to be diagnostic. High detail films such as those used for mammography can be beneficial here.
At the same time, many reptiles have highly keratinized scales, or, in the case of chelonians (turtles and tortoises), a shell. These coverings can mean a higher power beam is required, which can also mean loss of detail for internal body structures. Fortunately, motion blur is not a common issue, though.
As with other species of pets, good general rules of radiography apply. This means taking a minimum of two orthogonal views to get a complete picture of the part(s) of the body being radiographed.
Indications for Reptile Radiography
With reptiles, clinical symptoms are often subtle, and exam findings are often non-specific. So, diagnostic tools such as radiographs are important for figuring out what’s going on and providing the best treatment.
With this in mind, full-body radiographs are beneficial for any reptile who is showing symptoms of illness.
Additional common indications may include evaluating…
Bone lesions, such as osteomyelitis, traumatic injuries, or metabolic bone disease such as nutritional secondary hyperparathyroidism.
The digestive tract, including looking for ingested foreign bodies or other digestive ailments.
Reproductive issues, such as dystocia, egg binding, or yolk coelomitis.
Abscesses and other soft tissue swellings.
Lung disease.
Urinary issues such as bladder stones.
Problems with other organs such as the heart or liver, although these organs may be difficult to evaluate in detail for many types of reptiles.
Assessing if intraosseous catheters are placed correctly.
Restraint for Reptile X-Rays
Fortunately, many reptiles hold still without restraint, or with limited restraint, for certain x-ray views. But it’s still important to have a plan in place to ensure quality, diagnostic images are obtained.
A few examples of restraint for different reptile species may include…
For snakes, allowing them to crawl inside a plastic tube. This also prevents coiling (which may interfere with radiographic interpretation) and ensures the snake is evenly extended for their radiographs.
Cardboard boxes or other radiolucent containers for smaller species, especially small lizards. Note that this may result in a minor reduction in details/image quality.
Vagal response in large lizards, which means placing pressure over the eyeballs when the lizard’s eyes are closed. This stimulates the vagus nerve, resulting in a lower heart rate and a calmer lizard. A vagal response could be accomplished with gentle digital pressure, or by placing cotton balls over the eyes and holding them in place with VetWrap wrapped around the head. Dimming the lights and avoiding any noise stimulation will also help.
Chemical restraint if indicated. This could mean sedation or general anesthesia, depending on how challenging the patient is to work with, what information needs to be obtained from radiographs, and the health status of the patient. Be sure to check the best sedative drugs and doses for the particular reptile species you are working with.
Common Radiographic Views for Reptiles
As mentioned above, it’s important to obtain orthogonal x-ray views. Often, due to the smaller size of many reptiles, this means orthogonal views (a lateral and a DV) of the entire body.
It’s important to remember that reptiles don’t have a diaphragm. They have a coelomic cavity, rather than separate abdominal and thoracic cavities like mammals have. Because of this difference, placing a reptile (except for snakes) in lateral recumbency may result in coelomic contents shifting, which can confound radiographic interpretation.
To prevent this issue and view organs in their natural position, many veterinarians obtain lateral radiographs of reptiles using a horizontal beam while the animal is standing.
For chelonians, it helps to place them on some type of stand by balancing the plastron on a block, overturned bucket, etc. This facilitates the horizontal beam view and encourages the patient to hold still and extend their limbs and head from their shell.
Additionally, the horizontal beam can be used to obtain a craniocaudal view in chelonians. This allows comparison of the right and left lung fields.
Contrast agents, such as barium or iodine-based contrast, may be used, especially when evaluating the GI tract. However, it’s important to keep in mind that digestive transit times are highly variable (within a day at the shortest, and weeks at the longest) depending on the species, their nutritional status, and environmental conditions such as temperature and season.
If more detailed radiographs of the skull or extremities must be obtained, it’s important to collimate. For some species, veterinary dental films may provide better detail. Anesthesia may be needed for chelonians to fully view the skull or extremities outside of the shell.
Conclusion
Radiographs are a key tool when assessing reptiles for disease or injuries. But it’s important to understand the wide range of species variations in anatomy and become familiar with what’s normal and what’s not for each type of patient. This could mean having a good reference text, obtaining additional CE, or radiographing a healthy patient of the same species for comparison.

Once the best strategies and techniques are incorporated, diagnostic images can help a practitioner evaluate these unique pets and form an appropriate treatment plan.
Written by: Dr. Tammy Powell, DVM

Radiographing Exotic Pets: avian patients

When it comes to avian patients, many general principles of radiology still apply, just as they would for a dog or a cat.
For example, proper technique and a systemic method for looking at the entire image are important.
However, birds also present unique challenges. For example, their small size means that fine details must be visible on radiographic images. And a bird’s rapid breathing rate can create motion artifact and blurriness, which can compromise radiographic details.
Here are a few strategies and tips for radiographing an avian patient…
Restraint of Birds for Radiographs
Appropriate positioning and stillness of the patient are both crucial for obtaining x-ray images with enough detail to be diagnostic. Because of this, sedation or anesthesia are usually necessary, with appropriate patient monitoring.
Of course, the decision to administer anesthesia depends on the stability of the patient and whether they can handle anesthesia. But even with ill birds, light sedation may still be beneficial to reduce stress, discomfort, or injuries that could be caused by physical restraint.
When administering sedation or anesthesia, be sure to check the best medications and doses for birds, as these may vary from those used for dogs and cats.
Radiographic Technique for Avian Patients
It’s ideal to use the shortest possible exposure time. This helps minimize motion blur due to a bird’s fast respiration rate.
For small patients, tabletop technique is used. A grid is not needed, thanks to a bird’s air sacs which don’t cause significant x-ray beam attenuation or scatter radiation. However, a grid may be considered when radiographing an area wider than 10 cm.
Also, appropriate collimation should be used.
Positioning Avian Patients for Radiographs
Whether a patient is canine, feline, or avian, orthogonal x-ray images are more useful and accurate than single-view x-ray studies. So, whenever possible, try to obtain both a lateral and VD view.
A common view for studies is a “whole bird” radiograph for small or medium-sized birds, which means a head-to-tail view including the coelom, pectoral limbs, and pelvic limbs. However, it’s beneficial to focus on areas of interest, too—whether that’s examining organs in the coelom, evaluating a fractured limb, etc.
To visualize the coelom, it’s best to pull the wings and legs away from the body. That way, there’s nothing overlying the coelomic cavity that could complicate interpretation or cover up important details.
When positioning, it’s best to be gentle, especially with small birds that can be fragile. Pulling the wings too much can cause pain or injury, or lead to over-rotation and improper patient alignment. Tape may be used, but it should have minimal adhesive in order to avoid pulling feathers. Other positioning aids made from clear plastic can also be very useful.
For patients in poor condition, it may make sense to first do a “screening” x-ray via a horizontal beam. For this shot, the bird could be standing on a perch on the x-ray table. Sometimes, this gives enough information to rule out certain conditions (such as egg binding or heavy metal ingestion) and develop a preliminary treatment plan. Then, if needed, more detailed imaging could be pursued once the patient is more stable.
A Few Tips for Bird X-Rays
Here are a few more things to keep in mind when it comes to bird radiographs…
If possible, it’s helpful to fast a patient prior to radiographs of the GI tract. This allows better visualization, and it reduces the risk of regurgitation and aspiration pneumonia. However, keep in mind a bird’s fast metabolism. For very small patients, fasting beyond two hours may be detrimental.
Have a good reference guide available to use as a point of comparison for your patient’s images. This will help not only with distinguishing what’s normal and what’s not for an individual bird, but also for anatomic variations between species.
Consider a referral or consult as needed. There’s nothing wrong with referring a patient to an avian and exotics specialist. Or, if you take the radiographs yourself, consider sending the images for a teleradiology consult.

X-rays can be a very important part of the diagnostic plan for birds. With knowledge and some practice, bird radiographs may become faster and easier for the team, leading to prompt diagnosis and treatment of ailments and excellent avian care.
Written by: Dr. Tammy Powell, DVM

Dental Disease and Heart Disease: What’s the Correlation?

Dental disease is one of the most common health conditions affecting dogs and cats, even though much of it is preventable.
Estimates of dental disease prevalence vary, but many experts say that most (more than half of) dogs and cats over three years of age have some form of periodontal disease.
How Dental Disease Progresses to Periodontal Disease
The process begins with plaque, a thin, bacteria-containing film that forms on the teeth. Plaque can be removed by brushing. But if plaque is not removed, minerals in the saliva harden the plaque, which creates tartar (calculus). Tartar is much more difficult to remove, and it can build up to look like “concrete” deposits on the side of a dog or cat’s tooth.
Pet owners may or may not notice tartar on the crown of their pet’s teeth. But the biggest problem comes from the part they can’t see—the tartar that grows below the gumline.
This leads to periodontal disease, a condition that affects the structures that hold teeth in place.
Consequences of Periodontal Disease
The early stage of periodontal disease is gingivitis, inflammation or infection of the gums that is often noticeable as red, swollen, or bleeding gingiva. Gingivitis is reversible if treated in a timely fashion.
After that, further damages from periodontal disease are NOT reversible. This may include damage to the periodontal ligament, cementum, and alveolar bone. These three structures, together with the gingiva, are collectively called the ‘periodontium’.
As periodontal disease progresses, a pet may suffer from gingival recession, tooth loss, alveolar bone loss, and even jaw fractures in severe cases. And one ‘bad’ tooth may affect neighboring teeth, thanks to infection and damage to bone and other surrounding structures.
Bacteremia From Periodontal Disease
Tartar harbors a lot of bacteria, and a mouth affected by periodontal disease carries infections.
These bacteria may enter the bloodstream via areas of the mouth affected by periodontal disease, which may lead to negative health consequences for an affected pet.
Studies demonstrate conflicting conclusions, so the association between bacteremia from periodontal disease and pathology of certain organs (especially the heart, liver, and kidneys) is not as clear-cut as it was once thought to be.
For example, the common condition of MMVD (myxomatous mitral valve degeneration) in small dogs is no longer thought to be caused by periodontal disease. Instead, both are conditions that occur commonly in older, small breed dogs.
The link between periodontal disease and heart disease is more firmly established in human beings. And in pets, there have been associations noted between periodontal disease and pathologic changes to the heart, liver, and kidneys on necropsy.
Because of these associations with organ disease in other parts of the body, and since bacteremia can and does happen in dogs with periodontal disease, it makes sense to take extra precautions for pets with a condition that would make them more at risk from bacteremia.
For example, immunocompromised patients, or patients with certain types of heart conditions may benefit from an injectable dose of prophylactic antibiotics during a dental procedure, whereas it might not be necessary for an otherwise healthy pet.
There’s some speculation that chronic inflammation is responsible for pathology to other organs just as much as (or more than) bacteremia. Maintaining good oral health is the best way to decrease the risks of both infections and inflammation from periodontal disease.
Preventing Dental Issues Is Good for a Pet’s Overall Health
So, what’s the conclusion to draw from all of this information, some of which is conflicting?
Of course, that’s up to each practitioner. But in general, maintaining a healthy mouth will always be a good thing.
Having a chronic disease (such as periodontal disease) anywhere in the body can be a strain on a pet’s health. So appropriate dental care can only serve to improve the overall health of the pet and reduce any risks associated with bacteremia and chronic inflammation.

Additionally, good dental care can also improve quality of life by decreasing oral pain, preventing tooth loss, and decreasing halitosis that could interfere with the human-animal bond. So, preventive dental care is an important part of any pet’s health plan.
Written by: Dr. Tammy Powell, DVM

Ultrasound of the Duodenum and Jejunum in Dogs and Cats

There are many reasons why a veterinarian may perform an ultrasound of the duodenum and jejunum sections of the small intestines in a dog or a cat.
For example, the vet may suspect a GI foreign body, inflammatory disease, or neoplasia.
Here are a few key checkpoints to remember when scanning the duodenum and jejunum.
Setting Up the Gastrointestinal Ultrasound Study
If a patient can be fasted, that’s ideal.
An empty gastrointestinal tract may be easier to visualize, whereas food or digestive content may cause artifacts such as beam attenuation. However, this won’t be possible for all patients, especially in an emergency situation.
Patients are often placed in dorsal recumbency, although lateral recumbency may also be used. The patient can also be repositioned mid-study if needed for better visualization.
Performing a Thorough Evaluation
Often, a GI ultrasound study is part of an entire abdominal study. In some cases, the GI tract may be visualized on its own. Either way, to ensure nothing is missed, it’s important to perform the study the same way each time. Many experts recommend keeping it simple by following the GI tract in its normal order of digestion, i.e. starting with the stomach, then moving on to the small intestines (duodenum, jejunum, ileum), cecum, and colon. Examine each segment in both longitudinal and transverse views.
Evaluation should include wall thickness (and whether that thickness remains uniform within each GI section), wall layers, luminal contents, signs of obstruction, the presence of a GI mass or multiple masses, infiltrative disease, and whether there’s normal motility/peristalsis.
The Duodenum
The duodenum is located along the right lateral abdominal wall in dogs. It can be found near (ventral to or ventrolateral to) the right kidney. The cranial portion may be challenging to see and may require viewing via an intercostal approach.
In cats, the duodenum may be closer to midline, or just right of midline.
The wall of the duodenum is up to 5mm thick in dogs, and 2-2.5mm thick in cats.
Jejunum
It’s often difficult to trace the long jejunum loop by loop. So, most veterinarians evaluate the jejunum by sweeping the transducer from side to side across the abdomen, in a cranial to caudal direction. Slightly overlapping each sweep will ensure that nothing is missed.
The wall of the jejunum is 2-5mm in dogs, and 2-2.5mm in cats.
Evaluating the Layers of the Intestinal Walls
The walls of the intestinal tract have 5 specific layers, in this order: the luminal-mucosal interface (most interior layer), mucosa, submucosa, muscularis, and serosa (outermost layer).
In longitudinal view, these layers are easily distinguished from one another (in a normal patient), thanks to their alternating pattern of hyper- and hypoechogenicity. The inner and outermost layers, and the submucosa, are hyperechoic. The mucosa and muscularis are hypoechoic.
If these 5 layers are not distinctly visible throughout the intestines, it could indicate a problem. For example, focal wall thickening with obliteration of the layers could indicate focal neoplasia.
Make notes of any wall thickenings, whether they’re focal or diffuse, and whether the 5 layers are still distinguishable or not.
One normal finding that could be mistaken for abnormal is Peyer’s patches (pseudoulcers) in dogs, which appear as focal, hyperechoic indentations within the hypoechoic mucosal layer.
Signs of Obstruction
Sometimes, the obstructing foreign body may be visualized directly. However, this is often not possible. So, a foreign body obstruction may be detected due to differences in intestinal dilation proximal and distal to the point of obstruction. The intestinal tract proximal to the obstruction would tend to be dilated with fluid and gas, while the distal intestinal tract is normal or even empty.
With a linear foreign body, plication of the intestines may be seen via ultrasound. The foreign body itself may or may not be well visualized.
In case of an intussusception, the affected section of intestines will have a characteristic “bullseye” appearance in transverse view. If this is noted in an older pet, be sure to search for signs of neoplasia that could explain why the intussusception occurred.
Intestines may be hypermotile with a recent obstruction, but possibly hypomotile with a more chronic condition.
GI Neoplasia and Inflammatory Conditions
Neoplasia in the digestive tract may occur as a solitary mass, multiple masses, or diffusely as an infiltrative disease.
As mentioned above, discreet masses are often identified because of their focal thickness relative to the rest of the intestines and disruption of the wall layers.
Infiltrative disease, however, can be more difficult to pinpoint. There may be wall thickening with or without disruption of the wall layers. In particular, it can be challenging or impossible to differentiate between small cell lymphoma and inflammatory bowel disease in cats without further testing.
Regional lymph nodes should be evaluated, too.
Conclusion

The duodenum and jejunum are an important part of any GI evaluation. It’s helpful to get an idea of what’s normal and what’s not for these sections of the small intestines, as they’re commonly evaluated for a variety of conditions, including those listed above.
Written by: Dr. Tammy Powell, DVM

Evaluating the Urinary Bladder on Ultrasound

An ultrasound of the urinary bladder can be recommended for a number of reasons, including suspected uroliths, cystitis, and neoplasia—to name a few.
Often, the evaluation includes the entire abdomen and any other parts of the urinary tract that can be visualized.
Given all the conditions that can affect the bladder, as well as important information from an ultrasound study to help guide the treatment plan, it’s beneficial to gain proficiency in evaluating the bladder via ultrasound.
Use a Systemic Approach to Evaluating the Bladder
A systemic approach to the whole abdomen is good, and a bladder evaluation is usually just one part of an abdominal ultrasound study. So while it may be tempting to jump to the bladder right away if the patient is having urinary symptoms, it’s best to complete your abdominal ultrasound study in the same order that you usually do it.
Once you reach the urinary bladder, a systemic approach is again useful, to ensure nothing is missed. Here is one method for a stepwise evaluation…
Is the overall bladder shape normal and as expected? Through practice, a veterinarian can get a good feel for what shape is normal for canine and feline patients, and how it may change if the bladder is full versus empty or nearly empty.
How does the lumen of the bladder look? If urine is present, is the urine is anechoic? Is there sludge, sediment, crystalline material, a polyp, or anything else that is abnormal?
If there are uroliths present, they generally appear as hyperechoic structures inside the lumen of the bladder. There may be acoustic shadowing, and the calculi may move freely depending on how large they are.
Is the bladder wall smooth, a normal thickness, and well-defined? Be sure to evaluate the entire bladder. If cystitis is present the wall may be focally or generally thickened or have irregularities in the mucosa, depending on the severity and duration of the cystitis. Keep an eye out for polyps or masses/tumors, too. Also, look for deviations in the wall that could indicate a urinary bladder diverticulum.
If a mass is present, make note of the size, appearance, and location. Transitional cell carcinoma, the most common neoplasia of the bladder, tends to occur in the bladder wall near the neck and trigone. Commonly, these masses are hyperechoic or mixed echoic and have been compared to cauliflower in appearance. Evaluate nearby blood vessels and regional lymph nodes, too. Avoid cystocentesis or aspiration for samples, because of the risk of seeding the neoplasia into the abdominal cavity when the needle is withdrawn. Sometimes, it’s easy to confuse blood clots with masses, so keep this in mind and re-evaluate as needed.
Be sure to evaluate other urogenital structures, including the kidneys and ureters (the latter are often not visible unless there’s an abnormality), as well as blood vessels and lymph nodes in the region. Remember to look for the uterus/ovaries in intact females and the prostate in males, although it might not be possible to visualize these structures in all patients, especially if they are normal.
Whenever abnormalities are noticed, describe them in detail and take measurements. Include all of this in the notes. Even if things look normal, it’s still a good idea to take some measurements (such as bladder wall thickness) and describe what you’re seeing, as a baseline for comparison in case anything changes in the future.
A Few Tips
A full bladder can help with visualizing certain lesions (such as hyperechoic uroliths) by providing “contrast” or a backdrop to help make abnormalities stand out. Also, a full bladder smooths out the bladder wall, whereas an empty bladder may lead to false readings of wall thickening or masses. Additionally, a large bladder allows for an easier ultrasound-guided cystocentesis. So whenever possible, try to ultrasound with a full, or at least partly full, bladder. In some cases, it may be appropriate to give the patient water or IV/SQ fluids and wait for the bladder to fill prior to the study.
Pressure from the transducer can alter the bladder’s shape.
So be sure to practice with various pressures and become familiar with how the appearance of the bladder might change.
Repositioning the patient can also be helpful.
This may give you a better viewing angle and position for certain structures. Having the patient stand up may put gravity in your favor by decreasing the distance between the bladder and the probe. Also, patient movement may cause sludge/sediment to move around or disperse so that it’s not mistaken for a urolith.
Have appropriately sized needles, syringes, and collection materials available.
In case an aspiration/cystocentesis is needed, it’s best to have supplies ready to go.

Ultrasound of the urinary bladder is a very valuable skill, and it works well in conjunction with information gained from x-ray studies. Training and practice in ultrasound of the urinary bladder are often well worth it for patient care and for additional income from ultrasound studies.
Written by: Dr. Tammy Powell, DVM

Finding the Adrenal Glands in Large Dogs using Ultrasound

A thorough abdominal ultrasound includes evaluating the adrenal glands.
Common reasons to look at the adrenals include searching for signs of neoplasia, Cushing’s, or Addison’s disease. And even in animals where adrenal disease isn’t suspected, sometimes growths or other changes to the gland(s) are discovered incidentally.
Unfortunately, sometimes adrenals can play “hide and seek” and be tough to find. That’s true for any dog—but especially for large dogs with deep abdomens, since the abdomen may be too thick for the ultrasound waves to penetrate well.
Having a repeatable system for where to look can help. Here are some steps for finding those tiny glands inside of a big dog…
Perform an Abdominal Ultrasound in the Same Order Every Time
Just like reading an x-ray or performing a physical exam, a systemic approach helps ensure that nothing is missed.
Each veterinarian may have their own preference for how to go through a scan in a stepwise fashion. For example, some may scan cranially to caudally. Others may scan clockwise, or have some other system. Any system is fine, so long as it covers everything you need to see and is easy to repeat on each patient. So choose what works best for you.
In addition to revealing unexpected abnormalities of the adrenal gland(s) sometimes, systemically examining the entire abdomen will also help a veterinarian gain experience. Then, when it’s time to locate the glands on a patient with suspected adrenal disease, you’ll have plenty of practice to fall back on and may feel less pressure.
Where to Find the LEFT Adrenal Gland
To narrow the search, first, find the left kidney by scanning the left dorsal mid-abdomen.
Next, narrow the search even further by finding the vascular landmarks: the aorta (in long view) and the left renal artery.
Look for the spot where the left renal artery branches off from the aorta. The left adrenal gland should be just cranial to this junction.
Where to Find the RIGHT Adrenal Gland
First, locate the right kidney by scanning the right cranial abdomen.
Next, locate the vascular landmarks: the caudal vena cava (in long view) and the cranial mesenteric artery.
Apply some pressure, which will cause compression of the caudal vena cava and allow better visualization of the adrenal gland. The gland is dorsolateral to the vena cava and just cranial to the cranial mesenteric artery.
A Few Tips
It may be tempting to use the kidneys as a primary landmark since the adrenal glands are located near each kidney. However, the kidneys may overshadow the small glands. So while the kidneys are a good starting point, it’s also important to use vascular landmarks.
Color Doppler can be a big help, too. It often makes it easier to find and view vascular landmarks.
Minimize the distance between the probe and the adrenal glands as much as possible. This can be done by moving the probe as needed, and by applying gentle pressure if the patient allows.
What to Include In the Medical Record
Be sure to describe any abnormalities. Additionally, rather than just noting ‘normal’ or ‘abnormal’, it’s good to provide specific details in case a comparison is needed in the future. Here are some things to note, even if the glands look normal…
Measure and record the size of each gland. Measurements are typically taken from the cranial to caudal pole, as well as a measurement of the thickness of each pole.
Note if the glands are hypoechoic to surrounding fat or if their appearance is different than expected.
Classic adrenal gland shape has been compared to a ‘peanut’, or sometimes an ‘arrowhead’ for the right adrenal. Note if the shape is as expected or if it’s abnormal.
If any abnormalities are noted, list the most likely rule-outs and a recommendation for follow-up/monitoring or further diagnostics if indicated.

With practice, locating the adrenal glands will become second nature. It may still be challenging on some patients, but having a repeatable system and gaining experience will help.
Written by: Dr. Tammy Powell, DVM

Veterinary X-Ray Options: Naomi and CareRay Explained

Comparing X-Ray Panels: Naomi and CareRay
Digital radiography equipment continues to evolve, with several types of x-ray detectors or sensors available to veterinarians.
So, which is right for your practice? Do you need the latest technology to provide the best care, or is it best to get the most mileage you can out of previous generations of technology?
The Evolution of Digital X-Ray Detectors
Just like our cell phones and tablets, maybe it feels like there’s always a new type of x-ray technology available, whether you’re looking for small or large animal x-ray equipment, or for general, mobile, or dental radiography.
When trying to research the technology and all the lingo, maybe the choice feels a bit overwhelming.
To start with the basics, here’s a quick overview of the most common digital radiography plates on the market right now…
CR (computed radiography). CR cassettes are also known as phosphor plates. In terms of practical application, the biggest difference between CR and DR is probably the fact that CR requires an extra step—rather than the image being transferred directly from the plates to a computer, the sensors must be read by the CR plate reader.
DR (direct [capture] radiography). DR technology allows images to be read directly from the plate and then show up on a computer screen, which is usually a rapid process. Within DR, there are two main types of plate technologies:
CCD panels. Charge-coupled device (CCD) detectors are generally built into or attached directly to the x-ray table. This technology has been compared to a digital camera in the way it detects and records light.
Flat-panel detectors. Here, the x-rays are converted into an electrical signal (either directly, or indirectly by first converting x-rays into light and then into an electrical signal). The panel is separate from the x-ray table and can be removed in case a horizontal beam is needed.
The advantages of flat panels include lower x-ray doses and better detail and clarity in the images (although opinions on image quality vary amongst practitioners). On the other hand, flat panels tend to cost more than CCD panels.
Note: The abbreviation DR is also used for “digital radiography” in general, in addition to direct capture panels.
Additional X-Ray Equipment Considerations
In addition to the detector that picks up the x-ray beam, successful radiographs also require…
An x-ray generator, which produces the x-ray beam. This may be purchased as part of a new digital x-ray system. Or, older generators and tables may be retrofitted to be compatible with a new digital sensor.
Software. This is what shows the x-ray image that was picked up by the sensor so that a veterinarian can see and read the image. It’s also where images are stored as part of the medical record, or shared electronically with clients, other veterinary clinics, or specialists as needed.
Wired or wireless technology. So far as the sensor or plate goes, some have wire connections while others are wireless.
In addition to considering which sensor technology is a good fit for your practice, it’s important to think about whether or not any other equipment needs to be upgraded, and how compatible the whole system will be together.
When Is It Time to Upgrade?
This depends a bit on a veterinary practice’s needs. Typically, it’s not necessary to replace equipment for the latest model every time new technology is available, and it may be possible to keep older equipment in good working order for many years.
Using the Naomi CCD panels and CareRay Cesium (DR) panels as an example, here are some considerations…
If a clinic is using older Naomi CCD panels that are still producing great, diagnostic images, then it’s typically not necessary to upgrade to a flat panel detector.
The veterinarian is not missing out by hanging onto older technology that still gets the job done.
What if the plates work fine but there’s a software problem—say, the software is no longer supported? Or, what if there’s no longer any technical support or a warranty available for the plates, which sometimes happens with older technology?
Here, the decision to upgrade may come down to personal preference, budget, risk tolerance, and how much time and effort it takes to get readable images from the software.
Of course, if the panels are no longer producing diagnostic images, then it’s probably time to upgrade.
You can always check on your warranty if it’s still in place or ask about the cost of repairs, but sometimes veterinarians find that repairs are costly on older technology and their investment may be better spent on an upgrade. But this strategy will vary depending on each individual business and situation.
No matter which equipment you are currently using (or considering purchasing), remember to also think about things such as availability and cost of technical support, whether a loaner plate is available during repairs, and how the software integrates with your practice software.
Also, see if you can sell your used equipment (or make a trade-in, if your vendor allows) to offset the costs of new equipment.

All of these factors will aid in the decision of whether or not it’s time for an upgrade.
Written by: Dr. Tammy Powell, DVM